![]()
Happy Tuesday Gingerscrappers! Here’s the second in what I hope will be a series of tutorials to help you get the most out of your digi-scrapping stash and to grow your skills. So if you have an idea for what I should write about, please drop by the GS Facebook page and leave a comment on this thread.
Annette asked for some help using templates, so that’s what we’re going to talk about today. Every month there are two free Challenge templates provided by Gingerscraps designers, one on the first and the second halfway through the month. The reasons I mention this: they’re FREE and they’re readily available, plus they fulfill two challenges each month! Templates are a great way to speed up your workflow and to stimulate creativity. First, they take some of the decision-making out of the process by showing where to put papers and elements. Some templates are also pre-shadowed, so that’s one fewer step to take in building a layout. But they’re not set in concrete, so there’s a lot of opportunity for making the template truly your own. Today we’re only going to stick with the basics.
There are several forms of template available out there and I’m not going to pretend to be an expert in any of them. I work with PSE12 – Photoshop Elements version 12 (it presents some challenges, but I’m too cheap and suspicious to go with Creative Cloud so I’ve learned to deal with them) which is fairly versatile. You can work with PSD, TIFF or PNG files equally with PSE. The steps I’m going to show you in this tut will work with both PSD and TIFF formats. Let’s get started!
First, I choose a template that will work with the photos I want to scrap. For this lesson I’ve used the challenge template so graciously provided by Maggie of Mag’s Graphics. I used it pretty much exactly as it was presented, but you’ll soon see there are lots of ways to customize and alter any template. Stay tuned!
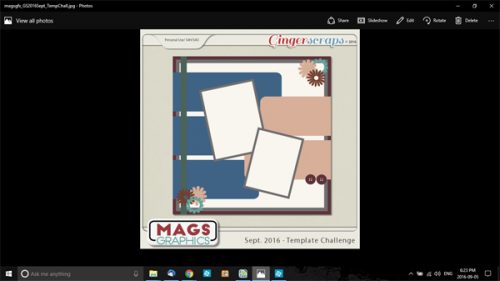
I open up the preview in an image viewer so I can figure out what I need to build my layout. I count up the different papers and elements then go to my Gingerscraps stash and start choosing what to use. For this layout I used September Buffet kits from Ooh La La Scraps (Autumn Chill) and Seatrout Scraps (Autumn Odyssey). I make a folder to hold the items I want to use so they’re all in one place and I can see how they look together. (Please bear in mind that this is MY workflow and I’m only making suggestions. Please don’t feel like I’m telling you the only way to do things… do what’s comfortable for you.)
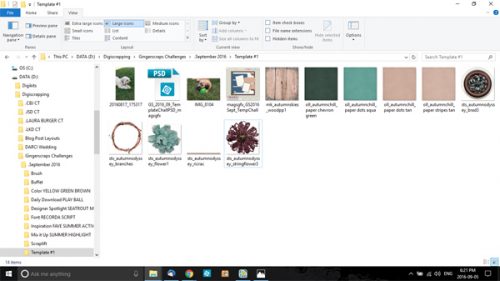
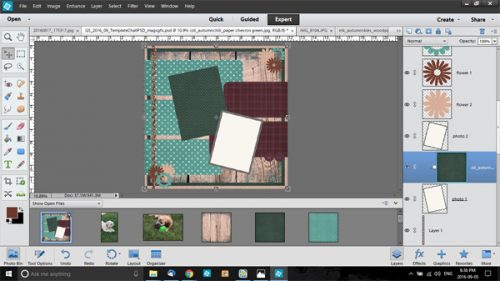
One advantage to doing things this way is that if you then double-click on the PSD template file in this folder, it opens automatically in PSE and is at the very top of the photo bin. Another advantage is when you click on Open Files, the software takes you right to this folder. Once I have all the items I’m planning to use open on my workspace, I select the background paper layer in the layers panel and work my way up, the same way I would if I was using real paper and elements. You can choose to work in any order that suits you best, but this provides an orderly way of proceeding.
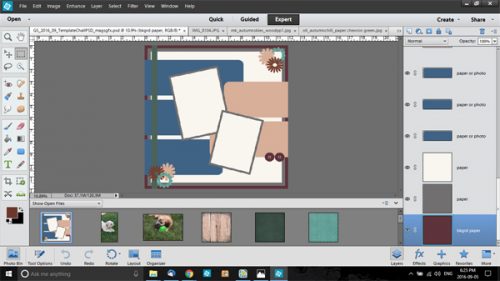
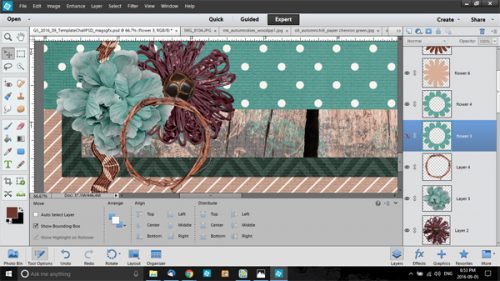
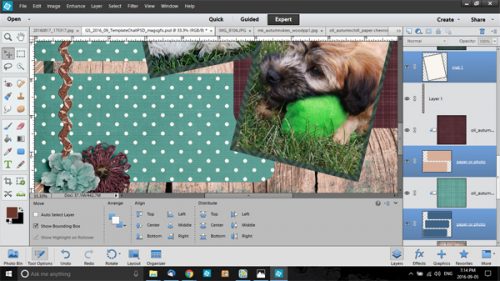
Start adding in your papers. The background paper is full sized in this template so it’s just a matter of dragging and dropping the paper you like onto the workspace. Mine is a tan paper. The next layer in the template’s layers panel is coloured gray and is a bit smaller than the background. You can drag and drop a paper on top of it then resize it to fit, but a much easier way is to use a clipping mask. Below you’ll note I’ve dropped a dark green paper on top of the gray layer in the layers panel. To create a clipping mask, which “clips” the paper to the shape below it, right-click on the layer and select Create Clipping Mask from the menu, or CTRL/CMD+G will accomplish the same action.
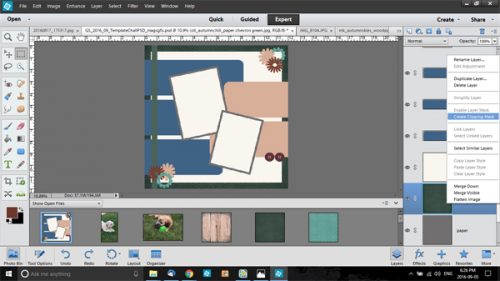
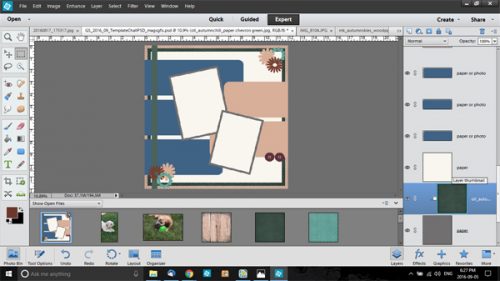
Voilà! The green paper is now neatly clipped to the gray paper layer and there is now a lovely border around the layout. I wanted to use a painted wood paper from Mandy King’s Buffet kit Autumn Skies for the most visible background layer so I dropped it on top of the white paper layer in the panel. But I also wanted the painted edges to show and that wasn’t going to work if I just clipped the paper to the layer. So I used the Move tool to select the edges and resized the paper to 93%. The best and easiest way to do this with papers like this is to click in the box at one corner of the paper and then type in the dimensions in the little tool panel boxes underneath. This method automatically centers your paper. Make sure you’ve got the Constrain Proportions box clicked so you get a uniform resize. Then you can go ahead and clip the paper to the layer below it and not lose much of the painted edge.

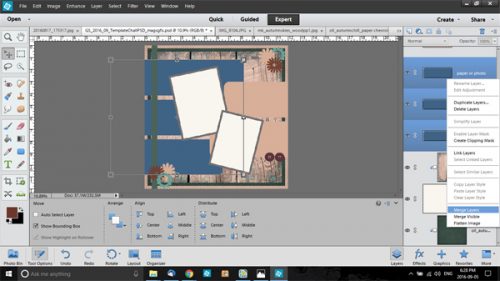
The next three layers in the template are papers or photos with rounded corners. Maggie has each of these paper blocks on their own layer so you can clip different papers to each one if you choose. I wanted them all the same, so I selected all three layers and merged them together, then clipped a single aqua polka dotted paper to the resulting layer in the palette. I could have copied the paper three times and done each layer individually but I’m lazy.
I did the same thing with the two rounded rectangles on the right side of the template and clipped a tan, polka dot paper to it. But when I looked at it, my first reaction was BLAHHH!
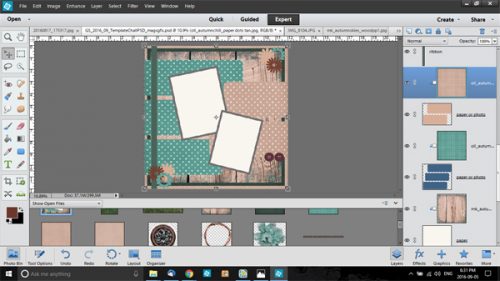
So I deleted that layer and went with a lovely burgundy plaid paper instead. Ah, MUCH better! That’s one of the beauties of using templates. You can clip 15 different papers to a shape then turn them on one at a time to see which one you like best, then delete the ones you don’t.
The dark green strip along the left edge of the template could be a paper strip, a ribbon, ricrac or stitches… or even a combination of all of them. I decided to use a piece of ricrac.
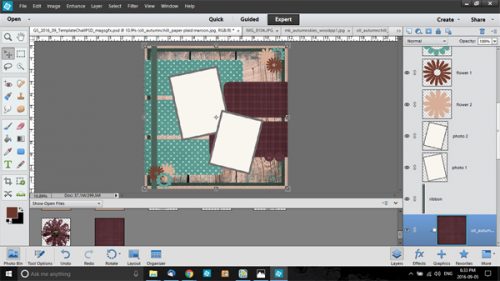
I really wanted to have the same dark green matting my photos as was used for the second layer of the border, but the template didn’t have separate mats for the photos, as I discovered when I clipped my green paper to one of the photo spots.
To get around that, I copied the photo layers – right-click, select Duplicate Layer then click OK on the pop-up menu, or simply CTRL/CMD+J – then resized the copy layers to make a nice mat border around what would become my photos.
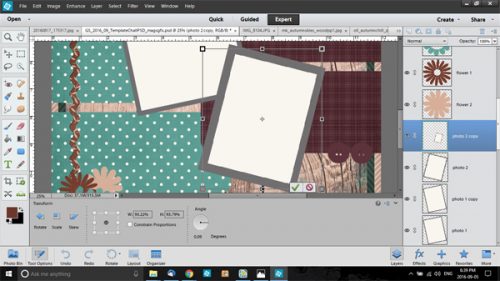
Clipping photos to photo spots is just the same as for clipping papers to shapes. I like to use the corner of the photo spot to line up my photo when the photo spot is tilted, like these are, unless I’m not worried about how the photo crops. Don’t worry too much about the size of the photo at this step, because you can resize it and position it once you’ve clipped it to the spot.
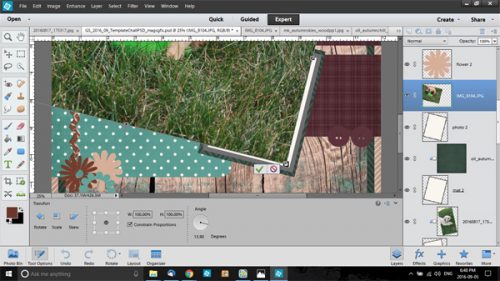
Things will start to move a lot faster once the background and photos are in place. This template, being a simple one, has only 3 different elements positioned in each corner. I chose a string flower with a button center, a flower that looks somewhat like a chrysanthemum and a grapevine ring. I decided that both clusters would contain the same items, as shown in the template through the use of identical shapes, but feel free to use whatever elements in whatever combo you want. Working from the bottom up, the next layer is the tan daisy shape. Drop an element onto your workspace and resize it a bit so you can see what you’re doing, then move it in place under the shape on the template, as shown. This will help with positioning and sizing. If you’re using a pre-shadowed template, you can copy the template’s shadow for that layer by right-clicking on the shape layer in the layers palette and selecting Copy Layer Style from the menu. Sorry, no keyboard shortcut for that. Once you’re happy with it, you can go ahead and delete or turn off the shape layer. (I ALWAYS work with copies of files so I don’t accidentally throw out something I might want to use again, so I can delete.)
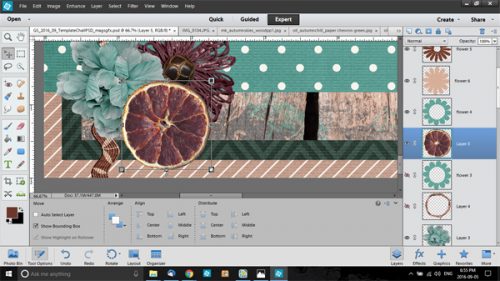
The template showed a circular element with an open centre so I thought I’d use a grapevine ring for that.
But… it wasn’t working for me once I did it. So I swapped it out for a dried orange slice. It looked a little funny lying overtop of a fairly fluffy flower, so I moved it down a couple of layers to where it sat flush against the paper, then repositioned it a little.
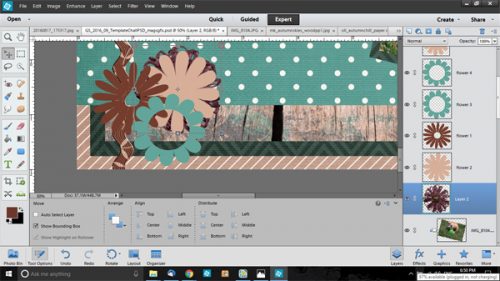
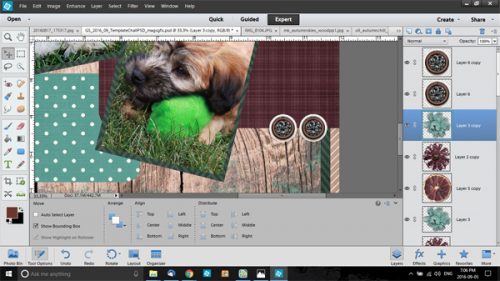
For the cluster in the opposite corner, I duplicated the three layers I just placed as described above and moved them up and into position, using the shapes provided by the template for placement. Took all of about 3 seconds! Then I dropped some buttons on the layout – lo! and behold… that brought me to the top of the template’s layers. Almost done.
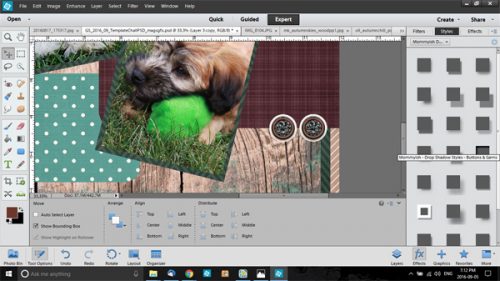
Now that all of the papers, photos and elements are in place, it’s time to shadow. I use a set of shadow styles by Mommyish most often, but you can use the drop shadows supplied with your software. (Getting into how to obtain realistic shadows in detail is beyond the scope of this tutorial.) I like to do this task in the most efficient way possible, so I select like layers and shadow them all at once. Then later, if I find it looks a bit funny, I can go back and tweak only the layers necessary.
The final steps are title and journaling. The challenge template doesn’t have a defined area for either but there are some nice open spots so I chose to journal on the upper burgundy paper and put my title on the lower aqua paper. If you’d like to see the final result, it’s in my gallery.
In the coming weeks, I’ll share some tips on how to get the most out of templates so keep an eye on the blog!
![]()


