Archives for January 2017

Tutorial Tuesday (Photoshop Elements)

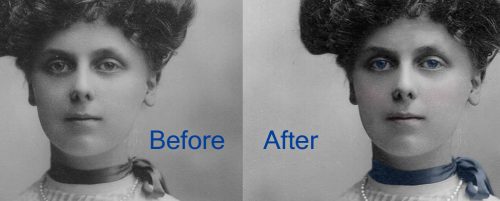
Only the Shadows Knows… Take TWO

Holy moly! Where did January go? I don’t know about you, but the older I get, the faster time flies.

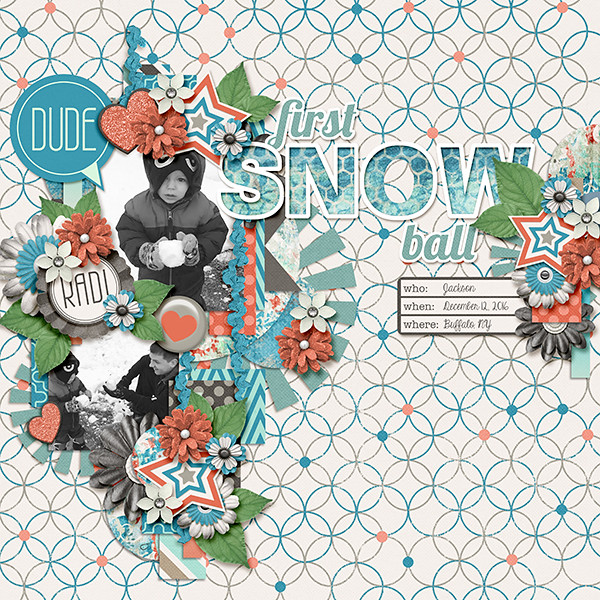
Two weeks ago I showed you one way to work around PSE’s blah shadows by cutting and pasting it onto its own layer so it can be tweaked to look more real. Today I want to show you another way to do that, along with a quick little trick for adding even MORE realism to your images. If you’re thinking you’ve already seen this tut, you are experiencing a little bit of déjà-vu but only that I’ve made this layout do double duty. (Remember, it’s a lot better to Work Smart Not Hard – WSNH!) I’m using this lovely ribbon and a paper from Seatrout Scraps‘ gorgeous Linen and Lace collection (retired).

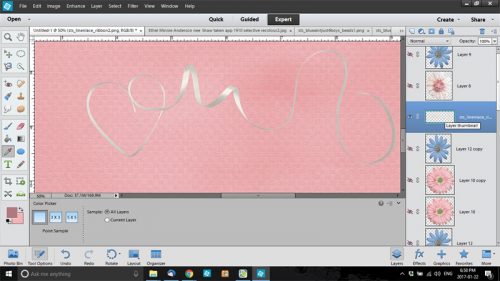
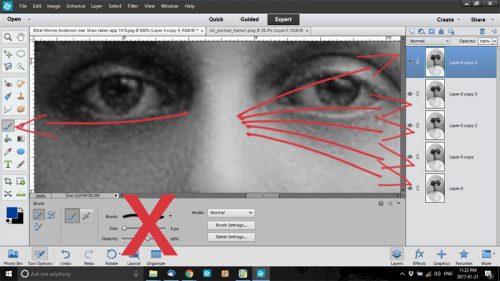
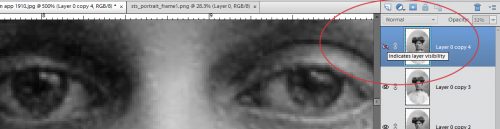
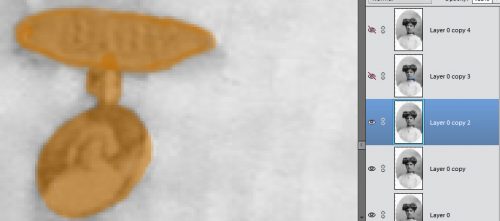
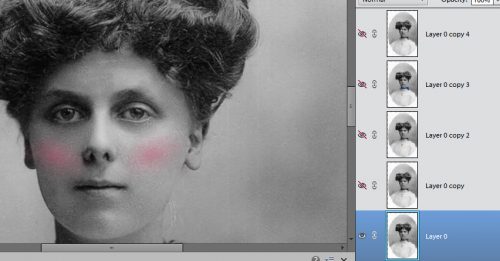
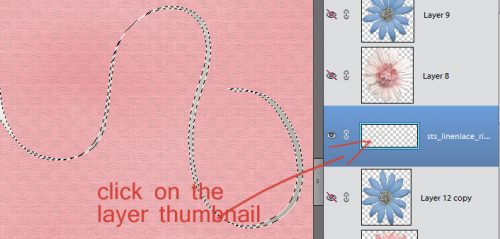
I decided I wanted to play with this ribbon after I’d already constructed my layout, so to see what was happening to it, I turned off visibility of all the other layers as you can see in the screenshot below. Then I clicked on the Layer thumbnail in the Layers panel to get my marching ants around the ribbon.

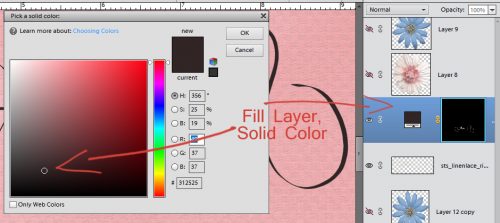
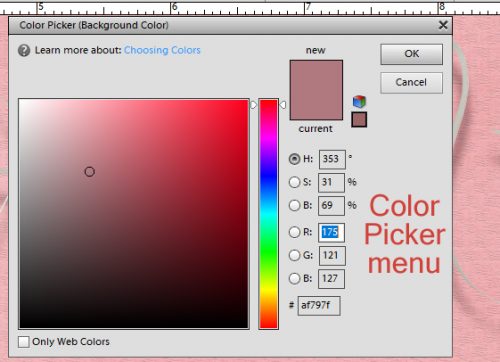
Then I clicked on that little circle icon at the top of the Layers panel that is half blue and half light gray and has a little triangle next to it. That’s how you create a Fill Layer quickly and easily. (WSNH!) I chose Solid Color and then with the Color Picker I chose a gray.

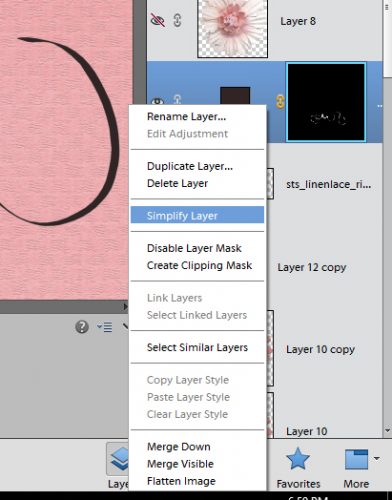
In order to play with the shadow, the next step is to Simplify the layer. You can also rename the layer to help you remember what it is. I’ll confess I don’t often bother. Note that for the moment, this shadow layer is still ABOVE the ribbon, which isn’t visible because it’s covered up.

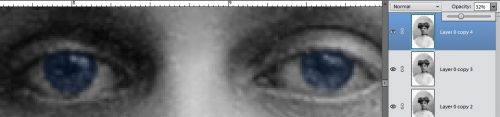
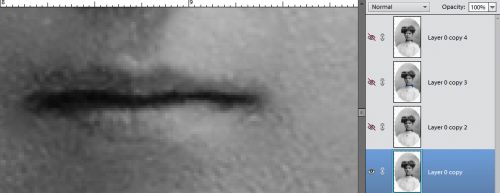
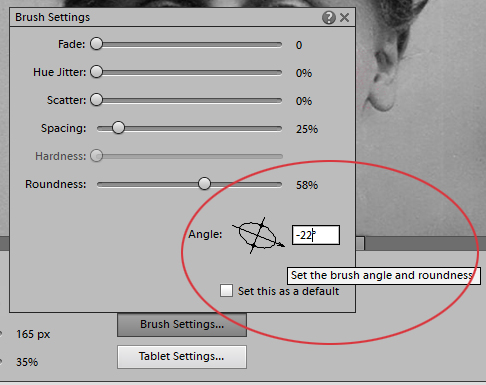
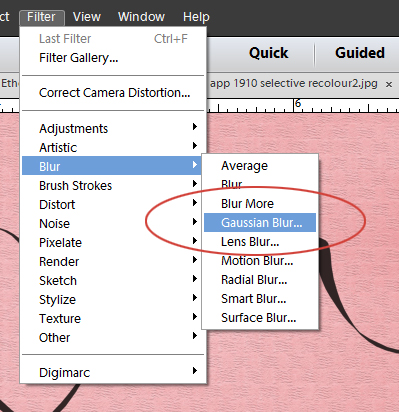
Okay, so now we can soften the edges of this new shadow layer, and we’ll do that with a Gaussian Blur Filter. Turn the visibility of the ribbon off so you can see exactly what’s happening.

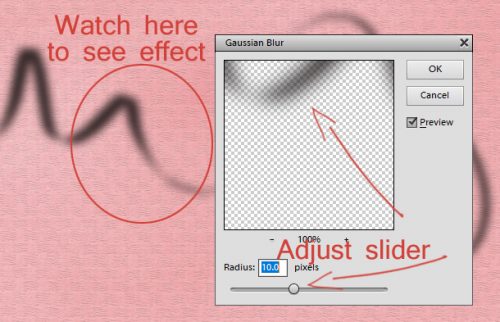
You can see what is happening with your shadow both in the preview pane of the Gaussian Blur menu and on your layout as you move the slider left or right. Just play with it until you like the way it looks.

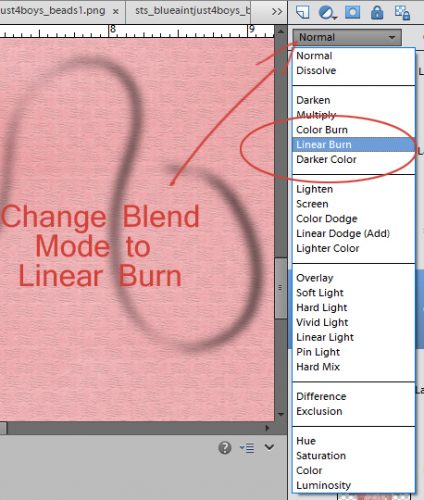
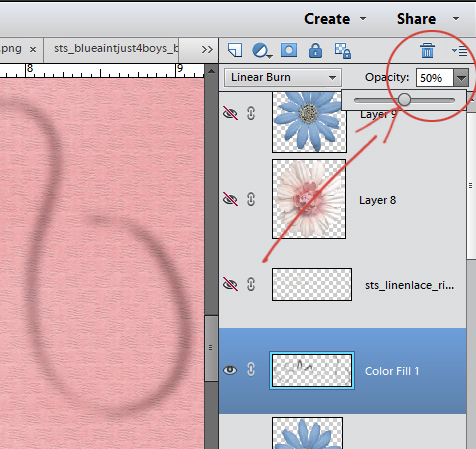
We haven’t actually touched on Blend Modes yet, partly because it’s a more advanced topic, and partly because we haven’t done anything needing a Blend Mode… until now. The menu for this handy, dandy tweak is found right at the top of the Layers panel under the other icons we’ve used before. Shadows look best when they’re a Multiply or Linear Burn, which I like better, so I selected that.

To keep working on natural and realistic, I decreased the opacity of my shadow to about 50% of its original appearance.

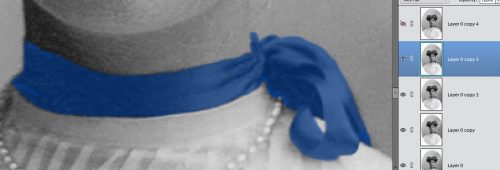
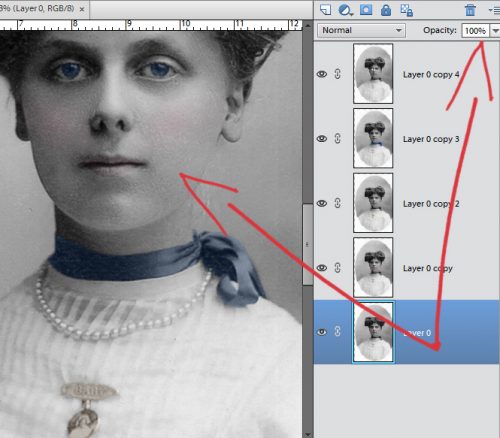
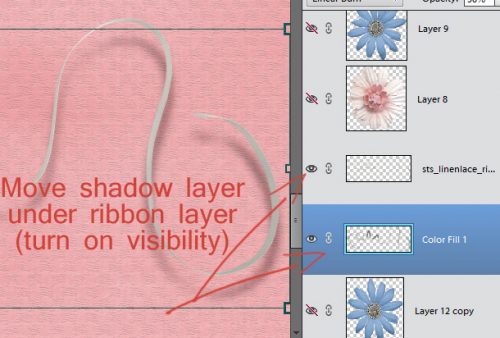
Looks pretty good, right?? Oh wait! We can make it even better! But to do that we need to see the ribbon itself, so turn the visibility for that layer back on, and move the shadow underneath it. WSNH tip: Ctrl/CMD+[ will do that for you. Then you can shift the shadow according to where your light source is coming from on your other layers.

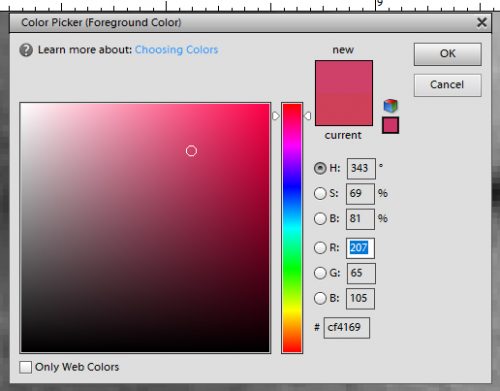
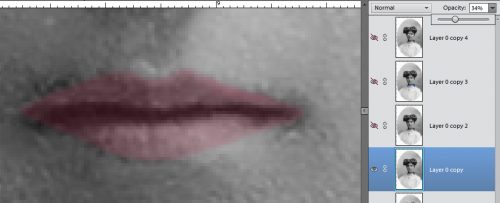
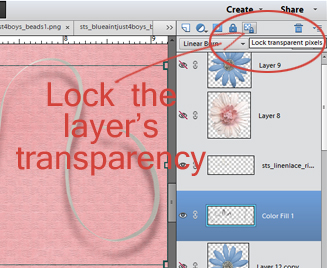
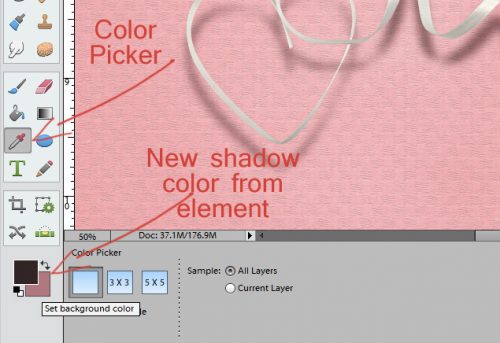
The next tweak we’re going to make is to change the colour of the shadow itself. Because let’s face it, a black or gray shadow isn’t really what one would see against a pink paper. You can make your shadow colour similar to whatever it’s falling on by selecting that colour with your eye dropper Color Picker tool then moving the eye dropper to the right and down to choose a deeper, richer hue of the same colour. Make sense? You can go ahead and choose your colour first but before you move on, lock the transparency of your shadow layer by clicking on the icon shown below.

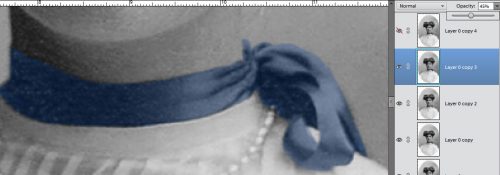
For my shadow, I chose a colour from the paint splatter I used and then adjusted it as I described above.

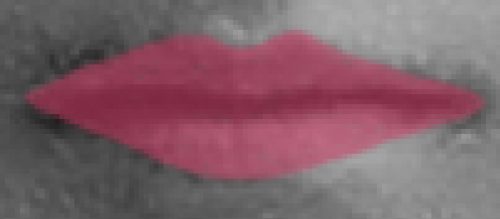
Now, with your shadow layer selected and locked down, click ALT/OPT+ Delete and bingo! Your shadow colour is transformed!

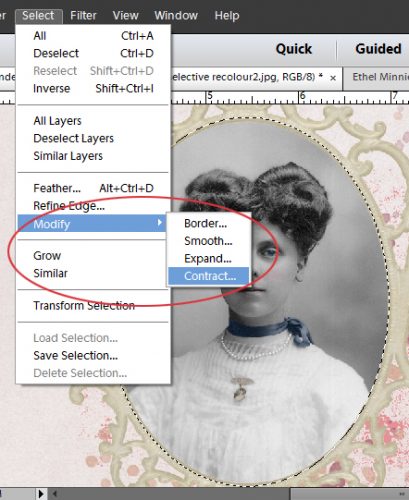
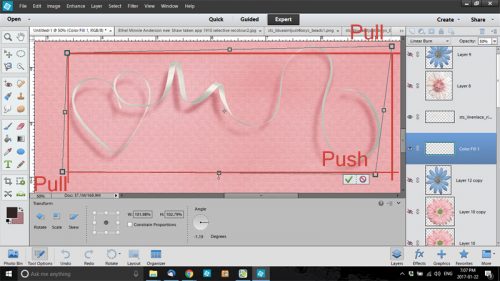
Now we can play with how the ribbon touches the paper. So click on the Image tab then Transform>Distort. Skew will work, but it doesn’t give you as much control. To distort your shadow, you’ll pull or push on the handles as shown in the screenshots below.

Pulling will move the shadow out and down in the direction you’ve chosen, while pushing movies it in and up.

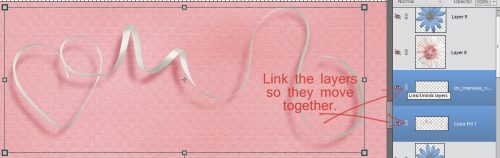
The last thing you have to remember is to link the layers together by clicking on that little chain symbol so that when you move one, the other moves too. I know it seems like a lot of steps, but you can do all of this in less than a minute once you’ve got the steps down.

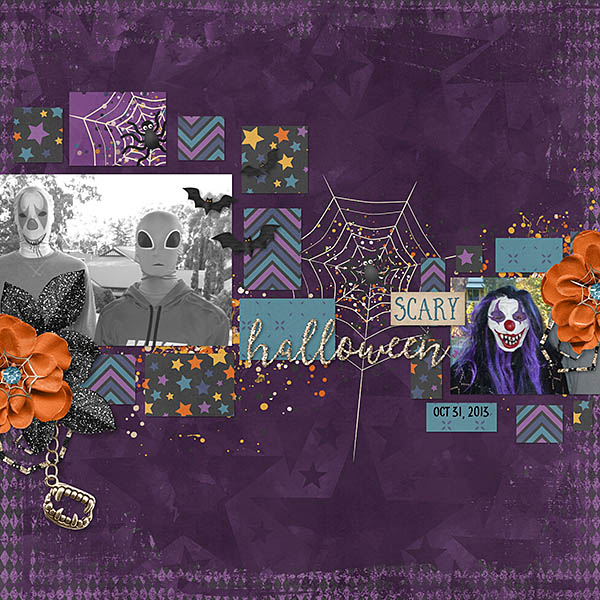
While we’re talking about shadows and the colour of shadows, a loyal GingerScrapper named Jen (hclappy in the gallery and forum) asked about shadowing elements against black or dark coloured papers. Obviously, using a black or dark gray shadow isn’t going to make much of a visual impact. So when I have a dark background, I’ll use a slightly brown shadow just to make some differentiation of colour. If you’re using drop shadow styles, they’re usually already a brownish shade, but if you find you’re not seeing them well, you’ll have to change each layer’s shadow colour individually. Unfortunately there isn’t a WSNH trick for that… I looked. You CAN, however, change one layer style colour then select like items (all your papers or flowers, for example) and shadow them all at once with your new colour by right-clicking with all your layers selected then selecting Paste Layer Style. Then it’s just a matter of tweaking where you see fit to make it all esthetically pleasing. That’s the goal, after all!

So far there is only one entry into the Tutorial Challenge. If you use any of the techniques or tips I’ve shown you this month, post your work to the GingerScraps Facebook fanpage Challenge Gallery, or if you’re not a Facebooker, you can post a link in the comments here for me. Then I can enter you into a draw to have your very own personal tutorial right here in February.

Next week, we’re going to talk about clusters and what to do if you don’t want to use a template but want an awesome cluster or two. Stay tuned!

Let’s Celebrate | Snow!

Let it Snow! Let it Snow! Let it Snow! I know there are plenty of you out there that are sick of it already. Coming to the end of January and you have seen enough of it. I however live in the southern parts of the states. We hardly see any. We are lucky to get a dusting once a year; and I LOVE snow! I thought it would be fun to showcase some great items from the store to get those snow-filled photos scrapped.

I also enjoyed looking at all things purple last week; and showing you some lovely photos to get those creative juices flowing as well. I thought I would show you some snow photos to do the same thing. These images are from Pexels. (All photos on Pexels are licensed under the Creative Commons Zero (CC0) license. This means the pictures are completely free to be used for any legal purpose.)


As well as those gorgeous photos, here are some lovely layouts to help you with some snow-tastic inspiration as well!


As always I will leave you with some great products from the store. There is an entire section dedicated to all things winter. Here are just a few of my favorites.


Fresh Baked: January 27, 2017

January is already coming to an end. Lots of fun stuff coming in February, but that does not mean the designers are stopping with the designing for January! So much goodness coming out this week! So many templates and gorgeous kits!

Remember when you spend $10 in the store, you get a great new collab!

fwp3222  https://store.gingerscraps.net/GingerBread-Ladies-Collab-Puttin-On-The-Glitz.html

[Read more…]

Sneak Peeks January 26th, 2017

Happy Thursday! Our designers have some fantastic goodies to scrap with this weekend!

From Dagi’s Temp-tations


From Tinci Designs

From Miss Fish

From Amy Stoffel

From CathyK

From Dear Friends Designs

Have a Wonderful Weekend!

GingerBread Ladies Sneak Peeks 1/25/17

It’s sneak peek time again. Once again, our designers have out done themselves with their new releases this week. Do you see one that you think you just have to have?

Make sure to head over to the store on Friday to see these and more!!!

Tutorial Tuesday (Photoshop Elements)

Heritage Photos Get a Makeover!

Ever wondered how other scrappers got that subtle-but-lush, hand-tinted look to their black-and-white photos? It’s super-easy, doesn’t take long and adds a really elegant look to your images. I’ll show you how, using this lovely 100-year-old photo of my great-grand aunt Ethel.

I started by making 4 copies of my photo, for a total of 5 layers. I selected my Brush tool and a royal blue from the Colour Picker. The eyes are done on my top layer because they’re the feature I want to have the most control over in this process. ZOOM in a LOT.

For eyes, I like to use a round, soft mechanical pencil brush. The edges of the brush are softened a little, which lets a tiny bit of the underlying layer to outline the area being brushed over. The size should be small enough to fit inside the area and allow for complete coverage. 9 pixels worked well for me. I painted over her irises with that blue colour I chose earlier. One thing to keep in mind: If you’re brushing over an area with an opacity of less than 100%, do all of your brushing in one action, with the left mouse button clicked the whole time. Otherwise, wherever your brushstrokes overlap the colour will be darker.

This is what her eyes looked like after I’d covered both irises completely with blue. Freaky and unnatural!

By pulling the Opacity of this layer down to 32% I could make the eyes look soft and let some sparkle through in the catch-lights.

Turn off the top layer before you move on. It eliminates distraction and gives you a clearer view of the changes you’re making on the layer underneath it. Bye-bye, blue eyes.

I’m still going to use the blue for the ribbon around her neck. I want the edges of my brush to be sharper, so I chose a hard mechanical pencil brush, and it could be a little bigger because I was covering a larger area. In the Brush settings it shows the Opacity as 60%, but I changed it to 100% before I did my painting because I knew I’d have to adjust the size of my brush to get into the tiny corners. I didn’t want those lap marks to show.

Very garish! But infinitely adjustable.

I decreased the Opacity to 45% – I left it just a little darker than I wanted my finished ribbon to look, because when I turn on all the layers again, the layers above are going to add their opacity adjustment to everything below.

The next item I painted was this brooch, on the centre layer. It was this that let me date the photo. I know Great-Grand Aunt Ethel had her first child, a boy she named George Albert, in April, 1913. I used a gold-yellow for it.

With the Opacity decreased to 35%, it doesn’t look nearly so tawdry. And you can read the embossed lettering better too.

On to the lips… second-to-last layer.

I liked this rosy pink for her lips and cheeks. Did you know that your blush will be the same hue as your lips, but slightly less saturated?

100% opacity. Clown school, any one?

Opacity decreased to 34%. Much better!

To blush her cheeks on the very bottom layer, I used a round spray brush – darker at the centre and gradually fading toward the edges – I found for free at Brusheezy.com. But having a circular patch of colour on our cheeks is really and truly clown-school unnatural. So I adjusted the shape/roundness and angle of the brush to match the contours of her left cheek. Did you know that you can “see” the outlines of your brush just by hovering the tool over your image? That’s how you adjust these settings.

First blush. Notice how all the other layers are not visible.

To do the other cheek I adjusted the brush angle to its negative value but left the roundness alone.

Yes, she looks very embarrassed.

I left the opacity exactly as is, at 100% and turned on all the rest of my layers. And magically, her face just looks pretty, with a hint of colour in her cheeks and on her lips. As long as you haven’t merged your layers, you can tweak the opacity of your colours on each layer until you’re in love with the result. Just remember that a light touch gives the best result.

It really is that simple! I bet you have a favourite black-and-white photo you want to try this with. Have fun!!

Below is just a quick-and-easy mini-tut especially for mskinsey. She wanted to know how to apply a border around photos and other items. So here you go…

My photo extended a long way past the edges of my frame. I used the Elliptical Marquee tool to select an elliptical area on my photo layer that just overlaps the edge of the inner area of the frame where the photo goes. Then I inverted the selection [CTRL/CMD>SHIFT>I] and cut away the rest of the photo [CTRL/CMD>X]. That makes the next step super-easy. I just clicked on the layer thumbnail for my photo and that selected the outside edge of my ellipse.

I clicked on the Select tab then chose Modify>Contract from the pop-down menu.

I first typed in “15” but it didn’t give me enough space between the frame and the marching ants, so I changed the number to “30“.

With my marching ants now 30 pixels inside the frame (you can see them peeking around the left upper edge of the menu box) I clicked on the Edit tab, then Stroke (Outline) Selection and entered the width and colour I wanted to use. I also chose for the stroke to go inside the marching ants. That’s a personal preference.

And that’s all it takes!

Next week I’m going to show you another way to play with shadows on their own layer, using the same layout, which is my January Color Challenge entry. (I’m all about working smart, not hard!) Take a look and see if you can guess what we’re going to do…

Don’t forget! If you use any of the techniques or tips I’ve shown you this month, post your work to the GingerScraps Facebook fanpage Challenge Gallery, or if you’re not a Facebooker, you can post a link in the comments here for me. Then I can enter you into a draw to have your very own personal tutorial right here in February.

Creative Style | Purple

GS_blog_CreativeStyle_Header

Hello scrappers. Today we are going to take a look at a creative style. Well, let me honest. It isn’t really a style so much as getting some inspiration from color.

There are many things that can make a layout stand out in the gallery. What grabs one person’s attention might not grab another’s. I could write multiple blog posts about what grabs mine. That being said, seeing a layout that has predominantly one color always grabs my attention. There really is no reason that I picked this color, except that I like it. Let us get some inspiration from the color purple.

We are going to take a look at some pretty purple images, some great digital scrapbooking layouts done up in purple, and round it up with the latest purple filled goodies from the store. If those do not do it for you, make sure you check out January’s Buffet. A lot of those have purple all through them!

Now, here are some lovely images to get those creative juices flowing. Did you know there was a place you could get pretty nice stock photos for free? These images are from Pexels. (All photos on Pexels are licensed under the Creative Commons Zero (CC0) license. This means the pictures are completely free to be used for any legal purpose.) I use them on my personal blog. I thought I would share with you guys while we get some inspiration for scrapping with purple.


Fantastic right? I find inspiration for layouts in all kinds of places. Looking at beautiful photos are one of them. Want a bit more inspiration? Here are some layouts that are predominantly purple. You know, to help get those ideas flowing! (all images are linked to their counterpart in the store. Go leave some loving!)


Are these not some lovely layouts! I know part of that is the great designers we have here at GingerScraps. These layouts are beautifully scrapped though. I hope you found at least some inspiration from today’s post. I will leave you with some great designs to get those purple filled layouts scrapped. As usual, all images are linked to their counterpart. We actually have an entire location in the store just for purple items.


Fresh Baked: January 20, 2017

This week, it’s time for retirement. No designers are leaving us, but some of their amazing kits are being retired to make way for new and better! There are also some new and gorgeous kits and templates being released this week as well!

Remember when you spend $10 in the store, you get a great new collab!

fwp322  https://store.gingerscraps.net/GingerBread-Ladies-Collab-Puttin-On-The-Glitz.html

[Read more…]

Sneak Peeks January 19, 2017

Happy Thursday! There are TONS of awesome new releases this week to get to!

From JoCee Designs

From Laurie Scraps

From Jb Studios

From Miss Fish

From Tinci Designs

From Dagi’s Temp-tations


From Lindsay Jane

From Clever Monkey Graphics

From CathyK

From Neia Scraps

From Aprilisa Designs

Have a Wonderful Weekend!!!!

Designer Sneak Peeks January 18th, 2017

Check out the Designers Sneak Peeks for this week!

Image may contain: text

Image may contain: text

No automatic alt text available.

No automatic alt text available.

No automatic alt text available.

Image may contain: text

No automatic alt text available.

Image may contain: text