Journaling INside the Box!
![]()
Greetings GingerScrappers! I’m hoping against hope the big server swap-out goes smoothly and quickly so nobody misses out on anything around here. I’m actually at work today – but you know nurses are capable of being in two places at one time (or at least the hospital thinks we are…) so you’re still going to get your dose of PSE instruction. Today we’re going with something really simple and straight-forward. Carol (user name gnana) requested a lesson on putting text inside a shape. Sadly with PSE, we’re limited to the custom shapes available within the software, but that doesn’t mean we can’t still be creative! So let’s have a look…
I was putting together a Chanukah layout for the January Recipe Challenge the other day, using Tracey Monette‘s (aka Clever Monkey Graphics) Hanukkah Oy kit and wanted to put my journaling inside a Star of David. (I made this tag out of an element and some paper.) See how I’ve selected the Custom Shape Tool below? The pop-up menu will automatically give you the Default Shapes so go ahead and select Show All then pick a shape that’s close to the one you want to journal within.
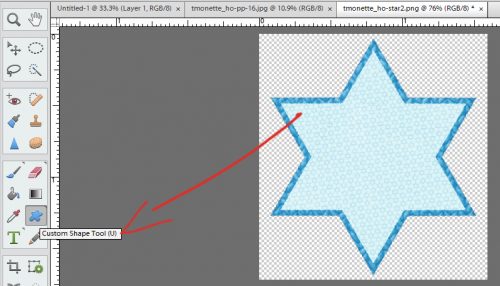
The best the software could do for me was a sheriff’s badge. So I went with that. I put my cursor on the tag then left-click>dragged out the shape to the size I wanted. (Make the shape as large as you can without extending past the edges of your item. You can always reposition it once you’ve got the shape and size you want.) The shape will then appear in your Layers Panel.

I don’t know about you, but I have a gazillion fonts and choosing the one I want to use is painfully difficult. So when I heard about wordmark.it I knew I’d use it a LOT! All you do is go to the website and pop some of your text into the box at the centre of the black band at the top. The site will then show you what it looks like in every font on your hard drive. How awesome is that?

Once I decided on the font I wanted to use (which isn’t the one shown in the screenshot… I actually used one called Worship Display, which seemed to be an appropriate choice) I made sure Horizontal Type Tool was selected. Then when I moved my cursor over to the shape layer, I got a slightly modified text cursor that looks a little like I’ve shown you below. That’s how you know it’s going to do what you want.
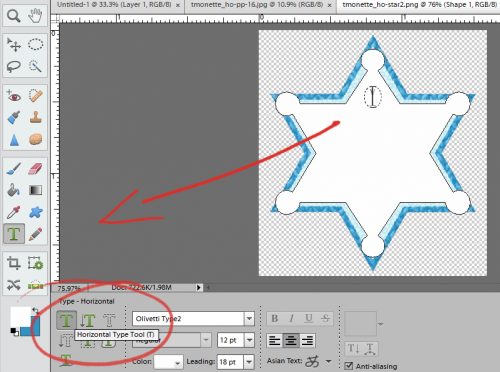
Sizing your text will determine how well your text fills the space. I could have gone smaller with the font, used more words and extended my text a little closer to the edges but the shape wasn’t huge and I wanted to be able to read it. You may well have to adjust what you want to say to make sure it all fits inside your shape. See how my text fits neatly and has a nice border around it?

I zoomed out a bit so you can see the entire text and how it fits.

Of course, I don’t want that white sheriff’s badge to stay there. When I turn the visibility of the shape layer off, my text remains and is still exactly where I put it. So guess what! That layer can just be deleted altogether. Cool, right?

So now you can go ahead and make your own tag shapes for journaling and have a polished look to your finished layout. The easiest way to do that is to create a shape. Then make a copy of that shape (CTRL/CMD+J) and simplify them (right-click on the layer>Simplify Layer) so you can play with them. Make the bottom one a little larger than the one on top so you have a nice border. Then clip papers to each layer. Bingo!
I hope you’re having fun learning new tricks! See you all next week.
![]()


