Get in SHAPE, Girl!
![]()
So, I was having a chat online with Lisa (slfam) about the April GingerScraps challenges. She wanted to take part in the Scraplift Challenge but didn’t know how to make rounded rectangles. This beautiful layout sort of demands them… if you’re like me and want to stick as close to the original as possible.
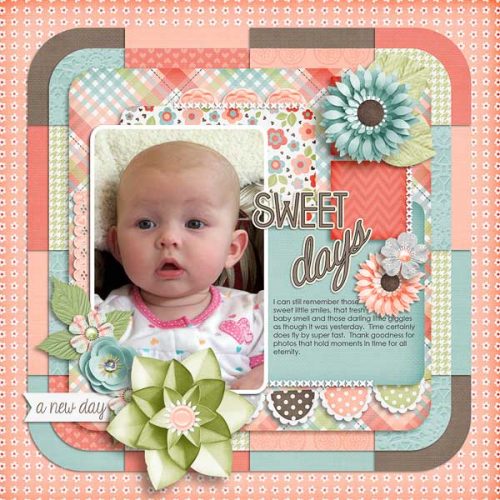
Looking at the layouts posted in the thread told me that Lisa wasn’t alone in wondering how to get those curvy corners. So I decided to work a tutorial out for y’all.
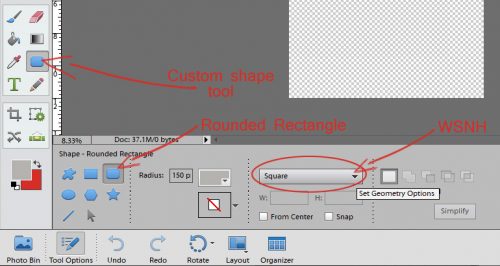
Let’s start out with a 12×12 canvas. Select the Custom Shape tool, which may look a bit like an amoeba on your desktop. The top right icon in the Tool Options section takes you to the menu for rounded rectangles. Because the example layout uses a square shape, I set the Geometry Options to Square.
The amount of curve on your corners will be determined by the Radius you set for them. You can type in any number you want and do a test run to see what it looks like.
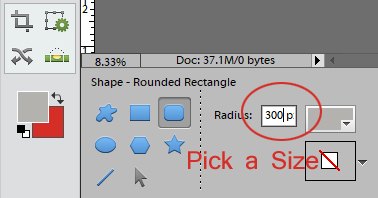
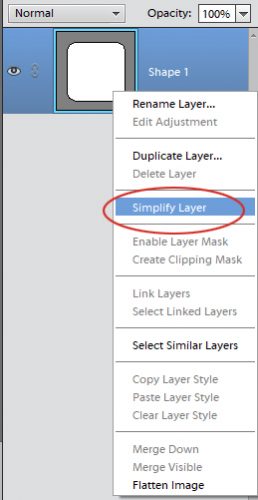
I started at 150 px, and just kept click-dragging out squares until I got to a radius of 400 and was satisfied with the amount of rounding. See the little Simplify button down there? You can WSNH by using it, or you can do it the other way. But you DO want to simplify your shape once you like it, because that makes your background transparent.
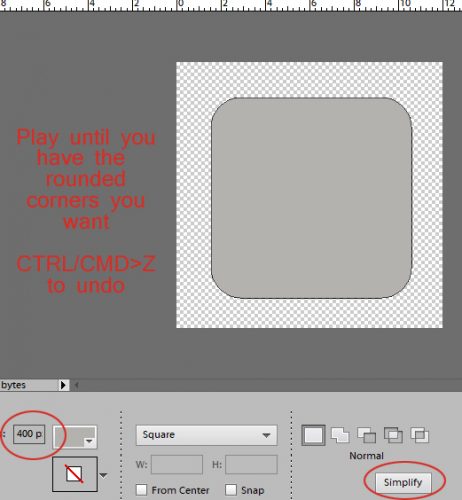
This is the long way… See what the thumbnail looks like? You want the background to be transparent for a later step.
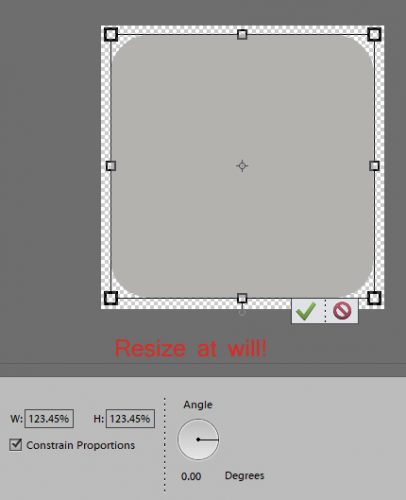
Now that I’ve got the shape with the curvy corners I was looking for, I can resize it – bigger or smaller – and still keep the corners at the same radius.
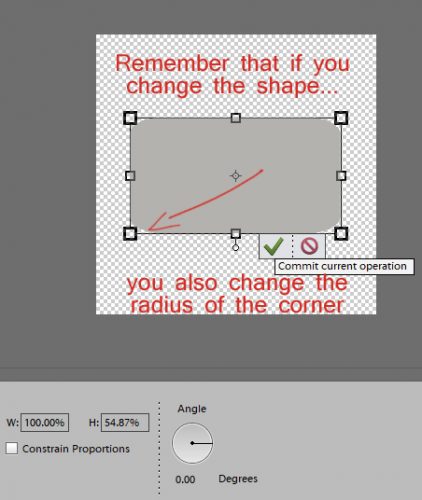
You can also change the proportions from square to rectangle, but when you do you also change the radius of the corner from a perfectly round one to a more elliptical one.
Here’s why I wanted you to Simplify your shape. After going to all that trouble (well… playing with the radius can be tedious!) you might want to save your shape as a clipping mask for future use. You can use the same mask over and over and over and over! (If you want to use it multiple times in one layout, just CTRL/CMD>J it as many times as you want.)
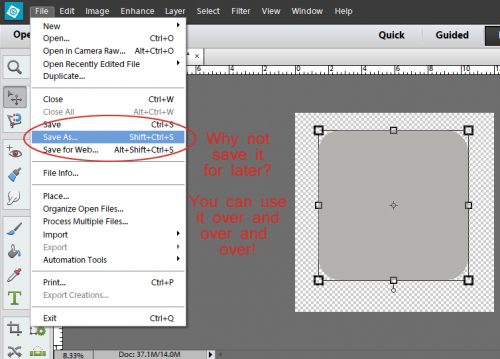
In the Save As menu, select where you want to put it so you can find it later. (I have a folder labeled Jan’s Elements where I’ve saved quite a few things I’ve created over the years.) Name it something simple you can remember and select PNG as the format. That’s how you preserve your transparent background.

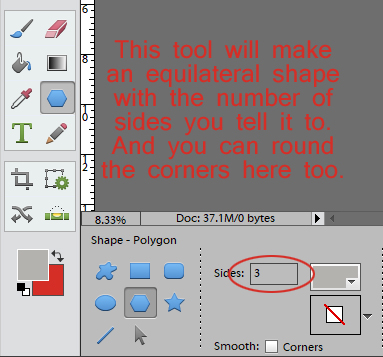
Now let’s take this little lesson a step further. We’re going to make a template for a banner. With the Custom Shape tool selected, click on the icon in the middle of the second row of the Tool Options section. That opens up the Polygon shape tool. You can make an equilateral (all sides the same length) shape with as many sides as you want. Let’s make a triangle.
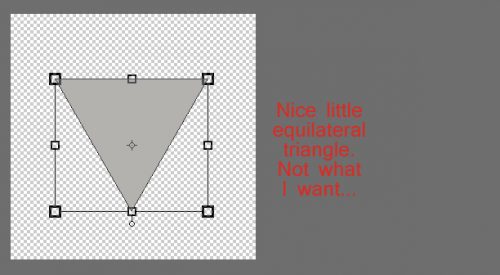
For my banner, I don’t really want an equilateral triangle. I’m looking for more of an isosceles triangle. (Am I causing you flashbacks to junior high math class? Sorry!)
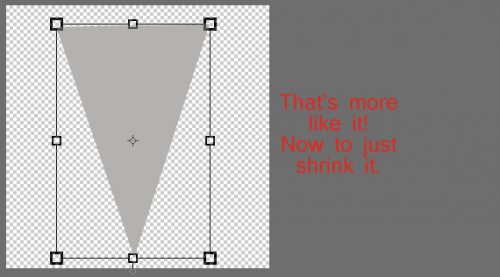
After I Simplified my shape, I changed the dimensions. Once I had the shape right, I could change the size to something more useful.
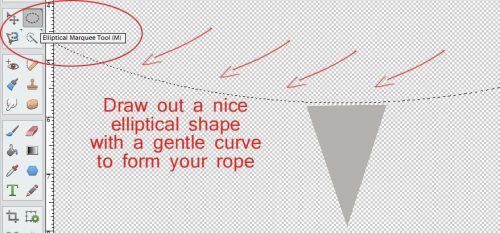
To make the string/rope that your banners will hang from, the next step is to draw out a nice elliptical shape using the Elliptical Marquee tool. A gentle curve will work beautifully.
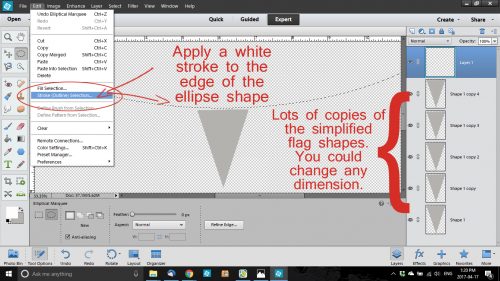
I made 5 copies of my little flag before I moved on to this step. For now they’re all still in a stack. Once the ellipse is drawn out and looks good, apply a white Stroke to the outside of the marching ants. Edit>Stoke (Outline) Selection…
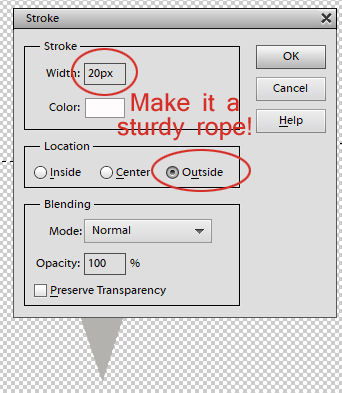
I chose 20px for this stroke. I wanted the rope to be strong! (At this point your rope will just look like a line. Giving it the appearance of rope or twine is an advanced technique we’ll have to explore another time.)
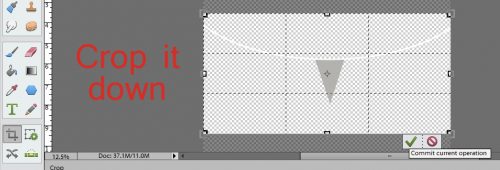
Once the stroke has been applied, Crop the whole shebang down to a manageable size.
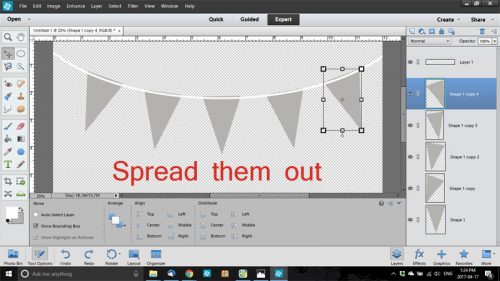
Then you can start moving your flags along your line. Spread them out. Tip them so they’re attached to your line at both corners of the short side. Don’t worry too much about eyeballing for a perfect spacing.
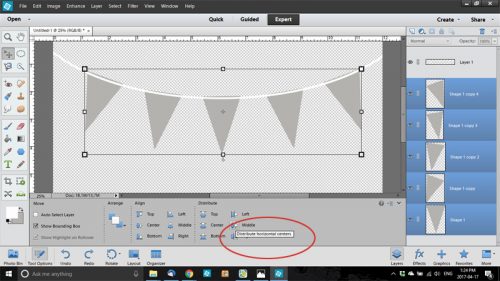
Once you’ve got them all lined up, select each of the little flag layers. In the Tool Options section of the Move tool, select Distribute>Middle and voilà! They’re all perfectly spaced. Too easy!
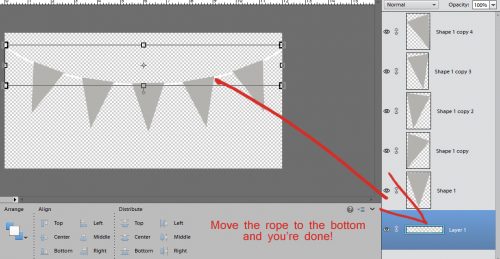
Move the string layer to the bottom and you’re done! Now you can clip papers to each of the flags, mixing and matching colours, patterns, stripes… whatever your little heart desires! And you’ll have a custom banner that’s a perfect match to the kit you’re using.
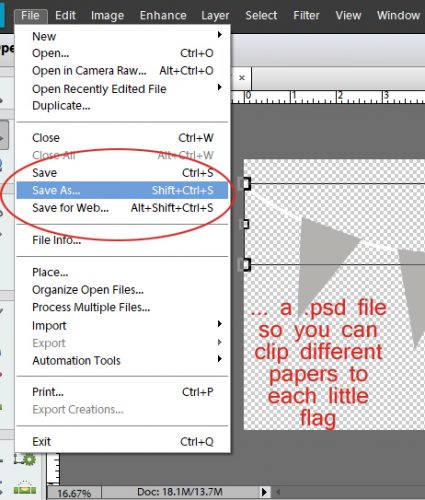
The final step is to Save As… Only this time you’re going to save it as a PSD file, which will let you change up your papers every time.
I just know you can think of a gazillion ways to use this lesson. If you like to add lots of tabs to your layouts, you can make your own clipping masks in the shapes you like best. There are so many things you can do with this you might never work without clipping masks again!
Remember, if you’ve used a technique from these tutorials, post your finished layout in the GingerScraps Facebook Tutorial Tuesday Challenge Gallery for an opportunity to have YOUR chance to challenge me. If you’re not a Facebooker, you can post a link to the layout you’ve created with the tutorial you used in the comments section here on the Blog. I’ll get a notification and will then enter you into the draw. The first week of each month I’ll have a random draw of all entries and the winner will be announced at the end of the first tutorial of that month.
Until next week, friends! Ellen‘s challenge is going to be a big one… as soon as I figure out how to show what I’m doing while I do it. Michelle is still deciding on her topic. Stay tuned!
![]()


