Behind the MASK
![]()
Today’s tutorial came about from a support request Ginger received; a faithful GingerScrapper asked how MASKS are used. So I have some suggestions. For this lesson I’ve used a mask from Seatrout Scraps lovely Tattered and Torn collection (retired) and papers from her Mom to Boys collection.
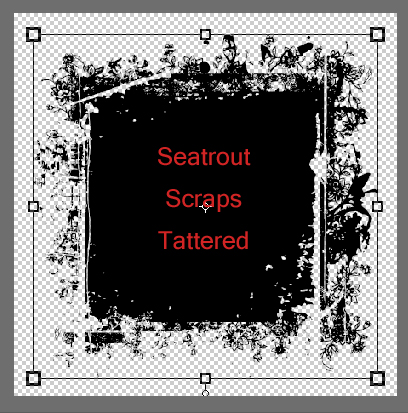
Masks are really versatile tools for the digital scrapper. They essentially create a cutout of whatever is clipped to them. With a little creativity, the sky’s the limit! They can be resized, flipped, turned, stretched, filled, glittered, glossed, textured, beveled – really, anything you can think of. Let’s start with the simplest use, clipping a paper to a mask.
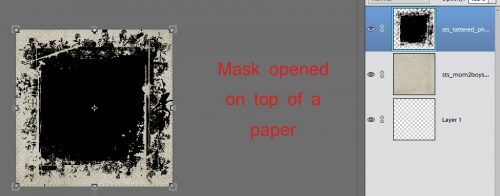
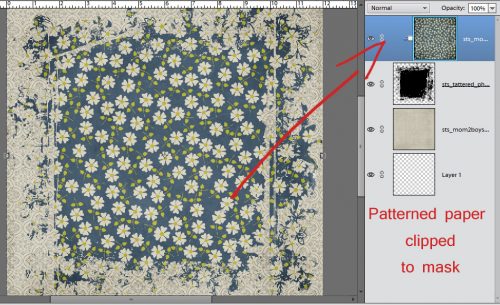
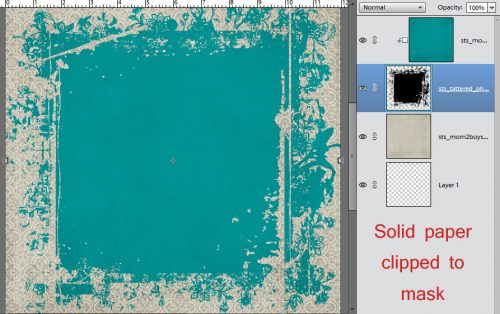
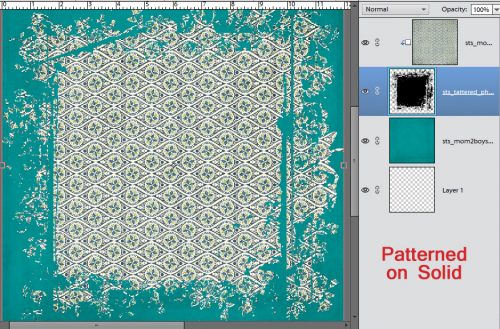
I opened a neutral patterned paper as my background, then dragged my mask onto it. I use Elements 12, which turns everything into Smart Objects when you drag and drop, meaning it’s the same size as the canvas it’s dropped onto. Sometimes this is a real curse… who wants a button with a 12 inch diameter?? (The work-around is to open the item on the workspace then drag it DOWN onto the page.) But in this situation I left the mask full-sized. Then I dragged a daisy-patterned paper on top of the mask. Right click on the layer, then select Create Clipping Mask, (WSNH: CTRL/CMD>G) to clip the paper to the mask as shown.
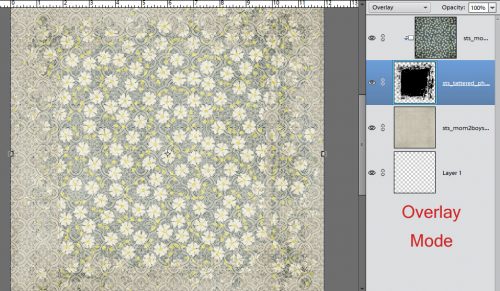
Once the paper is clipped to the mask you can play with Blend Modes. Working on the MASK layer, I changed the Blend Mode to Overlay.

And this is what it looks like. For this purpose, it looks kinda blahhhhh. But it might work beautifully with different papers.
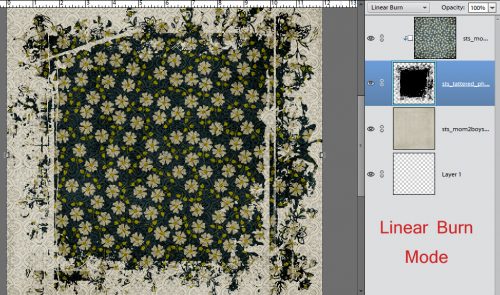
Next I tried the Linear Burn mode. (Actually, I tried them all but I’m not sharing the really ugly results.)
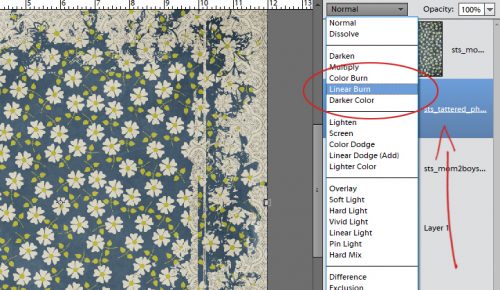
As discussed in the tutorial about Blend Modes, any mode that includes BURN in the name DARKENS.
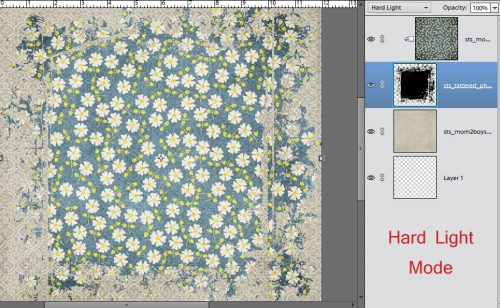
Hard Light doesn’t do exactly what one would think it does.
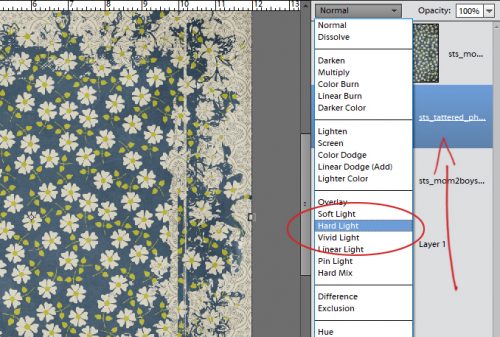
See how faded it is? So maybe it DOES do what it sounds like it should.
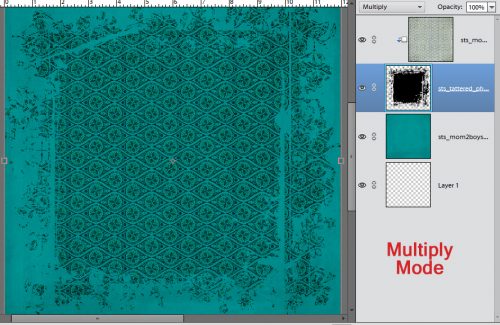
Next I played with a solid paper clipped to the same patterned paper.
To my eyes it looks a little umm… boring? So I played with some Blend Modes again. As before, I worked on the MASK layer.
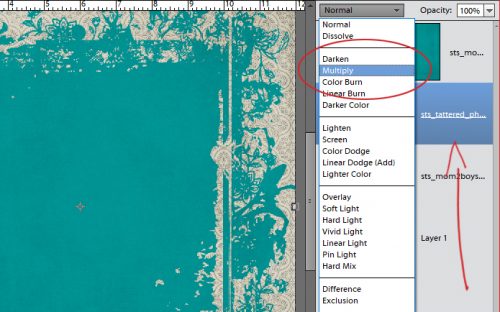
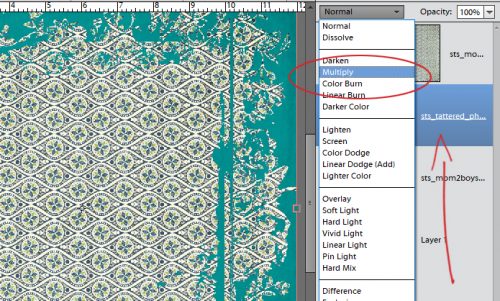
Multiply darkened but also added some more transparency.
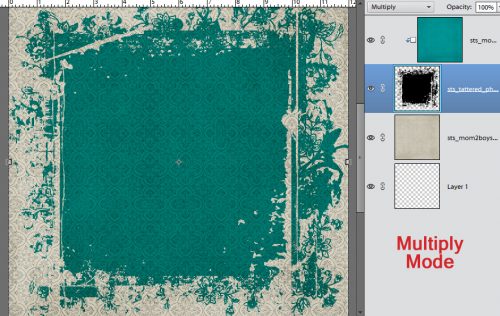
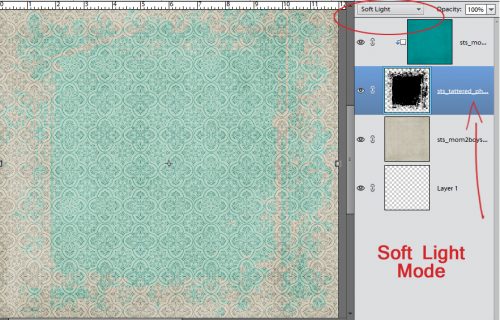
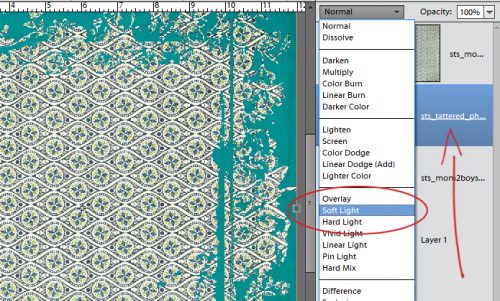
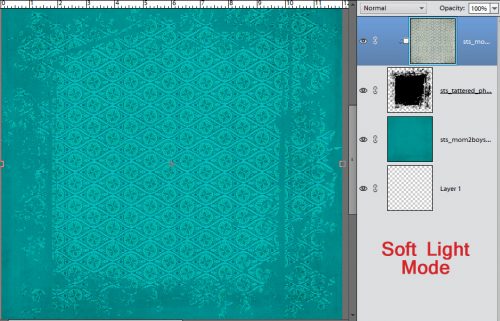
I tried some of the lighting modes and liked Soft Light best.
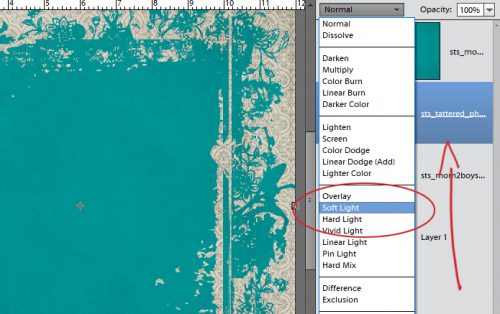
Soft is a great description for this look. But… it really reduces definition.
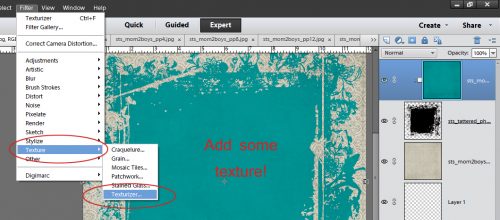
I played with the Texture Filter. (Filter>Texture>Texturizer)
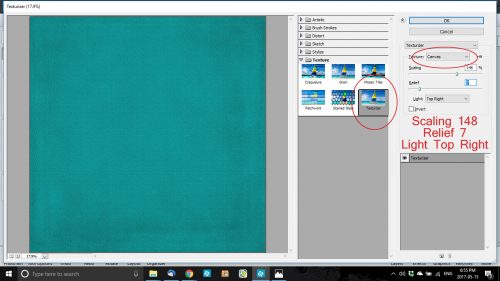
This is the menu that opens when you select the Texturizer. There are several adjustments you can make in this menu, starting with the type of texture you want. The selections are Sandstone, Burlap, Canvas and Brick. I selected Canvas. Then I used the sliders to adjust the Scaling, Relief and Light direction. The Preview panel lets you see what you’re doing.
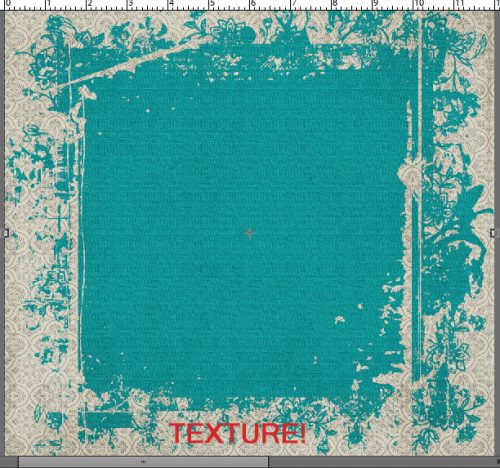
This is what it looks like after I’m finished.
Then I reversed my previous choices, clipping a patterned paper to the solid one.
I tried Soft Light on the Mask Layer.
It looks rather pretty.
Multiply?
Dramatic!
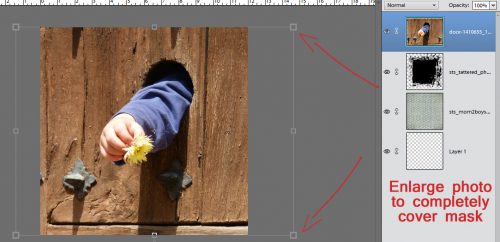
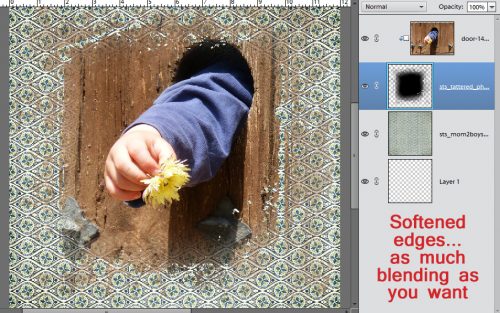
You can also clip PHOTOS to your masks. For best results, enlarge your photo so the entire mask is covered. You don’t want the mask itself to be visible.
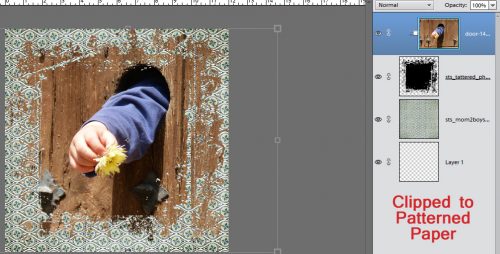
CTRL/CMD>G and voilà!
If you want to blend the edges into your background, you can use the Eraser tool with a large, soft brush set to a lowish Opacity so it softens but doesn’t erase completely.
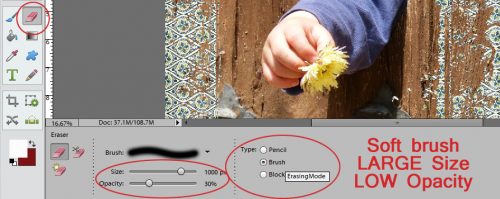
All I did was make a circle around the outside with my eraser brush. If you look at the thumbnail of my mask in the Layers panel, you can see how the edges have been lightened.
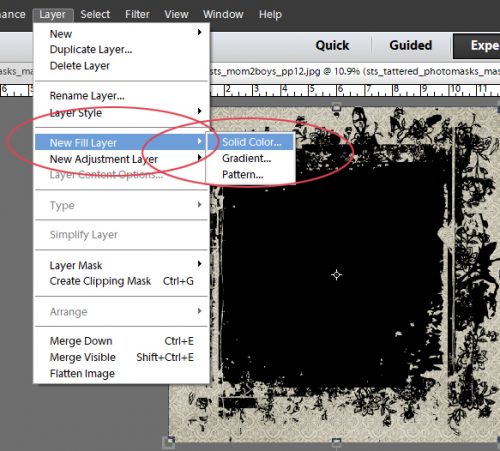
Another super way of playing with masks is to Fill it with colour. Using your Eyedropper, you can pull a colour from your photo or your background paper. Then select Layer>New Fill Layer>Solid Color.
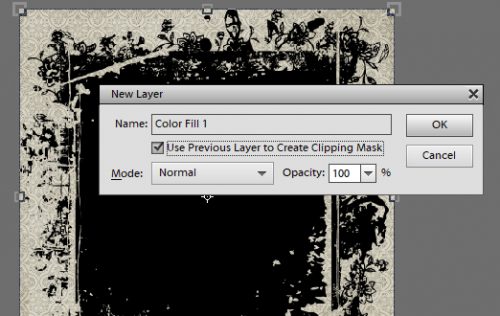
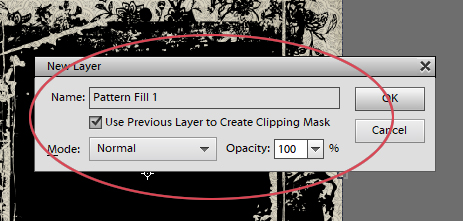
The drop-down menu looks like this. Check the Use Previous Layer to Create Clipping Mask box.
And you end up with this.
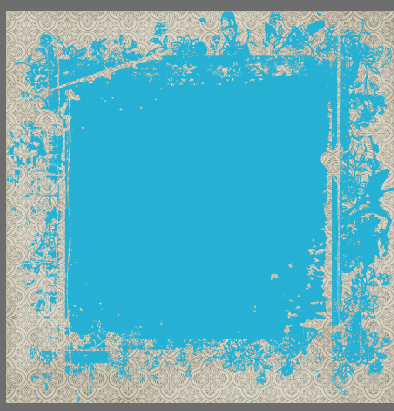
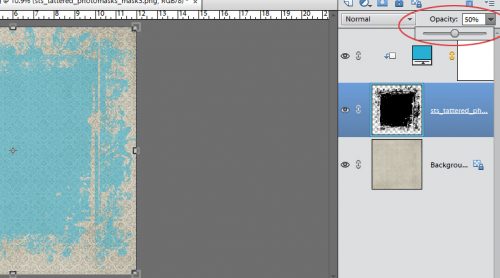
You can adjust the Opacity of the coloured layer by sliding the Opacity slider on the MASK layer to the left. If you adjust the opacity of your coloured layer the black from the mask will alter the colour you’ve used, darkening it.
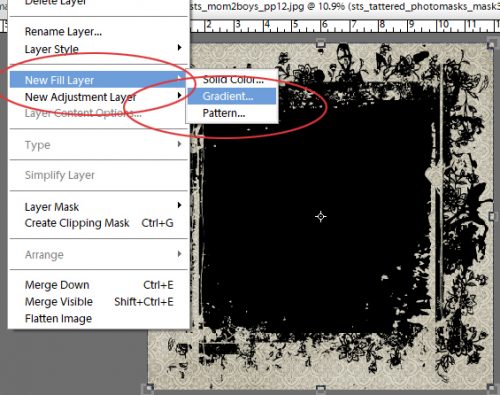
But there are more options with Fill Layers! Let’s see what the Gradient… setting does.
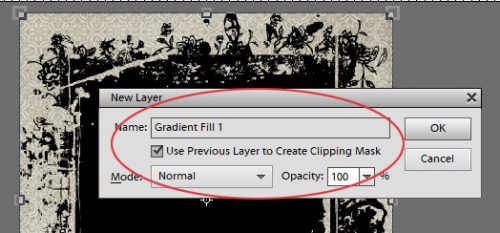
Again, make sure you’ve checked that Use Previous Layer box. Otherwise your Fill Layer will cover up everything.
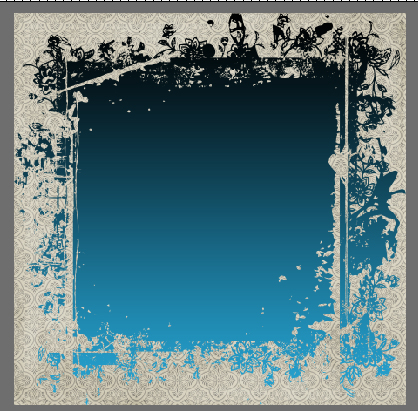
Ooh, that’s really pretty!
What does that third choice in the New Fill Layer menu do?
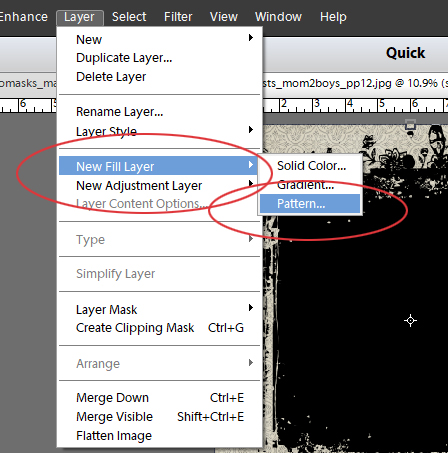
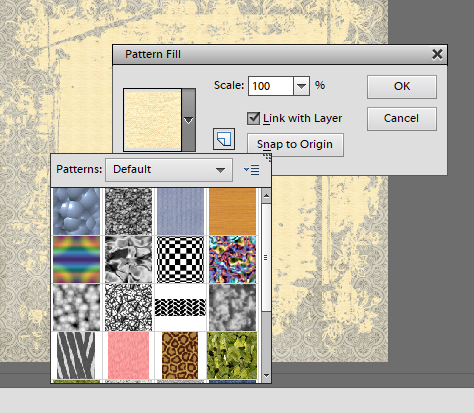
It opens up this menu…
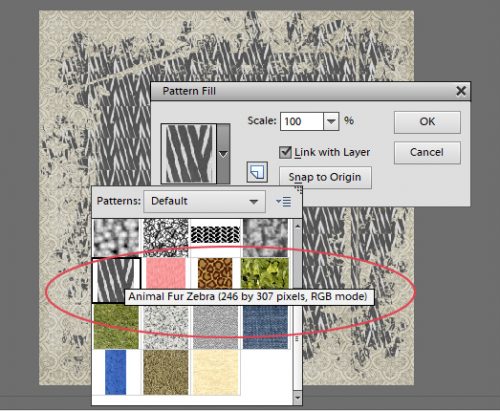
… which then opens THIS menu.
Wow… that’s an interesting look! I could play with this all day!
So there you have some ideas about what you can do with masks. They’re so much fun! Do you think you can guess which of these little tricks I’ve shown you is the one I used for my May Inspiration Challenge layout? Can you pick out the other tutorial techniques I’ve used?
When I contacted Bekki (bekfek) to tell her she was Mr Random’s choice to challenge me, she was pleased but felt that Ellen (gmae) should have had more entries. So she has graciously passed on her opportunity to Ellen, who is thinking upon it. I’m still working on Michelle’s (belis2mi) challenge…
Remember, if you’ve used a technique from these tutorials, post your finished layout in the GingerScraps Facebook Tutorial Tuesday Challenge Gallery for an opportunity to have YOUR chance to challenge me. If you’re not a Facebooker, you can post a link to the layout you’ve created with the tutorial you used in the comments section here on the Blog. I’ll get a notification and will then enter you into the draw. The first week of each month I’ll have a random draw of all entries and the winner will be announced at the end of the first tutorial of that month.
![]()


