Putting the “OH!” in Your Photos
![]()
Given the great interest in my two previous photo-editing tutorials, along with some requests for more, today we’re going to play a bit with some simple photo edits. You know that those spectacular photos on photo-sharing sites are mostly NOT straight out of the camera (SOOC)… they’ve usually had some post-production tweaking to add impact. The photo I’m working with today is one taken in Chicago several years ago; it’s of a statue by Dessa Kirk called Magdalene and is part of the Congress Plaza sculpture garden.
Step one when you’re unsure how you’ll like the result is to work on a copy. So I went ahead and CTRL/CMD>J my photo. If you like to work hard, right click on the layer then select Duplicate Layer.

I usually adjust the lighting first, because a lot of the time simply improving the lighting is enough. Well-lit photos are the ones that get attention.
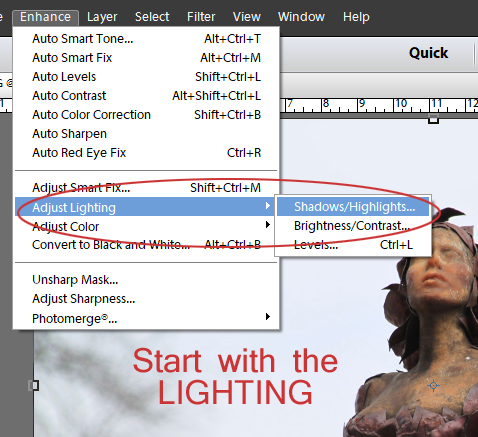
Elements automatically lightens shadows 35% when you select Shadows/Brightness from the drop-down. Take a good look at the results before you make any further adjustments.

I knew I was going to be making other changes to this photo that could affect the lighting so I pulled the slider Lighten Shadows back over to the left to 0. It’s vital that you look for “blown highlights”, especially if you’ve lightened the shadows. How do you know they’re blown? They’re light areas that should have detail but don’t. To bring them back pull the Darken Highlights to the right, watching what’s happening to your image while you’re adjusting. Even with the shadows unchanged, there were some blown highlights in my photo so I moved that slider a bit. Then check the overall contrast of the image. The bottom slider adjusts Midtone Contrast, so not the highlights or the shadows. Move that to where the image looks good to your eye. Be really careful that you don’t overdo it!

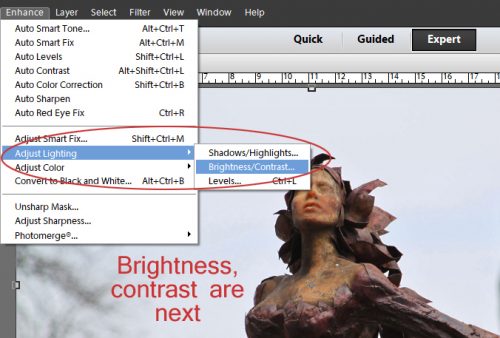
Next I adjust Brightness/Contrast. Seems redundant, but it isn’t.
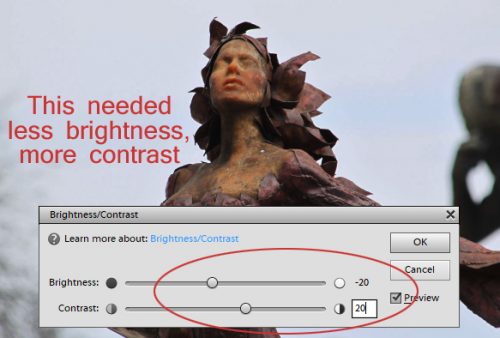
I found my image was TOO bright, so the slider went left. It also needed more contrast, so that slider went right. Everything you do will show on your image, and it’s really crucial that you watch what happens so you can avoid creating something obviously artificial. You’re going for gorgeous, not Oh-Look-I-Edited-This.
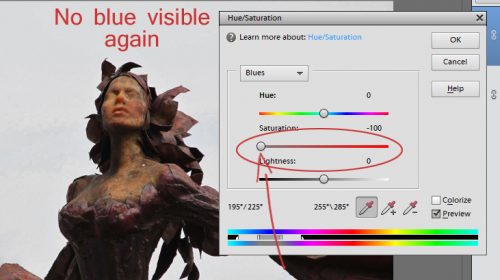
Once I’m happy with the lighting, I move on to colour. For this image I wanted to try to make the sky look more blue and to emphasize the rust, so I went into Adjust Hue/Saturation (WSNH: CTRL/CMD>U).

This menu has lots of options. You can adjust only one colour family or the overall colour. I went to the selector, clicked on the tab and selected Blues from the pop-out submenu. There’s no visible blue in my photo, alas. Pulling the Hue slider all the way to the left didn’t make much difference, but the sky looks vaguely green with a swath of lime.

Pulling the slider all the way to the right gave me these pinkish patchy spots that looked awful.

So I put the slider back to centre. Then I tried adjusting the Saturation. All the way left made the sky look leaden grey.
All the way to the right… WHOA, that’s very… umm… abstract.

I moved the slider back almost to centre then went to the Lightness slider. All the way to the left (darkest) eliminated any hint of blue there might have been.

All the way to the right and it’s back to blah grey.

Here’s where I ended up. I wasn’t totally happy with the sky but I moved on for the time being.
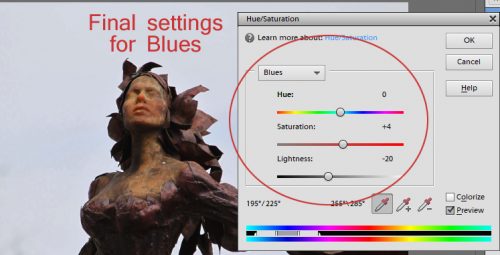
Then I reopened the Hue/Saturation menu and selected Reds in the same way. Hue all the way to the left and she looks like she’s a gorgon.

All the way to the right and she looks like Zelena from Wicked.

Hue ended up just left of centre. Then I went on to Saturation. This is a great way to see what a black-and-white version of your photo would look like and it’s one of the easiest ways to do it.
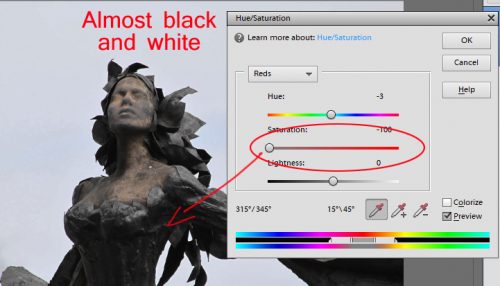
All the way to the right sets her on fire!

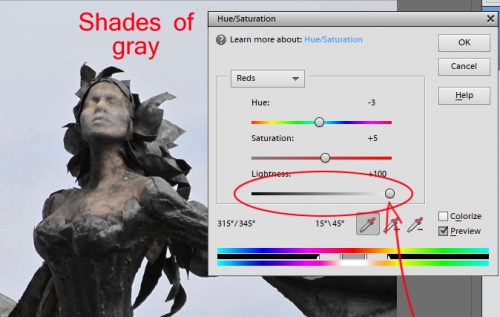
As you can see, the Saturation slider ended up just right of centre. The Lightness slider when full left again makes it look like a black-and-white image.

All the way to the right and it’s more like a really faded sepia.
Here’s where I ended up. Can you see the changes?
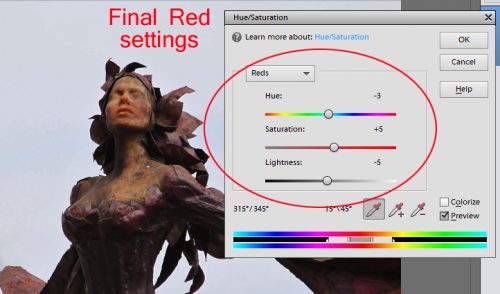
Then I wondered… what would it look like with a High Pass filter on it? Since I was already working on a copy of my image, I could apply the filter right on that layer.
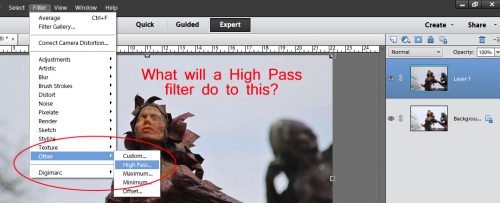
I adjusted the slider on the filter so that I could see the outline but not really any colour. And then I changed the Blend Mode to Overlay.

See the difference? It’s subtle but adds a little something, I think. (Her face looks a little thinner and her bosom a little bigger but I didn’t touch either one of those areas.)

Now… on to making the sky look like sky. I played around a bit before I found a method that worked for me. I opened the Color Picker and chose a soft blue.
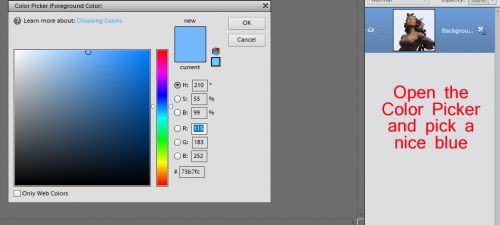
I used the Quick Selection (Magic Wand) tool to select the outline of the statue, including the larger of the little gaps. Then I Inverted the selection (WSNH: CTRL/CMD>Shift>I) so the sky was outlined. Next I used the Fill tool (Paint Bucket) to turn the sky blue. I noticed a couple of areas that were still that almost-white so I used a small hard brush and the same blue to paint out the gaps.

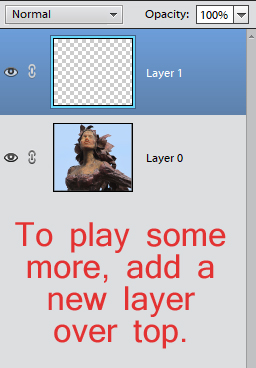
Better. But still not what I wanted. So on I went. I opened a new blank layer over the image.
I chose a large, soft brush that covered the section of my photo shown below. The Opacity is set to 100%.
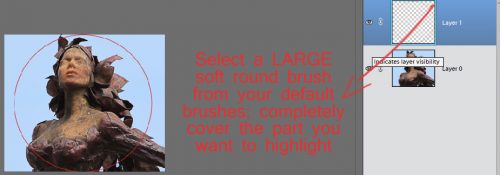
I went back to the Color Picker and selected a darker value of the same blue. Then, on the blank layer, I clicked the brush over my image a few times to build up an opaque blue orb with fading edges over the face of the statue.
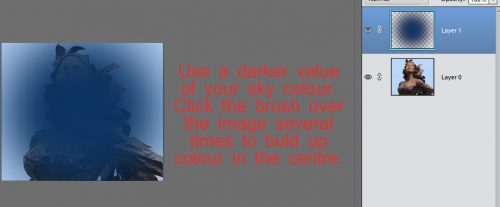
Okay… can’t see her at all right now. I changed the tool from Brush to Eraser and centred it over the blue splotch in the same way as I did with the brush. The Opacity is still 100%.

Now her face is visible again, but needs some more TLC.
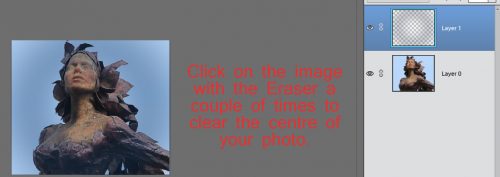
I zoomed in quite a lot then adjusted the size of my brush so that I could Erase the remaining blue from the statue. If you’re shaky at that activity, you can use a Layer Mask so you can paint back if you go outside the lines. I really didn’t want a visible white line around the edges of the statue so I was really careful.

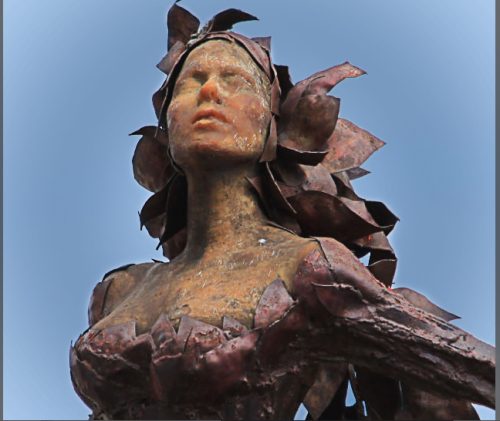
And the end result! It took me about 40 minutes to do all these steps and the screenshots, so you can see it’s not a huge time outlay for those special images that you just want to look a wee bit better.
Our next lesson will pertain to some of the mechanics of Elements. Stay tuned!
Remember, if you’ve used a technique from these tutorials, post your finished layout in the GingerScraps Facebook Tutorial Tuesday Challenge Gallery for an opportunity to have YOUR chance to challenge me. If you’re not a Facebooker, you can post a link to the layout you’ve created with the tutorial you used in the comments section here on the Blog. I’ll get a notification and will then enter you into the draw. The first week of each month I’ll have a random draw of all entries and the winner will be announced at the end of the first tutorial of that month.
![]()


