Archives for February 2018

Tutorial Tuesday (Photoshop Elements)

The EYES Have It!

A number of notable thinkers through history have said the eyes are the windows to the soul, or some variation of that. That might be true, but when we’re talking about photographs, portraits in particular, the eyes are the focal point to which all attention is drawn. Am I right? I did some photo editing for Terri in South Africa over the weekend and one of the things I did was to bring the eyes of her subjects out of the shadows. She wondered if I could use her photos as the basis for a tutorial, but the adjustments I made to them were a little too complicated for this forum. But I thought a quick, easy little tutorial on brightening eyes might be in order. Let’s look at this really cute photo I found on Pixabay.

Yeah, she’s as cute as a bug’s ear. But think how much cuter she’ll be with brighter eyes! Zoom in on your photo so the eyes almost fill your workspace. We’re going to use the Dodge and Burn Tools again. The Dodge Tool looks like a lollipop, or that plastic wand the eye doctor uses at the beginning of an eye exam when he asks you to cover one eye. Dodging selectively lightens an area on a photo. We’ll start there. Select the Dodge Tool as shown, then make adjustments to the settings. It will automatically go to the software’s preset default, or if you’ve used it, to the last settings you used. Because I used this tool on Terri‘s photos, the brush size is huge. Not gonna work now! For this part your settings are: Dodge>Range=Highlights>Exposure=20>Brush=15 to 20 or whatever size will fit between the outside of the iris and the edge of the pupil. Brush your Dodge Tool over the iris of each eye, concentrating on the area right under the pupil. Don’t go overboard, you want the colour to remain, just lighten and brighten.

The effect will be subtle. But if you look back and forth between this image and the one above, you can definitely see it. Now switch to the Burn Tool, the one that looks like a hand with the fingers and thumb making a circle. Burning selectively darkens an area of a photo. Your settings for this step should be Burn>Range=Shadows>Exposure=20>Brush size 10-15. You want the brush to overlap your dodged area, but only a little. Then brush the Burn Tool over the outer edge of each iris, with a little extra attention to the area just below the upper eyelid.

See the change? The eyes are so much brighter, but not bash-you-over-the-head-brighter. They still look natural and real. You could stop here and have made a great improvement to the way people perceive your photo.

So let’s amp up the brightness factor by adding to the catch-lights already there. Again we’ll use the Dodge Tool. (It seems like a LOT of steps but it really is an intuitive technique after you’ve done it a few times.) The settings I used are Dodge>Range=Highlights>Exposure=60>Brush=5. Then just hit the catch-lights with that tiny brush to brighten them some. The brush needs to be very small; catch-lights that are too big and prominent make the person look like they’re under the influence… not their best look!

Wowsers! It looks so good!!
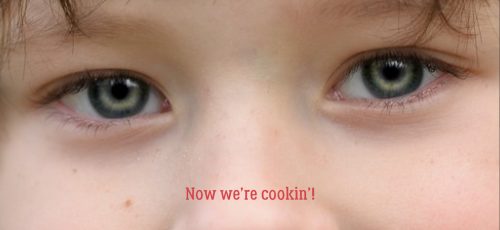
Again, you could stop here. Or you can switch back to the Burn Tool and using the same settings on Shadows, plump up those eyelashes a bit. I lined her upper eyelid then brushed over each lash to add some weight to it.
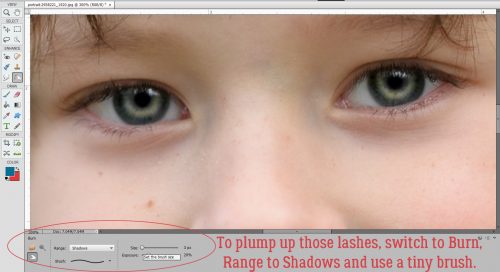
And when I was done, she looked like this. Now her eyes are much more noticeable and magnetic. It literally took me longer to do the screenshots than it did to brighten her eyes. I could have gone on to eliminate the freckles (why?? I LOVE freckles!) and even out her skin but I don’t think she needs it.

Will you try this one on one of your almost-perfect portraits?

Pinspiration | Big Titles

GS_blog_BePinspired_Header

Happy Saturday scrappers! I was perusing around Pinterest today looking for ideas. I stumbled upon a lovely layout (will show you below) with a big title. That got my scrappy gears moving in my brain. So, I thought I would share that inspiration with you.

So often we allow the photos or a great paper to be the focal point of our layout. We plop a title on at the very end of it all (if we do at all). Personally, I struggle with coming up with a great title. Really, as I scrap mostly my son, I feel like slapping “Isaiah” on every page. lol. I searched “scrapbook big title” on Pinterest & was inspired! Here are some great examples of making the title your focal point. Making a statement with a big title.

399614757ad42d854a1e6e689511aabe

The Pin | Original Source

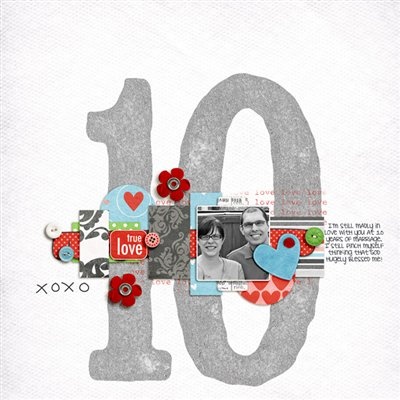
I really like the idea of the large number that signifies something. It works at the title as well as a great backdrop. The choice of alpha allows for the large number to blend perfectly to the layout & not over power it. Who doesn’t have a number that is significant to them. A person’s age, an anniversary, or a reunion. The next time you are scrapping a memory that has a significant number marker, think about making that your focal point. Scrap it with a big title!

499e14bfe7044229cceafe3688c27a78

The Pin | Original Source

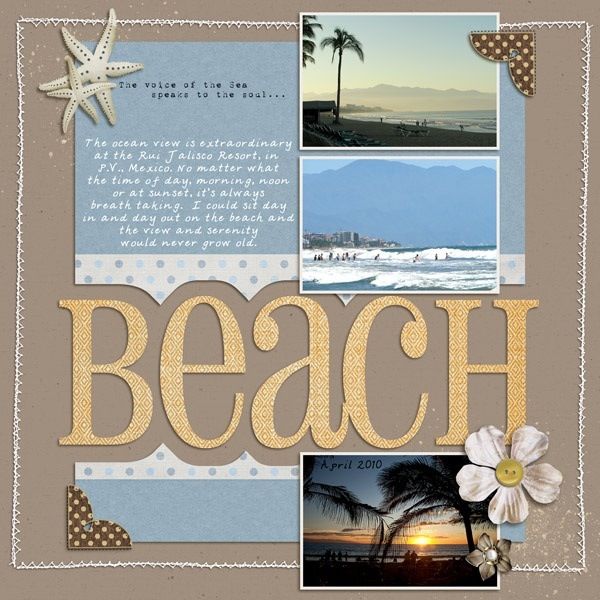
This really is the focal point of the layout. I really like how the paper is cut around the title. I feel like when it is time for me to go to the beach, I want to yell it to everyone. Just go around yelling, “BEACH!” lol. This large titled layout really brings all the pretty and fun beach photos together. Your eyes are drawn to the large title to start with. At the same time, it is bringing your eyes to the photos around it. This would make a great title page to a vacation book too!

[Read more…]

Fresh Baked: February 23, 2018

There aren’t any fun and wacky holidays comin up. Yesterday was National Margarita Day, so most likely, there was a little too much fun had, and everyone just needed a day off. Or something!

But, don’t take a day off. Sign up for Survivor! Join us on the Road Trip of a LIFETIME!

001_thumb
https://forums.gingerscraps.net/showthread.php?41674-Scrapping-Survivor-8-*Road-Trip*-SIGN-UP-HERE

Whether you take part in the game, make sure you at least check out the collab! It’s gorgeous! So many goodies: 10 Full Alphas, 127 Papers, 272 Elements, 28 Journal Cards, 2 Templates,  and 5 Layered Header Templates!

002
https://store.gingerscraps.net/GingerBread-Ladies-MEGA-Collab-Road-Trip.html

Remember when you spend $10 in the store, you get a great new collab! It’s time to get out and do some winter sports!

fwp
https://store.gingerscraps.net/GingerBread-Ladies-Collab-Winter-Wonderland-of-Sports.html

miss01
https://store.gingerscraps.net/Photo-Strips-3-Templates-by-Miss-Fish.html

miss02
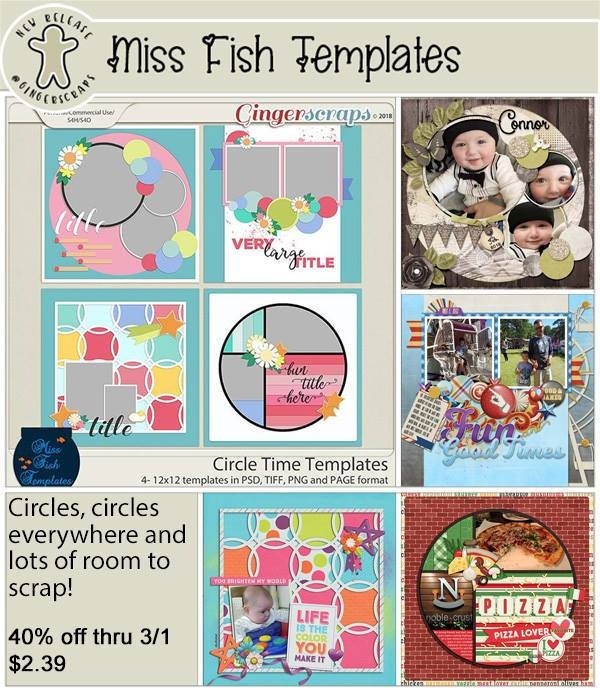
https://store.gingerscraps.net/Circle-Time-Templates-by-Miss-Fish-Templates.html

neia
https://store.gingerscraps.net/Neia-Scraps/

ponytails
https://store.gingerscraps.net/Week-by-Week-March.html

tinci
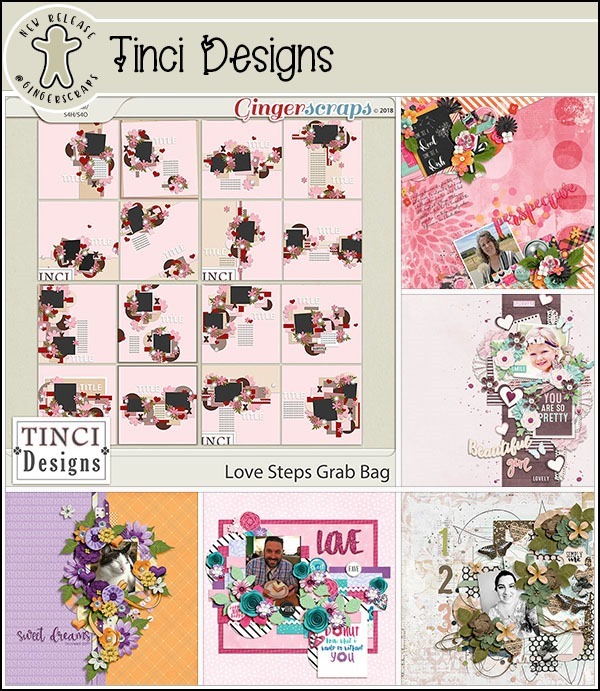
https://store.gingerscraps.net/Love-Steps-Grab-Bag.html

aimee
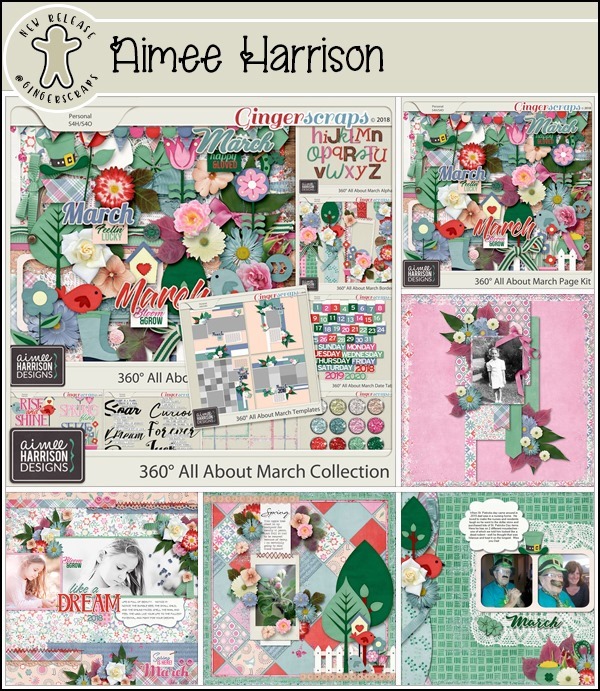
Collection: https://store.gingerscraps.net/360-All-About-March-Collection-by-Aimee-Harrison.html
Kit: https://store.gingerscraps.net/360-All-About-March-Page-Kit-by-Aimee-Harrison.html
Alphas: https://store.gingerscraps.net/360-All-About-March-Alpha-Sets-by-Aimee-Harrison.html
Templates: https://store.gingerscraps.net/360-All-About-March-Templates-by-Aimee-Harrison.html
Borders: https://store.gingerscraps.net/360-All-About-March-Borders-by-Aimee-Harrison.html
Date Tabs: https://store.gingerscraps.net/360-All-About-March-Date-Tabs-by-Aimee-Harrison.html
Titles: https://store.gingerscraps.net/360-All-About-March-Word-Art-Titles-by-Aimee-Harrison.html
Quotes: https://store.gingerscraps.net/360-All-About-March-Quotes-by-Aimee-Harrison.html
Messy Edges: https://store.gingerscraps.net/360-All-About-March-Messy-Edges-by-Aimee-Harrison.html
Glitters: https://store.gingerscraps.net/360-All-About-March-Glitters-by-Aimee-Harrison.html

boomers
https://store.gingerscraps.net/Tooth-Fairy-BGD.html

connie01
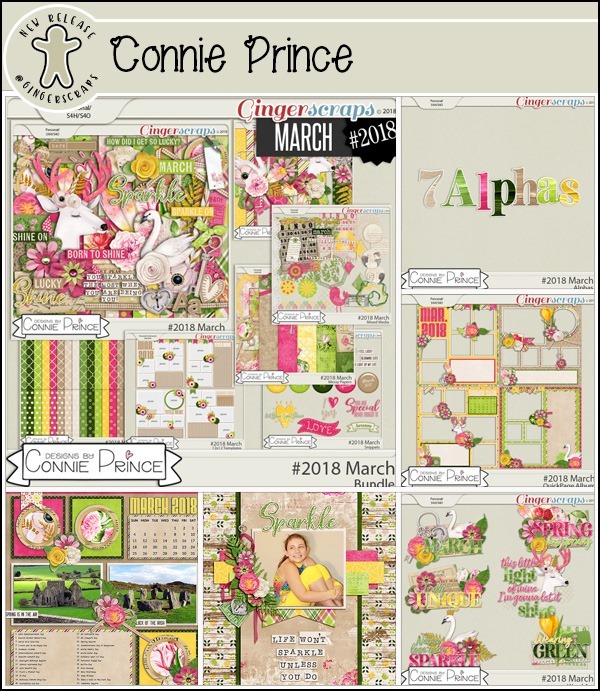
Bundle Collection: https://store.gingerscraps.net/-2018-March-Bundle-Collection-by-Connie-Prince.html
Kit: https://store.gingerscraps.net/-2018-March-Kit-by-Connie-Prince.html
Mixed Media: https://store.gingerscraps.net/-2018-March-Mixed-Media-by-Connie-Prince.html
Snippets: https://store.gingerscraps.net/-2018-March-Snippets-by-Connie-Prince.html
Messy Papers: https://store.gingerscraps.net/-2018-March-Messy-Papers-by-Connie-Prince.html
Border Clusters: https://store.gingerscraps.net/-2018-March-Border-Clusters-by-Connie-Prince.html
Templates: https://store.gingerscraps.net/-2018-March-12×12-Template-Pack-CU-Ok-by-Connie-Prince.html
Extra Papers: https://store.gingerscraps.net/-2018-March-Extra-Papers-by-Connie-Prince.html
Alpha Pack AddOn: https://store.gingerscraps.net/-2018-March-Alpha-Pack-AddOn-by-Connie-Prince.html
Word Art Pack: https://store.gingerscraps.net/-2018-March-Word-Art-Pack-by-Connie-Prince.html
Quick Pages: https://store.gingerscraps.net/-2018-March-Quick-Pages-by-Connie-Prince.html

dandelion
https://store.gingerscraps.net/XOXO-Digital-Scrapbook-Kit-By-Dandelion-Dust-Designs.html

dear
https://store.gingerscraps.net/Dear-Friends-Designs/

heart
https://store.gingerscraps.net/i-heart-you-9-Templates-HSA.html

heather
Bundle – https://store.gingerscraps.net/Celebrate-2018-February-BUNDLE-by-Heather-Z-Scraps.html
Kit – https://store.gingerscraps.net/Celebrate-2018-February-KIT-by-Heather-Z-Scraps.html
Accents – https://store.gingerscraps.net/Celebrate-2018-February-ACCENTS-by-Heather-Z-Scraps.html
Extra Papers – https://store.gingerscraps.net/Celebrate-2018-February-EXTRA-PAPERS-by-Heather-Z-Scraps.html
Journal Cards – https://store.gingerscraps.net/Celebrate-2018-February-JOURNAL-CARDS-by-Heather-Z-Scraps.html
Word Bits & Dates – https://store.gingerscraps.net/Celebrate-2018-February-WORD-BITS-and-DATES-by-Heather-Z-Scraps.html

jocee
Bundle: https://store.gingerscraps.net/Pisces-Bundle.html
Kit: https://store.gingerscraps.net/Pisces-Kit.html
Alpha: https://store.gingerscraps.net/Pisces-Alpha.html
Cards: https://store.gingerscraps.net/Pisces-Cards.html
Glitters: https://store.gingerscraps.net/Pisces-Glitters.html
Papers: https://store.gingerscraps.net/Pisces-Basic_Papers.html

kaklei
https://store.gingerscraps.net/Bits-of-yesterday-kit-page-by-Kakleidesigns.html

krist
https://store.gingerscraps.net/Kristmess/

lauries
https://store.gingerscraps.net/Just-Married-GrabBag.html

lauries02
Bundle: https://store.gingerscraps.net/Boardwalk-Fun-Bundle.html
Kit: https://store.gingerscraps.net/Boardwalk-Fun-PageKit.html
Flairs: https://store.gingerscraps.net/Boardwalk-Fun-Flairs.html
Grunge: https://store.gingerscraps.net/Boardwalk-Fun-Grunge.html
Ombre Papers: https://store.gingerscraps.net/Boardwalk-Fun-OmbrePapers.html
Titles: https://store.gingerscraps.net/Boardwalk-Fun-Titles.html
Journal Cards: https://store.gingerscraps.net/Boardwalk-Fun-JournalCards.html

linds01
https://store.gingerscraps.net/Spring-in-the-Air-Collection-by-Lindsay-Jane.html

linds02
https://store.gingerscraps.net/Spring-in-the-Air-Collection-by-Lindsay-Jane.html

ad01
https://goo.gl/UBQg62

Remember, if you complete 10 challenges, just ten, you get a free kit as well!!

cr
Get some pics of your love, because this kit is perfect for it!

Sneak Peeks February 22nd, 2018

Happy Thursday!!! This week is so chocked full of goodies we need to dig in right away!

From JB Studio

From Lindsay Jane

From Tinci Designs

From Kakleidesigns

From Miss Fish

From Aimee Harrison

From JoCee

From Ponytails

From Neia Scraps

Have a wonderful weekend!

Tutorial Tuesday (Photoshop Elements)
Here’s a Little Clip!

Today’s tutorial is brought to you by a comment made by Glee on one of my layouts. She asked me what to do with paper clips. So I used the same clip, from Blue Heart ScrapsBe Mindful February Buffet kit. This layout also uses a terrific template from Heartstrings Scrap Art‘s Winter Freeze 3 collection.

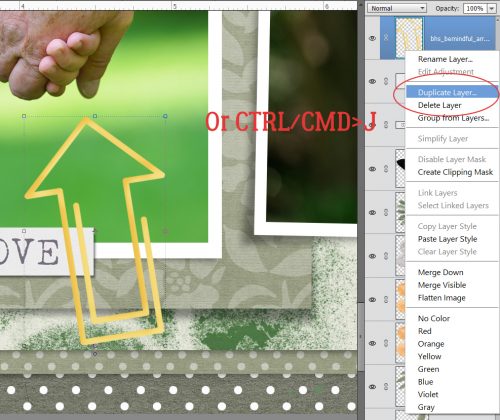
When you want to use a paper clip on a layout, you need to first think what it’s going to clip together. I like to clip several items together with mine, as you can see in the images above and below. I also like to leave a little bit of a gap at the bottom of the paperclip so it looks like it really is holding those things together. Once I’ve positioned my clip where and how I want it, I copy (CTRL/CMD>J) the clip layer so I have two of them. The “why” will become clear as we go along.

And…………..then I turn the visibility of the layer off.

I add a Layer Mask to the BOTTOM clip layer. (I forgot to select the correct layer for the screenshot below, so don’t do that!) If you’ve never used a layer mask I strongly recommend you start! They’re fantastic tools because if you remove something you didn’t want to remove, you can just paint it back. So make sure your bottom clip layer is selected, then click on the icon shown below.

This is what you’ll see in the Layers panel. Make sure you’re working on the MASK part of the layer – the blue outline has to be around the blank page. If you accidentally work on the thumbnail part of the layer, you won’t be able to paint back what you remove.

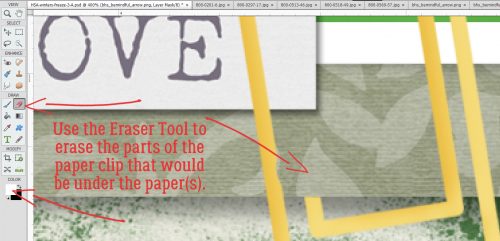
Then select the Eraser tool, and ensure white is the foreground colour. (White conceals, black reveals.) Carefully erase the part of the paperclip that will be behind/under your paper or photo.

If you’re having a hard time figuring out what to remove from your image, get a paper clip and a piece of paper, then put the paperclip on the paper somewhere. Put the paper flat on your desk and you can see what is hidden and what is not.

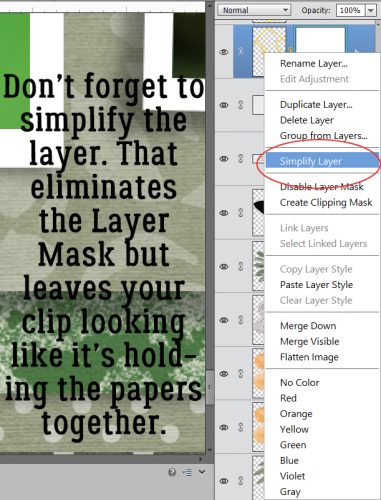
When you’ve removed the parts of your clip that will be hidden by your paper/photo, Simplify the layer. To do that you can right-click on the layer then select Simplify Layer. (No WSNH tip for that.) I know you’re wondering why all these steps are necessary, and it’s all about control. The Layer Mask is very forgiving, the Eraser tool isn’t. Simplifying the layer afterwards makes those changes permanent once you’re committed to them.

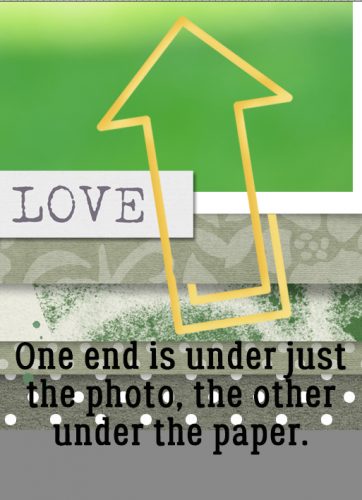
I like these shaped paper clips, both digital and real. There are lots of ways you can use them! Here I’ve tucked one of the free wire ends under the photo and the other under both the paper and the photo.

Now we can add a shadow to the BOTTOM clip layer that we’ve been working with. If you just go with a drop shadow style, you’ll have a shadow that runs over onto the paper and it’ll look odd. I don’t know who else has my problem, but those sorts of inconsistencies just jump out at me! So let’s avoid it. Create a new layer UNDER the visible clip. CTRL/CMD>click on the piece of paper icon to do that quickly. Then Select the outline of the clip by CTRL/CMD>clicking on the clip’s layer thumbnail. Then you’ll have those little marching ants. Using the Fill tool (paint bucket) fill the selected area ON THAT NEW LAYER with your shadow colour. I used black.

Once you have that shadow layer filled, you can shift the shadow to the angle where your layout’s light source is coming from. But then you’ll notice that shadow doesn’t actually touch the paper where it should. Use the Smudge tool to bring the shadow up to the paper. Just drop the cursor onto the black area near the edge, click-and-drag the tool to the edge of the paper.

Don’t worry if it’s overlapping the paper. It MUST touch the paper with no gap. Light can’t leak under wire , right?

Once you’ve got a good connection between your shadow and your paper edge (don’t neglect the other parts of the clip where some of it is hidden), you can carefully Erase the overlap. (Use a Layer mask if you’re unsteady.)

To soften the edges of your shadow layer, use Filter>Blur>Gaussian Blur. Look at the other shadows on your layout so you can make the clip’s shadow look natural. Remember that paper clips sit tight to the paper/photo, so the edges will be sharper than for other less-weighty items.

You want your shadow to look as real as possible. When you’ve got the Blur right, decrease the Opacity of the layer until it looks right.

Now, we could just call that good, but I think you know me better than that! I could get really technical here and start talking about Dodging and Burning, but I have a workaround that’s super-simple and that’s what you’re getting instead.

Now it’s time to turn on the second paperclip layer, the one we didn’t remove parts from. Then we’re going to add a Bevel style to it. Click on the Styles button down at the bottom right then select Bevel.

From the Bevel styles menu, I chose Simple Inner. The default settings will work very well, so no tweaking required. Can you see the way it makes the wire look round instead of flat?

The next thing is to add a shadow layer to this clip too. Make all the same lighting angle and Blur adjustment to it as you did for the first one. Here’s a WSNH tip: you can duplicate the degree of blur from your last action by simply clicking CTRL/CMD>F. After you’ve gotten those steps done, decrease the Opacity of BOTH the paperclip layer AND the shadow layer so that they’re barely visible.

Don’t be concerned that it seems really obvious when you’re zoomed right in tight. Nobody will see it that up-close but you.

See, here I’ve pulled out the zoom and there’s really just a hint of the wire showing through the papers.

Here’s my finished layout. I’m very pleased with it!

I hope you’ll give this one a try, unless you like your paperclips resting on top of your papers. There’s nothing wrong with that – paperclips and other things (dust!) can be scattered over other things. But now you can USE that paperclip to hold your goodies together!

Fresh Baked: February 16, 2018

Tomorrow is Random Act of Kindness Day and Sunday is National Drink Wine Day. That means, be nice and share a glass of wine with a friend! Be legal, obviously!

OR!! You could join us on a ROAD TRIP! This year’s theme for Gingerscraps Survivor is “ROAD TRIP”!!

001
https://forums.gingerscraps.net/showthread.php?41674-Scrapping-Survivor-8-*Road-Trip*-SIGN-UP-HERE

Remember when you spend $10 in the store, you get a great new collab! It’s time to get out and do some winter sports!

fwp
https://store.gingerscraps.net/GingerBread-Ladies-Collab-Winter-Wonderland-of-Sports.html

magical
Bundle: https://store.gingerscraps.net/Hunny-Bunny-collection.html
Page Kit: https://store.gingerscraps.net/Hunny-Bunny.html
Journaling Cards: https://store.gingerscraps.net/Hunny-Bunny-journaling-cards.html
Graffiti Pack: https://store.gingerscraps.net/Hunny-Bunny-graffiti.html
Glitter Pack: https://store.gingerscraps.net/Hunny-Bunny-glitter-pack.html
Woodgrain Papers: https://store.gingerscraps.net/Hunny-Bunny-woodgrain-papers.html

mags
https://store.gingerscraps.net/Date-Night-KIT-by-MagsGraphics.html

neia01
https://store.gingerscraps.net/Neia-Scraps/

neia02
https://store.gingerscraps.net/Neia-Scraps/

scraps
https://store.gingerscraps.net/You-Make-Me-Happy-by-Scraps-N-Pieces.html

tinci
https://store.gingerscraps.net/Miracle-of-winter-3..html

aimee
Collection: https://store.gingerscraps.net/Pretty-in-Pink-Collection-by-Aimee-Harrison.html
Kit: https://store.gingerscraps.net/Pretty-in-Pink-Page-Kit-by-Aimee-Harrison.html
Alphas: https://store.gingerscraps.net/Pretty-in-Pink-Alpha-Sets-by-Aimee-Harrison.html
Blooms: https://store.gingerscraps.net/Pretty-in-Pink-Blooms-by-Aimee-Harrison.html
Titles: https://store.gingerscraps.net/Pretty-in-Pink-Titles-by-Aimee-Harrison.html
Journal Cards: https://store.gingerscraps.net/Pretty-in-Pink-Journal-Cards-by-Aimee-Harrison.html
Messy Edges: https://store.gingerscraps.net/Pretty-in-Pink-Messy-Edges-by-Aimee-Harrison.html
Glitters: https://store.gingerscraps.net/Pretty-in-Pink-Glitters-by-Aimee-Harrison.html

aprilisa
Kit https://store.gingerscraps.net/XOXO-Kit.html
Cards https://store.gingerscraps.net/XOXO-Cards.html
Painted Papers https://store.gingerscraps.net/XOXO-Painted-Papers.html
Bundle https://store.gingerscraps.net/XOXO-Bundle.html

boomers
https://store.gingerscraps.net/Mardi-Gras-Magic-BGD.html

connie
Word Art and Flair Pack: https://store.gingerscraps.net/Travelogue-Idaho-Word-Art-and-Flair-Pack-by-Connie-Prince.html
Bundle Pack: https://store.gingerscraps.net/Travelogue-Idaho-Bundle-Pack-by-Connie-Prince.html

dandelion
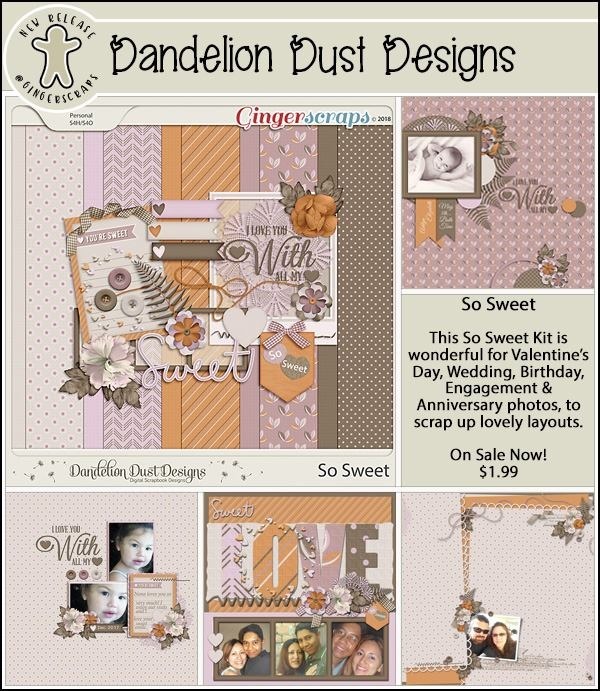
https://store.gingerscraps.net/So-Sweet-Digital-Scrapbook-Kit-By-Dandelion-Dust-Designs.html

daydreams
Bundle: https://bit.ly/TimeLBundGS
Kit: https://bit.ly/TimeLKitGS
Glitters: https://bit.ly/TimeGlittGS

heartstring
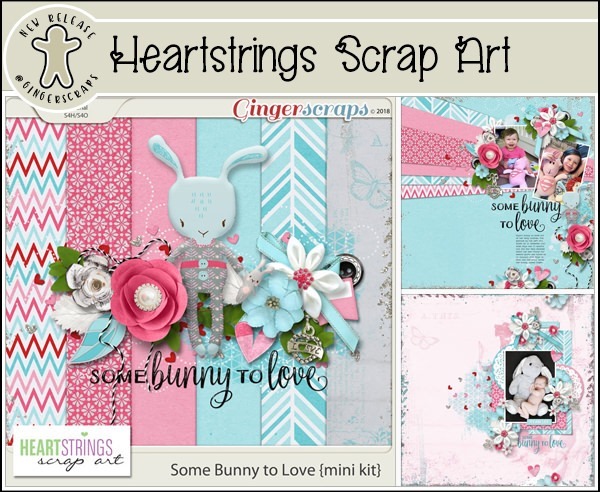
https://store.gingerscraps.net/Some-Bunny-to-Love-Mini-Kit.html

jocee
Bundle: https://store.gingerscraps.net/Be-My-Love-Bundle.html
Kit: https://store.gingerscraps.net/Be-My-Love-Kit.html
Alphas: https://store.gingerscraps.net/Be-My-Love-Alphas.html
Cards: https://store.gingerscraps.net/Be-My-Love-Cards.html
Glitter Pack: https://store.gingerscraps.net/Be-My-Love-Glitter-Pack.html
Basic Papers: https://store.gingerscraps.net/Be-My-Love-Basic-Papers.html

kristmes01
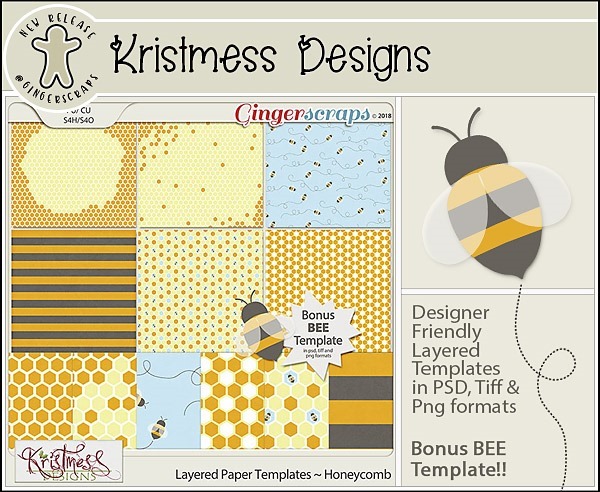
https://store.gingerscraps.net/CU-LPT_Honeycomb.html

kristmes02
https://store.gingerscraps.net/CU-Torn-Paper-Templates.html

lauries01
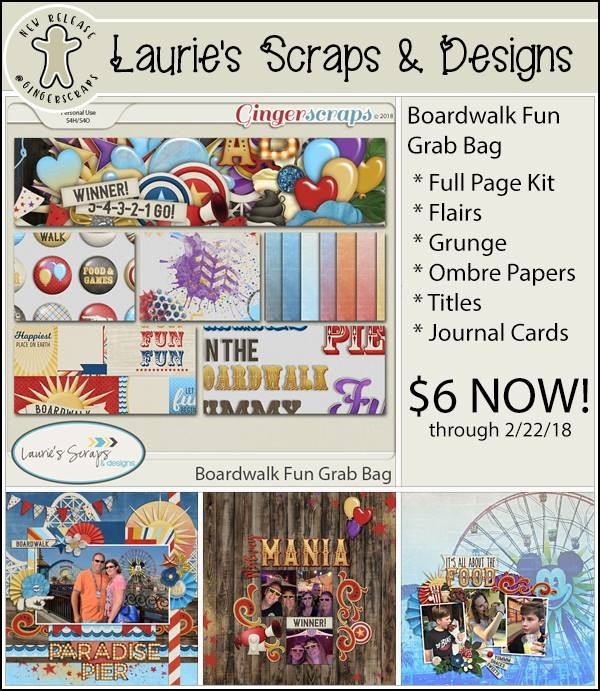
https://store.gingerscraps.net/Boardwalk-Fun-GrabBag.html

lauries02
Bundle: https://store.gingerscraps.net/Rock-On-Bundle.html
PageKit: https://store.gingerscraps.net/Rock-On-PageKit.html
Flairs: https://store.gingerscraps.net/Rock-On-Flairs.html
Grunge: https://store.gingerscraps.net/Rock-On-Grunge.html
OmbrePapers: https://store.gingerscraps.net/Rock-On-OmbrePapers.html
Papers: https://store.gingerscraps.net/Rock-On-Titles.html
Cards: https://store.gingerscraps.net/Rock-On-Cards.html

lindsay01
https://store.gingerscraps.net/Page-Borders-29-by-Lindsay-Jane.html

lindsay02
https://store.gingerscraps.net/Page-Borders-30-by-Lindsay-Jane.html

002
https://bit.ly/mags_GS

Remember, if you complete 10 challenges, just ten, you get a free kit as well!!

cr
Get some pics of your love, because this kit is perfect for it!

Sneak Peeks February 15th, 2018

Happy Thursday! I hope everyone enjoyed Valentine’s Day or will be celebrating this weekend! Tomorrow my husband and I will be renewing our vows with Elvis for our 10 year anniversary! Should be fun and I can’t wait to scrap the pictures already! Maybe some of our new releases will help you scrap some of yesterday’s memories! Let’s take a peek!

From Keley Designs

From Heather Z


From Day Dreams n’ Designs

From Heartstrings Scrap Art

From Tinci

From Neia Scraps

From Aimee Harrison

~~FEBRUARY BAKE SALE~~

Wow – it’s already the middle of February. You all know what that means. It’s time for the Bake Sale. As always, the Bake Sale includes goodies that our designers want to share with you for just $1. This sale runs from today through the 20th.

Let’s see what they have for us this month.

There are some great kits and template packs included this month. Time to head over to the Bake Sale section of the GingerScraps store and full up your cart!!

Tutorial Tuesday (Photoshop Elements 15)

SKETCHIER!

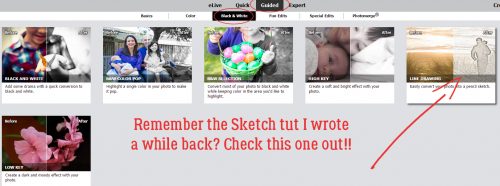
If you’ve been reading these tutorials from the beginning you might remember one on turning a photo into a sketch. It had a lot of steps and might have been a little daunting for the novice Elements user. So I think you’re going to love this one for its total simplicity. It’s one of the black-and-white Guided Edits in PSE 15 called Line Drawing. (It might also be there in 14, but when I tried to find out which version it debuted in, I wasn’t successful.) And the possibilities with it are endless!

The best photos for this technique are ones with sharp focus and lots of detail. I played with it using a close-up photo of my dog and loved it. For this example though, I used a stock photo from Pixabay. Then select Guided>Black & White>Line Drawing.

Take a look at the different items I’ve highlighted in the image below. They’re the controls for this Guided Edit and they’re all really useful.

In the upper left corner of the workspace, you can choose the way you view the changes. Your choices are After Only, Before Only, Before & After – Horizontal and Before & After Vertical. Below I’m showing you Before & After Horizontal, where you can watch the transformation as it happens. You also have the option of zooming in on specific areas of the photo.

The Pencil Sketch Effect button takes all the work out of the process. One click is all it takes. If you click more than once, the sketch effect becomes more minimalist; give it a try and see if you like it. You can always CTRL/CMD>Z back to the initial step if you don’t.

Here’s what my example looks like after 2 clicks.

The next step is optional. Clicking on the Adjust Layer Opacity button adds back a hint of colour without losing the sketchy effect. Multiple clicks on this button however don’t produce additional effects. As you’ll see below, you can still make adjustments to this step later.

Adjusting Levels is where the REAL magic happens. My copy of Elements has a glitch in it such that the Levels button in this Edit doesn’t work. But I know that CTRL/CMD>L will bring up the Levels interface. If you’ve never used the Levels adjustment menu you’re in for a treat.

Levels adjustments can be made on all the different channels (RGB, Red Green and Blue) but for this purpose RGB – the default – is the only one we need worry about. I played with the sliders so you could see the way each adjustment changes the image. Looking at the histogram – that black bit in the Input Levels box – you can see the way the curve bends as you move the sliders. For this adjustment, moving the right little wedge to the left lightens the image.

On the other hand, moving the left wedge to the right darkens the lines on the image and seems to sharpen it too.

The trick is to adjust them so that the image pleases you. Watch what’s happening as you move the sliders and you’ll know when you see what you like.

My final settings for this image are shown below. I moved the left Input Levels slider to the right and the right Output Levels to the left.

So, once you’ve got that image looking the way you want it to, maybe like a lithograph from an old book… click on that Next arrow at the lower right of the workspace.

Now you have a choice. Remember from our other Guided Edits? You can save it or you can work on it some more. I picked In Expert so I could play with it just a bit more.

As you can see, there are two layers there when you move to Expert. There’s no limit to the things you can do once you get to this point. The Opacity of the sketch layer is 82% when you first open up your project in Expert.

Just as an example, I put the Opacity of the sketch layer to 100% and that hint of colour (really obvious when you look at the sky) is GONE. I don’t think it looks as interesting, do you? But you could use this to make personalized colouring books… think of the options1

So then I lowered the Opacity to 60%, which keeps the sketchy detail but lets more of the colour come through. You could also lighten up the coloured layer underneath in spots so only the sketchy bits are visible in that area. If you plan to do that, right-click on the photo layer and select Layer from Background, so you can add a transparent layer underneath it.

When you’re totally happy with how it looks, you can merge the layers together and save it with a funky name. Of course, that step is optional, but if you use it for something you’ll have to be sure to link the layers so they move together.

Whaddya think? Are you going to give it a try?

Fresh Baked: February 09, 2018

There are so many great weird holidays coming up, not just Valentine’s Day! Today is National Pizza Day and National Bagel Day! All the carbs! Tonight is also the Opening Ceremonies for the OLYMPICS! Get your winter sports on! Thursday is Singles Awareness Day. Hey, don’t stress! Have a Gal-entines Day! The designers have kits that will fit any funny holiday or mood, and they’re coming out this week! We have Olympics celebrations; we have Valentine’s Day; we have carbs coming out our ears! There’s something for everyone!

BUT, before you hit the store, I have a secret for you! It’s almost time for Survivor. Not the Survivor you watch on TV, but the one you get to scrap! It’s almost time for Gingerscraps’ Survivor!

And YOU have the chance to guess the theme and win the official collab! We’ve had some weird ones (anyone remember Grandma’s Attic?). We’ve had some fun ones (we were lost on an island once). So, get those guesses ready! And don’t ask me! I have no clue!

01
https://forums.gingerscraps.net/showthread.php?41670-SURVIVOR-Season-8!!-Guess-amp-WIN!&p=486013#post486013

Remember when you spend $10 in the store, you get a great new collab! It’s time to get out and do some winter sports!

fwp
https://store.gingerscraps.net/GingerBread-Ladies-Collab-Winter-Wonderland-of-Sports.html

lindsay01
https://store.gingerscraps.net/Chocolate-Overload-Collection-by-Lindsay-Jane.html

lindsay02
https://store.gingerscraps.net/Chocolate-Overload-Quick-Pages-by-Lindsay-Jane.html

luv
https://store.gingerscraps.net/Document-Life-February-2018-Grab-Bag-by-Luv-Ewe-Designs.html

magsBundle: https://store.gingerscraps.net/Olympic-Dreams-BUNDLE-by-MagsGraphics.html  
Kit: https://store.gingerscraps.net/Olympic-Dreams-KIT-by-MagsGraphics.html
Journal Cards: https://store.gingerscraps.net/Olympic-Dreams-JOURNAL-CARDS-by-MagsGraphics.html
Winter Pack: https://store.gingerscraps.net/Olympic-Dreams-WINTER-Pack-by-MagsGraphics.html

missfish01
https://store.gingerscraps.net/Month-by-Month-February-Templates-by-Miss-Fish.html

missfish02
https://store.gingerscraps.net/Stacks-on-Stacks-2-Templates-by-Miss-Fish-Templates.html

neia
https://store.gingerscraps.net/Neia-Scraps/

scraps
https://store.gingerscraps.net/Spoonful-of-Sugar-by-Scraps-N-Pieces.html

tinci
https://store.gingerscraps.net/Full-of-love.html

aimee01
https://store.gingerscraps.net/Heartfelt-1-Templates-by-Aimee-Harrison.html

aimee02
https://store.gingerscraps.net/Pocketful-1-Templates-by-Aimee-Harrison.html

boomers
https://store.gingerscraps.net/Love-Bandit-BGD.html

cathy
https://store.gingerscraps.net/Mud-On-The-Tires-Bundle.html

connie
February Grab Bag: https://store.gingerscraps.net/February-2018-Grab-Bag-Winter-Sports-by-Connie-Prince.html
WordArt Pack: https://store.gingerscraps.net/Winter-Sports-WordArt-Pack-by-Connie-Prince.html

dandelion
https://store.gingerscraps.net/It-Must-Be-Love-Digital-Scrapbook-Kit-By-Dandelion-Dust-Designs.html

hearts
https://store.gingerscraps.net/Circles-of-Love-8–Templates-HSA.html

heather
Bundle – https://store.gingerscraps.net/League-Night-Bowling-BUNDLE-by-Heather-Z-Scraps.html
Kit – https://store.gingerscraps.net/League-Night-Bowling-KIT-by-Heather-Z-Scraps.html
Word Bits – https://store.gingerscraps.net/League-Night-Bowling-WORD-BITS-by-Heather-Z-Scraps.html
Accents – https://store.gingerscraps.net/League-Night-Bowling-ACCENTS-by-Heather-Z-Scraps.html

kristmess01
https://store.gingerscraps.net/Chantilly-Lace-Trio.html

kristmess02
https://store.gingerscraps.net/Kristmess/

lauries01
https://store.gingerscraps.net/Rock-On-GrabBag.html

lauries02
Bundle: https://store.gingerscraps.net/Let-s-Cuddle-Bundle.html
Kit: https://store.gingerscraps.net/Let-s-Cuddle-PageKit.html
Flairs: https://store.gingerscraps.net/Let-s-Cuddle-Flairs.html
Grunge: https://store.gingerscraps.net/Let-s-Cuddle-Grunge.html
Ombre Papers: https://store.gingerscraps.net/Let-s-Cuddle-OmbrePapers.html
Titles: https://store.gingerscraps.net/Let-s-Cuddle-Titles.html
Journal Cards: https://store.gingerscraps.net/Let-s-Cuddle-JournalCards.html

02
https://store.gingerscraps.net/CathyK-Designs/

03
https://bit.ly/mags_GS

04
https://goo.gl/DQK8T

Remember, if you complete 10 challenges, just ten, you get a free kit as well!!

cr
Get some pics of your love, because this kit is perfect for it!