Let’s Get Crafty: Scrabble Tile Necklaces

Thursday!! Let’s Get Crafty!! Woot!!

Let’s make some Scrabble tile Necklaces!

I was so lucky one day and found 2 scrabble games at the Goodwill! I love me some Goodwill! I have been searching for them! I really wanted to make some Scrabble Tile Necklaces!

So, this is my first of many to come. It was so fun and easy to make.

The first thing I did was drill a hole in the top of the tile, a tiny hole with a tiny drill bit.

Then is designed my necklace front in PSE. Printed it on matte photo paper. Covered it with Mod Podge to seal it. Glued it to the back side of the tile. (Wait for the Mod Podge to dry)

Then apply your Diamond Glaze, just a nice smooth coat. I goes on so easy!

Now you just have to wait for it to dry! When it’s nice and dry take a piece of beading wire make a loop in the top and stick it in the hole. Put a little super glue in the hole to hold it. Then put a split ring on the loop and put it on your chain! Your done! You can wear it both ways!

Check out these ones.  🙂 I like cherries. Aren’t they cute!

Have a great day! Go find you some Scrabble Tiles and get crafting!


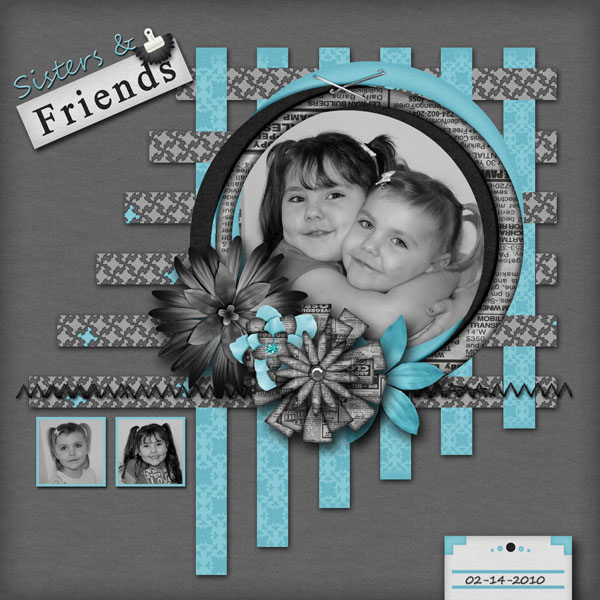
Kimmyscraps is our LOTW winner this week.  What a loving LO! Click the image to leave her some love in the gallery.
Congratulations Kimmy!!

Sisters and Friends


Kimmy used the kit Black & White & Blue All Over by Pretty In Green which is available here.


Don’t forget to vote for the next LOTW winner in the forum. You can be a LOTW winner too. All you have to do is scrap! Happy Scrapping.


https://gingerscraps.net/gsblog/2010/08/1656/

Let’s Get Crafty: Old Jeans

OK..Wow, it’s Thursday! What a week! I am not prepared for this at all! LOL! I thought it was Wednesday! Ha Ha! Well, I don’t have a tutorial for you today. But, I’m sitting here thinking, what the heck can I post about. Hmmm…looking at both of my sons sleeping on the couches. I have some pretty cool couches…there is not one person in the world who has my couches.

Well, yes of course, they are “home made” It all started years ago, my Dad, he is funny about jeans. If he get a tiny speck on his jeans he won’t wear them anymore. But, my Mom, being the crafty queen of the family, thinks, I can’t just throw these away, someday we will do something great with all these jeans.

Then there is me, I love denim, my living room is blue and yellow. A few years ago I bought some denim couches. They were pretty cute when I first bought them, but after a while I realize, this is not very good fabric they used on these couches. It’s like the cheapest, thinnest denim. If you spill, it stains…not good for a house full of kids. Bummer…I was about to have my 4th baby. Company coming to stay, and these couches look like crap.

Mom..help me! My Mom, she is amazing. She can make something beautiful out of nothing. So, we start thinking, I really love the idea of my denim couches, but these need help. “Hey, Julie dear daughter, I have a huge box a your Dad’s jeans I have been saving for years, lets remake your couch with them!” So, we cut and pinned and stapled and sewed. Well, Mom did most of the work and I sat there huge as a house 9 months pregnent braiding the trim for the arms. 🙂

I love my Jean couches, there are even pockets on them. My little boys love to put their cars in the pockets. The cover zips off so I can throw them in the wash. They are indestructible…and that is saying a lot in my house!

So, I will stop babbling and show you….

Pretty funky aren’t they! I love them! We have a new coffee table and new desk, repainted the living room since we made these couches. But the couches live on! It’s like your favorite pair of comfy jeans…only bigger.

So, I hope this inspires you to reuse something you thought you might throw or give away in to something fabulous!

Of course, you can always start of with something simple like a purse.

Yes, even after making a whole couch, we still had enought jeans left over to make a few tote bags.

Did you know that LOTW winners receive a gift certificate to the Gingerscraps store? All LOTW nominees receive a cookie and now you’ll receive a brownie point too if you use at least 75% Gingerscraps products.  The LOTW winner also receives a bonus brownie point just for winning. 

If you’re wondering what all these cookies and brownies are about be sure to check out this thread to get the scoop.  What are you waiting for? Post your LO’s in the gallery for a chance to be nominated. The more LO’s you post, the more chances you have to win!

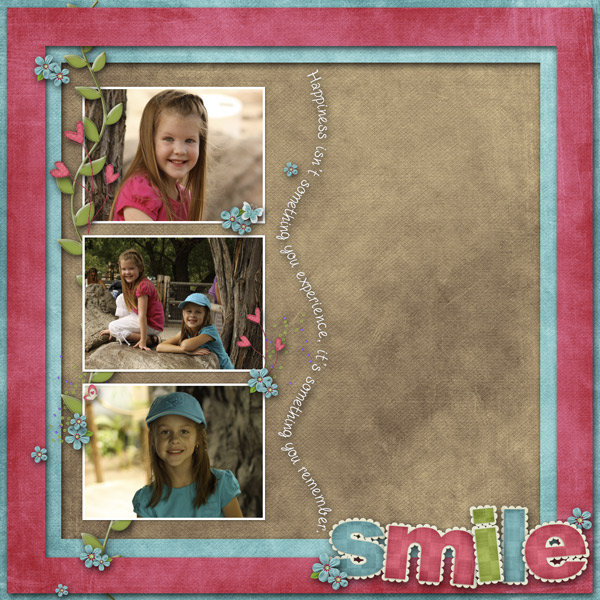
LOTW winner for week ending 7/30 is jencrook. Click on the image to leave her some love.

Don’t forget to head over to the LOTW Thread each week to vote on the LOTW page that most inspires you! You might just find one of your layouts have been nominated.

https://gingerscraps.net/gsblog/2010/08/1590/

Let’s Get Crafty: Gone Hybrid!

Who is ready to get Crafty! It’s Thursday! Yea!

So, you all see all these awesome Hybrid project in the galleries. You are thinking, man I really want to try that. But…it’s got to be so expensive. i don’t have the money to buy all those fancy supplies. Well, I am the queen of cheap! LOL! I love making Hybrid projects…but I don’t have a bottomless wallet! So, lets chat! How can you get started in Hybrid with out breaking the bank.

Some basic supplies…

*Scissors, small sharp ones work best, but I have even used my kids scissors when mine go missing…which happens a lot! lol

*Adhesive of some sort, there are 100’s of different adhesives out there, but really to get started all you need is a trusty old glue stick. My fave is the Pioneer Extra Strong Glue Stick. I get it at Wal Mart for like $1.50 or so. And we all have glue guns laying around. Mod Podge is great. It cost a little more that you might want..but it lasts forever. I have had the same bottle for years. And that 3D double sided tape is great. But, you don’t have to pay a lot for it. I get mine at the dollar store!

*Speaking of the Dollar Store, I love to find things at the Dollar Store to Embellish. I got these frames at the Dollar Store…gave them a little Hybrid love and what a great gift! The wooden letters came form the craft store but they were only like $5.00 for a huge pack of all different letters. I’ve been using them forever.

The flowers on this frame are not from the store. They are digi flowers from the kit I used, I just cut them out and inked the edges! Fold them a little on the edges. They look great!

*I get frames at the Thrift Store too! I even find craft supplies like ribbon, embroidery floss, buttons,  glitter etc at Thrift Stores! You just have to look! Yard Sales are great too!

*Another great thing to have is distress ink. Start out with one color like black or brown. It’s only about $3.00. I actually only have those 2 colors and use them on almost all my hybrid projects.

*Distressing the edges on your projects really gives a nice finished look. You can go to the craft store and buy special “Distressing Tools” but, why not just go grab a piece of sandpaper out of the garage, a nail file works great too.  You just need something that will “rough up” your edges a bit.

*A lot of times if you want to make a card or use one of the nifty “Hybrid Template” you will need to “Crease before folding.” Your fold will turn out way nicer id you crease them first. But, of course you don’t need any fancy tools for this either. You can use a magazine for a mat, an envelope or book for a straight edge if you don’t have a ruler, and even a butter knife or credit card will work as a “bone folder.”

*Now of course you will need a printer, ink and paper. My favorite paper is Epson Matte Photo Paper, but you can use cardstock too.

Now just get creative! Think of things in a different way. If you see a project that calls for “Chipboard” use a cereal box instead.

Like I used on this project….

How about these…I made them from coasters. Yes, those coasters they give you at Restaurants. Check these out….

So, come on! Do some Hybrid! You know you want to! 🙂 How about starting with GingerScraps “Sweet Cards” Challenge! Greeting cards are a super great way to get started in Hybrid!

LOTW for week ending 7/23

We have two LOTW winners for this week. Yes…a tie! How exciting is that? Two winners means two prizes and more scrapping. Congratulations to photom and AB_Digiscrape.  Each of these ladies earn a cookie and brownie for the Challenge Cookie Jar and they both get to go shopping at the Gingerscraps store.

Click on the images to leave  love in the Gingerscraps Gallery.

photom

AB_Digiscrape

Help us determine the next LOTW winner by voting in the forum. Maybe your LO has been nomimated! Happy Scrapping.

Let’s Get Crafty: CD Envelopes

It’s time to get crafty! Are you ready?

Today I’m going to show you a simple but useful project. As digital scrapbookers we all have millions of photos. I know I do. I’m also an amateur photographer and take pictures of friends and families in my community. I of course have to put  all these photos on Cd’s.  But then I will have these Cd’s full of pictures laying around. So, I make CD envelopes.  The great thing about doing these Hybrid CD Envelopes is, you can take your digi kits and decorate the envelopes in themes to match whatever photos are on the CD.

You want to give the Grandparents a CD with family pictures on it for Christmas. Decorate the CD Envelope with a Christmas kit, have birthday pictures on the CD, decorate it with a birthday kit! What  a great gift.

The envelope I did today is done with a little bit of a Western Theme. The photos I took were a a family and their horses. They were all wearing jeans and boots.

Let me show you how I did it!

The easiest way to make one of these envelope is to use a template. I used the CD/DVD Envelope Template by, Kelleigh Ratzlaff. She has some great Templates! Just clip your digi papers right to the layers on the template.

Of course you will need some digi paper, I used the Project 365 Scrap Your Life The Neutrals by, Scrappy Cocoa. The My Favorite Jeans Alpha by, HarmonyStar, and a cute little spur from the kit Buckaroo Blues by, Teri Mayo.

You will need a printer and some matte photo paper or cardstock, a glue stick and a bone folder (or whatever you have to crease the fold lines)

So, first step is to design your CD Envelope in your photo editing program. Easy Peasy. Just clip the papers to the layers and add a title or some elements to the front flap. Just remember to design the front flap upside-down. Then print..

Now cut it out and score on the fold lines.

Now fold where you scored…

Now glue and put it together. I like to use clothespins to hold it nice and tight until it dries. I also like to put little Velcro stickers to keep it closed too 🙂

Now put your CD in your envelope and you are done!

Here is another one I made for some photos of 3 girls.

I hope you make some too! See you next Thursday!

LOTW Winner!

It was a close vote this week, but our fabulous layout of the week winner is Helen (hslater). She used Marshmella Designs adorable Loving Hugs kit.  Congratulations Helen! Click the image to leave her some love in the Gingerscraps gallery.


Leave a comment on this post and I’ll pick a random winner next week to get little prize from me.

Go vote for the next LOTW winner in the forum and get your LO’s posted in the gallery so you have a chance to win.  You can be a LOTW winner too. All you have to do is scrap! Happy Scrapping.

GingerScraps Site CT Call!!

Yes, this is a big announcement! GingerScraps is having a  Site CT Call! Yes we are!!

Get those applications in!  This is your chance to work with the designs of ALL the GingerScraps designers! The call is open until all spots are filled so get your info sent in right away!

I can’t wait to see who applies!

Let’s Get Crafty: Chalk Paint

Hi my crafty ladies! It’s Thursday, time for “Let’s Get Crafty” Did you miss me last week? Yes, I know…I forgot! These kids and all their friends are keeping me busy! And eating me out of house and home!

So, today I did a fun and easy project with the little boys. All without even going to the store to buy any supplies! We made “Chalk Paint” I got the recipe from “Family Fun Online” Love that site! Lots of great fun and simple project for the family.

Here is the recipe…

1/4 cup Cornstarch…..1/4 cup water…..few drops of food coloring…That’s it!

Now mix it up and get out your paintbrush and find yourself some concrete!

(Don’t you love my cute little glass bowls, .25 cents at a garage sale)

Now of course, my boys wanted a road painted with the Chalk Paint…it’s all about cars around here. They really loved it. Actually I am typing up this post and they are still playing on the chalk road right out my window!

(Notice the little bits of  Homemade Playdough still on my patio, maybe I will teach you that next time.)

Looks like fun doesn’t it! Now of course you don’t have to paint a road. Paint whatever your little heart desires. Oh and you might have to make up a few batches. My boys have asked me for a few refills. Don’t worry about a mess either. Just take your hose a wash it away!