Playing with Text
![]()
How did it get to be November already? There are only 61 days left in this year. Doesn’t that sound depressing? Let’s get some distraction going and learn how to text on a path. GingerScrapper Janytime mentioned she’d like to know how it’s done, and I had to confess I didn’t know. So I set out to learn, and now I’m going to teach you! This month’s Font Challenge, hosted by the lovely Rachel Pearce, also known as Seatrout Scraps, is to use the free font Motion Picture. I just happened to have it in my font library, but in case you don’t have it and haven’t peeked in the Forum yet, you can grab it here.
As I’ve mentioned before, I like to do things like titles on their own workspace so I can see better what I’m doing. And as I’ve also mentioned before, you know what works best for you and your workflow, so my instructions are guidelines. Here’s the quote I plan to use for my Font Challenge layout.

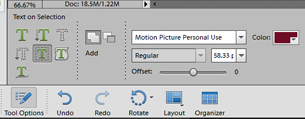
There are several ways you can manipulate your text in Photoshop Elements. Today we’re going to look at three of them. The first is Text on Selection. When you click on the Text Tool this menu opens up. The grayed icon is the one to click on to type on the outline of a selection. For the demo I’m only showing you how it works with an ellipse, but it also works for rectangular, circular and complex selections as well. I’ll show you at the end of the tutorial how to create a complex selection for those who are interested.
After I chose the Text Tool, my font, colour, size and the Text on Selection icon, I then clicked on the elliptical Marquee Tool (the icon with the dotted outline). I clicked and dragged an ellipse shape on my workspace. When I had the size and shape I liked, I moved it by holding down the CTRL/CMD key and dragging it to the centre. Then I clicked in the middle of the space created by the marching ants. It asked me to Commit current operation so I clicked on the green check mark.
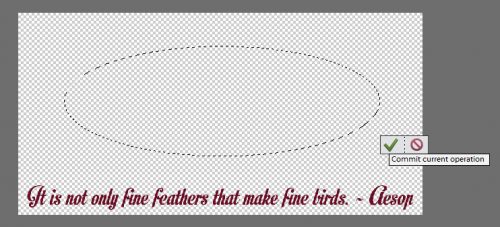
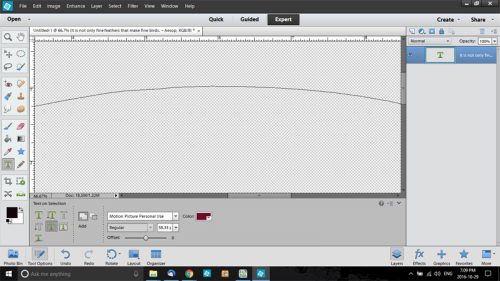
The software made a narrow line around the selection I made, as shown below. I zoomed in tight (CTRL/CMD++) so I could see what was happening. To begin typing my text around this outline, I moved my cursor onto that thin line until I could see the “I-beam” symbol that indicates the starting point for text and clicked it. I had hoped the screenshot would show you it, but I’m not seeing it there. Sorry!
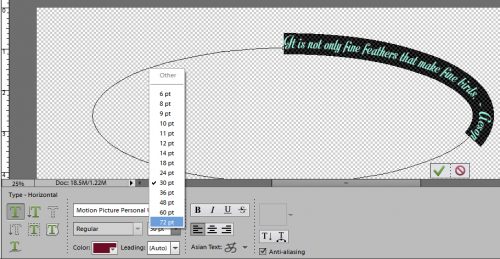
I started typing my quote and it looked like this. When I was at the end of the quote, I was asked to Commit current operation again. I wanted the type to cover more of the outline so I clicked the green check mark and then…

I double-clicked on the text… because it’s just as editable as any other text. I adjusted the size of the type until I was happy with it and clicked on the green check mark.
The end result is shown below. And I know what you’re thinking… “But I don’t WANT that line there!” And it’s easy to make it disappear.

Simplify the layer!
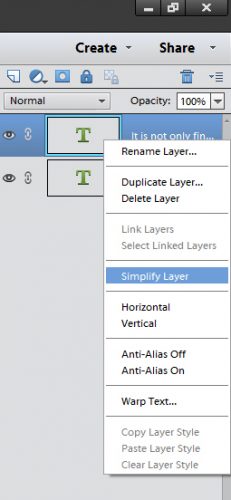
Et voilà! The line, or path, is gone and my text is a partial ellipse. Easy peasy!!

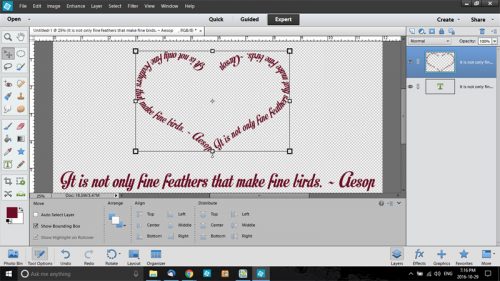
Now let’s look at Text on Shape. It’s actually a little more limited than Text on Selection because you’re restricted to the shapes shown: rectangle, rounded rectangle, ellipse, hexagon, heart, speech bubble and butterfly. I tried it with the butterfly and decided it was too finicky. But the heart… that was a great one to play with!

As with the ellipse, I clicked and dragged out a nice sized heart. Once I had it the size I wanted, I again clicked insode the shape to Commit to current operation and create the path. It took me a minute to realize that I had to start my text on the curve of the left side. I typed out my quote twice but it still didn’t reach back to the beginning.

So again, I double clicked on the text and increased the size of the font until it did. I had to add some spaces to keep the letters from running into each other in some spots, but in the end it looked great!

Then I simplified the layer and the path went poof. (Notice that the T that was in the Layers Panel for my text layer is now just a regular old layer. I can’t make any further adjustments to my typing now without undoing (CTRL/CMD+Z) that Simplify Layer step.
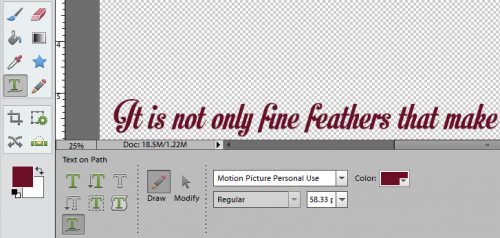
The final method I want to share is how to create a custom path to put your text on. This is what Janytime is interested in. The Text on Path icon is the one shown grayed out below.
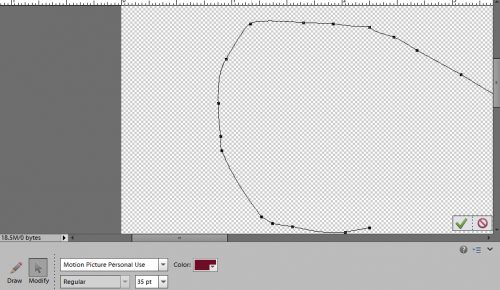
I drew out a swirly flourish as my path. It helps if you can do the whole path in one smooth movement, but if you feel like you want to adjust the hesitation points like the one on the first curve on the left, click on Modify, the icon right next to Draw.
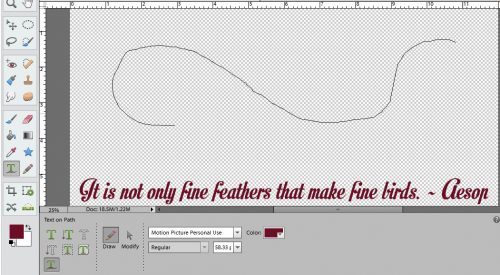
You’ll get a bunch of little black squares along the line of the path. By clicking and dragging the black squares, you can smooth out those little imperfections.

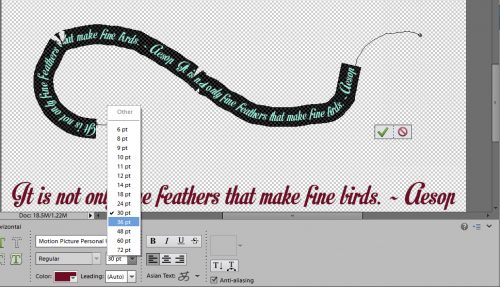
Then, just as for the other methods, I picked a spot to start my quote and typed it out. Then I adjusted the size so the text stretched all the way to the end and Committed to current operation.
Once I simplified the layer, the path disappeared and left me with a curvy text path.

So now you know three different ways to put text on different paths. But before I go… I promised to tell you how to create a complex selection for your path.
I like stars. I was disappointed to see that there wasn’t a star included in the Text on Shape tool so I played around a little and figured out how to text around a star. I looked through my stash and found a solid star. (If you want to use something that isn’t solid you’ll need to use the Fill Tool – paint can – to fill in the open areas.) You could also use the Shape Tool (that amoeba icon in the Tools Panel) to create a shape you like. The next step would be the same.

Then I “selected” the star by holding down the CTRL/CMD key and clicking on the star thumbnail in the Layers Panel. This part is VERY important. Make sure you click on the thumbnail – that’s what will give you your selection, your marching ants.

Create a new layer above the star to put your text on. Then turn off visibility for the star layer. (Close the eye.)

Next, in the Text Tool choose the Text on Selection icon and click inside the marching ants’ shape. Start typing.

If you’re doing this technique, you don’t have to simplify the text layer to get rid of your path, all you have to do is delete the layer with the star on it.

And there you are!
I know inquiring minds want to know which method I chose for my layout. Well, you’re going to have to wait until I post it to the Font Challenge gallery later tonight when I get home from work. I’ll be looking for YOUR efforts and I’ll make sure to leave you some love.
![]()
Wow – THANKS! You gave us a whole lot of information here in your tutorial! I’m going to practice, practice, practice!! This will be fun to master! Just have to find some quiet time to focus! LOL! This is an area I have not played in at all in my software, but I would love to get good at this!
I think you’ll get the hang of it pretty quickly. A little trial and error and Bob’s your uncle!