The EYEs Have It
![]()
This week, I’m going to go a little off-script, but in the end I think you’ll agree it’ll make for better layouts. So let’s talk about taking better photos. There are some really simple tips coming up that will make your photos so much more interesting and by default, your layouts will benefit too. I’m not going to baffle you with a lot of technical jargon, just some hints on things like composition, vision and mindfulness. The main component of great photos is light. If you train your eye to look at light as an extension of the image you’re planning to capture, you’ll be halfway there!
Oh, and taming that photo-destroying camera shake is an absolute must! If you’re going to be moving around and don’t want the encumbrance of a tripod to keep that camera stock still, you’ll need to brace your arms to minimize movement. If you WANT blurry, out-of-focus photos, hold your camera at arms’-length and snap away. If you don’t, hold your camera in both hands, tuck your elbows in against your trunk, take a deep breath, let it out slowly while you compose your shot and hit the shutter button as you get to the end of your exhale. This stays the same whether you’re shooting with a wildly expensive DSLR with a 300mm lens on it (although if you’re doing that, I’m going to bet there’s a tripod in there too) or if you’re snapping away with a cell phone camera.
This past weekend I went to a local festival I try to attend every year. Photo ops are everywhere at events like this, as long as you can be patient. If you can wait even a couple of minutes until the people clear out, you’ll get better shots. I have an abundance of patience and if I’m by myself, I take all the time I need to get what I want; I left the menfolk at home this year! So anyway, this festival is a classic-cars-and-classic-rock event that actually runs over 4 days. The weather is usually stellar for the Saturday show-and-shine and this year was no exception. Taking photos of cars in bright sunshine presents some particular difficulties and you’ll see how I addressed them when I show you my examples. All the photos I’m going to show you are SOOC… straight out of the camera and shot using the same lens. I haven’t made any adjustments.
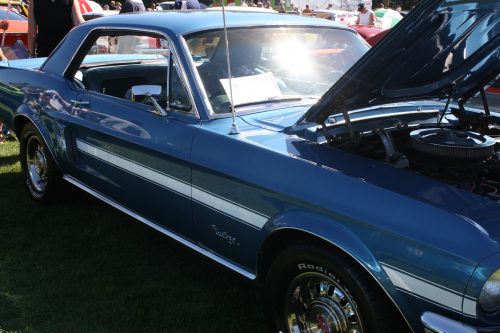
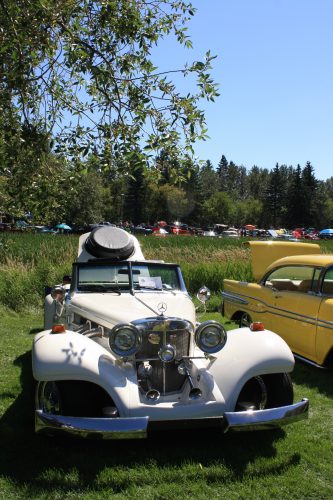
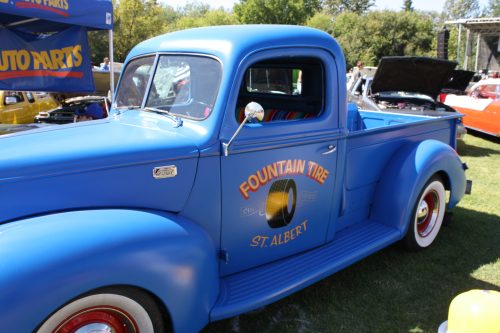
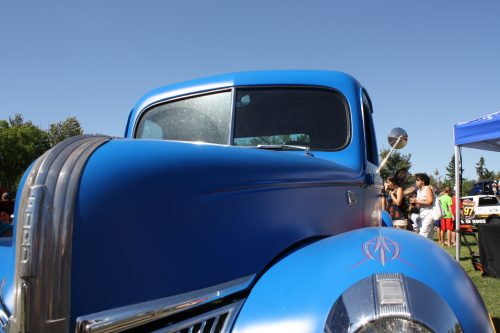
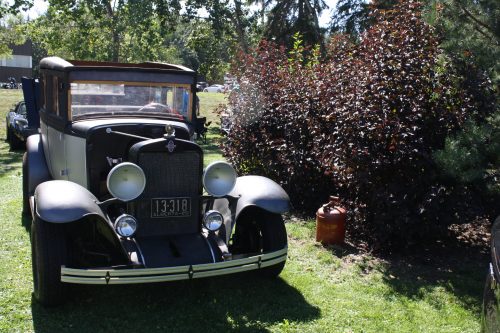
Let’s start with exposure. Using the light that’s available to your advantage is going to make your photos look a lot better. In this first photo I was shooting toward the light, so the fender and door area are a lot darker than I’d like. There’s also a LOT of glare from the windshield. Sure, I could fix it with PSE, but why not try to minimize how much tweakage will be needed right from the start? (A little WSNH tip. 😉 )
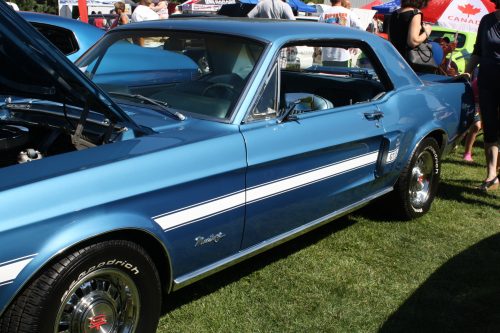
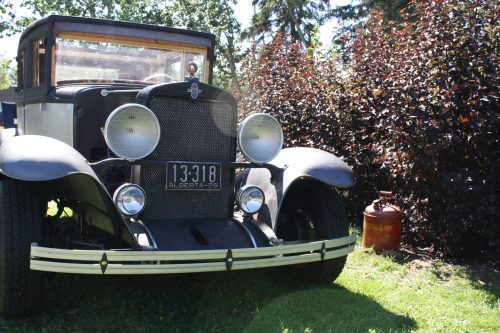
By going around the car and shooting from the other side, the exposure is much more even and the glare is gone.
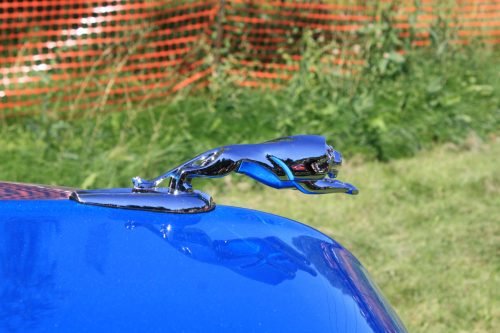
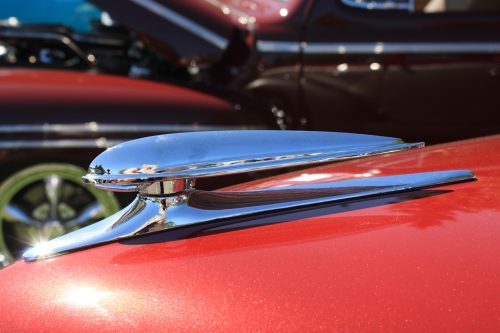
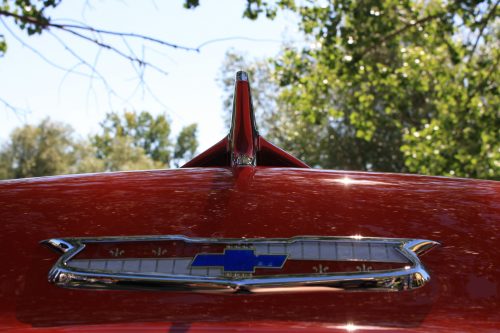
Think about what’s actually in your viewfinder – or on your LCD screen – and try not to have objects growing out of people’s heads or otherwise messing up your shot. Pay attention to what’s in the background. If you have to move a little, it’s not a bad idea. In this first image, that snow fence is just NASTY! I could crop it out, but…
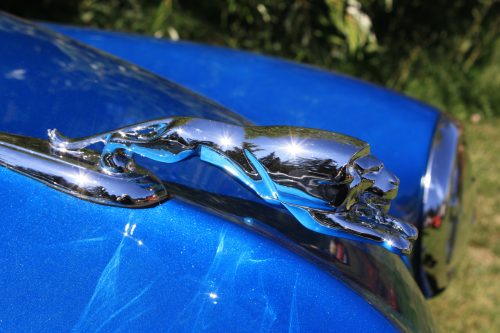
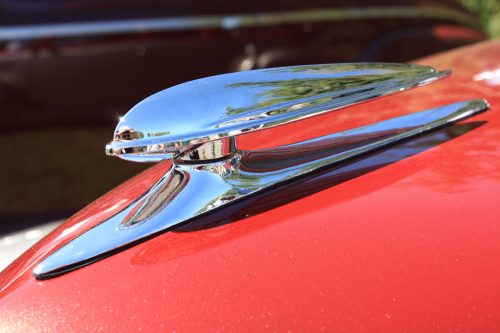
by just moving a couple of feet and changing the angle of approach, I caught a couple of sweet little sunflares and the hood ornament’s details are much more visible. At this angle the chrome reflects less of the paint colour and the crowds are still reflected but undefined.
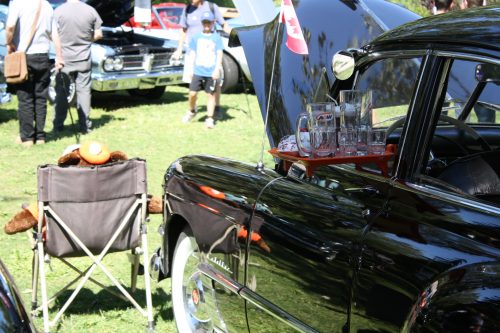
Another example of how simply changing your point of view improves your shot… if I wait a minute the guy will move. But the lawn chair and the sun canopy? Doubtful.

So I moved. Lawn chair? Gone. Sun canopy? Gone! Dude in the rust coloured shirt? Also gone!
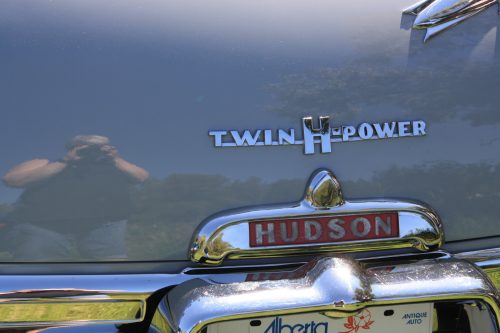
Reflections and shadows can make or break a photo. I often think details are more interesting than whole objects so I wanted to get a shot of the tail end of this Hudson. Oh dear… who is that old woman reflected in the paint? Oh yeah. Me.
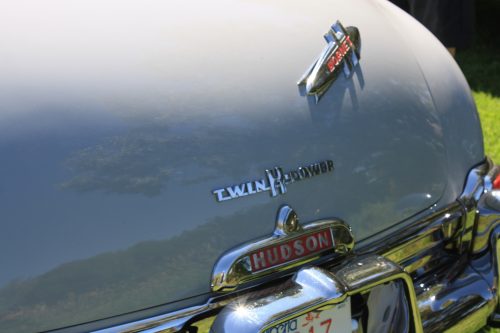
I took a step to my left, reframed and took this one. Much better!
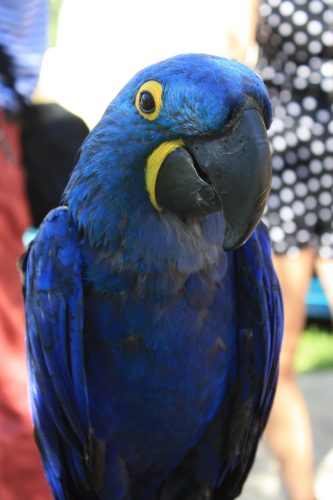
I think this photo can be redeemed a little (dodging and burning perhaps); I do like the way the woman’s face is framed by the parrot’s beak and breast, but the shadows are so overwhelming. Some judicious editing – and cropping – in PSE might make it useable.
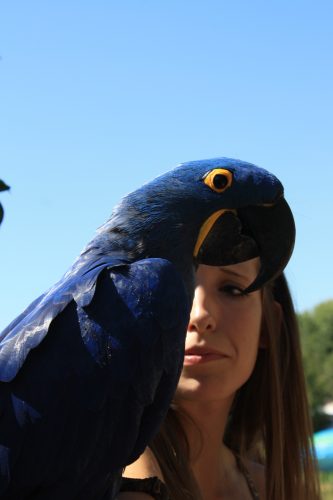
Fortunately, I was able to move a couple of steps to my left and got this one! Get a load of that depth of field. What a handsome bird. Fancy name too… hyacinthine macaw.
Another example of both attending to reflections and cropping in the viewfinder follows. The hood ornament is the subject here, but it’s a bit distracted from by the car behind it.
A slightly different angle and moving a bit closer captures nice reflections in the chrome, and plays up the detail a bit.
I’ve seen a lot of photos of ridiculously cute kids and pets that could be made really special just by getting down to their level. See the difference between these two photos? I think we’ll all agree that the second one is the more interesting one… even with the people in the background.
This shot is also taken from a crouch.
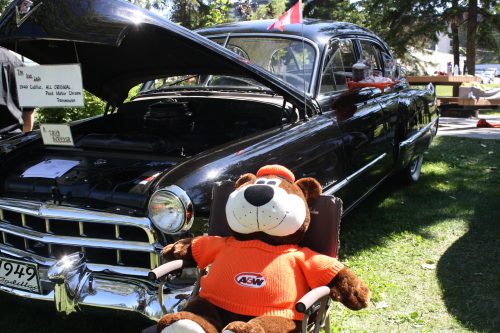
The next two examples show how the point of view makes or breaks your shot. This Caddy has been part of the show-and-shine for as long as I can remember. It’s one of my favourite cutesy touches so I usually take at least one snap of it. This is the first one I took. Kinda ho-hum. The exposure isn’t particularly great – the tray is underexposed and the Root Bear is overexposed. If I was telling a story with this photo, it would have put people to sleep in a heartbeat.
So I moved around, Now the Bear is the story. I could have done a better crop in my viewfinder, but that’s a really easy fix.
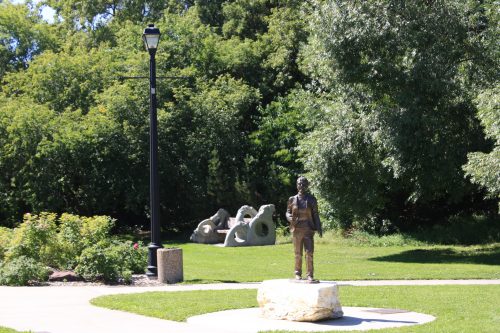
When I’m shooting points of interest like this view of one of our parks, I try and get the most effective shot I can. Sometimes that means ditching the good old landscape orientation.
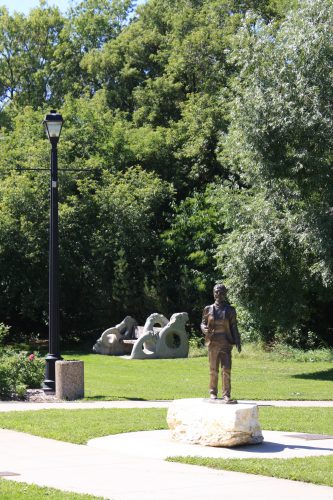
Beauty is in the eye of the beholder and to my eyes, this portrait-oriented shot is better.
Before I forget… when you’re shooting photos of water – rivers, lakes, oceans – remember that water will ALWAYS be level! There are few things more visually jarring than a tilted horizon with water in it, unless there’s something or someone in the foreground that provides the subject and the angle of the horizon is an artistic statement.
I think this pair of photos brings everything I’ve just suggested together in one. Cropping in the viewfinder, shooting up rather than down, taking advantage of the light and paying attention to the background are all aspects of the better shot. And I can’t wait to play with it!
Ooh, I caught a little bit of bokeh in these. Sweet!!
I hope you’ve found something useful in there and that I haven’t come across as bossy. I wanted to keep it simple and achievable for everybody. Let me know what you think!
![]()
I chide my daughter for pictures she’s taken of things growing out of heads! LOL! Then I caught one I had done. Whoops! I’ve made a folder of just those pictures too, just for laughs.
My husband is famous for them… and he can’t keep a cell phone still enough for anything in the photo to be recognisable. That’s why there are no photos of me with our grandsons.
Oh no, Jan … maybe you can take a selfie with your grandsons! You need to be in some photos with them!
Thanks for all the tips on photo taking — I’m not the best photographer; a lot of the photos just don’t turn out the way I hoped. I have been aware of the “items” growing out of people’s heads (my husband does this a lot; although I told him to watch for it) … & I have tried different points of view, but I haven’t really watched for lighting. My biggest problem is trying to get those action shots; where people (like my little granddaughter) are on the move! 🙂
Pam, what works for action shots is to anticipate what they m8ght do and set your shot slightly ahead of where they’re going so that you can see them enter the viewfinder. Then you’re all ready to get your shot. Take as many shots as you need to get the good one!
great tips Jan. I think we could all use a few notes on photo taking 101.
Thanks, Jan! I’ll give that a try!
Great tips Jan! Important things to keep in mind when taking photos.
Pam, it might not work every time but it will increase your odds. Another thing you might try is burst mode. If your camera has it, there will be an icon that looks like a stack of papers/photos. By holding down the shutter button, the camera will take photos continuously at whatever shutter speed is set until you take your finger off again. There are a number of free cell phone apps for both iPhone and Android that offer the same function. Out of a couple dozen shots, the law of averages suggests you’ll get at least a couple of good ones! And the beauty of digital photography is that if the shot’s a dud, you can just delete it.