More Fun with Photos!
![]()
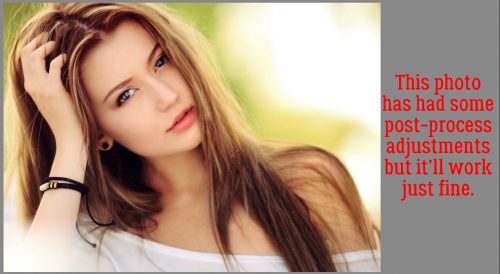
When I started thinking about what to write about for this week, it occurred to me that we hadn’t gotten back to those Guided Edits that have been getting better and better with each new version of Elements for quite a while. Then I saw a layout in the gallery that set off bells. The photos the layout was built around had that dipped-in-caramel-latte look that lends itself to so many palettes and styles, and I’ve been wanting to know how the scrapper gets that effect for a long time. I’m going to show you how, right now! I pulled a photo from Pixabay to play with and although it’s had some post-processing, it worked beautifully.
First things first. I opened my photo in Elements, then I clicked on the Guided tab shown below.

The Guided Edit I’m going to use is in the Black & White tab and is called High Key.

The interface within the High Key menu looks like this. It has two options, colour and black-and-white. I’m going to show you both of them so you can see what they do.

Clicking on the button more than once enhances the effect. For most intents and purposes though, a single click is all that’s needed. I really like the way the details are softened, but the catchlights in the model’s eyes seem to pop right off the photo.

The second step in this menu is the Add Diffuse Glow button.

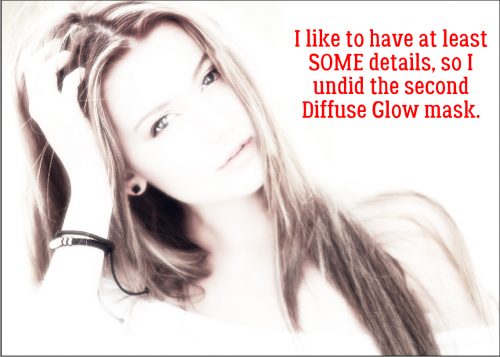
It’s a lot softer and slightly blurry, but those catchlights are still pretty awesome. It bothers me though that she looks like she has no nose.

As with the first button, clicking on it multiple times adds more and more “glow”.

I ended up Undo-ing the second glow mask.
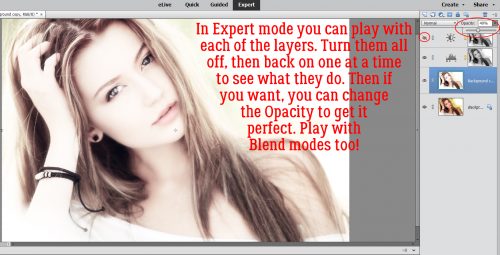
When I was happy (or mostly happy) with what I had, I clicked on the Next button at the bottom right corner of the screen and it took me to this menu. [You can see it in the menu images above.] I decided to see what else I could do with my photo so I clicked on In Expert to take me to the interface we’re all so familiar with. Had I been pleased with it as is, I could have Saved it or Saved it As and then renamed it. If I’d clicked on the Done button, the adjusted photo would appear in the Photo Bin.

The Expert mode shows the different layers the High Key script created. Each of those layers can be adjusted, turned on or off, Blend Mode changed, Opacity tweaked… whatever you like. In the example below I turned one of the layers (brightness) off and lowered the Opacity of the background copy layer to 40%. There’s a hint of colour in her hair, eyes and lips, her skin looks flawless and I could use this photo with just about any colour palette and scrapping style out there.
After I saw what the colour script did, I tried out the B&W one.

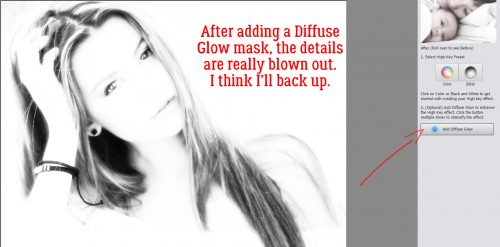
A single click gave me this.

When I added the Diffuse Glow, her features all but disappeared. So I Undid.
As you can see, even in the B&W mode I was able to pull a little colour into the image. All layers are visible except the Brightness layer in this screenshot, with the opacity of the top layer (gradient mask) at 50%.

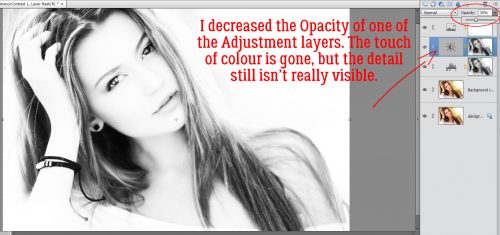
I turned visibility for the Brightness layer back on then decreased the Opacity to 35% and the image no longer has that hint of colour. But many of the details are still blown out.
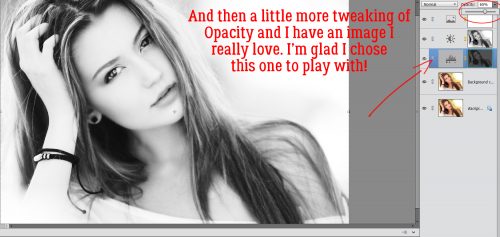
That third layer is the one with the Levels adjustment. If you haven’t played with Levels I HIGHLY recommend it! With a few twitches of the sliders, I was able to find her features again without losing that creamy goodness.

I played with layer Opacity a bit on the Level mask (65%) and loved the result. I can’t wait to use this trick on a layout, almost as much as I can’t wait to see how YOU use it!
![]()