Shaving Shadows
![]()
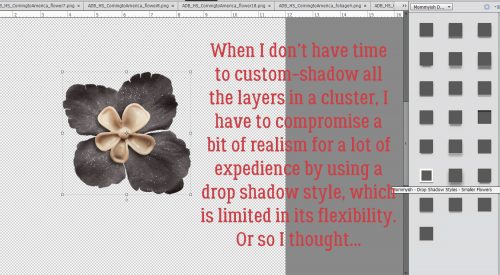
As you’ve already figured out if you read my tutorials regularly, I’m a bit of a perfectionist. I like things to look a certain way, and will try whatever it takes to get the effect I want. Shadows are something I don’t like to compromise on, and I often create custom shadow layers for my layouts. But I’m also a bit of a procrastinator and leave things until the 11th hour… and then I run with drop shadow styles, either ones I’ve loaded into my Styles menu or the ones the designer has added to the template I’m using. These Styles are limited in what can be tweaked, and when I’m building a cluster, sometimes the shadows just look wrong because the style isn’t more adjustable. In that case, if I’m in a real hurry, I look the other way, but I’m not happy about it. So when I discovered a Work Smart Not Hard method of customizing drop shadow styles, I was all over it! I was absolutely giddy!! It IS possible to erase JUST THE SHADOWS quickly and easily, to give that realism to my clusters!

There are a number of designers who have collections of drop shadow styles for sale. They make short work of shadowing a variety of elements with a single click. But they have limitations in the adjustments you can make to them. At least that’s what I always thought…
The image below shows the software’s adjustment menu for Styles. You can open this menu by double-clicking on the Style icon (the little fx icon on the right hand side of the layer in the Layers Panel). Whatever settings you choose, Elements applies across the board.

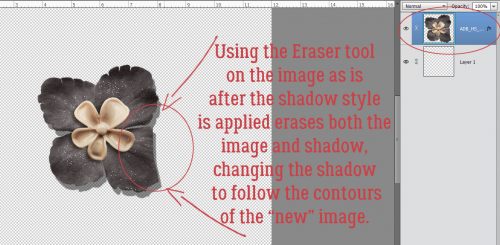
Now, if I try to erase any part of the shadow on this layer, I run the risk of erasing the flower too. But with the shadow style left intact as a style, when I erase part of the shadow, I also erase the part of the flower that casts the shadow. And it looks very odd.
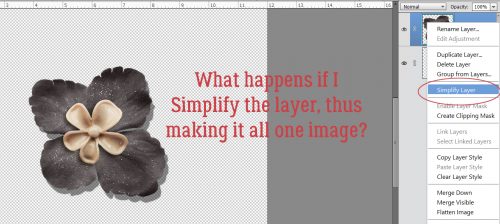
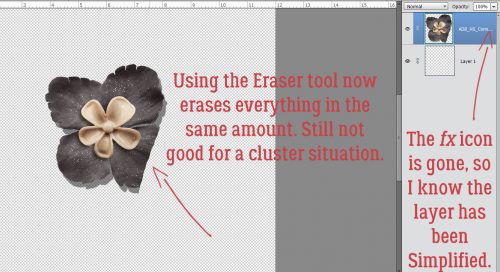
If I Simplify the layer (as I remind you constantly to do with your special effects), Erasing will erase everything equally; who has time for zooming in, using a tiny Erase brush and going pixel by pixel to erase just the shadow? I don’t.
See what I mean?
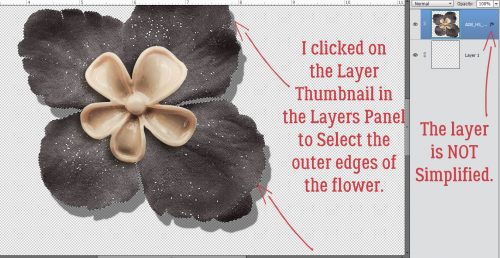
Here’s where the fun starts. If I Select the flower by CTRL/CMD>clicking on the image thumbnail in the Layers Panel…
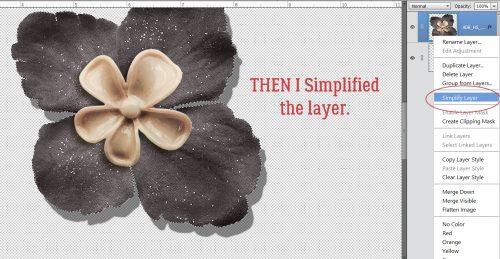
and THEN Simplify…
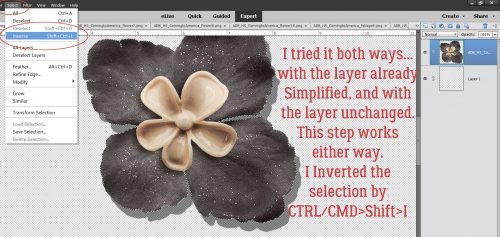
I can Invert the selection at any point either before or after Simplifying and it works just the same. To Invert, click on Select>Inverse or CTRL/CMD>Shift>I which moves the marching ants from the edges of the image to the edge of the document and Selects everrything in between – the shadow.
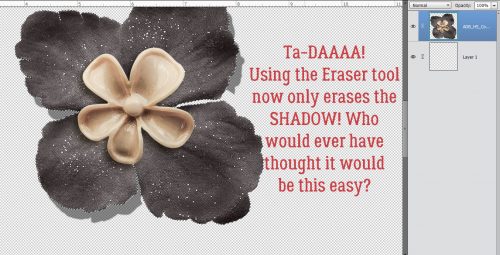
Now I can Erase just the shadow!! At this step I can use the Eraser brush at 100% opacity to completely remove the shadow, or I can decrease the brush Opacity to whatever I want to just to lighten the shadow in that area. Or I can partially erase, partially lighten. It’s a bonanza of options!
You may never have a reason to use this trick, but I’m glad I shared it with you.
![]()