It’s All About the EXPOSURE!
![]()
Today’s tutorial comes to you courtesy of my weekend wandering through that black hole known as Pinterest. I wasn’t even looking for inspiration but BAM! there it was!!
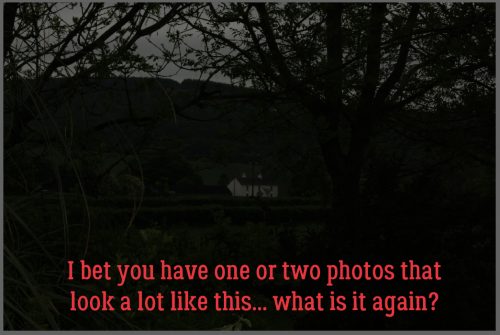
I don’t know about you but I have a whole folder of photos that are unscrappable for one reason or another. Many of them are seriously under-exposed… and they’re usually of something I really, really, REALLY wanted to use for a layout. Like this one, for example. I took it on my first trip to Ireland in 2014; there’s a lovely 2-storey manor house in the centre, surrounded by idyllic countryside. But you’d never know it. All my efforts in the past to improve these shots were failures, mainly because they looked really over-processed and artificial. Then I found this method of fixing these oh-so-dark shots. To wow you thoroughly, I’m going to start with this one, as my worst example of underexposure.
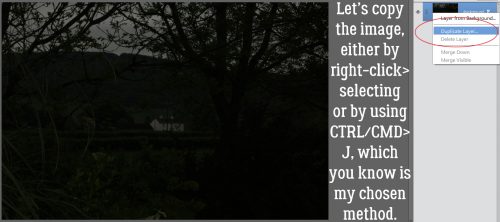
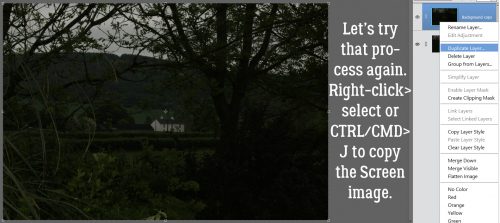
The first thing to do is make a copy of the image, either by right-clicking on the layer and selecting Duplicate Layer, or simply using the shortcut CTRL/CMD>J. If you choose the first method, there’s an extra step, because PSE is going to ask you to name the new layer. The shortcut just makes a copy, and calls it that. (You already know what method I use.)
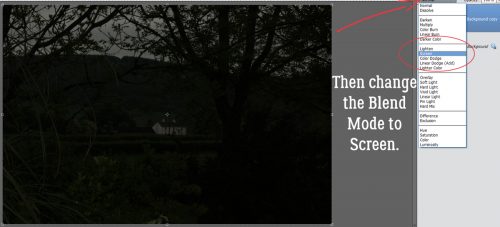
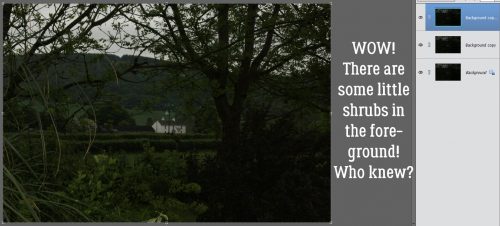
Now for the magic! Just change the Blend Mode from Normal to Screen. Click on the button at the immediate upper left of the Layers panel and select Screen from the drop-down menu. For those of you who don’t know much about Blend Modes, they’re really great tools; I put together a tutorial on what they that you can find here.
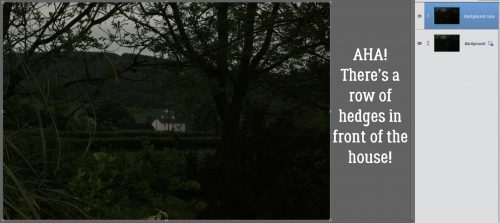
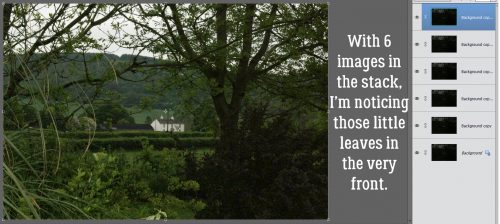
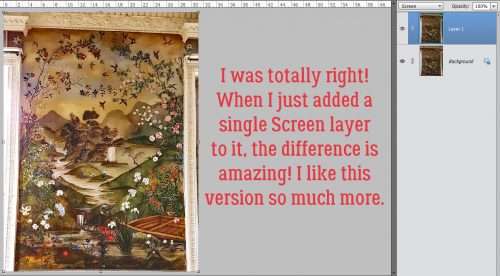
Can you see the change that simple step has made? Hedges!!Shrubs!
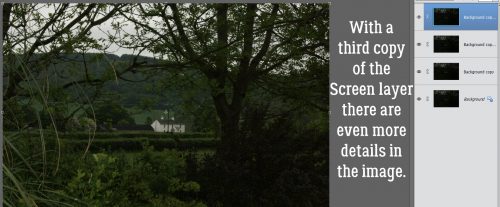
Just by copying the Screen layer, I can bring out more details.
Still not great, but so much better…
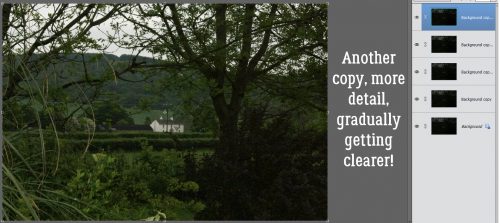
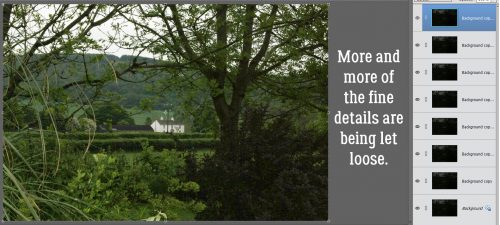
So I added another copy of the Screen Layer.
And another…
I kept adding copies of the Screen layer and the image just kept getting better and better.
It’s getting there, but still has some room for improvement.

Almost there!
And then… YES! I can see the leaves on the shrubs in the foreground, the trees on the hill and have a much better photo.
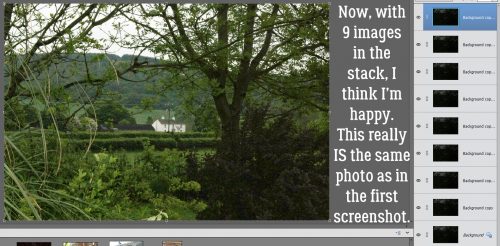
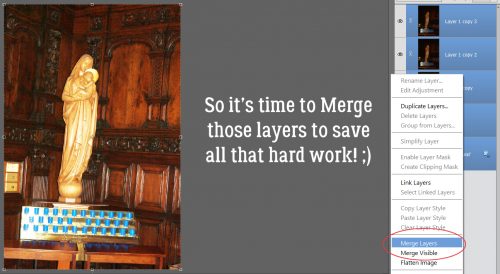
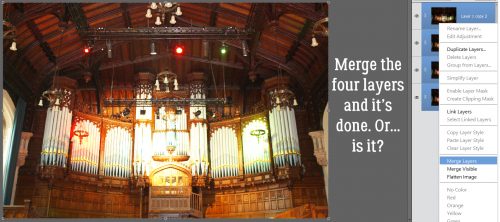
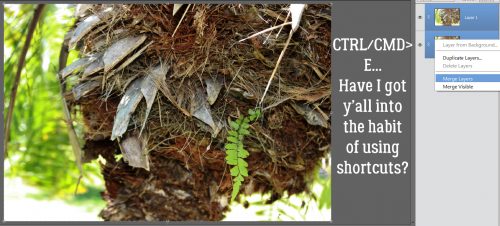
Then I Merged all the layers together. Select all the layers then right-click somewhere within the Layers panel, choosing Merge Layers from the drop-down menu. Or do what I do, select the layers then CTRL/CMD>E.

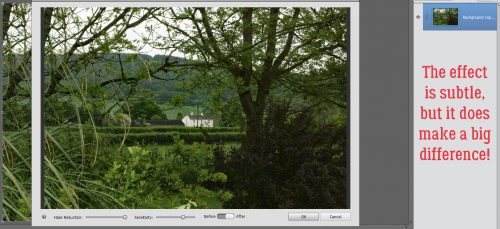
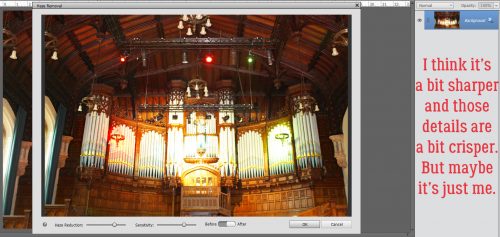
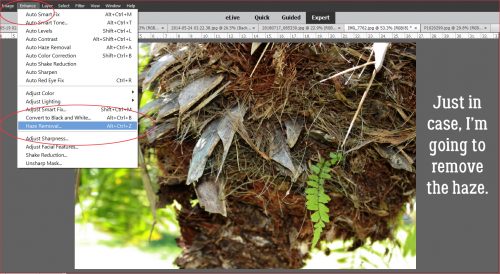
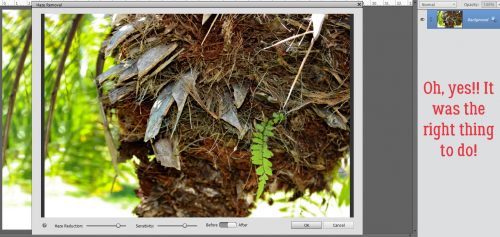
I’m happy with the exposure now, but I feel like the image is a bit hazy. So my next favourite new tool is the Enhance>Haze Removal (or CTRL/CMD>ALT>Z).
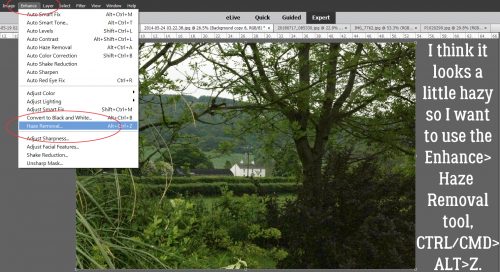
It doesn’t change the image in a huge way, but the leaves are sharper, the house looks sharper and the colours are a smidge more saturated.
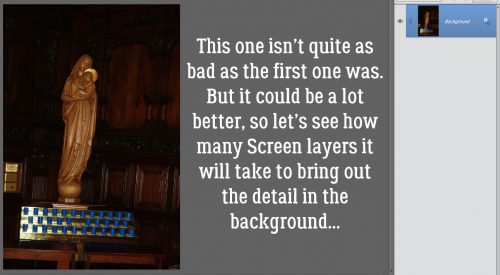
Let’s try it again, this time with an indoor photo taken without a flash. No harsh shadows, but also no background detail…
The first Screen layer does this.
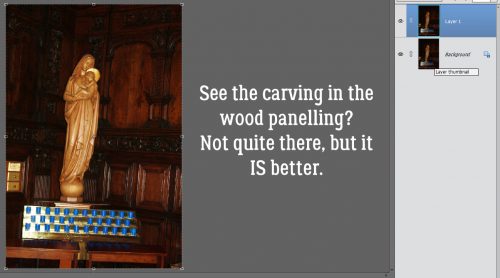
Adding a second Screen layer brings out more of the carved panelling.
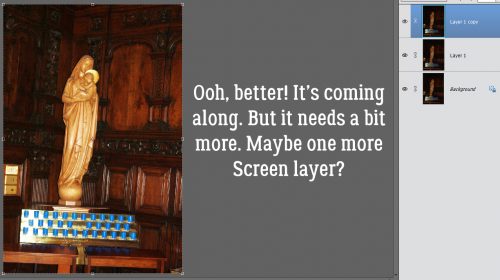
Now I’ve got three Screen layers and I’m almost happy.
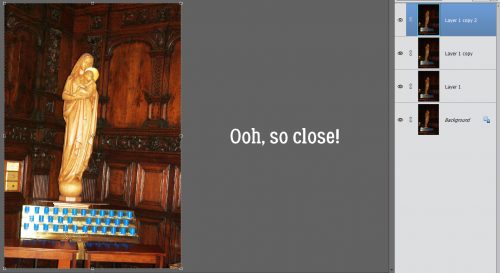
Four Screen layers and I’m happy.
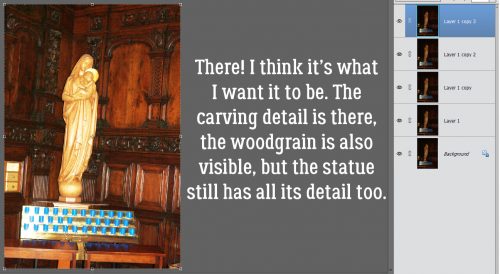
Merge those layers and carry on! This one isn’t too hazy so I didn’t use the Haze Removal tool.
Let’s try it one more time, with an image that isn’t terrible, but could use a little help.

First Screen layer…
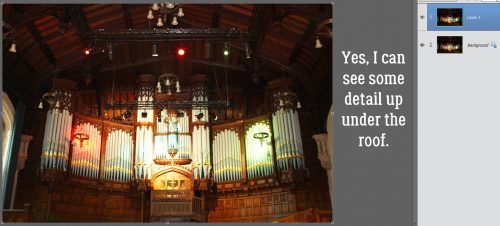
I added another one, then one more and now could see the beams under the roof a lot better.

Then I Merged the layers.
I wondered if Haze Removal would make it even better. And to my eyes it did.
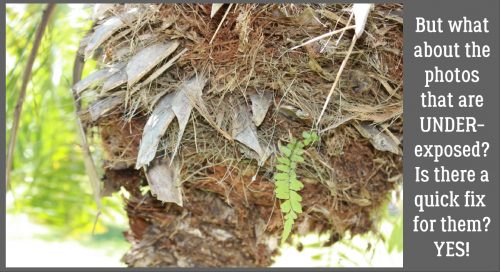
So that’s a handy trick for the under-exposed shots. What about the ones that are just a little blown out – over-exposed? Is there a quick trick for them? YES! This photo is from my daughter’s wedding trip to Jamaica.
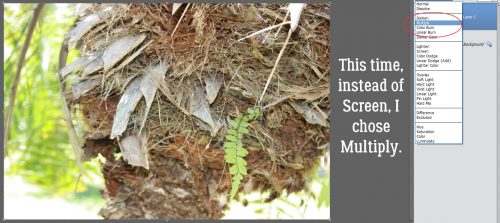
Now, this wasn’t in the little piece I found online, but I thought about if for a minute and decided to try something… it worked! I copied that first layer but instead of using the Screen Blend Mode, I chose Multiply.
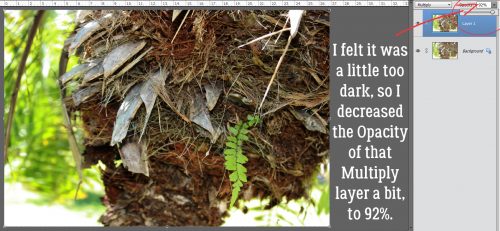
Look at that! It’s a bit dark, but much better with just ONE blended layer on top of it.
The easiest way to adjust it was to lower the Opacity of that Multiply layer to 92%.
Merge those babies!
I gave it the Haze Removal treatment too.
And there it is!
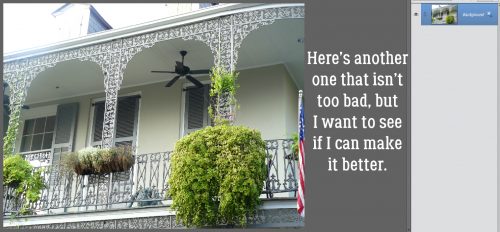
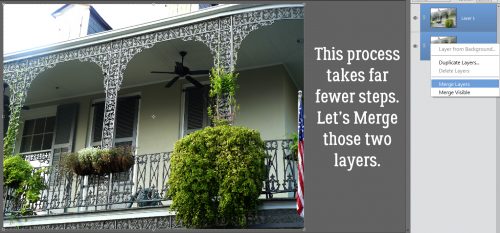
This next one, a gallery I shot in New Orleans, doesn’t need a lot of adjusting either, but I wanted to know if I could love it more.
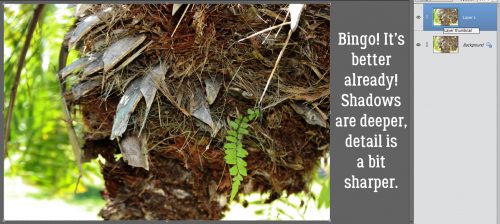
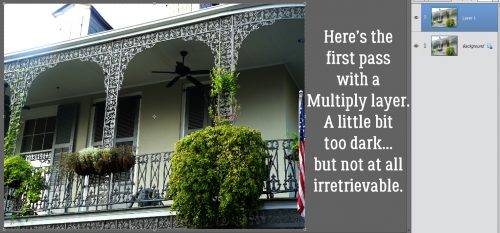
After the first Multiply layer I feel it’s a bit too shadowy now. But I know how to fix that.
Ooh, that’s better! 82% is about the right amount of Opacity here.
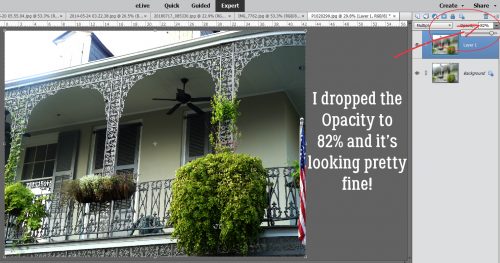
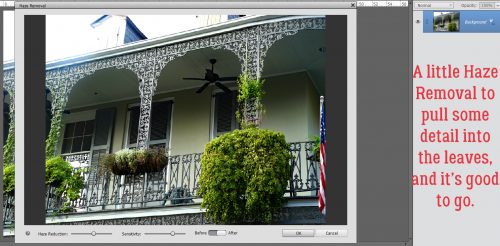
I love that this trick is so much less labour-intensive! I Merged the two layers…
and hit it with the Haze Removal tool too.
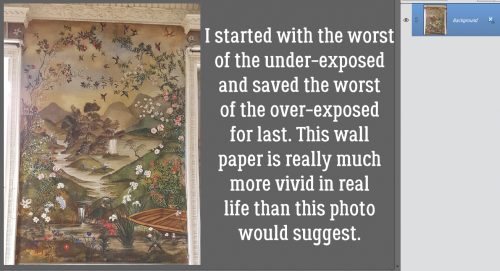
I saved the worst for last. This wall paper is in the circular entry hall of the manor at Coollattin, the estate where my Irish ancestors lived and worked until 1847. It’s hand-painted watercolour on heavy paper, and it’s absolutely beautiful. But you wouldn’t know it from this photo!
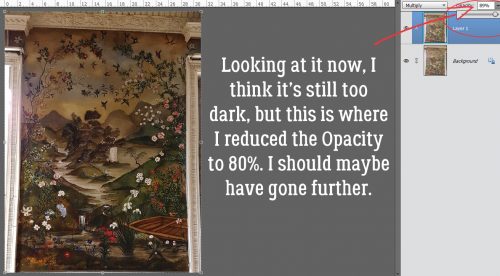
One Multiply layer later… I think it’s too dark now, but when I was batch-editing I thought it was fine.
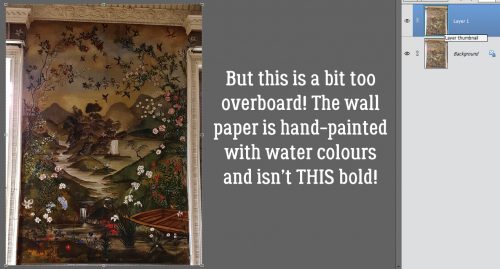
I kept going with the process and reduced the Opacity to 80%.
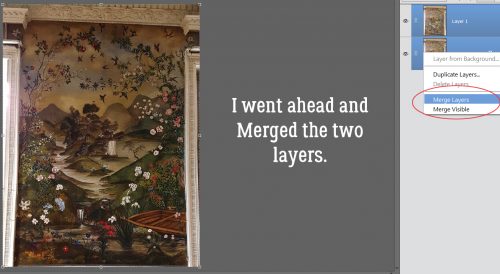
It’s better than the original so I Merged the two layers.
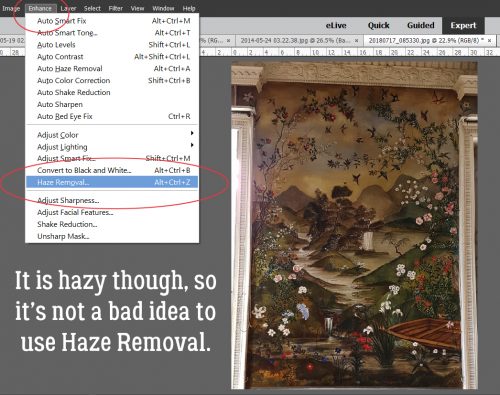
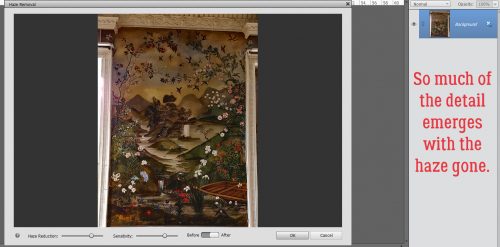
And got rid of the Haze.
There’s a lot of detail visible now, and the colours are much more saturated.
Then, just to see, I added a Screen layer and it’s PERFECT!
Are you already looking through your photo folders for shots to experiment with? I bet you are!
![]()