Hybrid Pillow Box
![]()
Have you ever wished you could customize your gift boxes and make them really personal for the intended recipient? Well, have I got a treat for you! And once again, the credit goes to calgirl (Steph). She found a printable template online for a pillow box and thought I could bring you a great seasonal tutorial for doing it digi. I thought it would be a lot more complicated than it ended up being, and I even managed to come up with a layered template for your crafting pleasure. You can grab it here: Dropbox
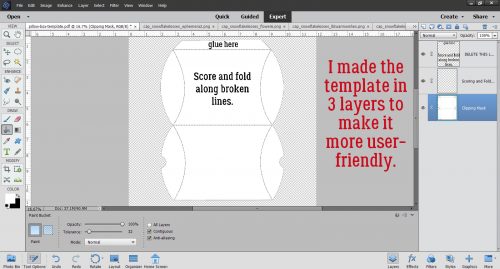
The template is on a letter-sized canvas so it can be printed on standard (inexpensive) cardstock. You can easily resize it a bit bigger or a lot smaller, and really make it your own. When you’re ready to print it you can either turn off the top (instruction) layer or delete it altogether.
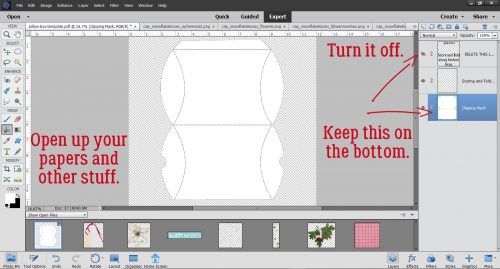
So, go to your stash and decide what you’re going to use for your special pillow box… papers and embellishments for the occasion. I used Aimee Harrison’s A Rustic Christmas kit. Turn off that top instruction layer for now, or go ahead and delete. You’ll know what to do without it.
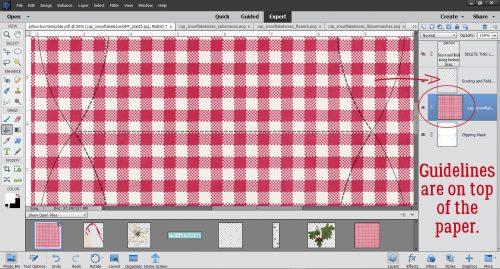
Drop your paper on top of the bottom layer. You’ll still be able to see the guidelines.
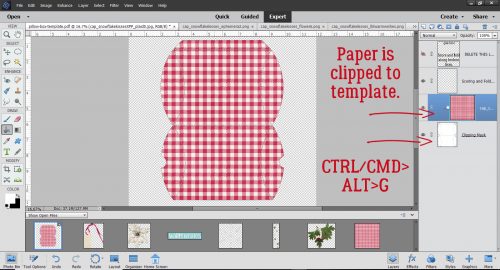
Then Clip (right-click>Create Clipping Mask or CTRL/CMD>ALT>G) your paper to the template.
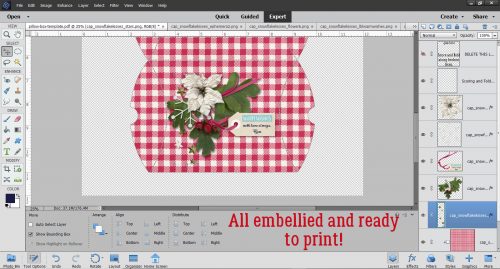
Using the guidelines, add in your embellishments. If you’ve added a tag or a label, pick a pretty font and type in your sentiment. What could be better than NOT to need a tag or label? Once you’ve got your clusters and what-have-you in place, add in your shadows. All that’s left is to print it, cut it out from the cardstock, score it and fold it up. A little dab of glue along the very top edge to hold it together and you’re DONE! You can use a bone folder, or a stylus or a totally dead ballpoint pen to do your scoring. If you’re worried about the guidelines showing on your finished box, you can decrease the Opacity of that layer down to barely visible. Or… If you want, you can put the guidelines on the back simply by flipping over the paper and running it through the printer again. Just turn the rest of the layers off and everything will line up perfectly.
I make jewelry for gifts, and I think this would be a perfect way to present them. In a custom box with my signature on it! How many ways can you think of to make this work for you??
![]()
Love this pillow box idea !!! Thanks for the tut and temp. 🙂
Thanks so much for the template!! Wonderful tutorial — perfect for this season of giving! On a smaller scale, I would fill them with candy & use as favors or place cards at the dinner table! Thanks, Jan! May you have a wonderful Thanksgiving!!!
Very clever! Thank you so much! This will come in handy all year for various occasions. Love it! Wishing you a happy Thanksgiving!
Great job with this tutorial and for the template! Maybe some time do another type of box? A square box with a separate lid? Just thinkin’ ; – )
Wow, you’re not holding back, are you? I’ll have to think about that one…
Happy Thanksgiving to all of you in the US. (We Canadians had our Thanksgiving back in October.)