Jan has a Challenge for All Y’ALL!
![]()
We’re living in interesting times. I know we’re all afraid and worried about what’s happening and what’s yet to come. And we have no control over any of it. I also know that humans are remarkably resilient, we’ve lived thorough hard times before and come out of it stronger, and that this is temporary. While we stay in our homes (or, because we provide an essential service, we’re going to work anyway) we all have lots of time for our thoughts to add to our stress. Rather than throw the Serenity Prayer your way, instead I want to extend a challenge to you. I’d like you to find a photo that speaks to the part of you that isn’t afraid, the part that still has hope. It can be a photo you’ve taken, or someone you love has taken or one you found on an open-source photo website like Pixabay. (Just looking through those sites is a terrific distraction!) Then I want you to find an inspirational quote to match the optimism or spiritualism of your photo. And then I want you to create a meme with it! (No, you don’t have to share it with anyone unless you want to, but it might be a comfort to somebody you know who seems to be doing okay but really isn’t.)
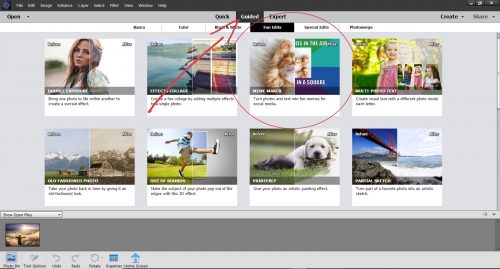
Photoshop Elements 2019 and 2020 have a Guided Edit that makes memes easy to create. It’s found in the Fun Edits menu as shown below. But don’t worry if you’re working with an older version. The same steps can all be done manually.
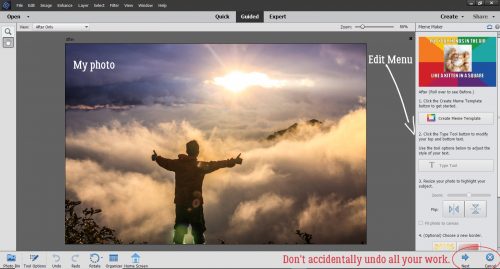
This is the photo I chose to work with. I had quite a few from Pixabay that would have worked but I like the thumbs-up gesture and the sunbeams that to me represent God’s love. The Edit menu looks like the screenshot below. One warning: don’t hit the Cancel button at the bottom unless you really like starting over from scratch!
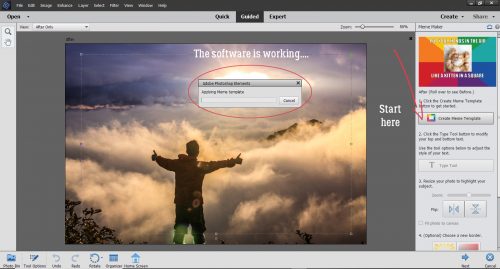
First step is to click on the Create Meme Template button. Then a progress bar pops up.
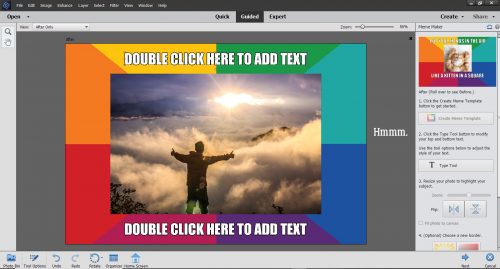
Oh… hmmmm. Let’s keep going. There has to be a way to change that border!
The next step is to add the text. My quote is one from Benjamin Disraeli and it’s pretty spot-on. Once you’ve clicked on the Text Tool button, the same Text interface we’re all comfortable with opens up.
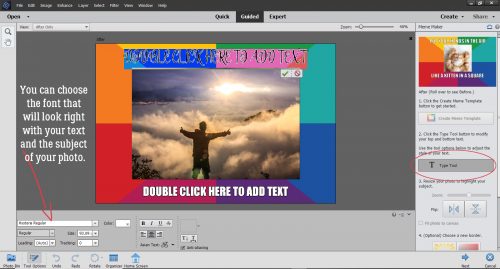
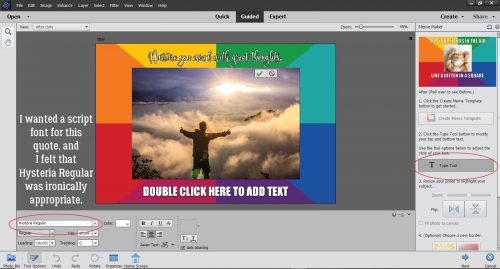
The default text is Impact Regular, but I want a script font so I looked through my vast collection and tried Hysteria Regular on for size. (See the image above for what it looks like.) I thought it was weirdly appropriate.
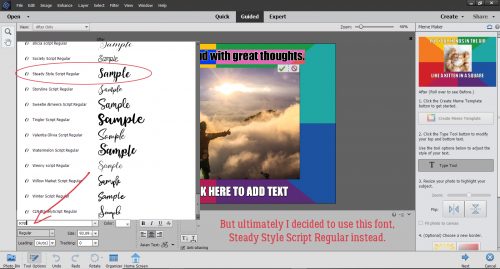
But it wasn’t quite the look I was after so I went back to my fonts and chose Steady Style Script Regular (another appropriate choice!) instead. In later versions of Photoshop Elements, it’s easy to find a script, or a typewriter or a sans serif font just by typing the style of font you’re looking for in the box. I typed in “scrip” and all the fonts in my collection with “script” in their name were displayed.
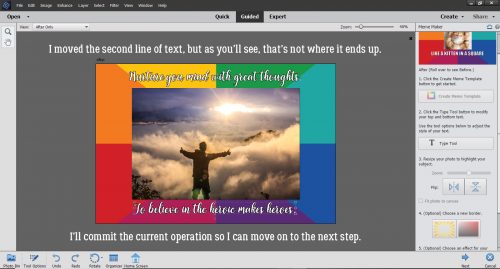
After I typed in the first part of my quote at the top of the meme, I clicked on the checkmark to Commit the Current Operation. The software needs that instruction to move to the next step.
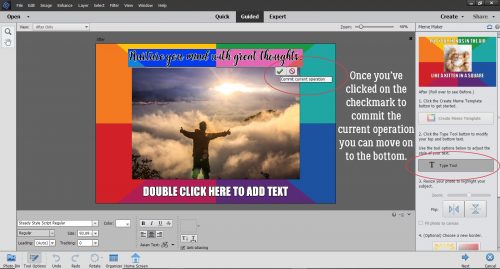
Then I typed in the second part of my quote. The Edit allows for moving the text, and knowing I wanted to include the author’s name as credit for the thought, I moved the second line of text up a smidge. Then I Committed the Current Operation again. Without taking that step, I couldn’t move on with the Edit.
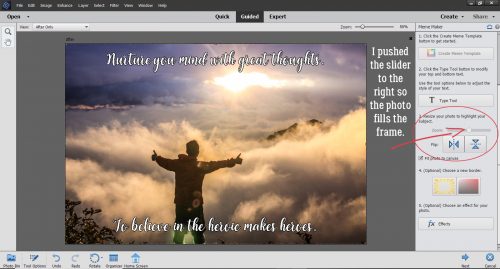
Aha! Here’s where I can do something about that border that I don’t think suits my meme. I moved the slider to make the photo bigger, then noticed the Fit Photo to Canvas tick box. So I ticked that box!
If I’d decided I still wanted a border, just not THAT border, this is where I could have changed it. And there’s an option to add an Effect to the photo. I like the photo as is. I apologize, I didn’t actually play with those steps so I can’t show you what the options look like. But you can always experiment if you like!

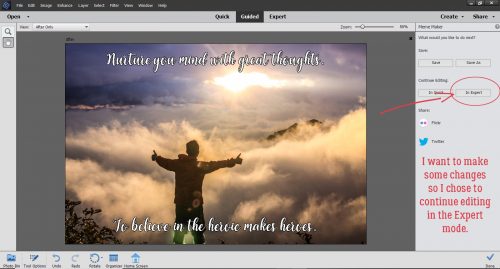
Now that I was happy (more or less) with my meme and having not been able to add the author’s name onto the meme, I clicked on the Next button and then chose Continue Editing in Expert.
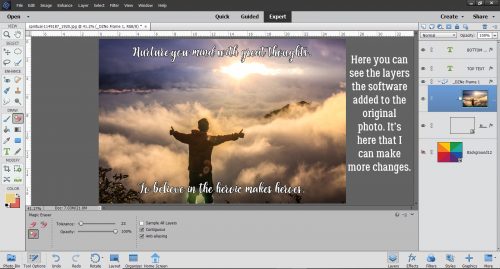
When the Expert work space opens, you can see all the layers Elements has added to the image. Now I can decide where I want to put my author’s name.
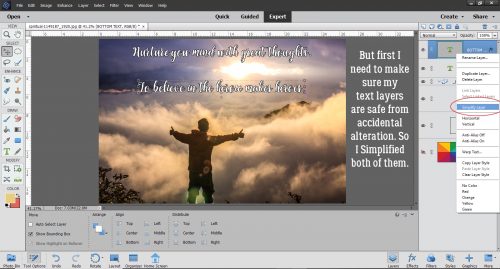
But first, to protect my other text from accidental messing up, I Simplified both text layers. Then I moved them closer together, bracketing the sunbeams.
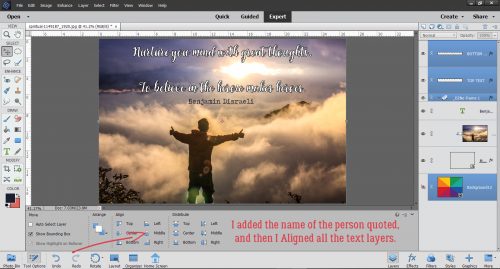
After I changed the font to a typewriter one, I added Disraeli’s name onto the image. To make sure the text layers were properly centred, I selected all three text layers and the (invisible) background layer, then Aligned the layers by the Middle.
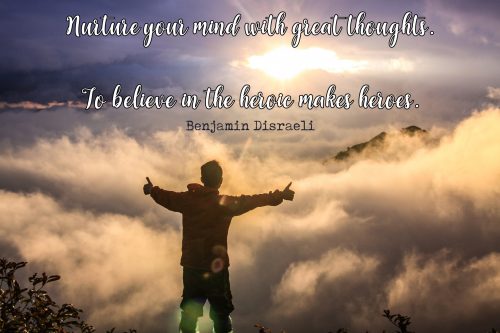
And here is my finished meme. To all the folks who are still standing between us and disaster, I salute you.
Edited to add: The typo in my original version was bothering some readers enough that they pointed it out to me. So I’ve cleaned it up and replaced the final image. (I didn’t do ALL the screenshots – there are 9 of them in all – and it would have been a ton of work.) Keep on swimming, friends!
![]()