I Love a Curvy Border
![]()
(Bold, coloured text indicates I’ve linked that text to either a designer’s store or a specific kit/collection.)
I’m so glad to know that I’m not the only one with a huge pile of old scrapbooking magazines, and that I’m also not the only one to go through them looking for ways to translate what they hold into a digital version. Ellen (gmae) messaged me about a scrapbooking mag she had that was dated sometime in 2007, a Better Homes and Gardens “Ultimate Guide to Digital Scrapbooking” with step-by-step instructions. The instructions were based on Photoshop Elements 4.0… should be a piece of cake, right? WRONG! I remember trying to follow some of those magazine instructions and being completely lost. Ellen tried to follow the steps for creating a curved clipping mask, like the sort some of our amazing designers sometimes include in their collections, but she couldn’t get past the second step and she asked for help. So I rolled up my sleeves and gave the instructions a spin. And got hung up. At the second step. They totally didn’t make sense. So today, I’m going to show you how to make a curved paper border for your layouts step by step and anybody will be able to follow the instructions!
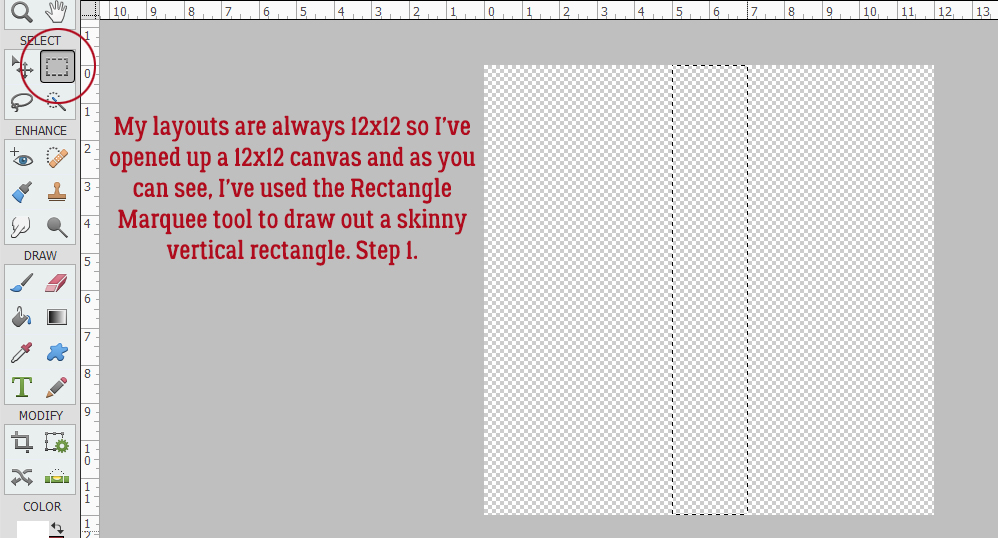
I think the easiest way to make this work well for you, I recommend opening a canvas on your workspace in the same size as your scrapbook layouts. I always do 12×12, but I know lots of people like the 8 1/2×11 format so you do you. then, using the Rectangle Marquee tool pull out a skinny vertical rectangle as shown.
The next step is to fill the Selection (your skinny rectangle) with a solid colour.
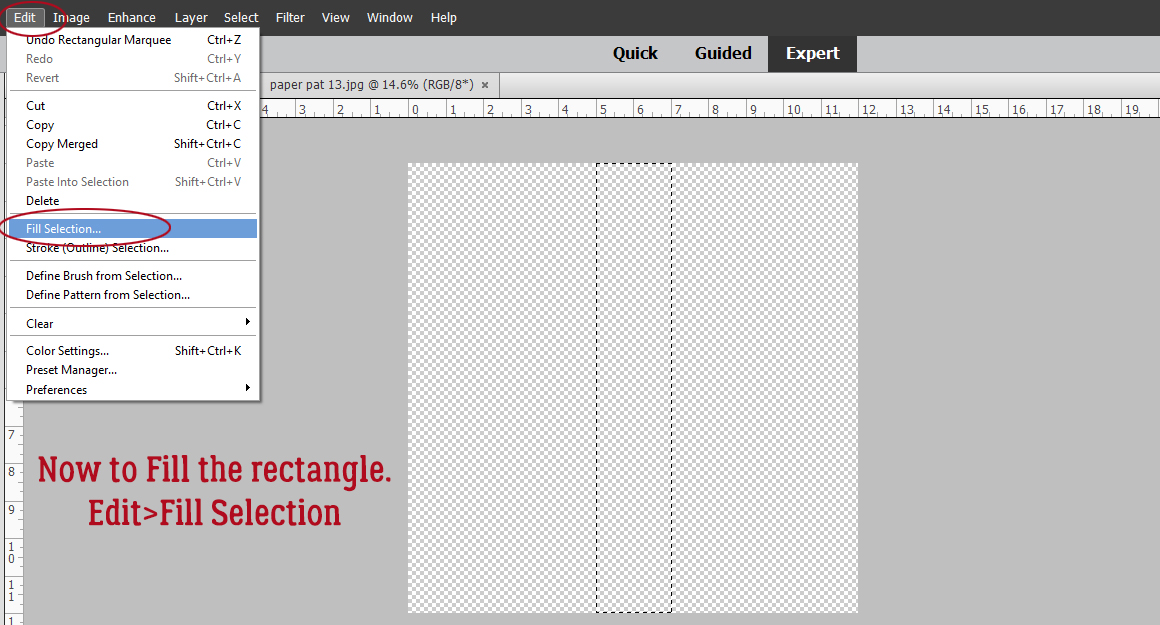
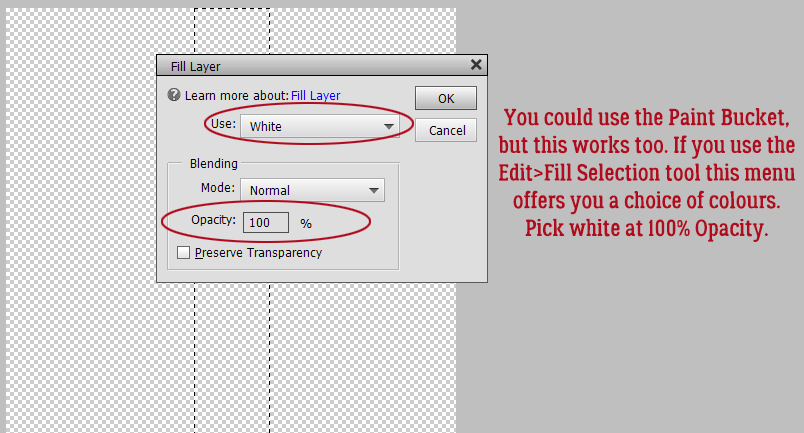
The magazine said to use Edit>Fill Selection and white at 100% opacity so I’ll show you that method. Using the Paint Bucket would work just as well.
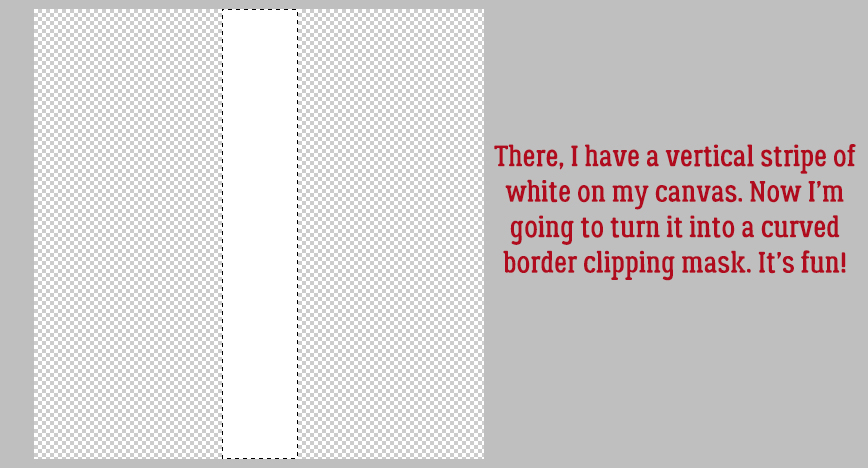
And it’ll look like this when you’ve Filled it.
We’ve played around with Filters quite a bit recently and we’re going to do it again today. This time it’ll be Filter>Distort>Shear…
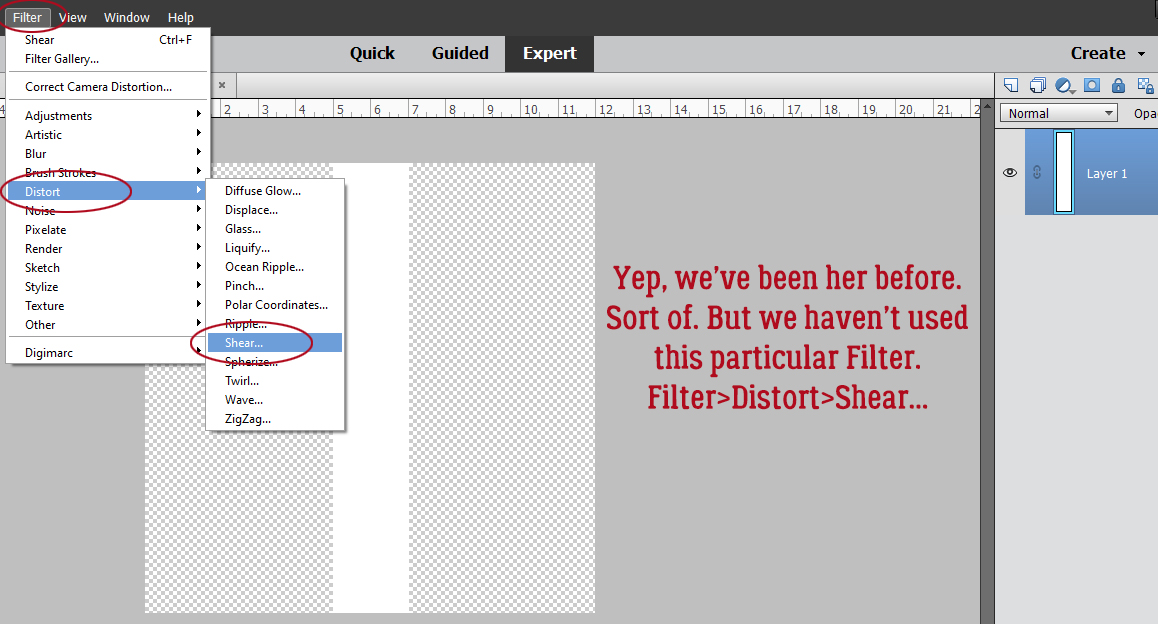
Here is what the default controls for this Filter look like. The two most important parts are the vertical line inside the upper box and the Preview image in the lower box.
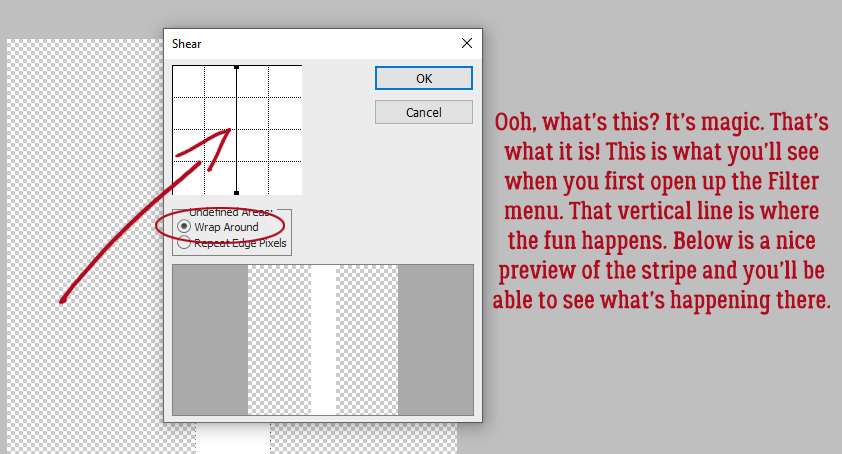
To demonstrate what manipulating that vertical line does I simply grabbed the “handle” – that black dot at the very top of the line – and moved it over horizontally to the left. See what happens to the Preview? I love that they’ve put a grid there to make achieving symmetry easier.
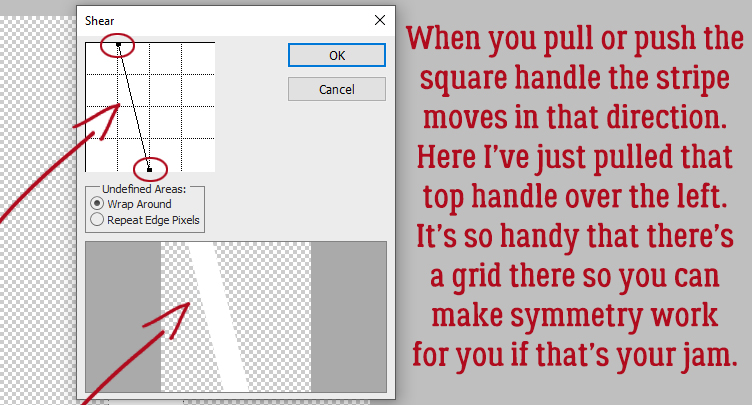
To begin with the default setting only has the two “handles” at top and bottom. But you can create a new handle anywhere along that line. Here you can see I put one right in the centre and pulled it one block over to the right, and the stripe follows that curve.
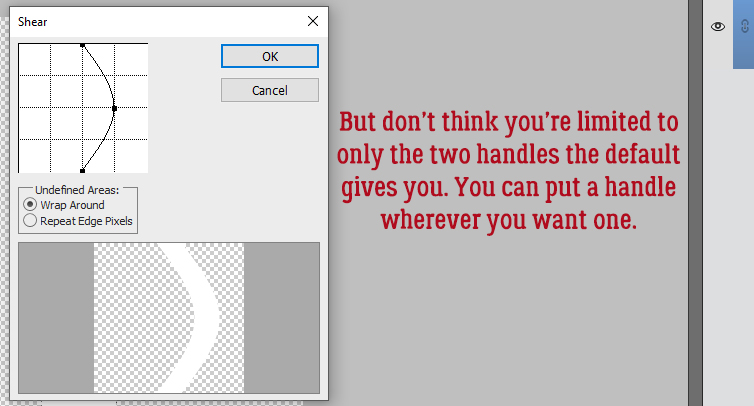
I’ve created a sine wave in this image. The thing to note here is that when you make a deep curve like this, you’re not going to have perfectly parallel outer edges to your stripe, not that it matters much.
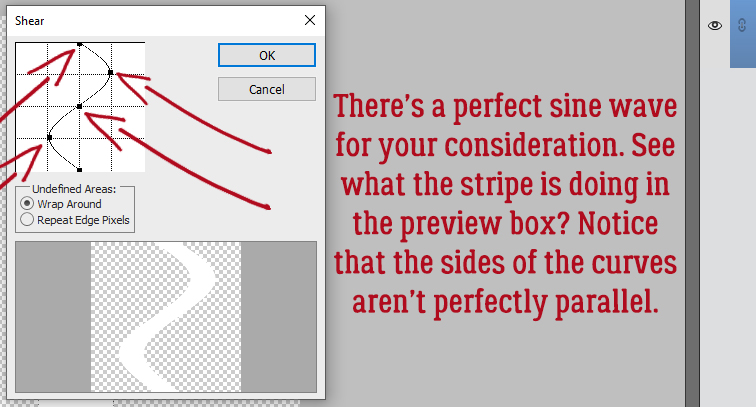
You can make your curves as plentiful and deep as you want.
Use the grid! It’s a great tool!
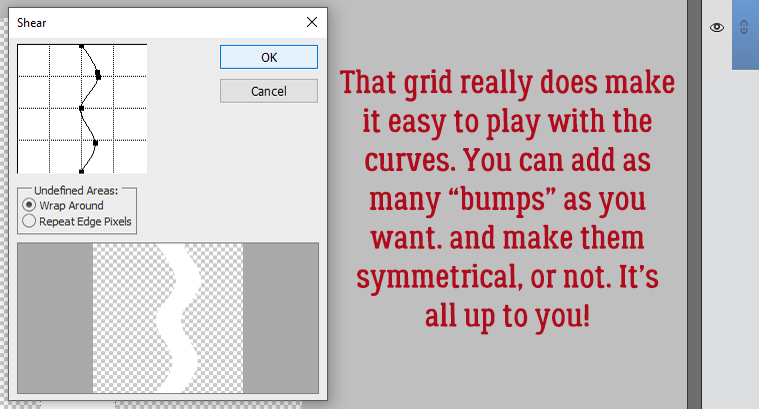
For my imaginary layout I’m going to put the curved border over along the left side so I moved my final camel-hump curved stripe over there. Only problem is I don’t want my background paper to show through at the edge so I’ll need to Fill those two voids.
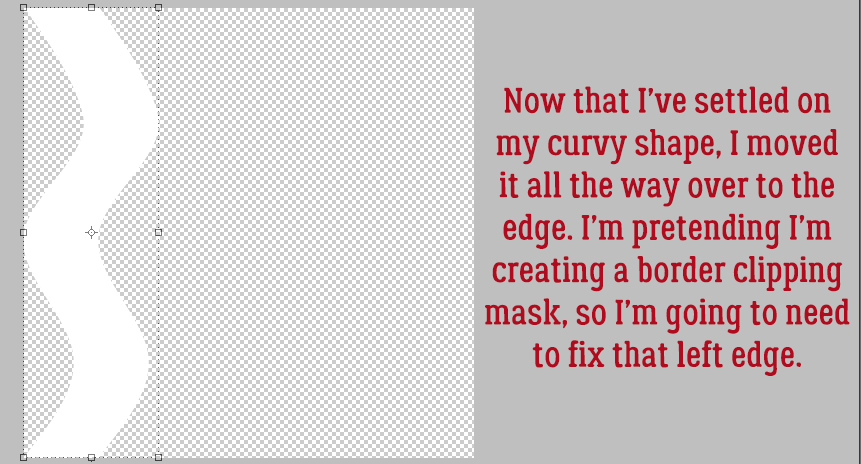
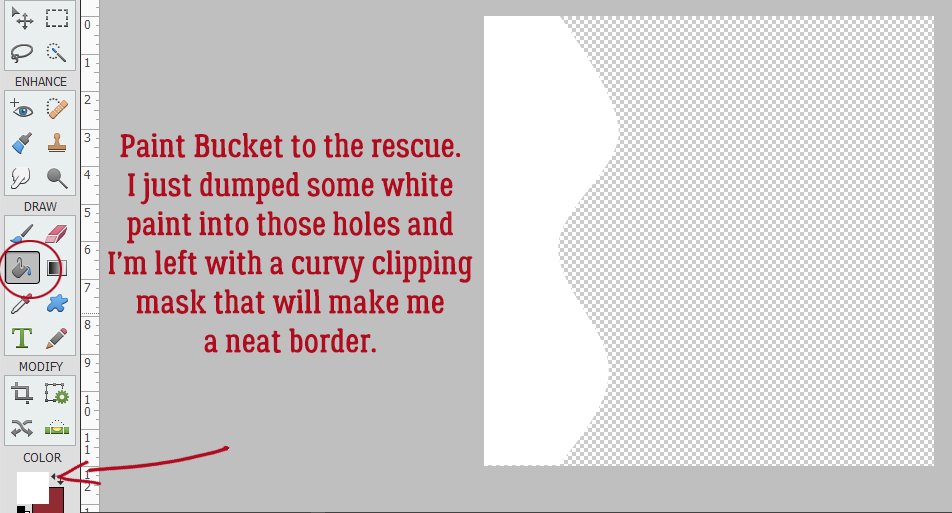
Here’s where the Paint Bucket rushes to the rescue. All I need to do is dump some white paint into those holes and I’ll have a complete clipping mask.
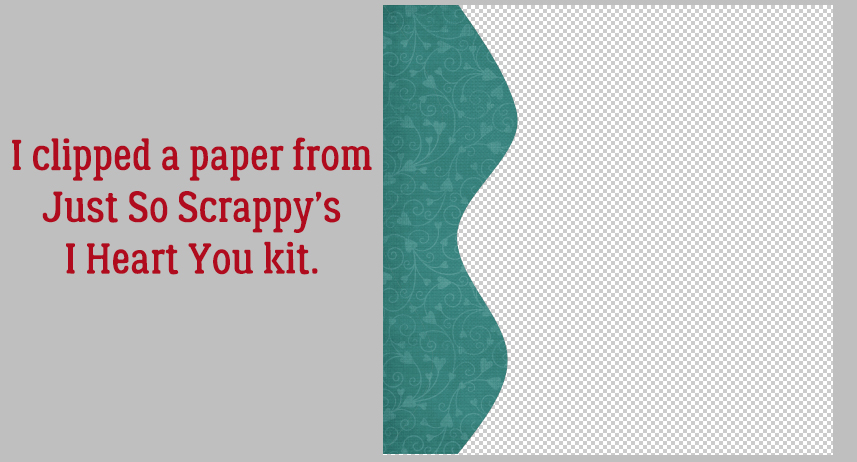
To see the clipping mask in action I Clipped a paper from Ooh La La Scraps‘s I Heart You kit to my mask. (Sorry for the typo on the screenshot. JSS and OLL are the same person and I sometimes mix them up! BTW… the BUNDLE is on sale today for just $5.00!!!) The keyboard shortcut for clipping is CTRL/CMD>G for versions up to 14 and CTRL/CMD>ALT>G for versions 14 and up.
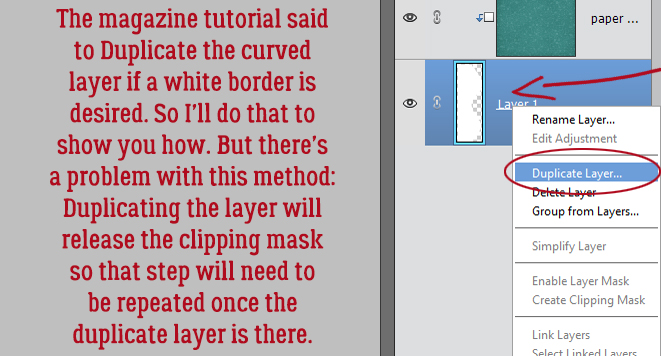
Because I wanted to see if I could make sense of the directions in the magazine, I followed their third step, which was to Duplicate the curved clipping mask layer to create a white border. I think a Stroke would do that with fewer steps, but okay. Let’s do it. Only problem? When I Duplicated the mask layer, the paper was “released” from the clipping mask! Now I have to redo clipping the paper to the mask again. So yeah, Stroke borders are the way to go!
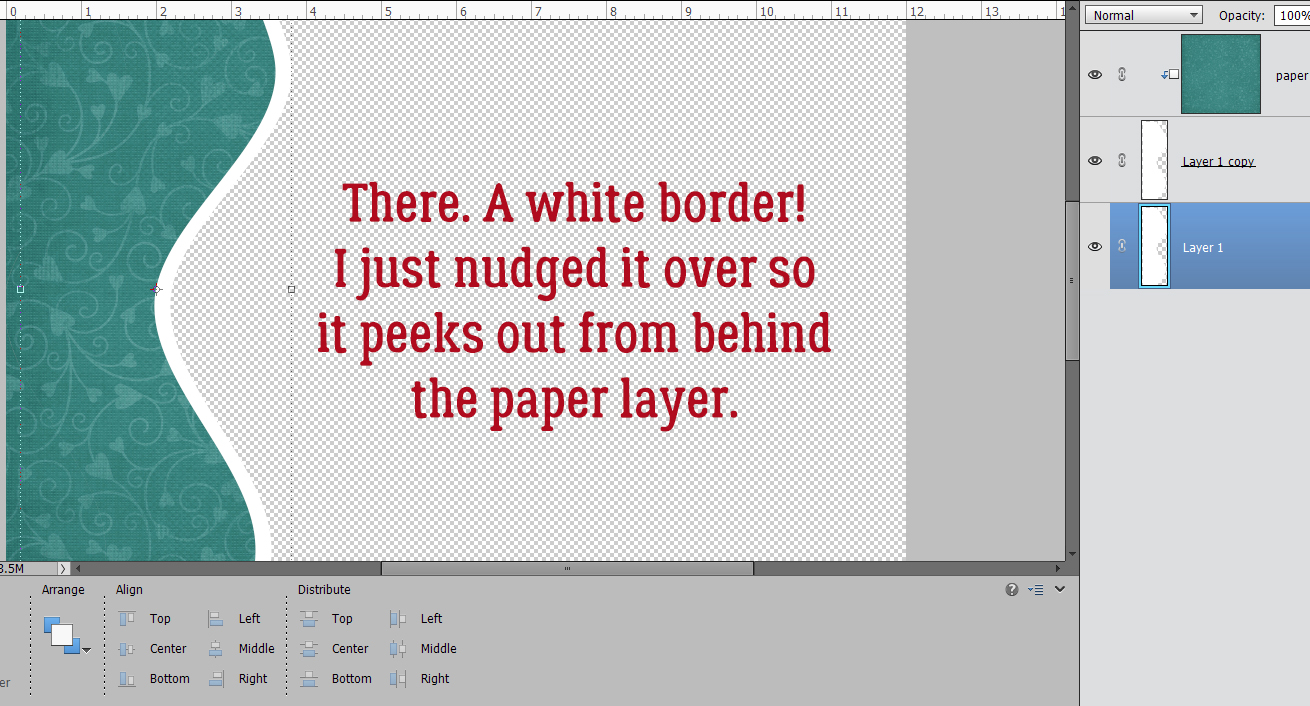
I nudged the bottom curved mask layer over to the right so it moves out from under the paper and now there’s a white border.
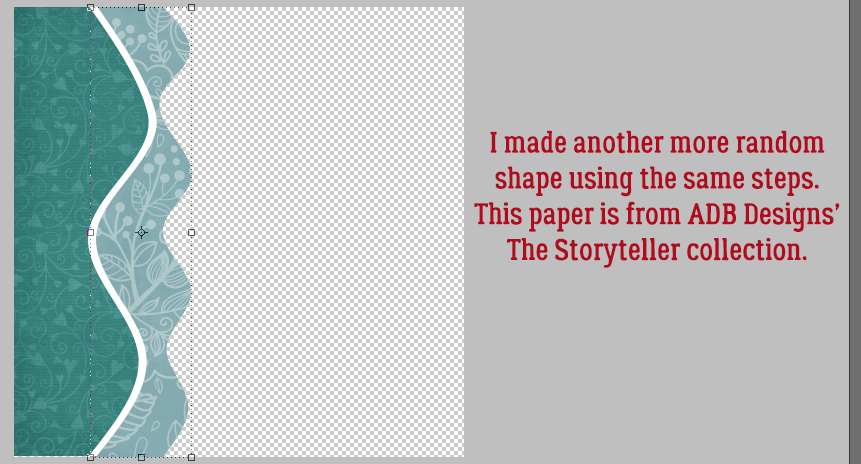
For fun, I created another curved clipping mask, this time with four relatively symmetrical bumps on it. I clipped a paper from ADB Designs‘ The Storyteller kit to it. I think the two papers look good together.
Here’s a refresher on using Strokes to add a border. Edit>Stroke (Outline Selection) opens this menu. Decide how wide you want your Stroke and choose a colour for it. Make it 100% Opacity and you can put it wherever you like. I just went Outside because that’s what I used last. 😉
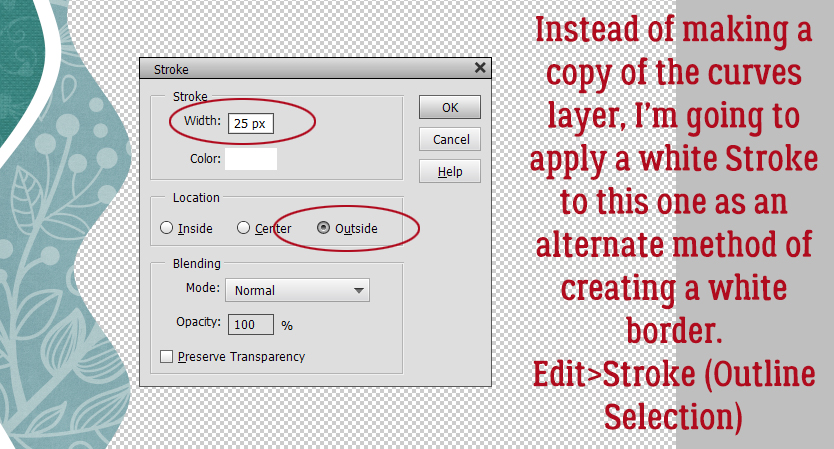
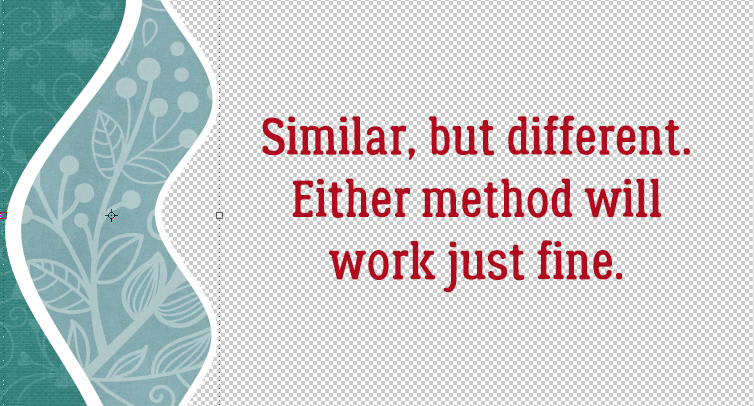
It’s a lot simpler to do a Stroke border. It looks pretty similar but uses fewer steps.
I made one more randomly bumpy border using the same steps and clipped another of ADB‘s papers to it. To give the appearance of paper layers, they need a drop shadow. Feel free to use a shadow Style if you like. I did mine using my tried-and-true method and now there’s some dimension to the border.
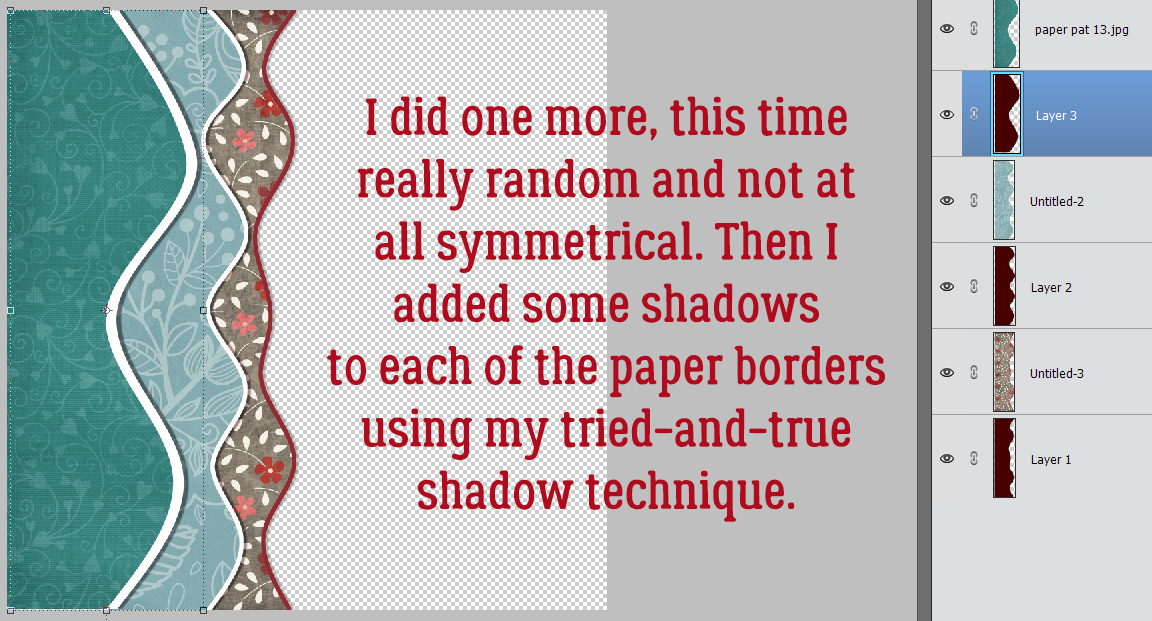
Some things I discovered: 1) Subsequent border masks have to be made on their own canvases. The Filter doesn’t understand what you want if there’s already one Shear filter present. 2) When you use the Distort>Shear… Filter and want to do the same technique on a new object, it will return you to whatever curves you used last, unless you close your Elements and reopen it – and who wants to do that?!! So prepare to be a little more challenged on those new curves. 3) To fill the area along the edge of your subsequent border masks, drag out a rectangle with your Rectangle Marquee tool that touches the free edge on the one side and sits inside the filled part of the stripe on the other. Then dump some paint into the rectangle with the Paint Bucket. Easy peasy.
Maybe you’ll be able to work this technique into a Survivor layout. That would be pretty sweet! See you next week.
Here is the link to this weeks PDF version: https://bit.ly/3vN9S4e
![]()
Thank you Jan! Your a genius! Finally found my big mistake and why it wouldn’t work for me! I forgot to remove those marching ants! Your tut helped me see that. Thanks again for coming to my rescue and the additional hints are always great. Stay well! Ellen
I think there was a little bit more to it that that. As I said in the text, I got hung up at step two as well. So I ignored the instructions and did what I knew would work. 😉
Oh, this looks so fun, easy, and useful !!!
Thank you 🙂
So fun! So easy! I’m going to try it with some other things (ribbon, maybe) and see how it comes out.
I love using the Shear filter for curvy shapes! You can distort the shape after making it by pulling / pushing on the bounding box nodes too.
Any of the Transform tools would give you a ton of flexibility. The shapes can be resized too. I think there are infinite possibilities with this one!
Thanks for an awesome tutorial! This one is fun and can be used frequently!