Going Creative with the Stitch Technique
![]()
PDF Version : https://bit.ly/3zUIB2y
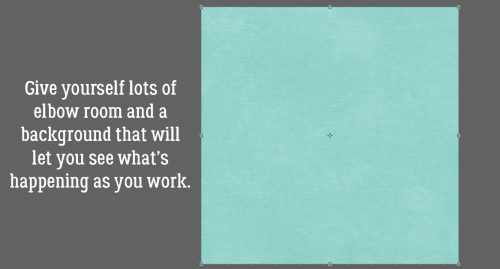
Today I’m going to build on the stitch tutorial from a few weeks ago. I have three more ways to add stitching to your layouts that go beyond vanilla. I’ve played around quite a bit to be sure the instructions are accurate, and you’ll be surprised how easy these new options are. Let’s start out by making sure we have room to work. I opened up a new 12×12 workspace and dropped a paper on it so the stitches – I’ll use white – will be easy to see.
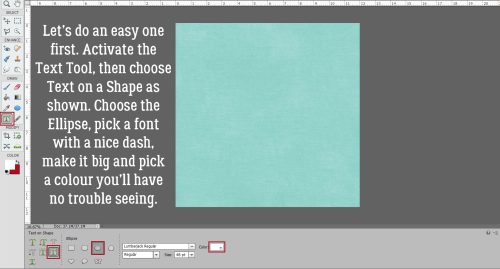
Again we’ll use the Text Tool because it has so many options. I’m using Elements 2021; if your version is much older you may not have all of these Tool Options. The option we’re starting with is Text on Shape and we’ll be using the Ellipse to create a circle. My screenshot font is Lumberjack Regular and I’ve used it for two of my samples today. If you have a font with a dash symbol that has a rounded look to it, it’ll work beautifully. Set the font size to at least 40 points.
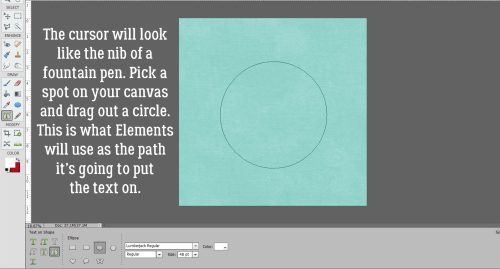
Drag out a circle on your paper. You can make it as big as you want. It can always be resized later to fit your layout. This outline will tell Elements where to put the dashes and how to position them.
Move your mouse until you see the Text Tool cursor. It’ll become visible when you intersect with the edge of the circle and it looks like a swoosh with an I-beam crossing it. Click to set it in play then using the dash and the space bar, type out a long string of stitches. They will move and bend to the shape you’ve created; the dash sits above the baseline, but that won’t really matter.

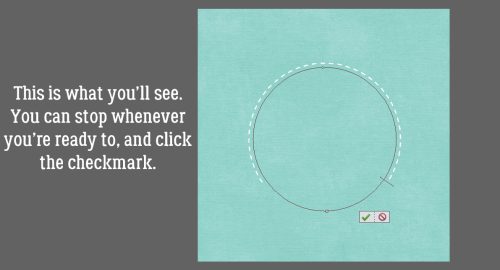
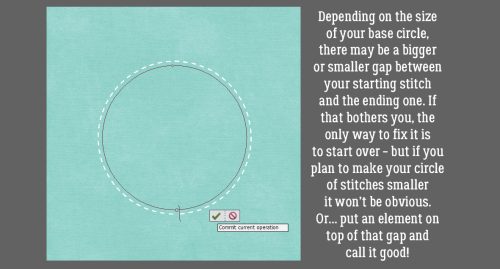
Here you can see what I mean. You can stop when you’ve only gone part way around if you like, or keep going to enclose the circle.
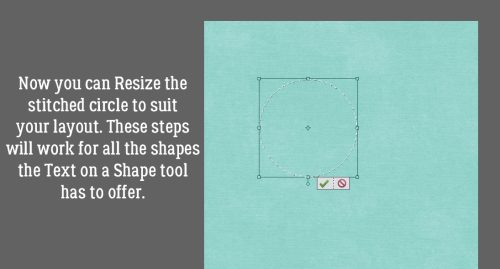
Your spaces may or may not uniformly proceed around your circle when you reach the finish line. If this is a concern for you there are a couple of options – start over, adjusting the size of the circle or the font until it’s perfect, or you can accept it and just cover it with a flower or a brad on your layout. If you resize the stitched circle to a smaller version, it’ll be less noticeable.
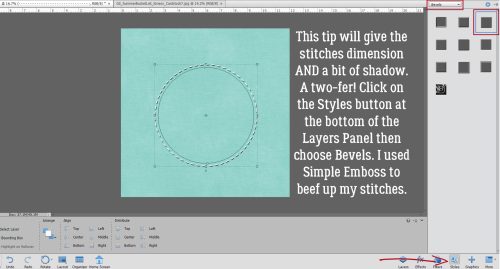
Now to give the stitches some dimension. By using a Bevel Style, you won’t have to add a shadow later! Click the Styles button at the bottom right of the Layers Panel, choose Bevels from the dropdown menu and then choose Simple Emboss.
These are the default settings for Simple Emboss. You may find them to be too strong. Styles can be adjusted by double-clicking on the fx icon on the layer.
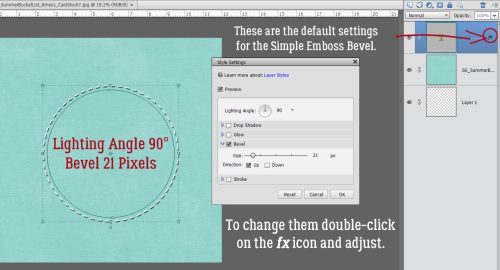
You can see how just shifting the Size slider to the left makes each stitch a bit flatter.

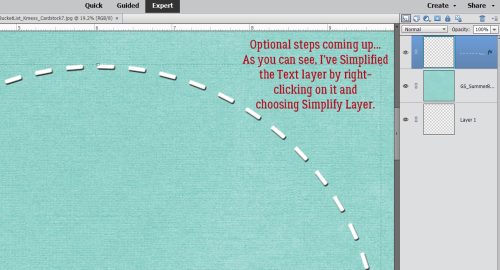
You could stop at this step and have some very nice stitches. But if you’re interested in a bit more realism, that’s pretty easy. First Simplify the text layer by right-clicking on the layer then choosing Simplify Layer.
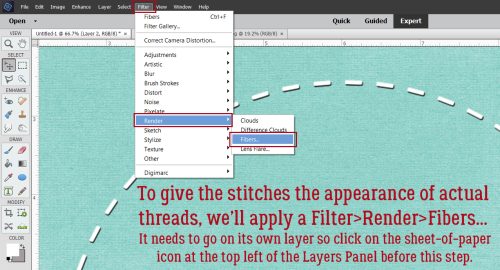
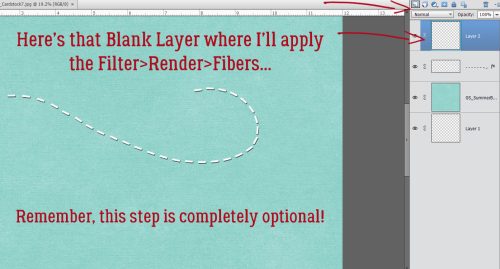
To make the stitches look a bit more like they’re made of thread and not paint, we can apply a Filter. It needs to go on its own layer though, so click on the sheet-of-paper icon at the top left of the Layers Panel. Then click Filter>Render>Fibers…
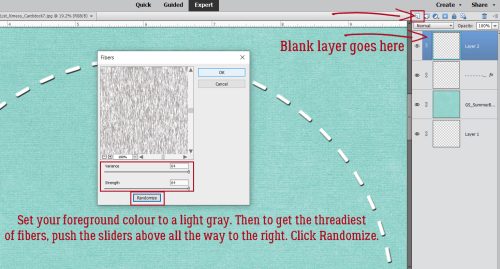
Make sure your foreground colour on the Color Picker is set to a light gray – the filter will be whatever colour you have in the foreground, and red isn’t pleasing! The Filter Options look like this. For the most thready look possible, push those sliders all the way to the right and click Randomize.
This is what is supposed to happen! Don’t worry. It’ll be fine!! Right-click on that Filter Layer and choose Create Clipping Mask from the menu.

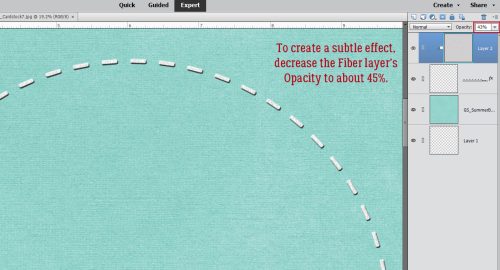
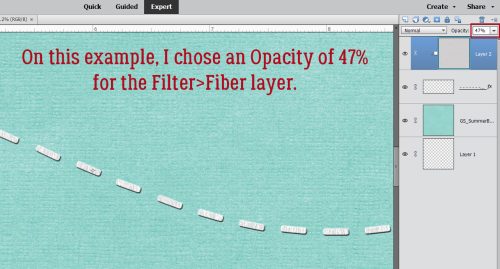
Then all that’s left is to adjust the Opacity so that you have the thread effect but not so strongly that it’s distracting.
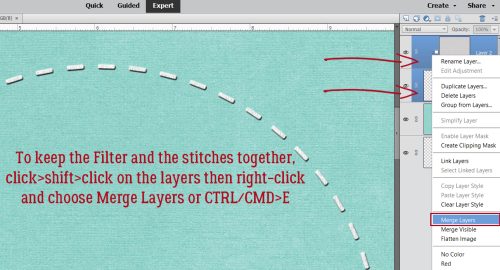
To be sure the stitches and the thready filter stay together, click>SHIFT>click on the layers then right-click and choose Merge Layers. Or use the keyboard shortcut CTRL/CMD>E.
If you look closely now that I’ve shrunk my circle, you might be able to see the slightly bigger gap between my first and last stitches. Maybe.
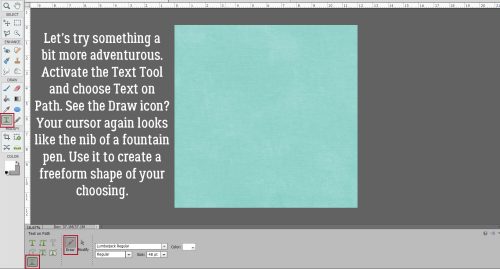
Okay, now let’s try something a bit more out there. This time, I chose Text on Path from the Text Tool Options. See the Draw icon? It turns the cursor into a pen, a fountain pen… and you’re only limited by your wrist’s flexibility and the size of your mousepad!
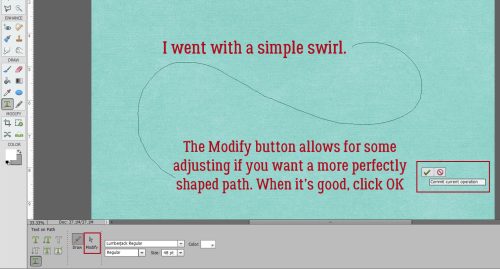
I clicked on my paper to tell the cursor to get to work, then drew a simple swirl. It looks pretty smooth, so I don’t need to Modify it. But if I did, the Modify icon will give me the necessary tools.
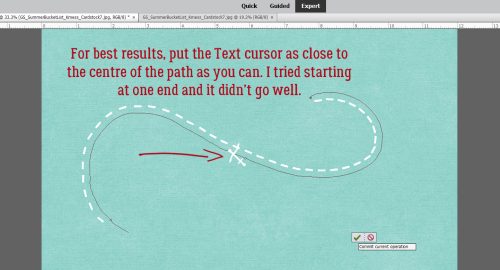
To get the stitches to conform to the swirl and extend from one end of the line to the other, I discovered I needed to click my cursor as close to the center of the line as possible.
This time I went ahead and Simplified before adding the Bevel.

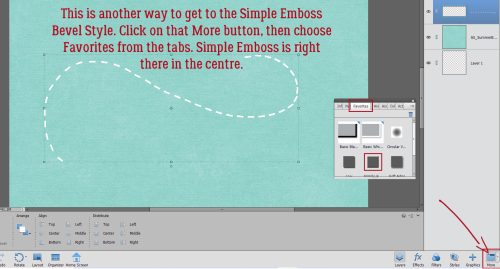
You may not have ever explored the More button down there at the bottom of the Layers Panel. I just happen to know there’s a Simple Emboss under the Favorites tab.
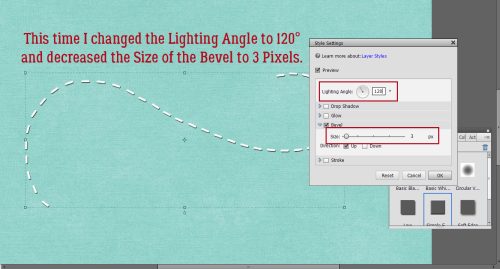
This time I changed the Lighting Angle as well as the Size. Always make sure your Lighting Angle matches your shadows; there might be a visible incongruence that will bother you otherwise.
On to the thready Filter… but only if you want to!
This time I left the Filter a little darker.
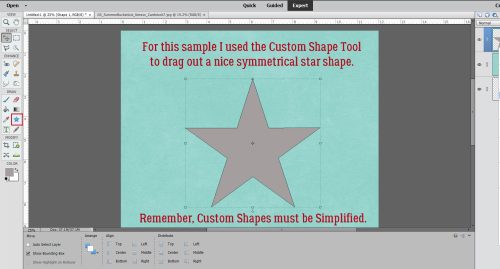
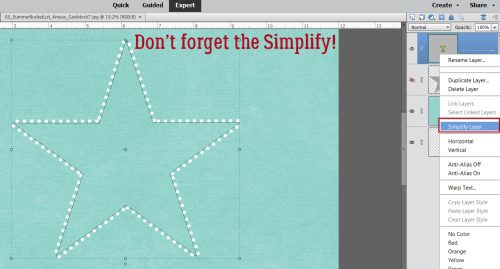
The last sample looks like it’s the most complicated, but it’s not. Let’s use the Custom Shape Tool and drag out a nice 5 pointed star. Don’t forget to Simplify, because you won’t be able to manipulate it otherwise.
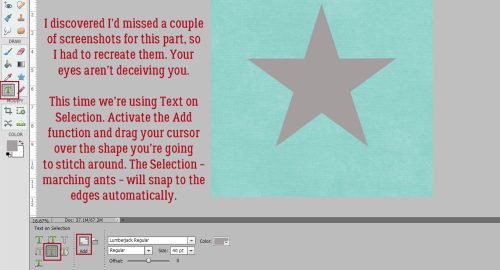
Next, I chose Text on Selection. I made sure it was set to Add – meaning wherever the cursor was dragged would be part of the Selection. It doesn’t have to be precise, just click inside the shape and drag the cursor to the edges. The marching ants will snap to the edges automatically.
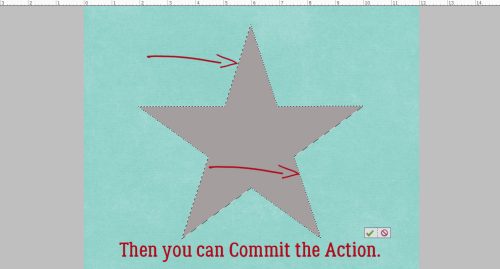
Once you’ve got the edges Selected, Commit the Action.
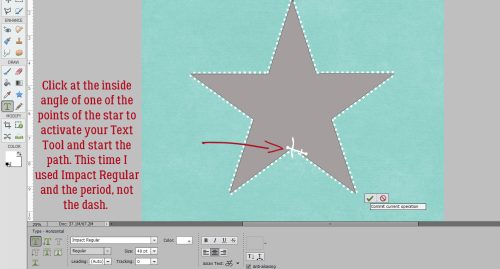
Choose a logical starting point, like the inner angle of one of the points. Click to activate the Type Tool and start typing. I switched the font to Impact Regular and used the period instead of the dash. As I typed, the stitches moved along both sides of the star until they met at the top.
Don’t forget to Simplify the text layer!
I tried all the Bevel Styles to see which one worked best with the period-style stitches. It turned out to be Simple Scallop.
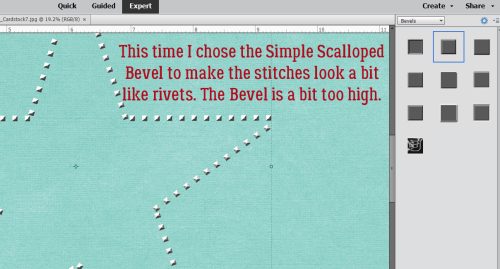
If you squint, these look almost like cross stitch!
PDF Version : https://bit.ly/3zUIB2y
I hope you’ll give one or more of these a try. If there’s something you’d like me to build a tutorial for, you can leave me a comment here on the Blog, or send me a Private Message through the Forum – user name is ObiJanKenobi. Next Tuesday I’ll be doing a Challenge Spotlight. Stay tuned!
I know you can buy these but it is great to be able to do it yourself. Thanks
Another fun tutorial! I will have to look more closely at the built-in bevels for PSE. You found some interesting looks.
Thanks for showing us how we can create our own stitches. You make it look so easy!!