Deckle the Halls
![]()
PDF Version : https://bit.ly/40dpsoB
Ellen (gmae) asked for a deckle edge tutorial almost instantly after last week’s tutorial appeared. So I obliged. I’ll show you a couple of ways to do it; the hardest part is the math!
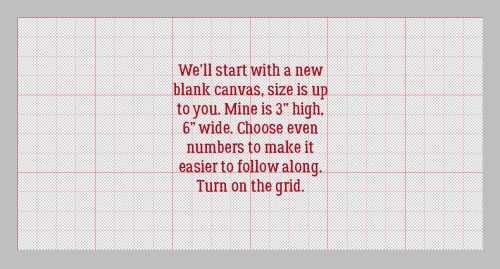
Start off with a new blank canvas. Make it a bit bigger than your desired paper strip/tag/photo mat. Then turn on the Grid. View>Grid.
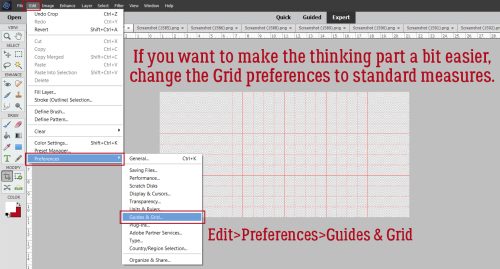
Let’s review how to set your parameters for the Grid. You can choose the colours for your Grid and Guide lines – helpful for those of us with old eyes – and the details of your Grid. Click on Edit>Preferences>Guides & Grid.
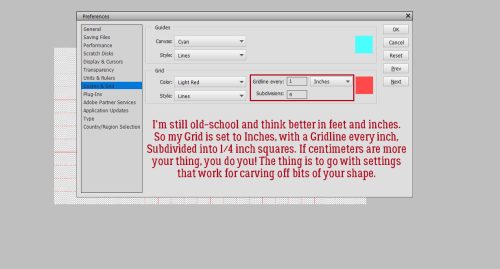
I’ve found that light red works well for my Grid lines, so that’s what I’ve chosen. I’m old enough that I learned feet and inches before Canada went to the metric system and I still think in feet and inches, so my Settings reflect that. There’s a Gridline every inch, with 4 Subdivisions of each large section, or every 1/4 inch. These Settings are completely up to you and how you think, so set them up for success. Just pick them so that they make the thinking and mathing easier.
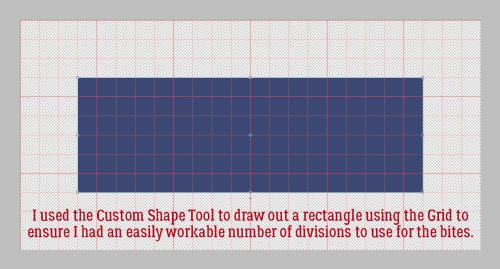
Now make a Custom Shape. Straight sides – square or rectangle – will be easier than curves for your first attempts, especially when it comes to mathing.
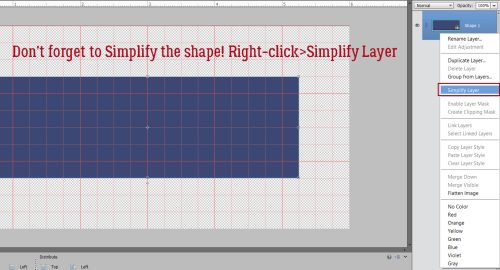
Make sure you Simplify the Shape Layer. Elements won’t let you do anything with that shape until you do. Right-click>Simplify Layer if your version doesn’t provide a Simplify button.
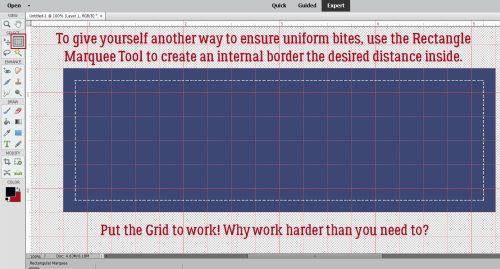
Because this technique requires uniformity in the size and placement of the bites you take out of the edges, you may benefit from a Guideline of your own. Drag out an internal border using the Rectangular Marquee Tool using the Grid to help you keep it consistent. Alternatively, you can CTRL/CMD>click inside the shape layer thumbnail then Select>Modify>Contract to the distance you want.
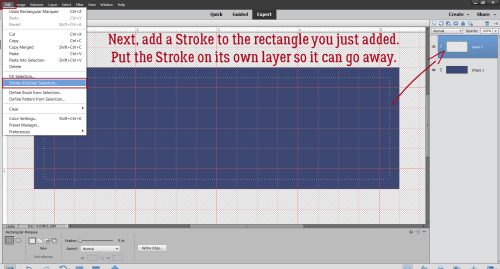
Drop a new blank layer onto your layer stack above the shape layer, then Edit>Stroke (Outline) Selection. You want it on its own layer so you can make it disappear when you’re finished with it.
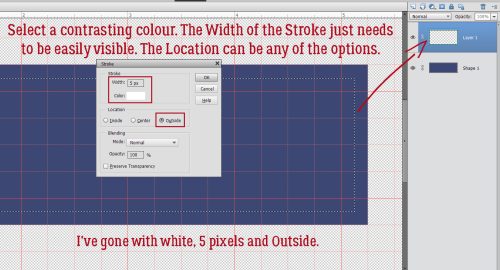
Choose a contrasting colour (so you can see it), decide on a Width (I went with 5 pixels) and a Location (I went with Outside).
After you’ve got your personal Guideline in place, turn off the marching ants by Select>Deselect Layers or CTRL/CMD>D. Elements won’t let you do anything else while the ants are marching.

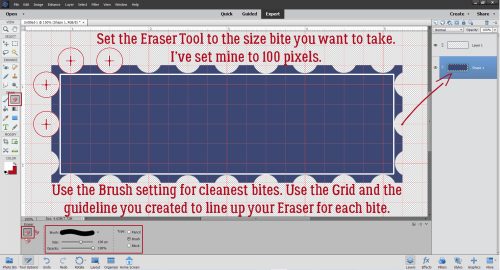
Activate the Eraser Tool. Choose a hard, round brush, and make the diameter something manageable. I’m using 100 pixels. Then, using your personal Guideline and the Subdivisions on the Grid, position the Eraser cursor so the edge of the cursor’s outline is touching the Guideline you created and the crosshairs are centered on the Grid Subdivision line. Click to take a bite, then move on to the next spot as shown.
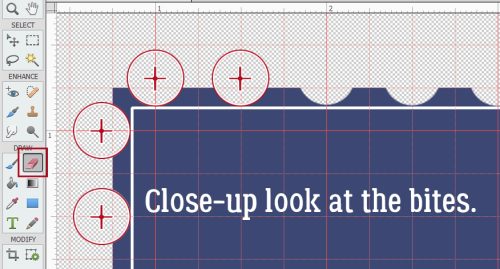
Here’s a closer look.
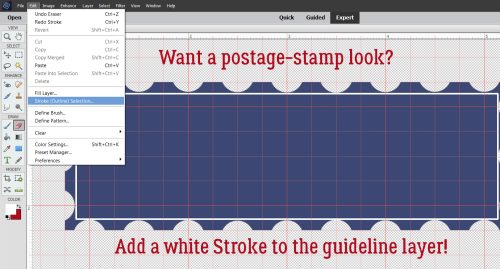
Once you’ve gone all around the edges, you’re done and your personal Guideline can be deleted or turned off. If you want to go for a postage stamp look, leave the Guideline there and that layer active. Go back to Edit>Stroke (Outline) Selection.
This time you’ll want the Stroke to hang over the edges all the way around. You might have to try a few Widths to get it right. You can’t really make it too big! I ended up at 45 pixels.
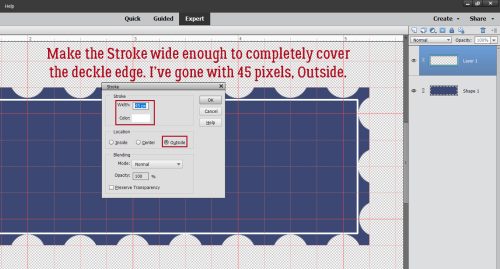
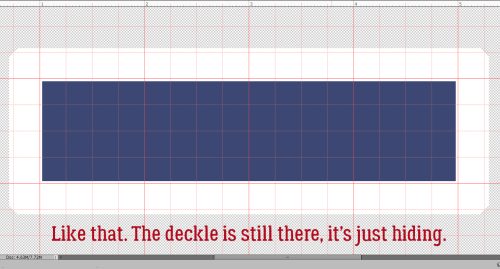
There shouldn’t be any little bits of the deckle edge visible.
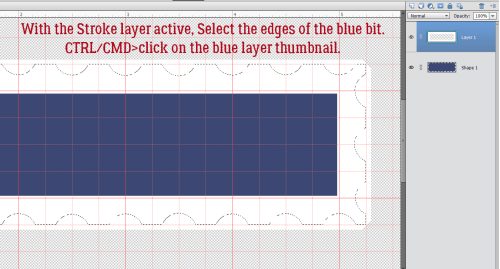
Again, with the Stroke Layer active, CTRL/CMD>click on the Shape layer thumbnail to Select the deckle edge.
To remove the parts of the Stroke hiding the bites, Select>Inverse or CTRL/CMD>SHIFT>I to move the Selected part OUTSIDE the Shape layer’s edges.

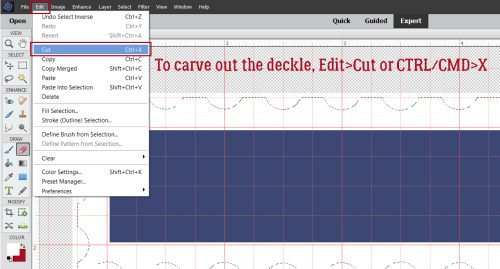
Then Edit>Cut or CTRL/CMD>X to make the Stroke layer deckled too.
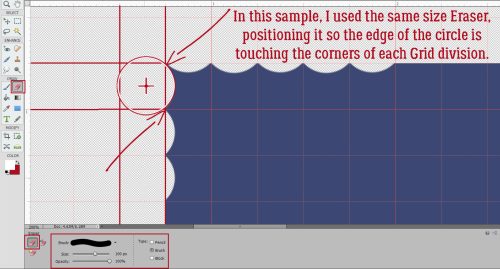
Here’s another sample for you. I used the same size Eraser, 100 pixels, but instead of using an inner border as a guide, I positioned the cursor’s outline so it intersects the corners of the Subdivision. That positions the Eraser perfectly each time and the bite is quite a lot shallower.
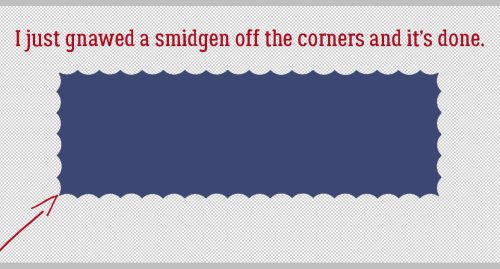
I felt the corners were a little too acute so I nobbled a tiny bit off each one and this is the end result.
There are so many ways this can be customized by varying the Shape used for your Eraser, but that’s a whole other conversation!
I hope if you’re in the part of the country getting blasted with yet another blizzard that you’re safe and warm, and don’t have to leave the house until it blows over. Oh, and Happy Pi Day!
![]()
Thanks Jan! But UGH! Math! LOL I’m going to have to try this when I get some play time! Already have a couple other ideas to try with it.