Selectively Recolouring Brushes – Revisited
![]()
PFD VERSION : https://bit.ly/3pwIn0c
Awhile back Jill asked me if I’d consider writing a tutorial for making the Challenge brushes look like the images the designer shows of the brush in full colour. I pointed her to some similar topics from before, but the request kept niggling in my brain. This month’s brush is GORGEOUS and, wouldn’t you know, Alexis had an image in full colour. May is my birthday month and lilies of the valley are one of my favourite flowers/scents, so I dived in.

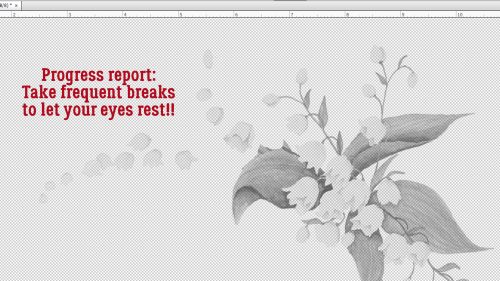
Before we get started, here are a couple of tips. If you’re planning to recolour THIS brush, you should be well-rested and have your glasses on. You WILL feel some eye-strain! And make the time to take breaks every so often to give your eyes and brain a rest!! As usual, I’ve experimented with each step to ensure the pitfalls have been already identified and covered over. I can screw up anything, so let me make all the mistakes so you don’t have to. I’ll only show you what gave me the best results.
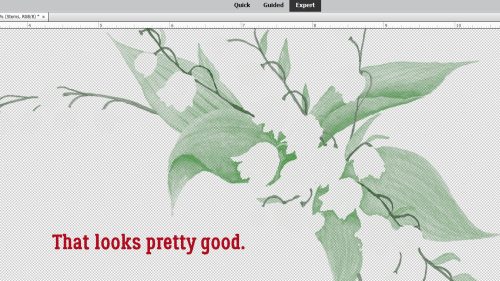
Let’s get going. This brush if quite transparent, as you’ll see in the screenshots. I’ve got it on a transparent background and the gray grid is easily visible. I approached this task the same way I do selectively recolouring word art.

First step is to make several Copies of the brush layer. Make more Copies than you think you’ll need. Because once you get going, you might need to have an unblemished Copy waiting for you. So decide how many colours you think you’ll be using, and then make one more Copy than colour. Elements offers several methods of doing things like making Copies. Layer>Duplicate Layer is one way. Right-click on the layer and choose Duplicate Layer is another. If you use these methods there’s another step before you’ve got those new layers. (See next screenshot.) The easiest way to make Copy layers is to use the keyboard shortcut CTRL/CMD>J.
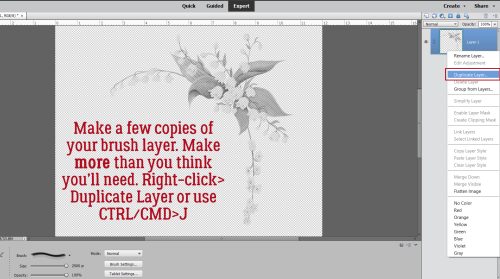
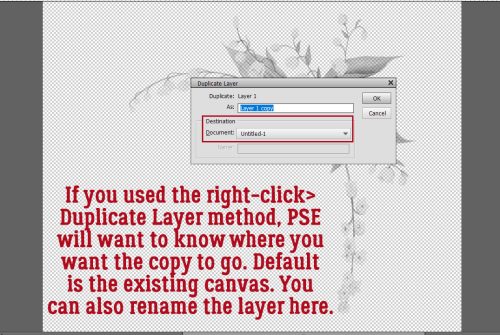
When you use the first two methods above, Elements will ask you where to send the Copy. This is handy if you want to Copy a layer from one project to another or to start a new project based on that Copy layer. In this interface, the default setting is to Copy it into the existing project; you can also rename the Copy layer to help you keep all your stuff straight.
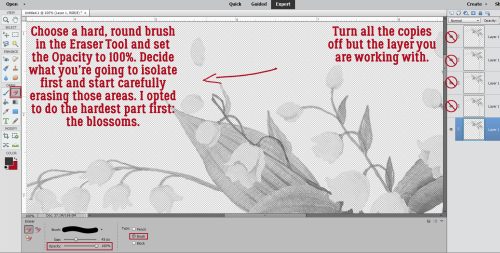
Close your eyes on all but the bottom-most layer so you can see what’s happening. Activate your Eraser Tool. Choose a smallish, hard, round brush for your Eraser and set the Opacity to 100%. Decide which parts of the brush you want to isolate first. I usually go with the one that will be the most work first, in this case, the blossoms. Then start very carefully Erasing everything BUT the blossoms.
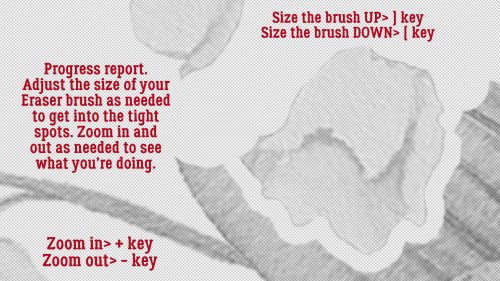
I really hope you get comfortable with using keyboard shortcuts. It may seem like an impossible dream that you could memorize them, but the more you use them the easier it gets. They’re amazing time-savers so they’re worth trying. To increase the size of your brush, click CTRL/CMD>] as many times as needed to bring it to the size that will work best. To shrink it, use CTRL/CMD>[. Zoom in (CTRL/CMD>+) and out (CTRL/CMD>_) as needed to see what you’re actually doing.
Remember, take frequent breaks so your eyes don’t fall out.
If you find yourself looking at a Zoomed IN image and can’t figure out what to keep and what to remove, turn one of the other Copy layers’ visibility on momentarily. See how it darkens the image so you can see that little stem so much better? Once you’ve identified the next area, turn the Copy layer back off. If you leave it on, you won’t see where you’re Erasing.

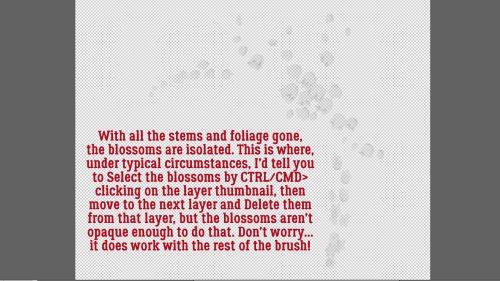
There… only the blossoms are visible on this bottom layer. If this was word art, or if the brush was more opaque, it would be easy to Erase the blossoms from the next layer. But I tried it and it didn’t work. Rest your eyes. Get a glass of water, Stretch your legs…
Let’s work on the stems. The more remote blossoms were easy to remove from the second layer. It’ll be a bit more challenging where there are leaves and blossoms touching, but not impossible.
Now I have just the stems. They’re much more meaty so they’ll come out of the leaves much easier.

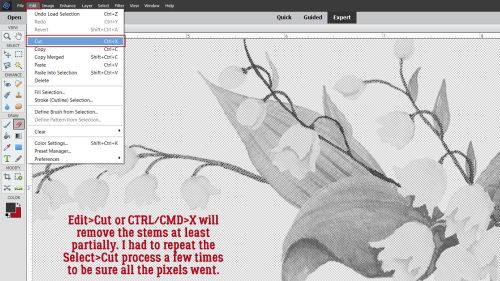
Move up to layer #3. CTRL/CMD>click INSIDE the STEMS layer thumbnail to Select the edges of the stems. Don’t click outside the box though, or you’ll activate the stems layer and have to Undo. It’s hard to see the marching ants in the screenshot but they are there.
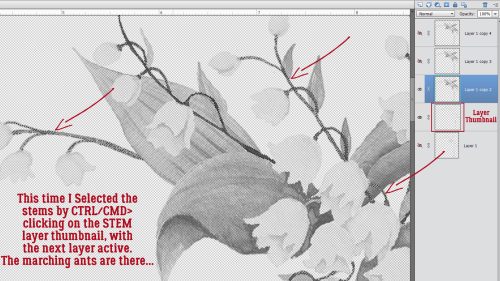
For this step you can Edit>Cut or CTRL/CMD>X to remove the stems from layer #3. I found that, due to the transparency of the brush, just Cutting once left a ghost image, so I repeated the Select>CTRL/CMD>X process several times, until every pixel was removed.
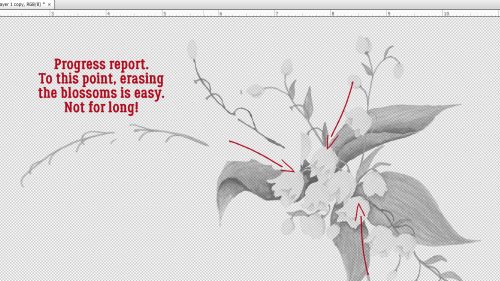
After the stems were removed, I tried again to Select the blossoms and although I couldn’t see the marching ants at all (I wasn’t seeing much of anything by then…), when I hit Select>CTRL/CMD>X a couple or four times, the blossoms vanished!

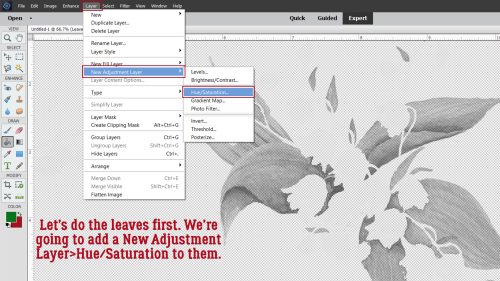
This is where I really took one for the team. Figuring out the best methods for colouring each layer was a major experiment. For the leaves, that turned out to be applying Layer>New Adjustment Layer>Hue/Saturation. I’d never used this option before but I think it’ll be a great tool.
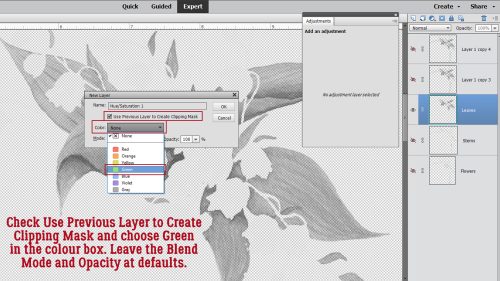
Check the Use Previous Layer to Create Clipping Mask box. Choose green from the dropdown menu. Don’t worry if it’s not the green you want. That’s changed in the next step. Leave the Blend Mode set to the default Normal and Opacity at 100%.
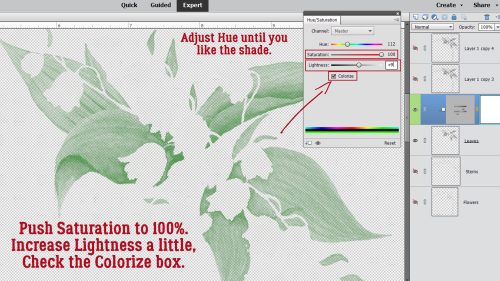
At first you won’t see ANY green. Check the Colorize box! Push the Saturation slider all the way to the right. Then use the Hue slider to get the right green. If you think it’s still not quite right, adjust the Lightness slider. You’ll see all of the changes in real time. Look at how all the shading and details are preserved.
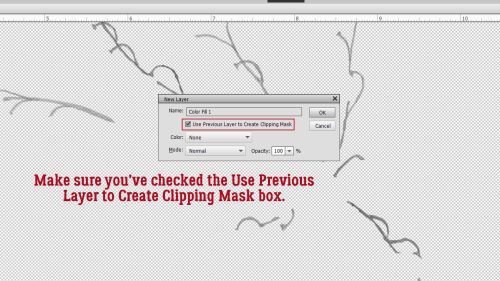
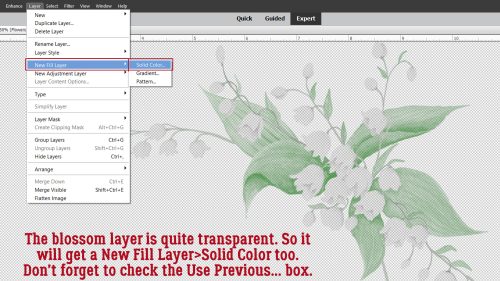
The stem layer didn’t cooperate with an Adjustment Layer so it got the Layer>New Fill Layer>Solid Color treatment. The keyboard shortcut for Undo is CTRL/CMD>Z. You can go back several moves if needed, but if you find you’ve gone one step too far, Redo is CTRL/CMD>Y.

Always check the Use Previous Layer to Create Clipping Mask, otherwise you’ll just have a solid coloured square.
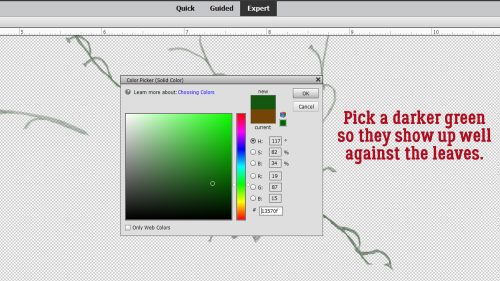
I picked a much darker green for the stems so they’d show up better. Notice they’re still quite transparent.
So I Merged the Color Fill and stem layers together. Select both layers then right-click and choose Merge Layers. Or… CTRL/CMD>E.
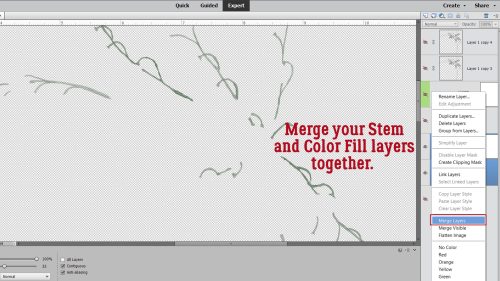
My reason for Merging was so I could Copy the stem layer to make them more visible.
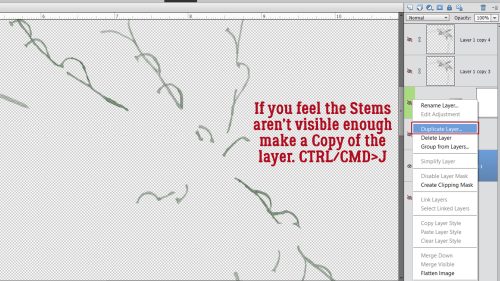
With the Copy layer in place, the stems are much more sturdy.
And it’s coming along nicely! On to the blossoms.
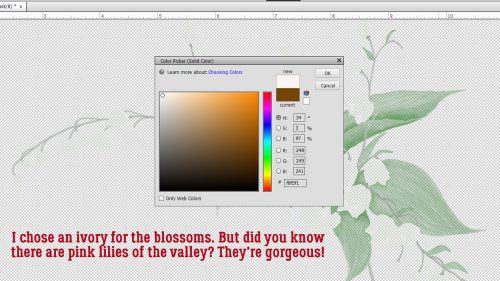
If I didn’t add at least a hint of colour to the blossoms, whatever will be behind the brush will show through them and that might not be a good thing. So I added a Layer>New Fill Layer>Solid Color.
I chose an ivory shade here. When you see my finished layout, you’ll also notice I made a bunch more changes to the blossoms, but let’s stick to the basics.
As expected, against the transparent background the blossoms are difficult to see. Will changing the Blend Mode for that layer to Multiply help? I still want the shading and detail preserved.

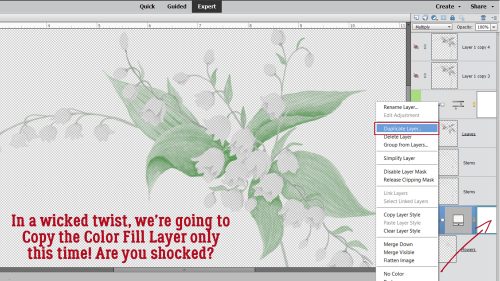
Let’s try something completely different… let’s make a Copy of JUST the Color Fill layer!
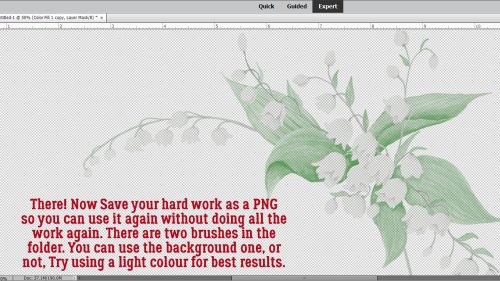
And the finished product is not terrible. I don’t know about you, but I think I’m going to Save this as a PNG so I don’t have to do the work all over again!
I turned my finished project into a sticker and went with a really minimalist look for my layout. I’ll get it into the Gallery later.
Next week’s tutorial will be much less involved, I promise!
![]()
wow – you’ve really done a great job showing more of how we can customize a brush – and that is a beautiful brush!
Jan, like Jill, I too have often wondered how Alexis does that. Ugh though, how does she have so much patience? Maybe she colors the parts as she creates it and only provides the flattened layers to us. I can not imagine doing so much work every month.
I’ve finished the flower and stem layers so far. Well see how it all looks when I’m finished.
Thanks for breaking it down.
Glee, I’m sure she paints them with watercolours then converts them to brushes. Much less time-consuming!
Thank you for this tut. I have been trying to figure this out and trying to find directions for how to do it! I will read through when I can follow along step by step.