Quick Trick: Styling Strokes
![]()
What a way to close out the year! Today is my husband’s and my 47th anniversary – yes, we got married on New Year’s Eve… so he wouldn’t be able to forget the date. 😉 And it’s Tuesday, so tutorial time. Today’s Quick Trick tut evolved out of a private message I received from Jennifer: “I use Photoshop Elements. I know how to add a stroke to a photo or title with a solid color from the color picker. Is there a way to use a style (like a glitter style) for the stroke outline? I can’t figure it out.” Well, of course there’s a way, it’s very quick and easy, and I think I know why she’s struggling. Let’s play!
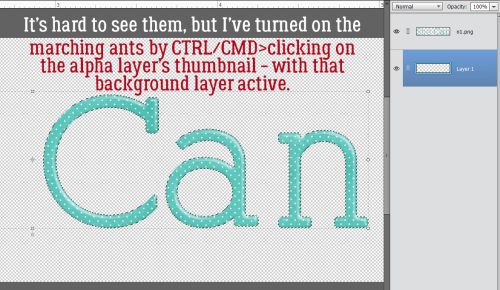
I just whipped up a simple title using one of the alphas in Just So Scrappy‘s collection She Can. I Merged the letters in the title, and they’re on the top layer in the Layers Panel. The background layer is my working layer now.

The next step is to Select the edges of the title by CTRL/CMD>clicking on the Layer Thumbnail for the title layer. (Make sure you still have the background layer active!!)

To create the Stroke, click Edit>Stroke (Outline) Selection…

The colour of Stroke here doesn’t matter because the Style will change it. I went with white, a width of 20 pixels and set the location to Outside.

The Stroke will pop up on the background layer, all by itself. So when I do something to it, nothing else is touched. I think this is where Jennifer was having trouble. If the Stroke is on the same layer as the title, the Style‘s going to hit EVERYTHING.

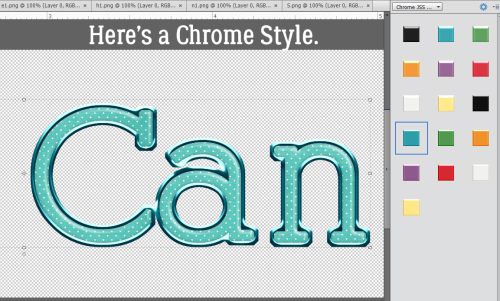
The following screenshots will show you some options. All the Styles I’ve used in these samples are available at GingerScraps. They’re either Just So Scrappy or Karen Schulz products. Here I’ve used a chrome Style from JSS. It’s shiny and rounded.

Remember when using glitter Styles that scale really matters here. If you use a really chunky glitter Style on a smaller object, like this title, it’s not really going to look like glitter. I’ve used the finest glitter in this JSS batch.

The best way to choose a Style from these batches is to try them on! When you find the look you like, you’ll know. This silver Style from KS has the look of wire.

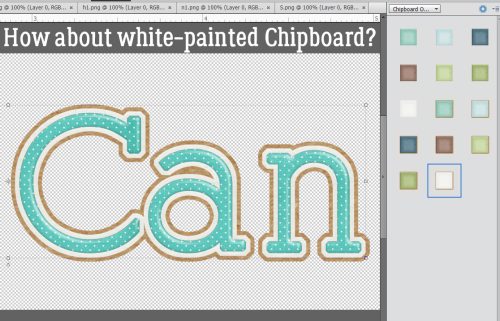
JSS‘s Styles bundles usually include chipboard! There’s a coloured version and a painted, kraft-edged version.

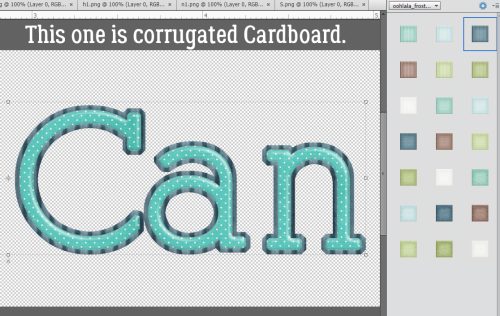
This corrugated cardboard Style is from the same JSS Styles bundle. It gives an interesting look to the Stroke.

Now, here’s a little bonus for you. Let’s see what a TEXTURE does! Make sure you’re still on the background Stroke layer… Click Filter>Texture>Texturizer.

Don’t be intimidated by this Tool interface. Anything you do is Undoable! One thing I don’t love about this Tool is that the Preview is really hard to see (even with perfect vision, and Lord knows I don’t have that!) so I often have to CTRL/CMD>Z my way out of something ugly. Anyway, here’s where you choose what Texture you want, and how visible it is. There are four options: Brick, Burlap, Canvas and Sandstone. I went with Canvas. Scaling determines the size of the texture’s visible effect – for Canvas, think the width of each thread. Relief determines how high off the paper the Texture appears to rise. It’s almost like a Bevel effect. Play with your sliders. Don’t be afraid to experiment. Nothing is final until you’re satisfied! And Light source MUST match the light source for the rest of your layout, otherwise it’s going to look wonky.

I Zoomed in a lot so you could see the effect. Barely-there, but pretty. To my eyes, this looks a lot like satin stitch embroidery on canvas. Maybe it’s just me…

For 2025, there will be some new and exciting changes here at GingerScraps, and here on the Blog. We have some new Designers coming aboard, and each month, we’ll be offering TWO Designer Spotlights! (Designers are not expected to chat with me so I can Blog about them. 100% voluntary.) What does that mean for you? Double the Daily Downloads, for one! Plus some great coupon codes, maybe more Challenges… I guess we’ll see. Tutorial Tuesday will be changing somewhat too. There will be a Greatest Hits tutorial, a new content tutorial (as long as I can come up with something 😉 so keep the suggestions coming!) and a Challenge Spotlight each month. I’m slowly moving files onto my new laptop, and hope to have it finally set up soon. Then I’m going to strip this one down and only use it for Cricut Design Space… where the naked keys don’t matter so much. 🙂
Happy New Year to all of you!
![]()
OH MY GOODNESS I never thought to approach it this way! You are amazing!
Thank you so much for these tutorials! I really enjoy and appreciate them!
Happy Anniversary!! What a fabulous tutorial! For me, the top tip is this: “The next step is to Select the edges of the title by CTRL/CMD>clicking on the Layer Thumbnail for the title layer. (Make sure you still have the background layer active!!)” I have come up with work-arounds that aren’t always what I wanted, but this should solve it. Thank you so much! Happy New Year!
Happy Anniversary & a very Happy New Year!!
Thanks for all the tutorials you’ve shared with us PSE users! This last one of the year is terrific — I never thought about working on the background layer! This is such a cool effect! Thanks again for sharing with us, Jan!!
Thank You!!!!! and Happy Anniversary!