LET’S CELEBRATE | Earth Day

GS_blog_LetsCelebrate_Header

Did you know the 22nd is Earth Day? What is Earth Day you ask?  It is a day in which events worldwide are held to demonstrate support for environmental protection. It was first celebrated in 1970, and is now coordinated globally by the Earth Day Network, and celebrated in more than 192 countries each year. Numerous communities celebrate Earth Week, an entire week of activities focused on environmental issues. (via wikipedia)

There is a digital scrapbooking kit for just about every holiday imaginable. I took the search work out of it for you! Here are some great Earth Day inpsired digital scrapbooking kits I found in our store.

REDUCE, REUSE, RECYCLE: Complete Kit by Inspired Designs


Here Today Back Tomorrow by Clever Monkey Graphics


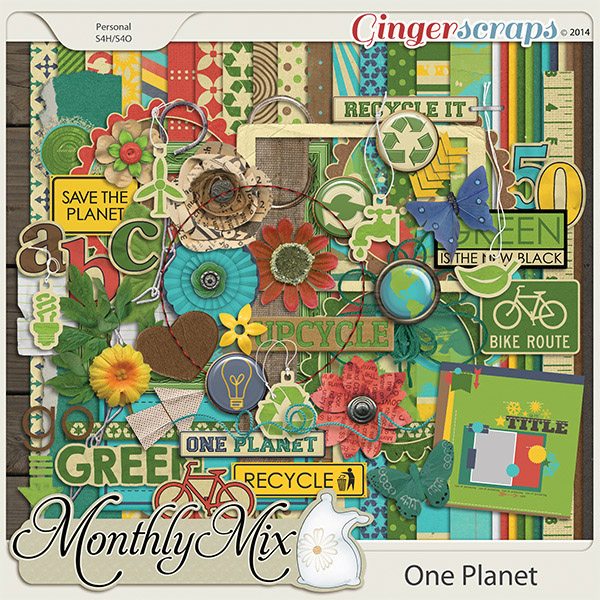
Monthly Mix: One Planet


Going Green by Wimpychompers

So, get to recycling, love some nature, and save some paper! You know, I think digital scrapbooking is a great way to get that started! Make sure to upload your layouts to our gallery. Come back here and link us up to your Earth Day layouts! We would love to see what you created!
GS_footer_LaShawn

“Clock” Plate on Let’s Get Crafty.

First off, before I start my Crafty Thursday post I want to say Happy Birthday to my best friend, my sister Ginger! She is the strongest, prettiest, smartest, best-est sister ever! Oh and make sure you scroll down to the post below to see a little Birthday Secret!

As I was browsing around some of my favorite crafty blogs the other day I came across this oh so pretty plate. I was like, Oh so cute. I could Hybridize that idea! So today for Let’s Get Crafty we are making a “Clock Plate”. It’s not a “Real” clock :). But, it is so pretty hanging on my wall. The original idea came from this lovely Blog HERE, Vintage Sky.

For my version the first step..well the second, the first was to go to the Thrift Store and find the perfect plate. Measure the plate and design a clock in Photoshop, or do what I did and find one in your digi stash! There are tons of kits that have clocks in them! The clock I used was a freebie I downloaded forever ago, by Digital Anemona. Re size to the size you need for your plate and print!

(Don’t mind those little squares at the bottom, those are for some scrabble tile necklaces I’m making)

Then cut it out and use some ModPodge to attach to your plate. Cover it with another layer of ModPodge to seal it.

It will dry clear.

When it’s dray make a little “hanger” on the back like this. I used my glue gun, but it came off a few days later..lol..so then I used super glue. That is holding so far!

Add a long piece of ribbon of lace to “hang” the plate. It’s really being held by the little tab we made. But it looks like it’s hung with the long pretty ribbon. Just tie the long piece to the short piece.

Ta DA! Here is the finished product.

Close up…

That’s it! Easy and cute!

Have a Crafty Thursday!

Let’s Get Crafty: Cutest Pedestal Goodie Stand

Have you missed me? It’s time to get crafty! Yea! I have missed doing these posts…it gives me an excuse to get crafty. Today is a fun one, and totally cheap..oh does that sound bad…how about inexpensive. That’s better. This whole project was my Mom’s idea, she is THE QUEEN of crafting. She does it all! She is amazing. I could do years worth of Crafty Thursdays with all the stuff she makes. This is where my sister Ginger and I get our artsy genes from. My Mom LOVES to make beautiful items that look like they came from one of those cute little boutiques, out of stuff she has around the house or finds at yard sales and thrift stores. She was the Queen of Up-Cycling before it became cool 🙂

So, this is what we are playing with today. Plates and candle holders. We probably all have one of those plates laying around that looks so cute but you never use it. And a mismatched candle holder. You just don’t want to throw away. Heck if you don’t just go to any Thrift Store. There are tons of super cute plates and candle holders you can pick up for next to nothing! My Mom took a bunch of her plates and candle holders she had gathered over the years and made them into the Cutest Pedestal goodie stand. Perfect to serve you yummy cookies, muffins, fruit, gosh everything looks great on these Pedestals!  Let me share with you some of the one’s my lovely Mother has created. Then I will show you step by step how we made mine 🙂

Here are my Mom’s creations…

Now aren’t those adorable! I just had to make one and I had the perfect plate. When my husband was in the Army we were stationed at Fort Bragg, in Fayetteville NC, lot’s of great memories there. One day I was looking around in my local Thrift Store..by the way, I’m in CA now. No where near Fayetteville, NC.  I found this plate that said Fayetteville NC on it! Can you believe that. All those years I lived there and I find the Fayetteville plate in CA. LOL. Of course I had to have it, and the price of .75 cents was just right! Now I have had this plate sitting in my cupboard for a while and when I saw my Mom’s Pedestals, I knew I wanted to do that with my special plate. Oh course my Mom had the perfect cream colored candle holder for me to use 🙂 Thanks Mom. Of course she got the candle holder at the Thrift Store too. So let’s get started.

First step (after you choose the perfect candle holder and plate that is) is to clean any dust off of your candle holder and plate. Then take some sandpaper or a sanding block and sand the bottom of the plate and the top of the candle holder. I used a sanding block.

Next, take some nail polish remover and clean it again real good removing any dust from the sanding.

Next you will want to lay your plate down with the front of the plate towards the table then lay your candle right in the middle of your plate. Get it nice and centered. Take a sharpie and draw a circle all the way around the candle holder.

It will look like this.

Take your glue, I used gorilla glue, it is super strong super glue. Don’t use the cheapo super glue. Get the good stuff. You an also use epoxy, but I didn’t want to deal with the mixing and mess, so I just used Gorilla Super Glue.

Put your glue on your plate right on the inside of the circle that you just drew. Like this. Be quick, it dries fast. And don’t use too much. Just enough.

Now, stick your candle holder right on top of the glue. Press it down and hold for like 20 seconds. You can wipe off the ink now too if you want.

Now to seal it even more for a nice smooth tight hold. We took some Aleene’s Jewel it glue and went all around the edges where the plate and candle holder meet. You could also use clear caulk. It works too. Just make a nice smooth bead all around the edge and smooth it with your finger.

Place a nice big book on the top for a while while the glue dries.

Now you have a beautiful Pedestal Plate Stand to place your yummy goodies on top of. Here is mine.

From the top. (Yes, I know my plate has a little chip, but it’s ok, it’s a special plate)

My kids ate all the cookies, but it looks great with fruit on it too 🙂

Now doesn’t that look easy and fun! Go out and make your own! Please share with us if you do! Have a happy Thursday and go get Crafty!

Let’s Get Crafty: Acorn Nativity

It’s time to get crafty! Who’s ready? OK…I’m not…hahaha. I haven’t had any time to craft in forever. But, I do have a really cute project to show you. It is my very favorite Christmas decoration. My daughter made this for me when she was about 11. She is 17 now. I pack it very carefully every year.

This is a project that you don’t really need any money for. When Kayla made this she just went searching around the yard at her Grandmas house. She found a few things in the craftroom and a little hot glue. She made this all on her own one afternoon. Came up with the idea in her own cute little brain. 🙂 I love it.

I know a lot of your kids would have fun making something like this. I know all my kids love Nature Crafts. You can find inspiration anywhere. Right in your own back yard!

Here is her “Acorn Nativity Scene”

And here are some close ups. Pretty darn cute isn’t it.

Now go out on a Nature Hike and make one for yourself!

Let’s Get Crafty: Old Jeans

OK..Wow, it’s Thursday! What a week! I am not prepared for this at all! LOL! I thought it was Wednesday! Ha Ha! Well, I don’t have a tutorial for you today. But, I’m sitting here thinking, what the heck can I post about. Hmmm…looking at both of my sons sleeping on the couches. I have some pretty cool couches…there is not one person in the world who has my couches.

Well, yes of course, they are “home made” It all started years ago, my Dad, he is funny about jeans. If he get a tiny speck on his jeans he won’t wear them anymore. But, my Mom, being the crafty queen of the family, thinks, I can’t just throw these away, someday we will do something great with all these jeans.

Then there is me, I love denim, my living room is blue and yellow. A few years ago I bought some denim couches. They were pretty cute when I first bought them, but after a while I realize, this is not very good fabric they used on these couches. It’s like the cheapest, thinnest denim. If you spill, it stains…not good for a house full of kids. Bummer…I was about to have my 4th baby. Company coming to stay, and these couches look like crap.

Mom..help me! My Mom, she is amazing. She can make something beautiful out of nothing. So, we start thinking, I really love the idea of my denim couches, but these need help. “Hey, Julie dear daughter, I have a huge box a your Dad’s jeans I have been saving for years, lets remake your couch with them!” So, we cut and pinned and stapled and sewed. Well, Mom did most of the work and I sat there huge as a house 9 months pregnent braiding the trim for the arms. 🙂

I love my Jean couches, there are even pockets on them. My little boys love to put their cars in the pockets. The cover zips off so I can throw them in the wash. They are indestructible…and that is saying a lot in my house!

So, I will stop babbling and show you….

Pretty funky aren’t they! I love them! We have a new coffee table and new desk, repainted the living room since we made these couches. But the couches live on! It’s like your favorite pair of comfy jeans…only bigger.

So, I hope this inspires you to reuse something you thought you might throw or give away in to something fabulous!

Of course, you can always start of with something simple like a purse.

Yes, even after making a whole couch, we still had enought jeans left over to make a few tote bags.