Scrapping with Heritage Photos
![]()
Whew… I’ve had a frustrating few days. Before I went to bed on Hallowe’en (which should have tipped me off…) I downloaded and installed the Windows 10 Fall Creators update. It’s not like Microsoft really gives us a choice any more – it’s not IF you want to update, it’s WHEN. So I caved. And almost caved in. It changed a bunch of my settings without telling me, the one I was most upset with being my ability to take screenshots of my work for these tuts, and to know where they’re saved. Had to get Microsoft to take over my laptop remotely to get it sorted out. And if that wasn’t enough frustration, it also messed with Photoshop Elements 15, causing it to slow to barely a crawl. I went so far as to remove it from my laptop then reinstall it, hoping that would solve my issue. It didn’t. But strangely enough, at about the (creative) midway point of the layout you’ll see below PSE suddenly started working normally. I’m not sure it’s completely resolved, but I was darned glad when it snapped to! Now, all of that preamble is my apology for the skimpy nature of this week’s tutorial.
You may have noticed that I like to use heritage photos for many of my layouts. As the family historian and keeper of the family tree, I’ve amassed quite a collection of photos of long-dead relatives. And given that we Canadians will pause for several moments of reflection at 11:11 am on Saturday, November 11th to remember those whose sacrifices have allowed us the lives we live, I wanted to do a new layout for Remembrance Day. So that’s what you’re stuck with, me droning on about how to incorporate heritage photos into your layouts.
Let’s start with some tips on scanning that will cut down on your workload. When you’re going to scan old photos, especially the fragile ones that are decades old, make sure your scanner is set to a resolution of at least 300 dots per inch (dpi). If you have a choice to go higher and it’s an extra-special photo, go higher. Make sure the glass on your scanner bed is pristine; I use a Swiffer dry dusting cloth to wipe over the surface before and between scans. I also go over the face of my photos just before I put them face-down on the scanner bed. That will really cut down on the dust. Save your scans into a folder you can find again later.
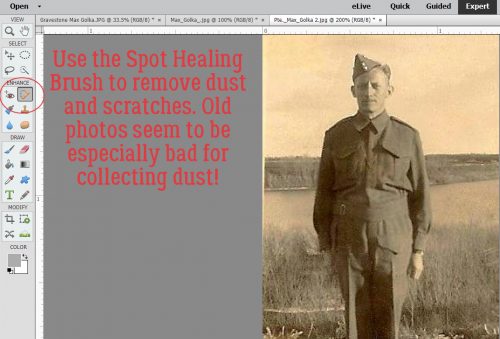
And next, some simple, light edits. We’ve covered these before, so I’ve just put instructions on each photo.
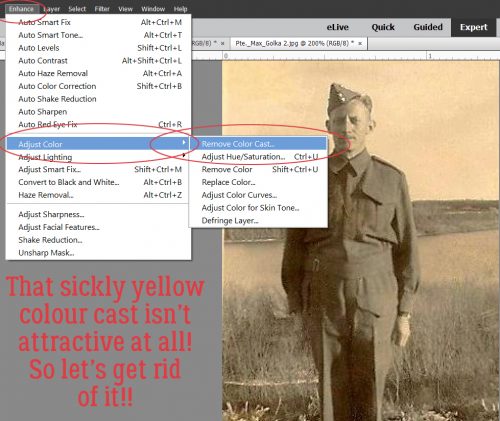
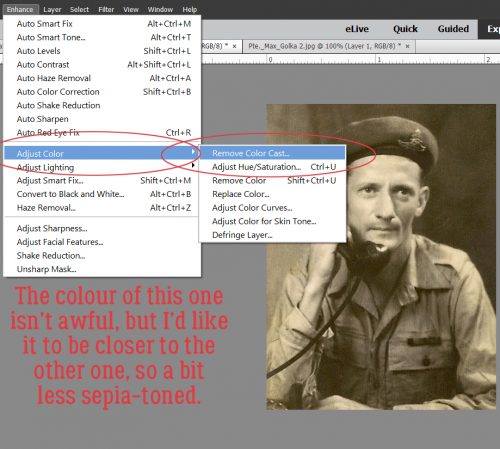
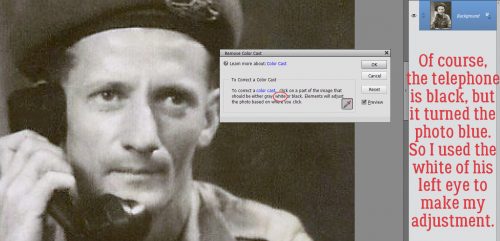
I’ve never really touched on removing colour cast, but I know we all have those photos that are too warm or too cool and they just don’t look right. A lot of old photos are yellowed like this one; it’s especially true about photos scanned from newspaper or magazine articles. So let’s talk about removing colour cast.
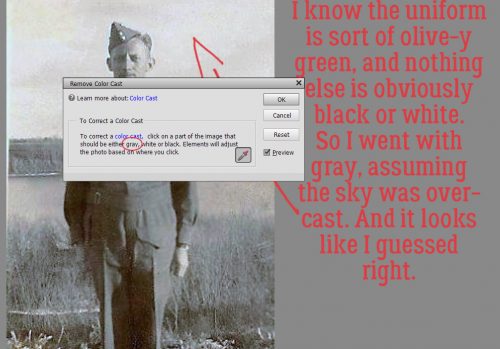
The tool asks you to click on something in the photo that is white, black or gray. It’s not always easy to know what’s what in old photos, so you may have to try a few things. I tried the shadows on his pants (black) and it was WRONG! CTRL/CMD>Z to the rescue!! Nothing is obviously white, so I decided the sky was probably overcast and gray. Yep!!
At this point you should look at your photo’s overall appearance and decide if you need to adjust the brightness or contrast. Those controls can be found in Enhance>Adjust Lighting>Shadows/Contrast and Enhance>Adjust Lighting>Brightness/Contrast. If the image looks well-balanced then move on.
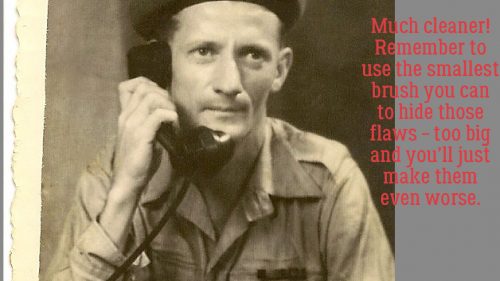
The first photo did need some Spot Healing but it wasn’t as obvious as this one is. In addition to the dust you can see, there are some fairly obvious scratches.

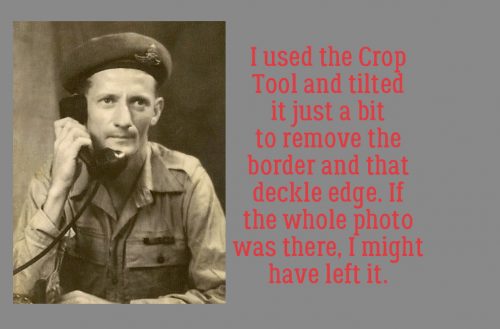
Don’t be reluctant to crop those photos. You’re going to save the changes as a copy, right? So that original will look exactly the same. This photo was scanned on an angle, so I used the Crop Tool to remove the deckle edge and to adjust Uncle Maxie’s posture a little. A soldier would never lean in an official photo.
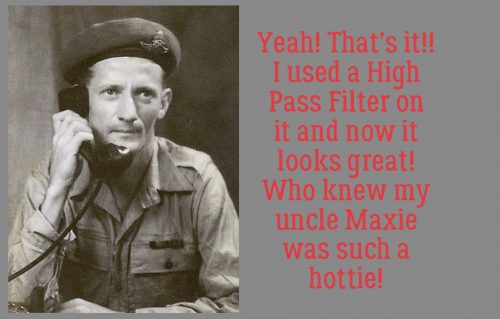
Although the colour in this photo isn’t as ghastly as the other one, I want them to look like they were taken by the same camera so I opted to remove the colour cast here too. The only snag I ran into was that clicking on the phone receiver, which I KNOW to be black, turned everything really blue! The one thing in the photo I knew for a fact was white was the sclera of his eye. So I clicked on it in his left eye and it did what I wanted.
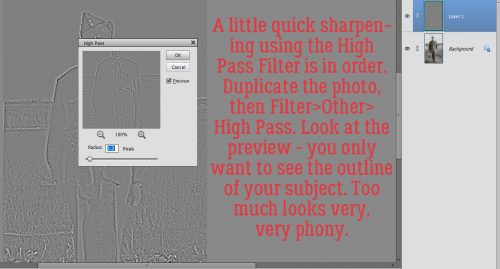
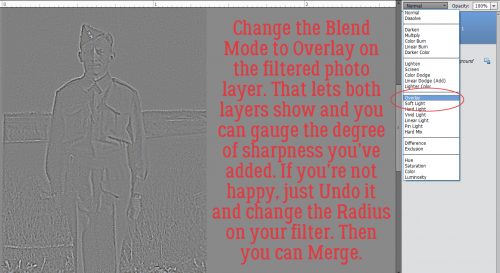
Then I threw a little High Pass filter over it and voilà!
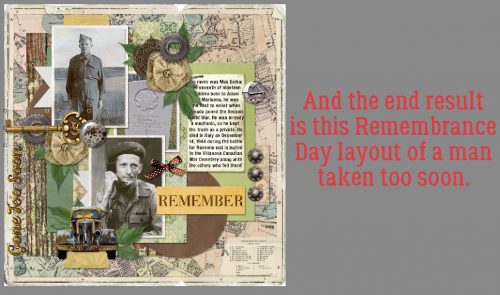
To create my memorial layout, I used a template from Tinci Designs‘ Jump into Fall collection and a Heartstrings Scrap Art collection called Time Traveller. I know my grandmother, who was Maxie’s older sister, would approve.
Some kits perfect for your heritage layouts:
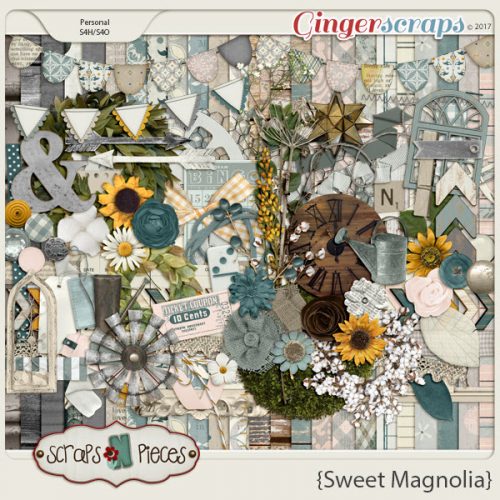


There are so many more!!
![]()