First Past the Post(mark)
![]()
I unpacked the January Challenge Reward collab Snail Mail earlier today and was thrilled to see some postmarks included in the elements. They’re from this month’s featured designer, Neverland Scraps. A few years ago I made my own postmark that had my hometown and birth date on it for a layout I was doing. Postmarks can be nice additions to a variety of different layouts, but what if the ones in this kit don’t exactly work for you? Let me show you how to make your own.

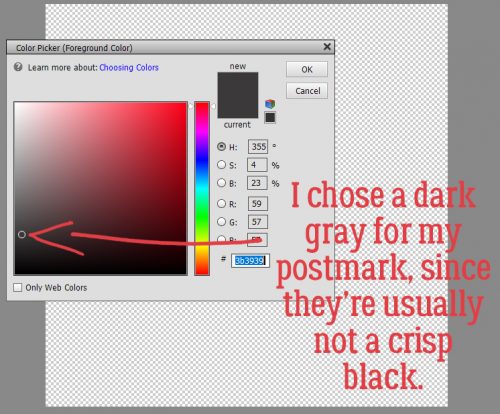
I started by choosing a dark gray colour to work with. The ink used for postmarks in the old days when letters were hand-canceled (I worked for the post office back then) was more of a blue-black than a true black, and it often looked more gray than anything else, as the ink pad aged.
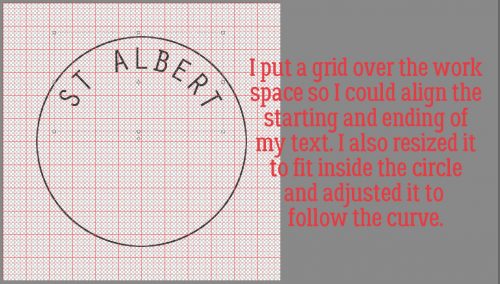
I opened a 12×12 canvas on my workspace so I could have lots of room to manoeuver. Then I pulled out a large circle using the Elliptical Marquee tool with the Tool Option on Fixed Ratio 1:1.

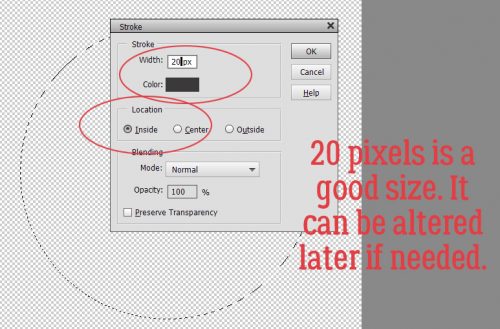
Then I applied a 20 pixel stroke to the inside of my circle.
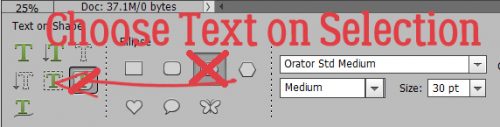
So here’s where I confess that I changed my technique part way through the screenshots. When getting ready to put your text onto your postmark, choose Text on Selection, the one with the marching ants around the T, and as you can see, I used Orator Std Medium for my sans-serif text. For a refresher on text manipulation see Playing with Text.
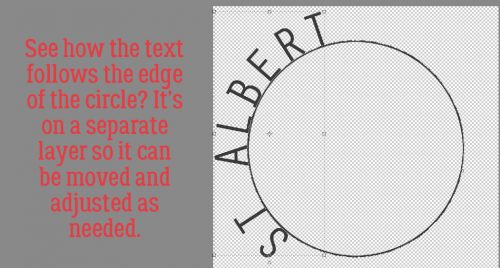
The key here is to make sure you get the little tilde shape with your I-beam text cursor ~ when you click on your selected path. To create text that curves up, the cursor line should be mostly on the outside of your circle. Then type out the name of the city/town/village you want your postmark to come from. Don’t worry about where it’s placed on your circle because you’re going to move it and manipulate it anyway,
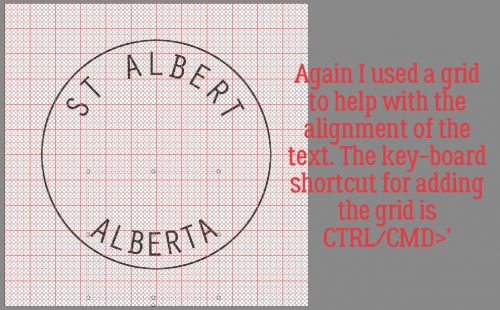
To move it into place and to make it fit into the circle, you’ll need to resize and rotate. I used the grid to help me position it in the right spot and line it up right.
To get the province/state/country curving downward along the bottom of your postmark, click your tilde/I-beam so that the cursor shows longer on the inside of the circle. Then type out your text.
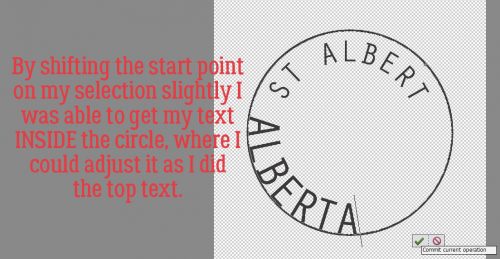
Then resize, rotate and position it so it’s following the curve at the bottom of the circle.
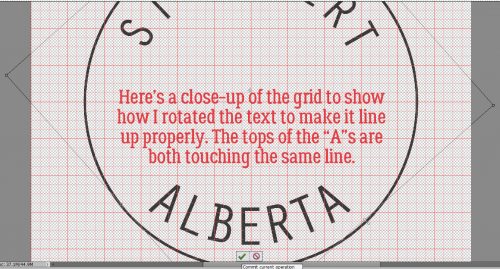
Here’s a closer look at the grid so you can see how the tops, bottoms or sides of the first and last letters line up.
Then it’s simple to put the date in the centre, just using the regular text tool.
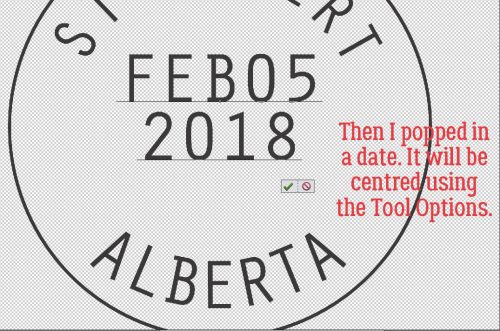
I used the Move Tool Options to align the date both top-to-bottom and side-to-side.

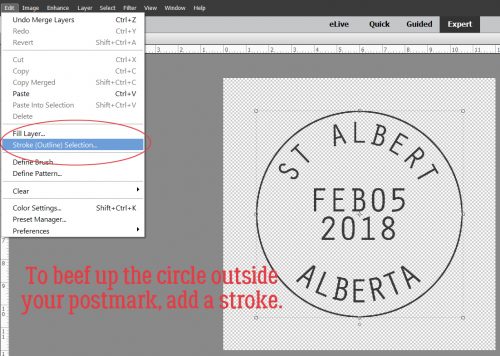
Let’s play with the postmark a bit more. I added a stroke to the circle layer because it looks a little flimsy. I chose another 20 pixel stroke, but I put it Outside.
There, it has a lot more presence! It’s on the same layer as the text in my example.
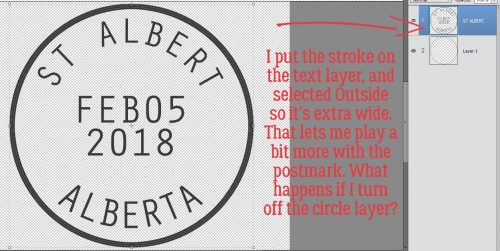
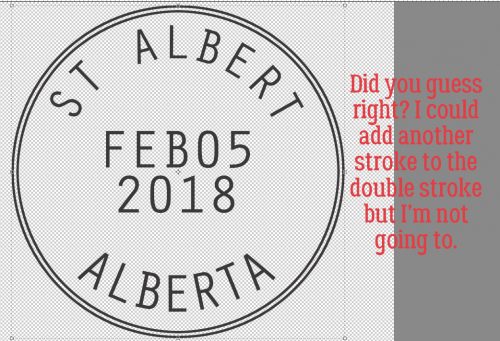
If I turn the circle layer off, now the postmark has a double outline!
As I mentioned above, I worked for Canada Post for a number of years before I went into nursing. The ink we used to hand-cancel letters and parcels often left a bit of a raised edge, so I’m going to show you how to add a Bevel Style to your postmark to add to the realism.
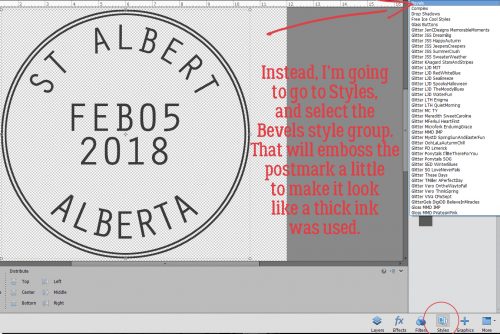
My example uses a Simple Inner bevel. The image below is before it’s applied.
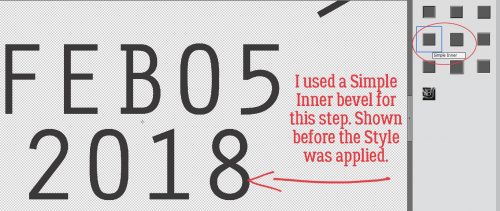
And after… It looks slightly embossed and gently curved. Now you can shrink your postmark down to something approaching a real one and all that detail will be intact.

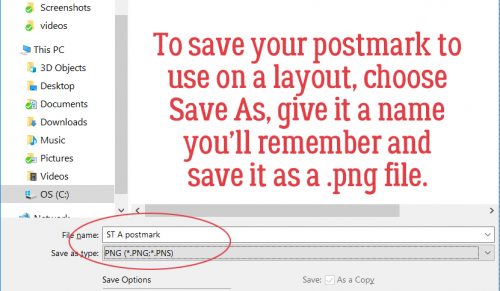
To save your postmark to use on your layouts, select Save As (CTRL/CMD>Shift>S), give it a name you’ll remember, then save it as a .png file to preserve the transparency of the background.
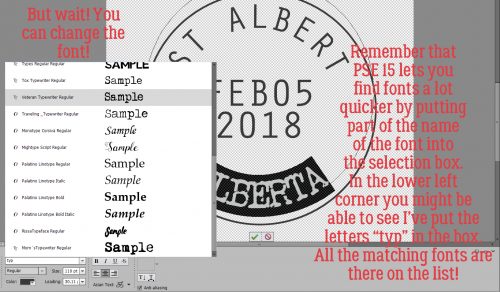
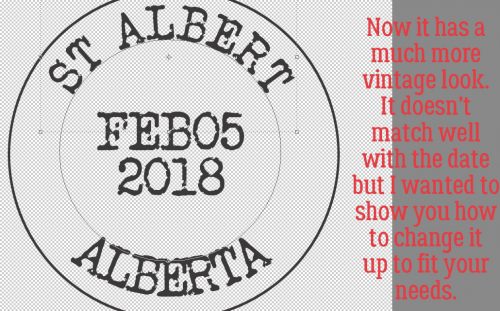
But wait!! Let’s say you wanted to have your postmark represent a historic date, like maybe July 4, 1776… then you’d want to use a more vintage font, such as Veteran Typewriter Regular. If you haven’t simplified your text layers, you can easily change your font by selecting the Type tool, double-clicking on the text on your postmark and selecting the new font. Remember, in version 15, you can let the software find the font you want by clicking on the selection bar then typing in a few letters from the font’s name, as I show below.
After I changed all three text layers, I have a nice vintage postmark too!
Now to build me a layout using Snail Mail!
![]()
Wonderful tutorial, Jan! I’ve put text around the outside of a shape … but never on the inside! & I haven’t done that very often, so I always forget the steps. I bookmark a lot of your tutorials, so this will come in handy the next time I want to do this. The postage cancellation stamp looks good! Thanks again!
Hi dear! I think you were reading my mind! I really wanted the post mark in that kit to reflect the date and location of the page i made with it….oh you are the best. I will work on this and amend my layout before I print it out. Thank you.
PS, I loved hearing about your days working at the PO, and then how you applied it to making the element real. MAHALO!!
😉 glee
Pam, I’m glad I could show you something different! When it’s time for me to plan my tutorial for the week, I sometimes struggle with topics. As long as there’s somebody who is interested, that’s GREAT!
Glee, you always make me laugh. Working for the PO was an adventure… especially at Christmas time, and tax time. Lineups 20 people deep, parcels piled up to the ceiling and threatening to avalanche down on top of me, hand-cancelling a 6-inch stack of “special” Christmas cards while the sender watched to make sure it was done correctly… One of my favourite customers was an elderly lady who bought things from the home shopping channel. And it never looked like she thought it would, or fit the way she wanted it to, or some other reason why it had to go back. And another lady who sent huge parcels to Poland – her customs declaration always listed “cookit ham” on it. Lots of fun!
I really appreciate your weekly Tutorials – Thank You for taking time to make them! ;-}
Nifty, thanks!! 🙂 ♥