Clusters… Have Them Your Way, the Easy Way!
![]()
I’m a big fan of templates. They’re an amazing time-saving tool for getting layouts done, while still allowing for individual style. But once in a while I go rogue and design a layout without using any time-saving devices. And sometimes I shock myself by creating a perfect cluster that looks fantastic… only to find that when I try to recreate it later, I can’t get it quite right. Of course there has to be a WSNH hack for that! And I’m going to show it to you. I’m using a cluster I created for Katie, Ooh La La Scraps‘ genius designer, with her Freezing collection.
If you save your layouts as a PSD file, this part will be super-easy. If not, you’ll be starting from scratch and might want to wait until you have that AHA! cluster creation at a later date.
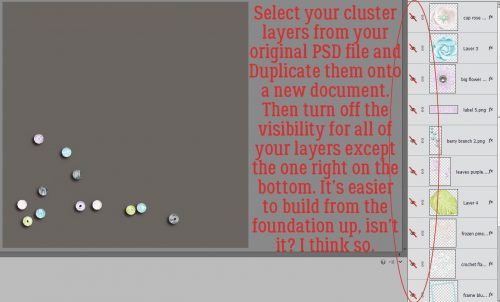
Let’s assume you’ve got the layout in PSD form. Open up the file in PSE. Then select all the layers of that perfect cluster. To select multiple layers, hold down the CTRL/CMD key as you click on them. Once you have all the layers selected, right-click in the Layers panel and click on Duplicate Layers. (We’ve done this part before.) In the submenu that opens up, select New Document and click OK. A completely new work space will now be there for you to work on separate from your original layout.
Once you’ve got all those layers on your new work space. turn the visibility to all the layers off, except for the one on the very bottom. (Or you can work from the top down, your choice. I work from the background out.)
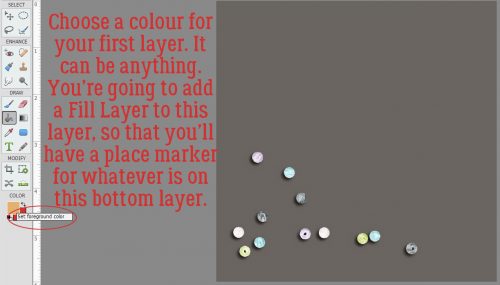
Now you’ll select a colour to make the place marker for that first layer. Whatever floats your boat… gray, pastel, dark, light, whatever makes sense to you. You’re going to make a New Fill Layer on top of that first layer to create your place marker.
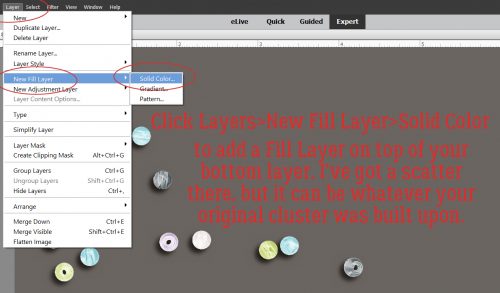
If you’ve never used the Fill Layer function, you’ll be in for a treat. It makes a lot of things much easier! Click on Layer>New Fill Layer>Solid Color.
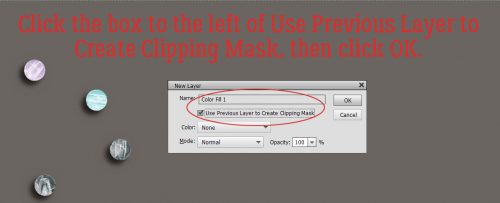
Make sure you click the box to the left of Use Previous Layer to Create Clipping Mask.
See what happened? All those little beads are blaaaah yellow, but they’re now a place marker for a scatter. You’ll notice that the shadow style is preserved, which is another time saver. But… that shadow style will disappear with the step after this one, unless you copy it. Right-click on the original layer and choose Copy Layer Style.
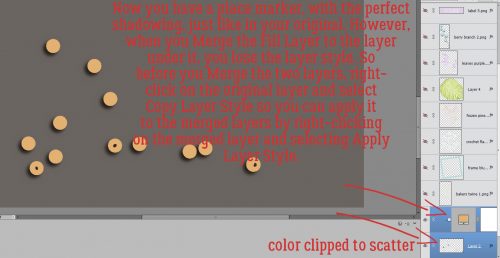
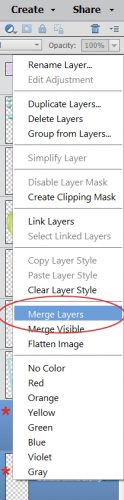
Then select both the original layer and the clipping mask layer to Merge them. Right-click on the layers, then choose Merge Layers, or CTRL/CMD>E. Once the layers are merged, right click on the new merged layer and Paste Layer Style to it. Voilà… the layer has a shadow again.
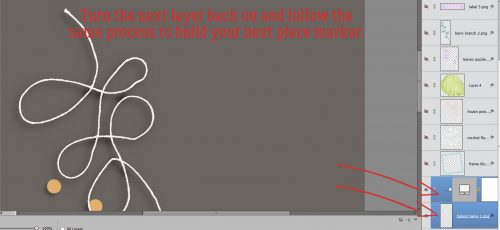
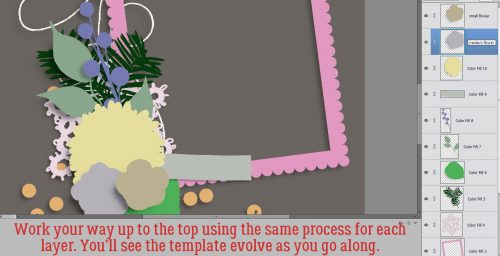
Continue on with all the layers in your cluster, using the same process. Change up either the colour or the intensity of each different layer so you can easily see the different components of your template later. When I was putting together the screenshots for this tutorial the whole thing took me about 11 minutes, bottom to top.
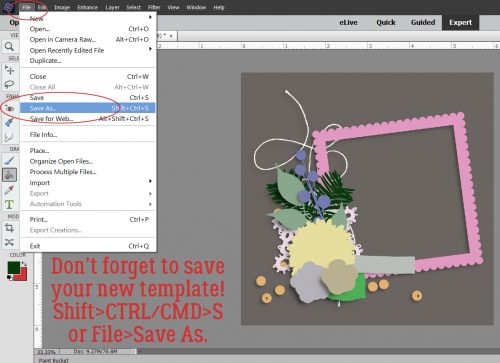
This is what my finished cluster template looks like.
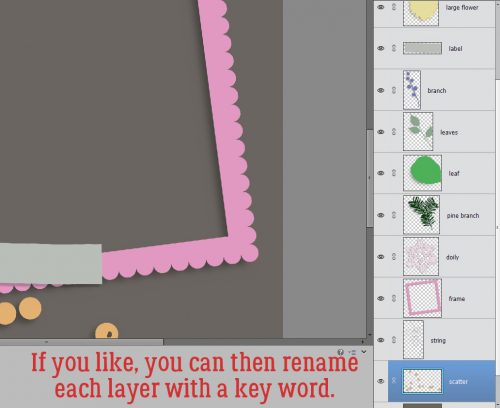
When I had all the layers converted to place markers, I renamed each layer. You can right-click and select Rename Layer, or simply double-click on the label within the layer’s box in the Layers panel then just type in whatever works for you.
Now you want to save the fruits of your labour! File>Save As (Shift>CTRL/CMD>S), tell the software where you want to save it, then give your cluster a name.
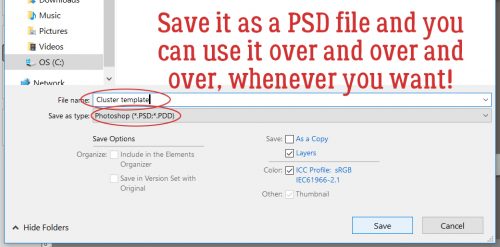
Tell the software you’re saving the file as a PSD and you’ll have your very own, personally-designed cluster template to use again and again!
I think next week we’ll do another Guided Edit. See you then!
![]()