Memory-Keeping with Not-So-Great Photos
![]()
I don’t know about you, but I’m seriously lousy at getting good selfies. Maybe I’m too critical, or maybe I just don’t look good in photos. But when the only photos I have of an event I really want to scrap about are those nasty selfies, what’s a woman to do? Such was the day I went to the beach on the Wild Atlantic Way… the ONLY day out of the whole two weeks I was in Ireland this time when it rained. It was also the only chance I would have to walk on the beach at Kilkee, where my 3x great-grandparents were born. So I went ahead to walk on the beach (although I didn’t walk the cliffs – I AM a bit of a chicken) and took the nasty selfies, then scrapped them into a minimalist layout for the January Color Challenge.
When I say it was raining, I’m not talking about the soft, misty rain Ireland is usually known for; it was more like a prairie downpour. My hair was plastered to my head and my jacket was soaked through. (And I was freezing… in July!)

If I was going to do something with these photos that I could live with, I was going to have to think a bit. I made a copy of my photo so I’d be playing with it and not the original.

Then I did something I’d never done before… I checked out the possibilities in the Effects menu. I played with each of the options to see what they do, and some of them will be given more attention in upcoming tuts. Imagine my surprise when I found an even quicker-with-fewer-steps sketch effect than we’ve looked at in other tuts.
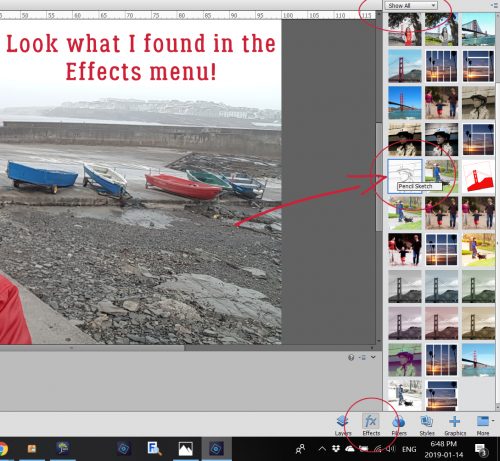
Just one click and I had a sketch!

The effect produced another new layer.
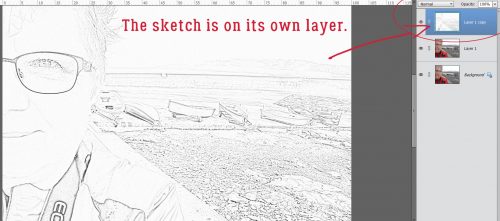
The details are pretty blown-out, so I thought about how to find them again. (Although I wasn’t really upset that the crowsfeet are gone!)

I used the Levels adjustment (Enhance>Adjust Lighting>Levels or CTRL/CMD>L) to darken the outlines. With Levels, pushing the Input Levels dark value slider to the right as shown and the Output Levels light value slider just slightly to the left allowed some colour to leak back in, but also brought the details and textures back. The raindrops on my glasses are more obvious now.

I wanted a tiny bit more sketchiness so I duplicated the sketch layer (right-click on the layer then select Duplicate Layer or CTRL/CMD>J) then played with the Levels again. Can you see the difference in the histograms between the two images?

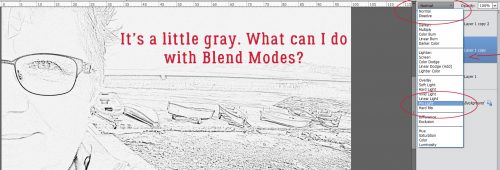
Just for fun, I played with some Blend Modes too. Some of them give really interesting results… There are no limits on creativity here!
I chose Pin Light. The only difference it makes is to brighten the image up a bit. And maybe sharpen the sketch effect a smidge.
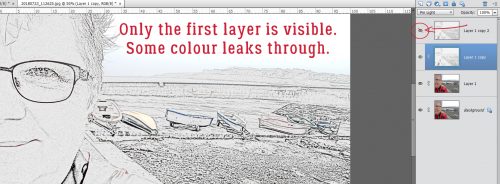
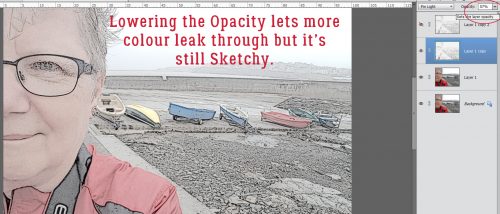
Lowering the Opacity of that layer lets a bit more colour show through without losing the total sketch effect.
But naturally, I have to play a bit more.

I tried all the Modes then settled on Overlay.
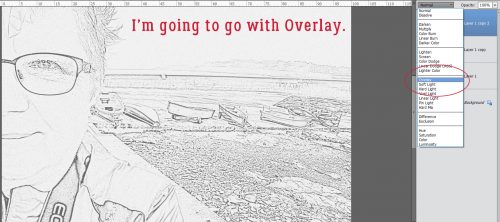
That’s more like it! Some of the gray is gone,, the details are sharper and there’s a hint of colour.

After I Merged all the layers, this is what I ended up with.

And my final layout looks like this… The blended photo in the background is simply clipped to a mask then the mask’s Opacity was lowered a bit to blend the background a bit more.

![]()