A Whole New Meaning to Copy-and-Paste!
![]()
Welcome to the tutorial that almost wasn’t! The last week has been a little difficult around our house and the weekend was particularly so. I didn’t have time to put together something to share with you before I had to go back to work yesterday. 12 hour shifts don’t leave a lot of energy, mentally or physically, and I always do two in a row so I was expecting to have to disappoint you all by posting a “sorry…” and a promise to do better. But the over-staffing fairy visited me this morning and I magically got the day off. Not having a topic in mind, I had to do some pondering. And then I learned something myself that I knew would be perfect for this week. So we’ll settle for late, rather than not at all. Here goes!
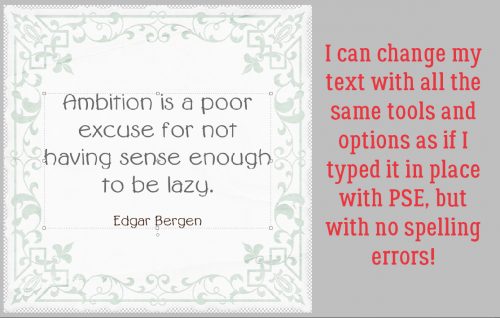
Have you ever put your heart and soul into a layout, then spent forever coming up with the perfect journaling – only to hate the way the journaling looks, or worse… see a glaring typo? Have you ever wished PSE came with a spell-check? Or that you could copy-and-paste something from a website? Well, have I got the trick for you! Word and PSE work together! And even better… all your fonts are there in Word too!
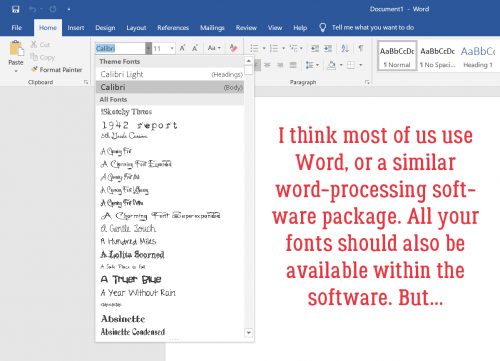
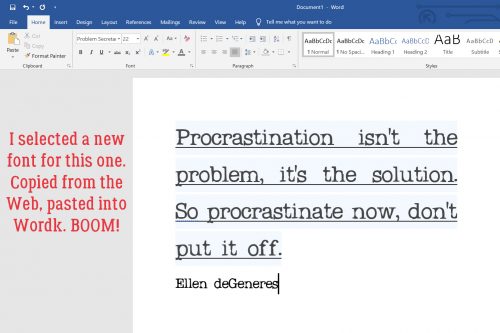
Your Word version may be different from mine; the interface might look different but this is pretty basic, and all the things I’m going to show you will work with any version. I opened a new blank document in Word, chose a font and set my formatting so that my text would fit inside a border on a beautiful journaling blank I pulled from Ooh La La Scraps‘ Shabby Chic collection.
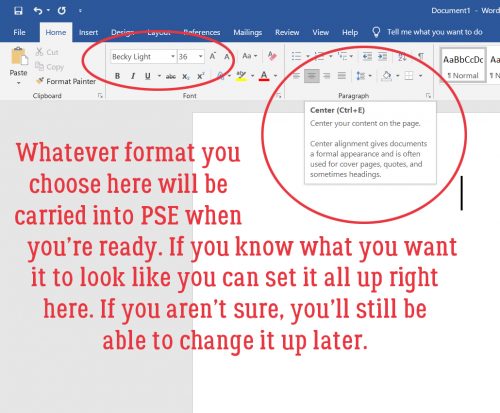
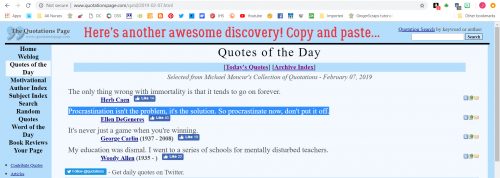
I love using quotations for a variety of reasons. Like not having to think too hard! I typed out this one in a matter of a few seconds. I changed the size of the font for Mr Bergen’s name.

I just spotted a typo on my screenshot below. RATS! Word’s spell-check wouldn’t have caught it either, but it DOES catch those transposed letters, “e”s that should be “a”s and that kind of thing. It also capitalizes the first word of each sentence for you if you forget.
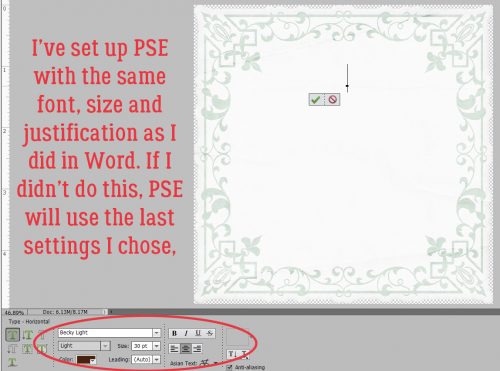
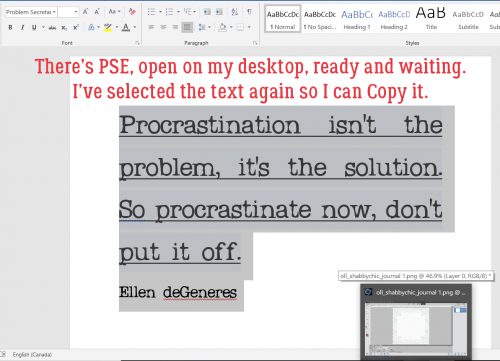
Then I opened up Elements on my desktop, dropped my journal blank onto a new document and set up the Text tool with the same font settings that I chose in Word. If I skipped this step now, Elements would default to the last settings I used.
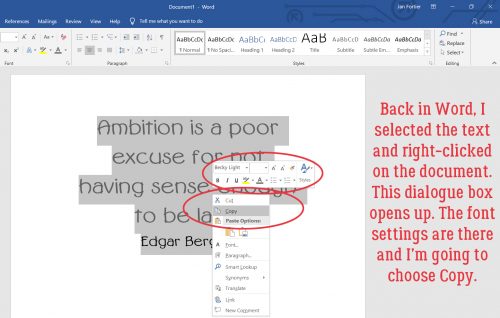
Back to Word… I selected the text then right-clicked to open up a dialogue box. It looks like this. I want to Copy the text. (WSNH tip: the same keyboard shortcuts I’ve shown you in previous tuts also work exactly the same in Word, so CTRL/CMD>C will work to copy the text.)
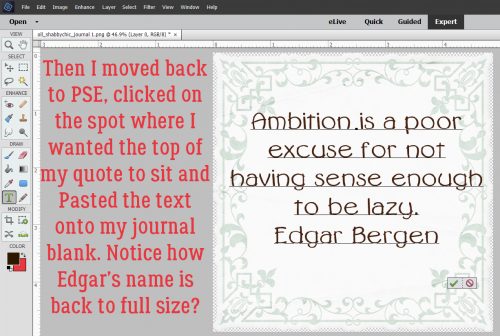
I flipped back to Elements and Pasted my text into the journaling space. That can be done by right-clicking then choosing Paste from the dialogue box, or CTRL/CMD>V. Did you notice that Elements ignored the different text sizes?
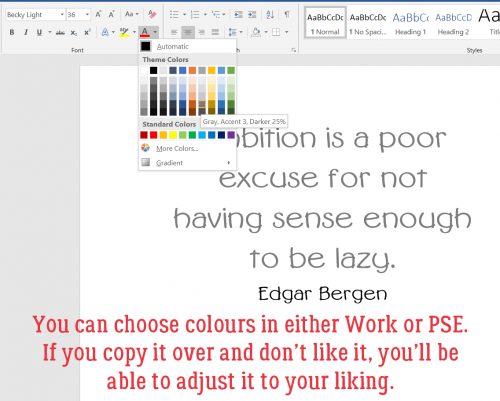
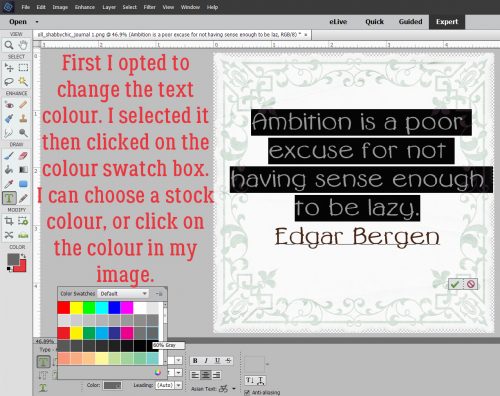
Now I have the ability to change it up to suit my layout. I changed the text colour first by pulling the gray from the border.
Then I changed the font size on Mr Bergen’s name again. Now that I know the font size changes made in Word don’t move over to Elements, I can skip that step in the future.
Even better, it’s totally possible to Copy whole sections of text from a web site or other document on your computer and Paste it into Word. As you can see in the screenshot below, I’ve selected a new quote from my favourite quotations site.
Then I Pasted it into Word with a couple of clicks! Yeah. I wasted time resizing Ellen’s name. (Did you catch the typo in this screenshot too?)
Here you can see that I’ve got Elements open and it’s just waiting for me to Copy-Paste Ellen’s words of wisdom over.
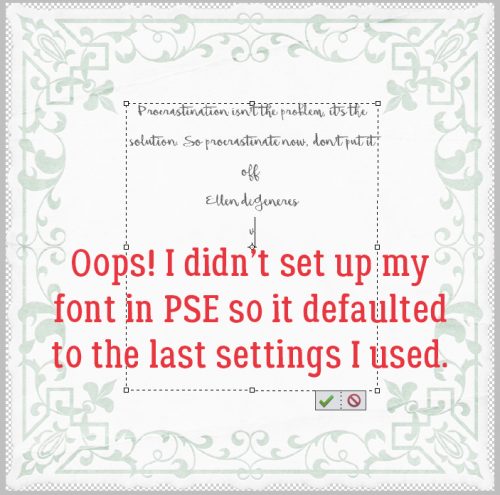
Oh, right… I didn’t go to Elements and set up the font. So this is the font, size and colour I used for the last layout I created.
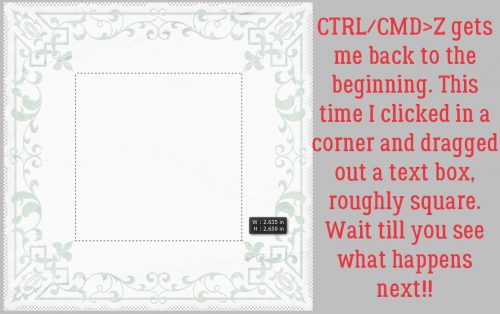
So I just Undid that step and started over. But this time I decided to use a Text Box. This handy tool helps to constrain the text so it doesn’t bleed out into areas where I don’t want it. To create a Text Box, with the Type tool click-and-drag from one corner diagonally to the opposite corner of the area you want to cover with text. This journal blank made it easy by having reference points in the border.
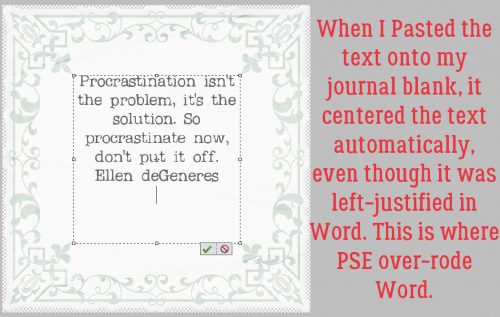
And then I pasted Ellen’s quote into my text box. Notice that it’s now centre-justified, rather than left-justified as it was in Word. I had “Center” selected in the Text tool settings and Elements over-rode Word.
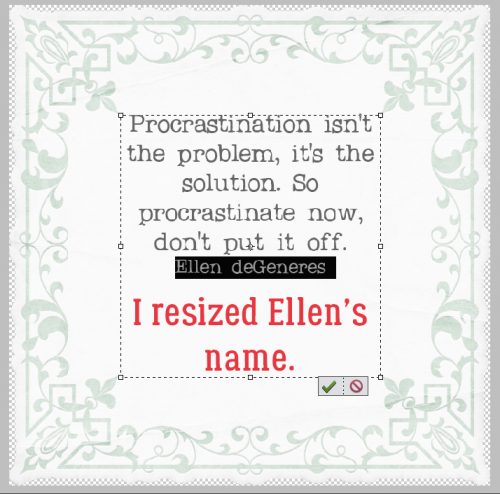
This time I didn’t have too many changes I needed to make, other than shrinking Ellen.
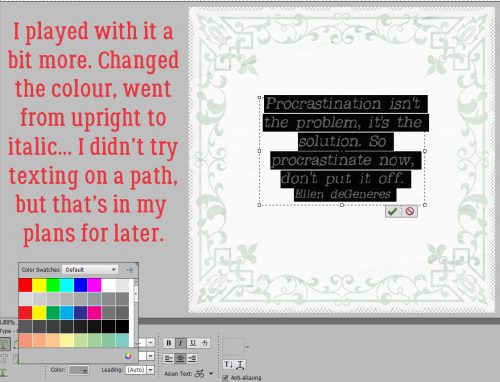
But to show you how easy it is to change it to suit your purposes, I switched the angle from upright to right-italic and changed the text colour. I want to try this trick with texting on a path, but wanted to get you the basics now. Stay tuned!
![]()