What the Heck is a Vignette?
![]()
It’s been awhile since we did anything really creative using a Guided Edit. Today we’re changing that!
The dictionary has a number of definitions for the word “vignette”.
noun
- a decorative design or small illustration used on the title page of a book or at the beginning or end of a chapter.
- an engraving, drawing, photograph, or the like that is shaded off gradually at the edges so as to leave no definite line at the border.
- a decorative design representing branches, leaves, grapes, or the like, as in a manuscript.
- any small, pleasing picture or view.
- a small, graceful literary sketch.
verb (used with object), vi·gnet·ted, vi·gnet·ting.
- Photography . to finish (a picture, photograph, etc.) in the manner of a vignette.
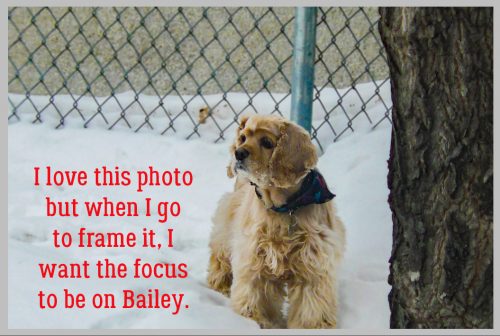
This photo – “a small, pleasing picture or view” – of my cocker spaniel Bailey (who left us 4 years ago) is my most favourite one of her. When I was sorting through a box of stuff I found a frame I had bought for this photo shortly before she died; I decided it was time to print and frame the photo, but wanted to increase the impact of it a bit first.
My first thought was to add a vignette effect to my vignette. Photoshop Elements has one in the Guided Edits menu, so here goes!
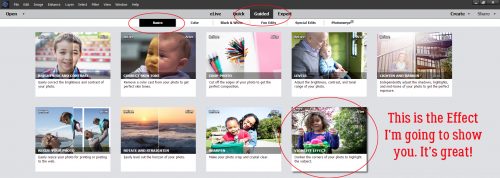
This particular effect has quite a few uses, especially when it comes to landscape photos where there’s an element or view that screams for sharper focus (attention-wise). But it would also be stunning with newborn photos, wedding photos and any number of others.
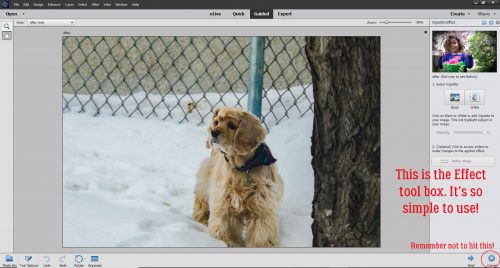
When you open the tool, this is what the interface looks like. Remember, down at the bottom right corner there are two buttons, a Next and a Cancel. The Next button gives you the option of saving, sharing or moving on to the Expert workspace. The Cancel button resets the image. So if you’ve made several adjustments and are pleased with your efforts, take great care not to Cancel it!
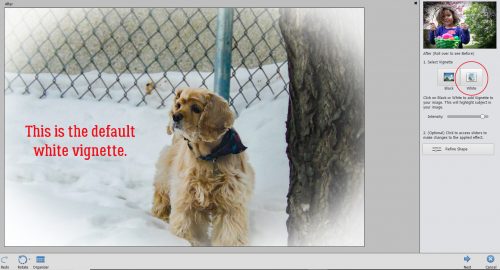
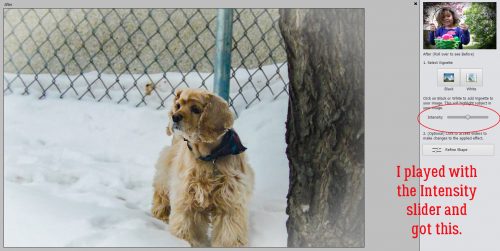
Obviously there are two vignette options here, Black and White. I’m showing you the white first, with the software’s default setting. It’s not the look I’m after, but I have some adjustment capability so let’s see what happens when I use them.
By decreasing the Intensity of the vignette effect, I get an effect I like better.
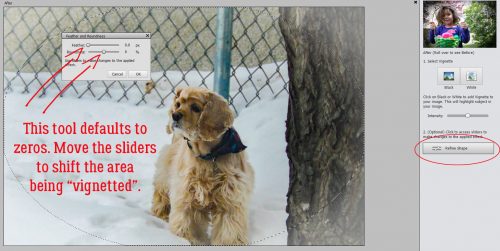
The button bar I’ve circled is the second adjustment tool, which lets the user shift the shape of the vignette and softness of the edges. I’ve shown you the defaults. The marching ants show you where the software has made its selection.
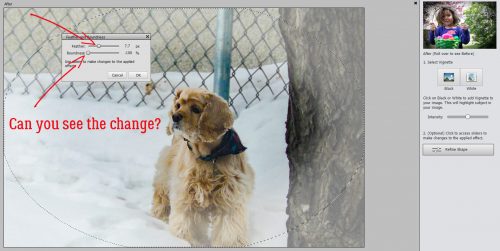
I moved the Feather slider over a bit to the right (to 7.7 pixels) and made the edge softer, then slid the the Roundness handle all the way to the left (-100%). The Roundness tool contracts or expands the selection edge. Can you see what that did to my photo?
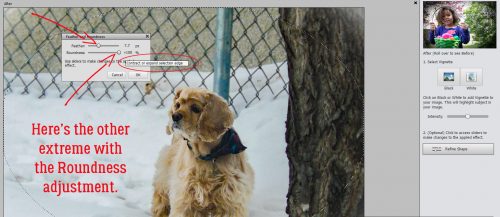
This is what I get when I move the Roundness slider all the way to the right without adjusting the Feather. But even with lots of tweaking, it’s not the look I’m after. So I hit the Cancel button.
Then I tried the Black vignette. Here’s the image with the defaults. TOO too…
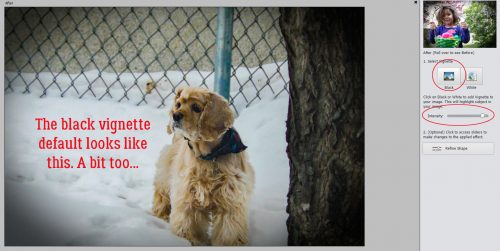
So I pulled the Intensity of the vignette down to about 55% and like it a lot better.
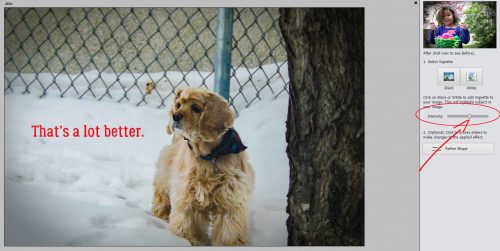
This time I pushed the Feather slider all the way to the right, 50.0 pixels.

Then I played with the Roundness, moving the slider left to -10%.

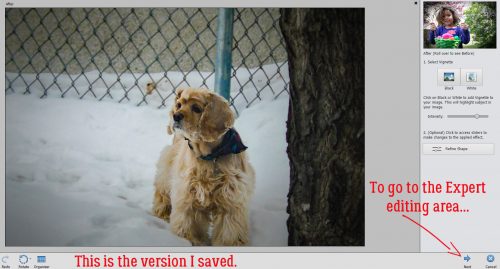
There it is! Bailey is the focus, the edges are darker and softer and I’m really happy with the way it looks. I can print it now and get it in the frame. If I wanted to work with this photo more, inside a layout for example, I would go to the Next button and make my choice of subsequent actions. I Saved it to my folder for printing.
Can you think of a photo in your collection that would be even better using this technique? (There’s another way to do this technique that’s a bit more work, and I’ll show you how in another lesson.)
![]()
[…] 126. What the Heck is a Vignette? […]