True Colours – Not Just a Song
![]()
Has anybody seen my mojo? It seems to have gone walkabout without me! I haven’t scrapped a single thing this month. Not one. That can’t be allowed to continue!!
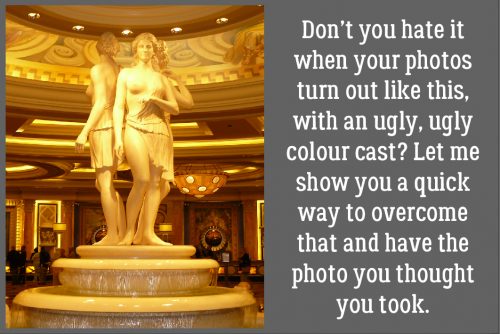
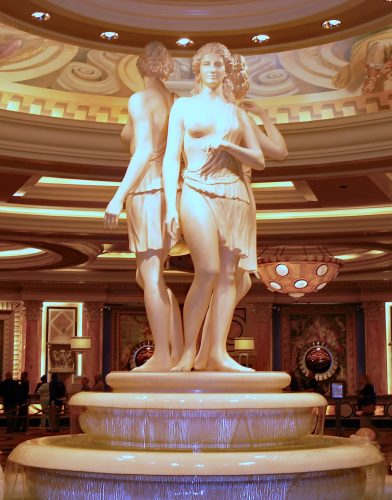
Today I thought I’d show you a really quick (literally only 5 minutes of your precious time) photo edit that will help you save those special photos that just aren’t. I think we’ve all taken a bunch of photos of a special event or trip, only to find out when we’re ready to use them that they’re not quite the masterpieces we thought they would be. Sometimes that’s because the lighting did weird things to the colours… like in my example photo below. For those who’ve never seen it, this is the Three Graces fountain at Caesar’s Place in Las Vegas. But it’s not supposed to be yellow.
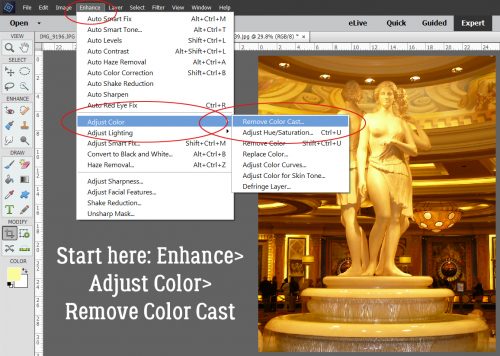
The path to solving this problem and unlocking the true colours in your photo goes like this: Enhance>Adjust Color>Remove Color Cast.
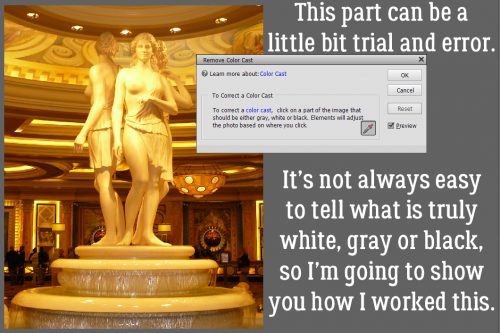
Fixing an ugly colour cast is pretty simple, but it often is a bit of a trial-and-error exercise. Everything in the photo is affected by the same odd colouration so you’ll be making some guesses. The tool works by using an algorithm to adjust the colours based on you telling it which areas of the photo are either white, gray or black. The trick is to figure out which is what!
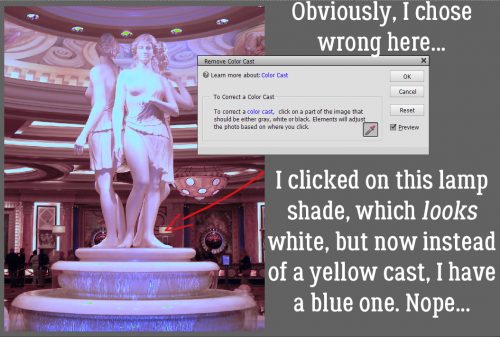
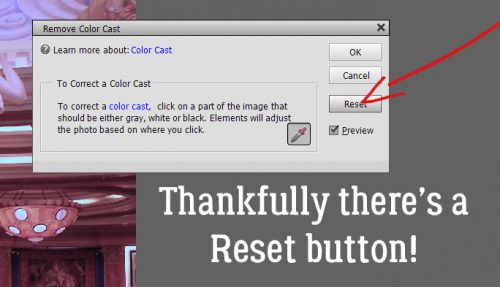
Because my photo is 10 years old, I really can’t remember the kind of details that would make this easy. So I just picked a spot – the lampshade – that I expected to be white. But I was wrong.
Fortunately, with a single click, I can Reset the image and try again.
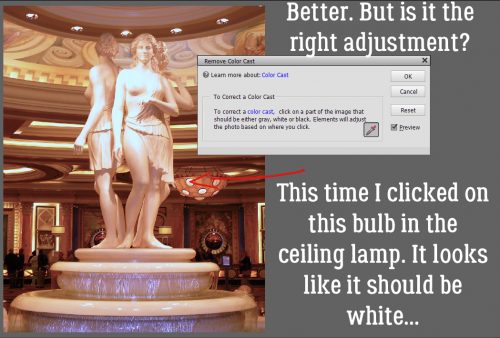
This time I chose the bright light in the chandelier as my “white” source. The result is better, but is it right?
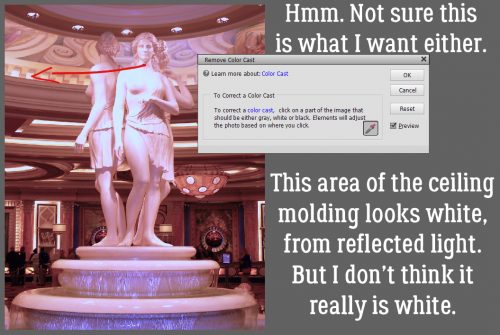
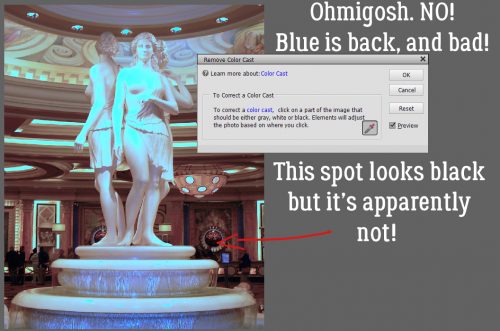
So I went to the reflected light in this molding. It looks white… but apparently it isn’t.
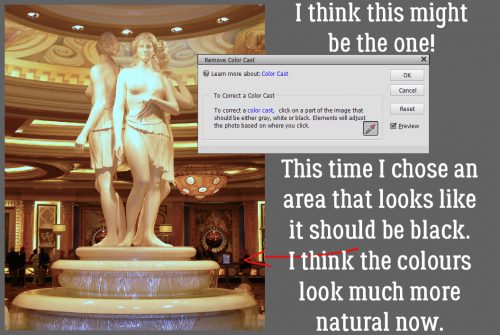
I was obviously failing with the white areas, so then I tried a spot that looked like it should be black… the sleeve on the jacket this woman is wearing. Better. Best?
To be sure I’d gotten it right, I tried a couple more spots. I assumed the sculpture was marble, or intended to looklike marble, so I clicked on an area of cheekbone. There’s still a hint of sepia in the image though.

So I tried black again, clicking on the dark area of the mirror, shown below. Fooled again! It’s NOT black.
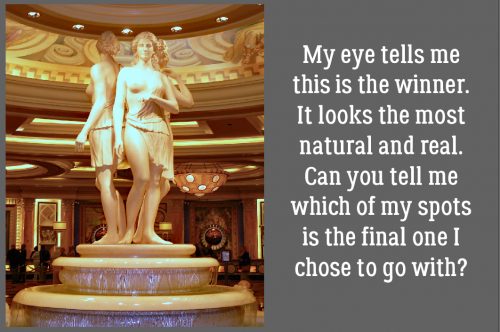
This is the one that my eye tells me is truest. With a little haze removal, it should be vastly improved from the original. Another photo saved!
Finished version… 5 minutes. Tops!
![]()
I always wondered exactly how to use this tool — thank you for another great tutorial!!!
the black sleeve of the jacket?
I think I know why you’re confused. Sometimes when using these tools I zoom waaaaay in. There is a woman in the background on the right side of the fountain but she’s only really visible zoomed in.