Circular Stencils – Another Paper-to-Digi Technique
![]()
Once again, Steph (CalGirl) brought me an idea for something fun to convert from paper to digi and I loved it so much I jumped on it. She shared a video from Mindy Eggen Design with me, showing a paper background technique using a circular stencil and texture paste; the finished product was gorgeous and we both knew there would be a way to do it digitally. We also both recognized that there are lots of ways to use the “stencil”, so today we’re going to create the stencil and next week (or maybe two) we’ll look at how to use it in different ways. Even though I’m going to give you specific details about making this technique work, please be aware that you may still have to tinker with the formula. But I know you’ll like the results.

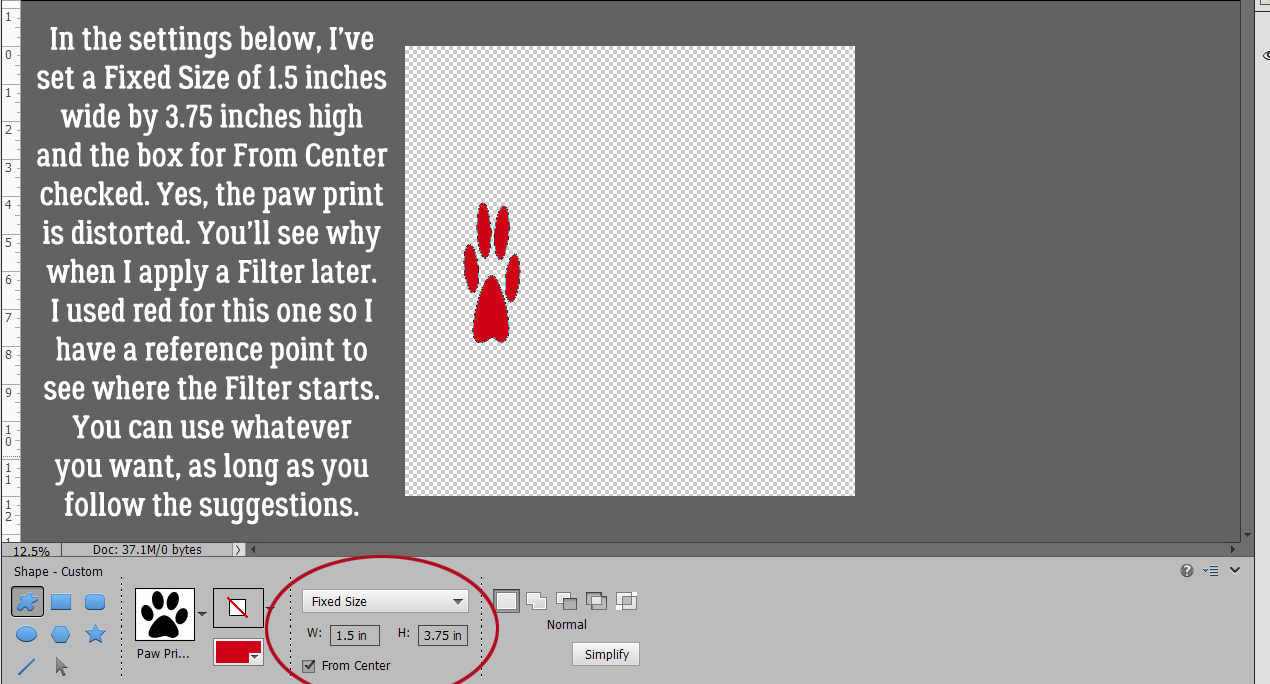
I started with a 12×12 inch canvas (you can use whatever dimensions you like) because I scrap in that size. As you can see, I’m using the Custom Shape Tool. The video’s stencil is a flight of butterflies, and I worked out the basics using the butterfly shape, but for my example I’ll use the paw print. It’s very hard to see the settings I’ve used but not to worry: it’ll be in the text.

While I was figuring out how to make the technique work, I discovered that I wasn’t able to see for sure where the circle started so I made the first shape in one colour and all the rest in another. That really helped. So I have red as my foreground colour. I have Fixed Size selected and 1:2.5 ratio width to height or 1.5 inches wide and 3.75 inches high. Yes, the resulting shape is really distorted, but that’s a necessary evil.
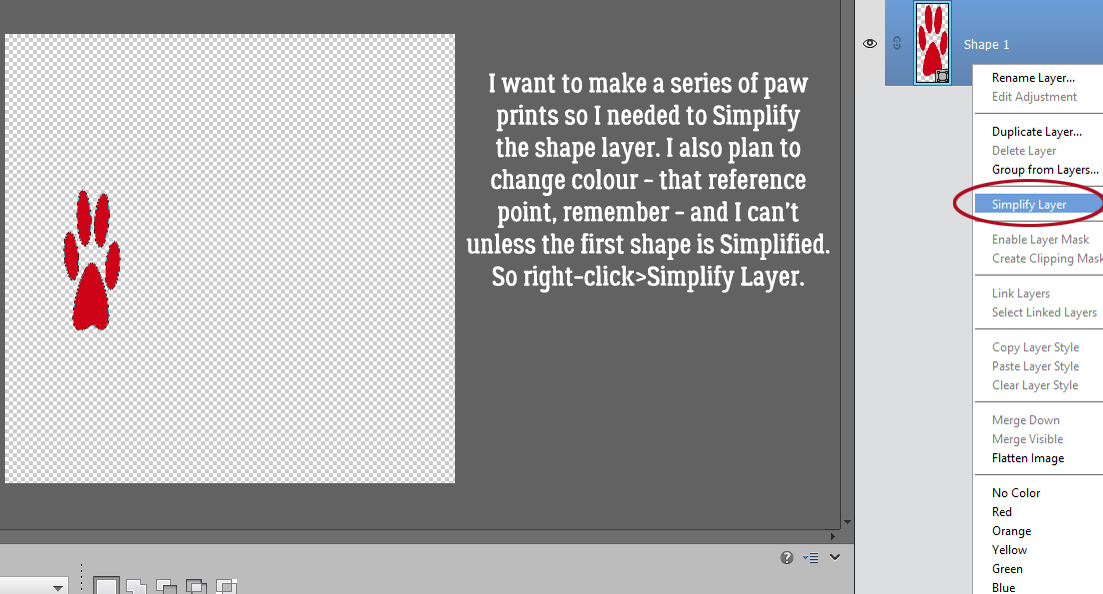
The Custom Shape Tool creates Smart Objects. When they remain Smart Objects, the only adjustments that can be made are to size and position. And… I can’t change the foreground colour – it’s locked at red. Because I want to use the same shape and settings again, I’m going to Simplify the shape layer. More about that later.
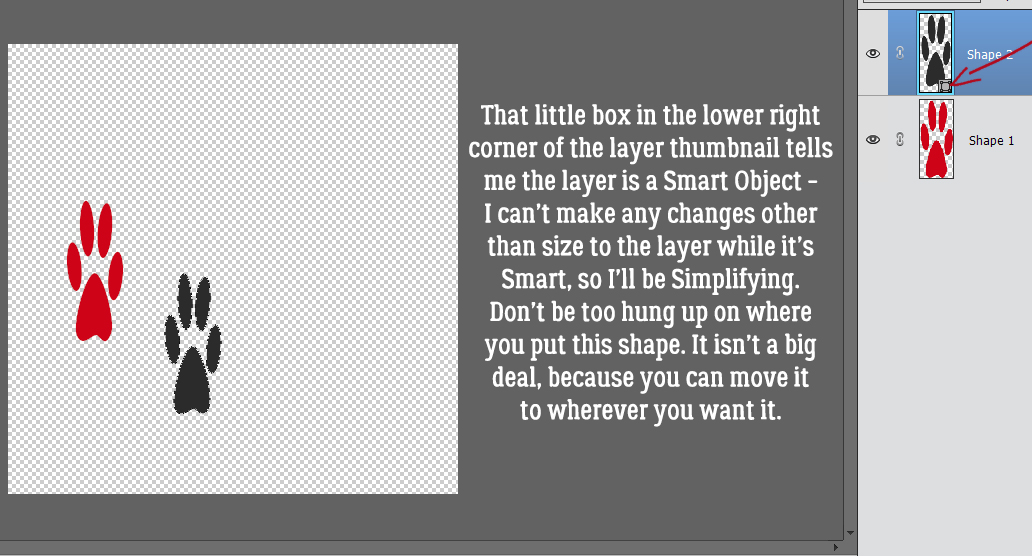
This screenshot shows you the difference between a Smart Object – the gray print – and a Simplified object – the red. On the layer thumbnail there’s a little box in the lower right corner. That’s your clue that the layer is only minimally adjustable. You can place your shapes anywhere on the canvas, since they’re easy enough to move later.
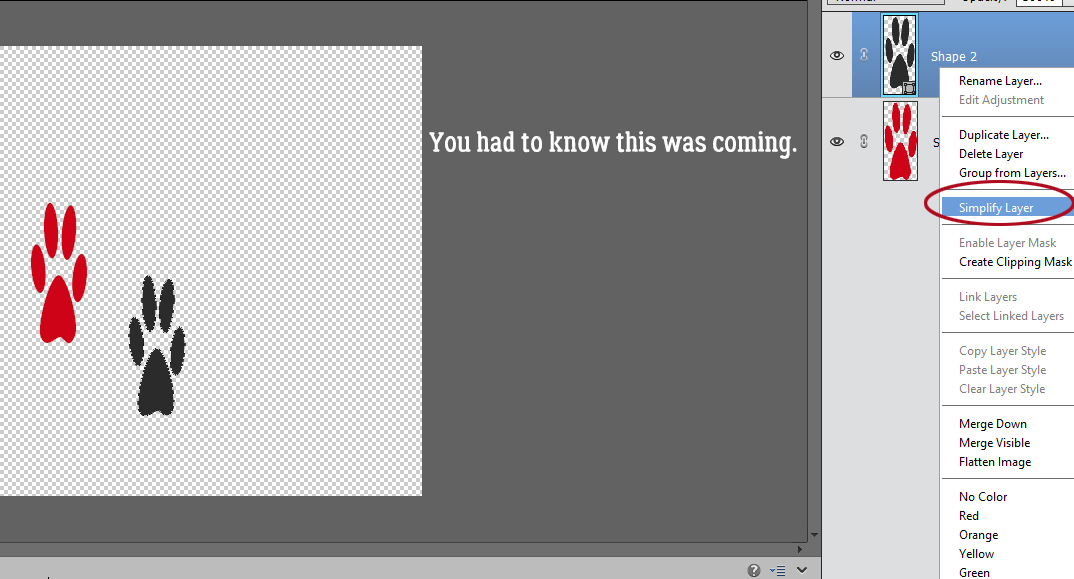
Yes, let’s Simplify things!
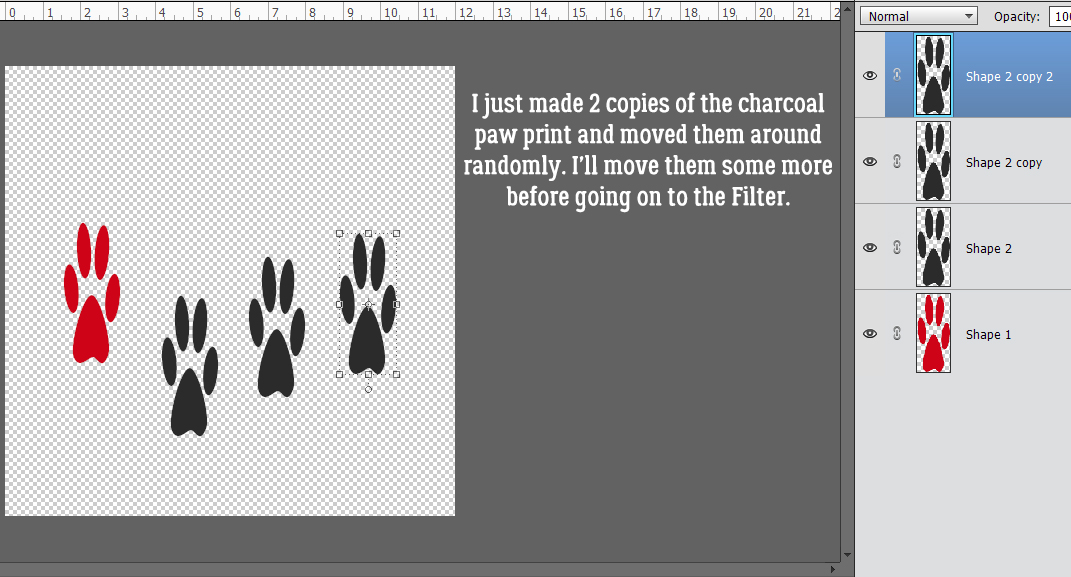
The quickest and easiest way to have multiples of something is to Copy it (right-click>Duplicate Layer>OK or even quicker and easier, CTRL/CMD>J). I made 2 more copies of the gray print and moved them around.
One thing that became quite obvious early on was that if this trick is going to work the object furthest to the right has to be touching the edge of the canvas. The far-left object doesn’t have to touch, but it can’t be too far away either.

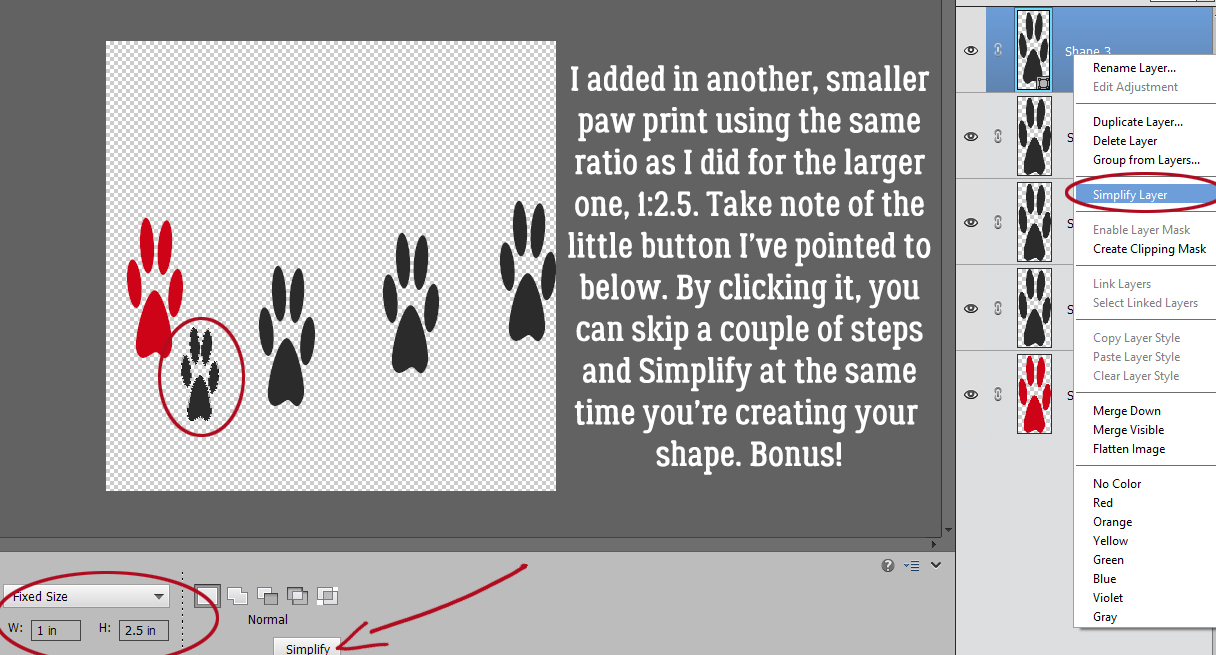
Next I added in a smaller paw print, using the same 1:2.5 ratio (1 inch wide, 2.5 inches high). Take note of the button I’ve pointed out with the big red arrow. By clicking it, you can create a shape and Simplify it in only 2 moves! Mind blown!!
I made some small print copies and slid them in between the bigger prints. Almost ready for the Filter…
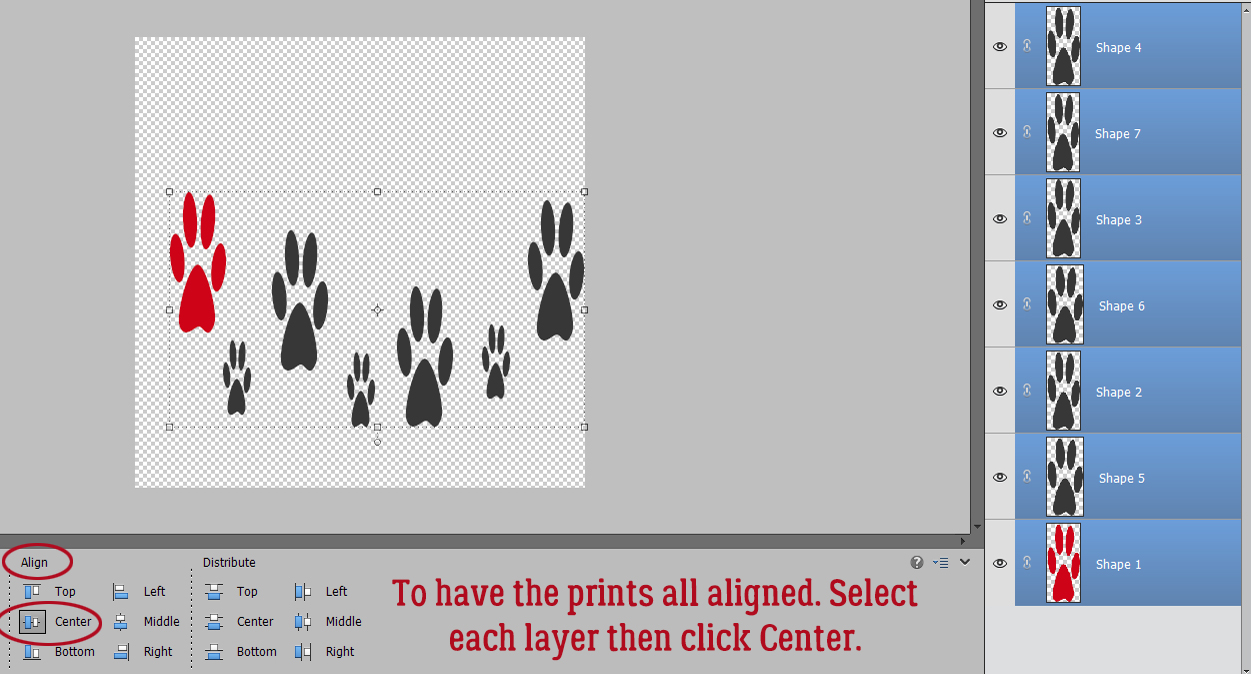
If you want to have the centres of the shapes aligned, Select all the layers by clicking on the top layer, hold down the Shift key and click on the bottom layer then click on Align>Center.
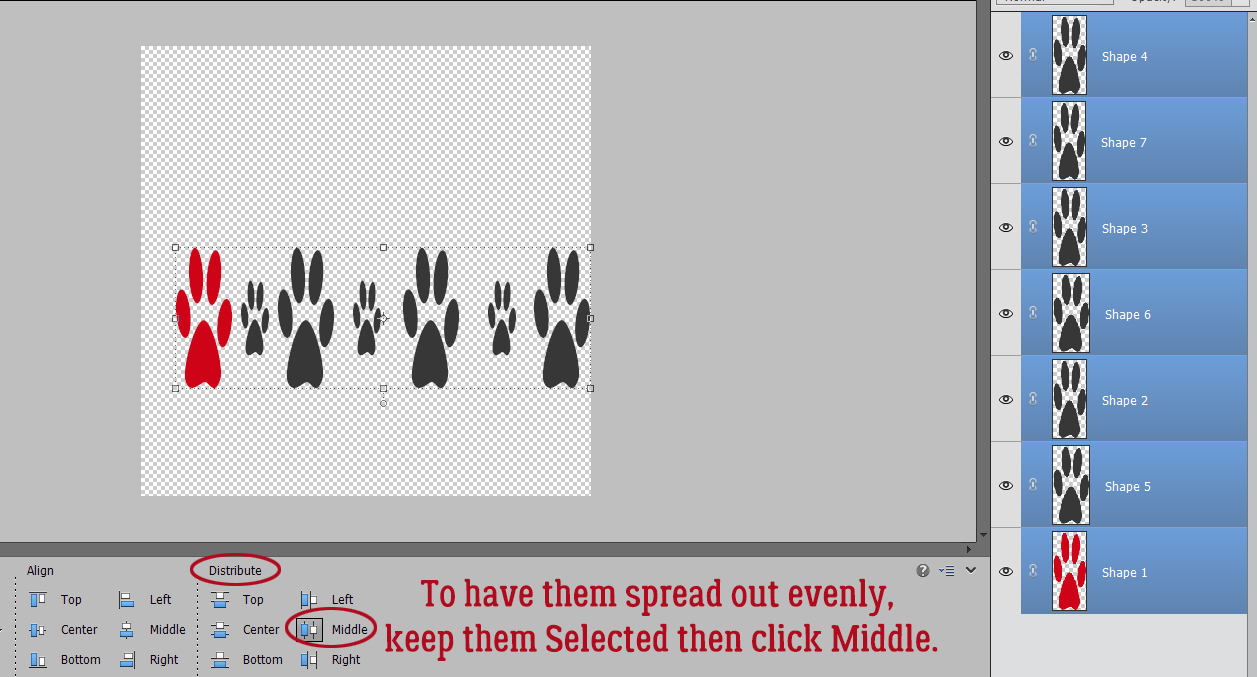
To have them evenly spaced, keep them Selected, then click Distribute>Middle.
This is what the line-up looks like aligned and evenly spaced.
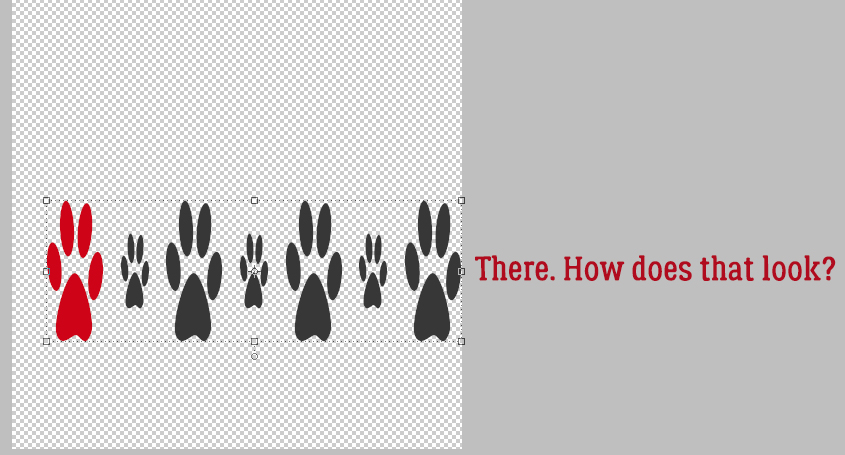
And then after I’ve applied the Filter, this is the look. But I’m jumping ahead….

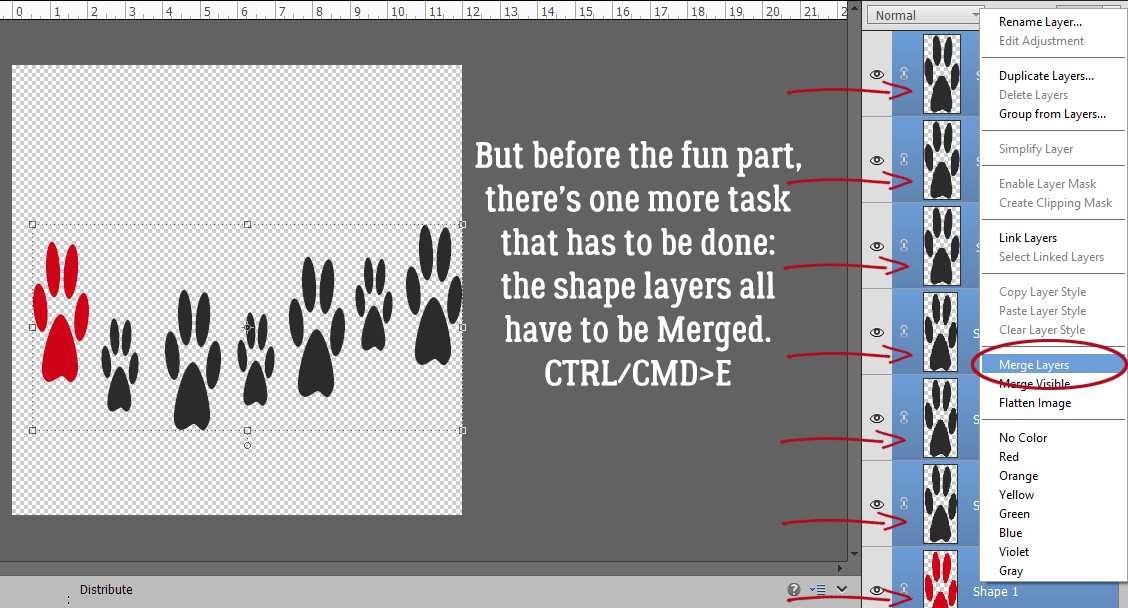
But first, since I want ALL the prints to be Filtered, I’m going to Merge the layers. Select all the layers by clicking on the top one, hold down the Shift key and click on the bottom one. Right-click>Merge Layers, or CTRL/CMD>E.
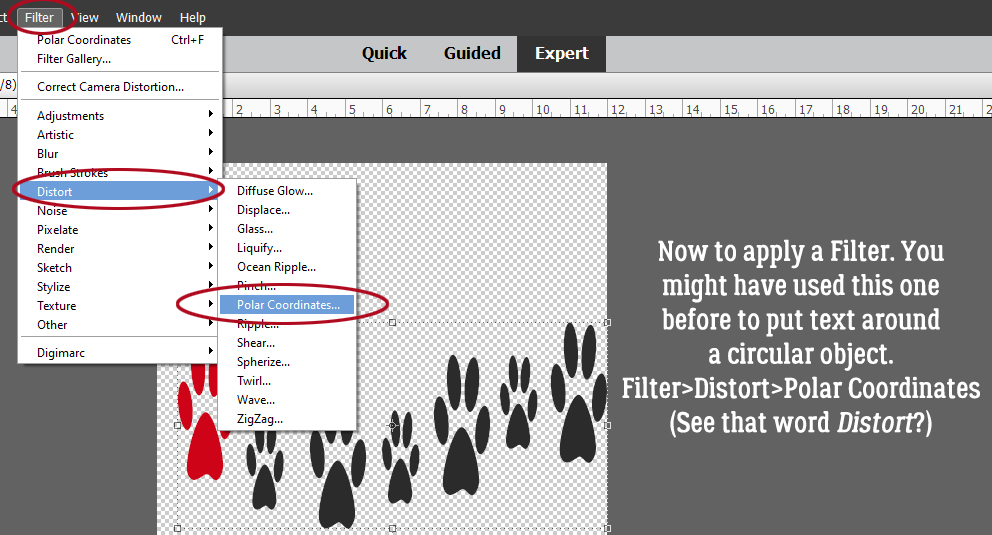
The Filter I used is Filter>Distort>Polar Coordinates. The key word there is DISTORT! And that’s exactly why the shapes have to be odd to start with.
The method of Filtering I want is Rectangular to Polar. The Preview pane shows how wonky some of the prints look so rather than click on OK, I clicked on Cancel. Now I need to figure out how to overcome that flattening effect.
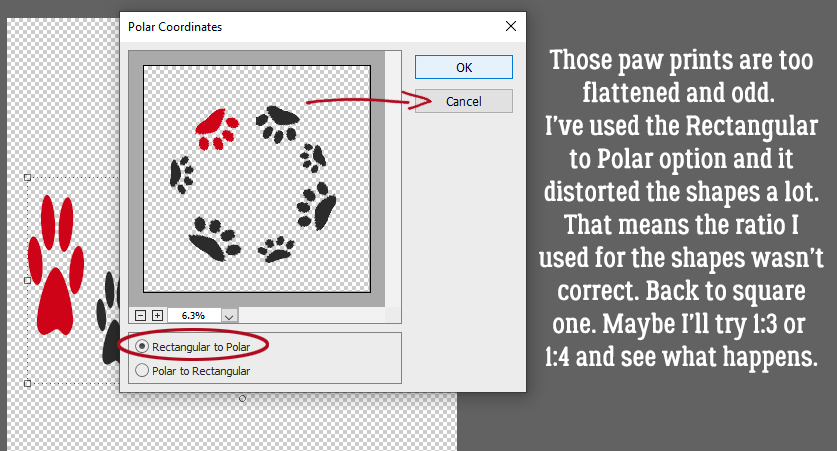
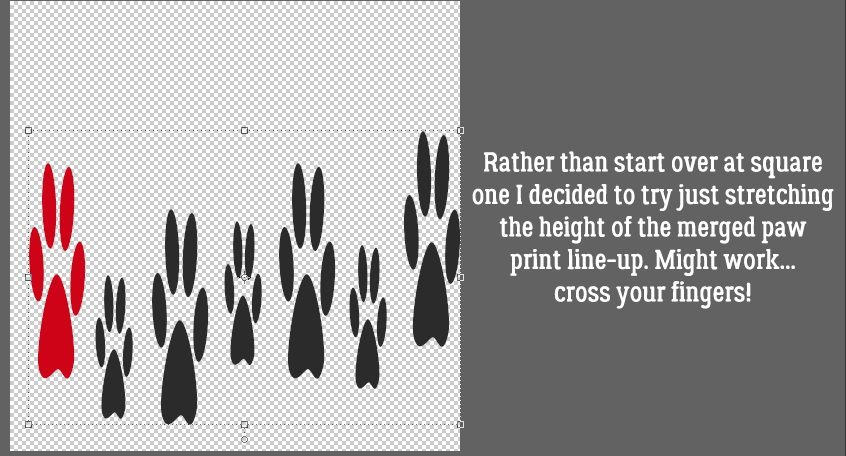
Rather than go all the way back to the beginning, I chose to stretch the prints’ height by using the Move Tool. It might work, might not! (I estimate the ratio now to be about 1:5)
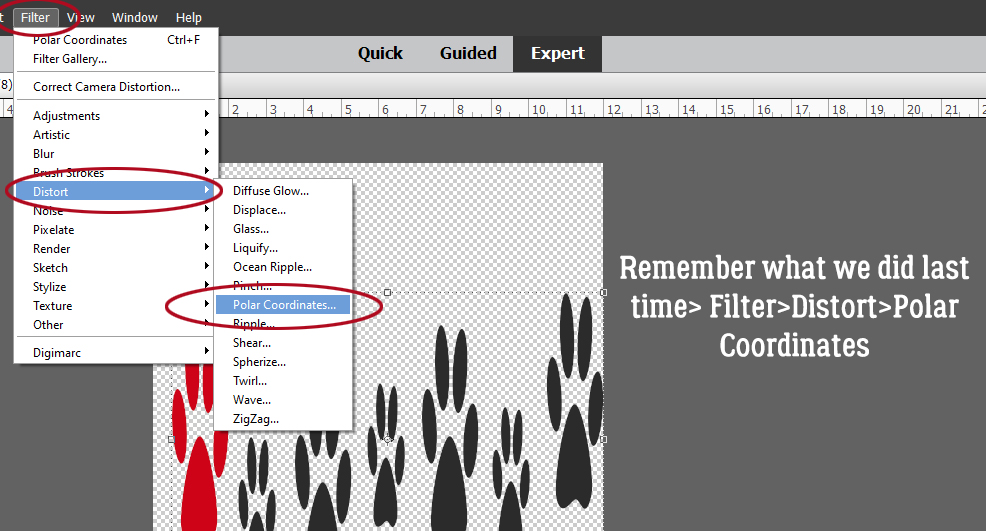
I went back to the Filter menu and chose Distort>Polar Coordinates again. Remember, if you haven’t shut down and restarted Elements, you can apply the same Filter last used simply by clicking CTRL/CMD>F.
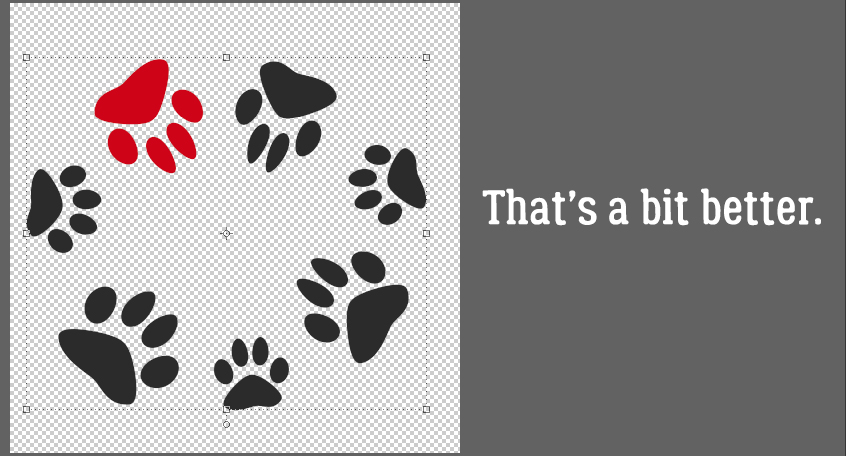
That looks a bit better. Some of the toe prints are still a little unusual, but I can live with that.
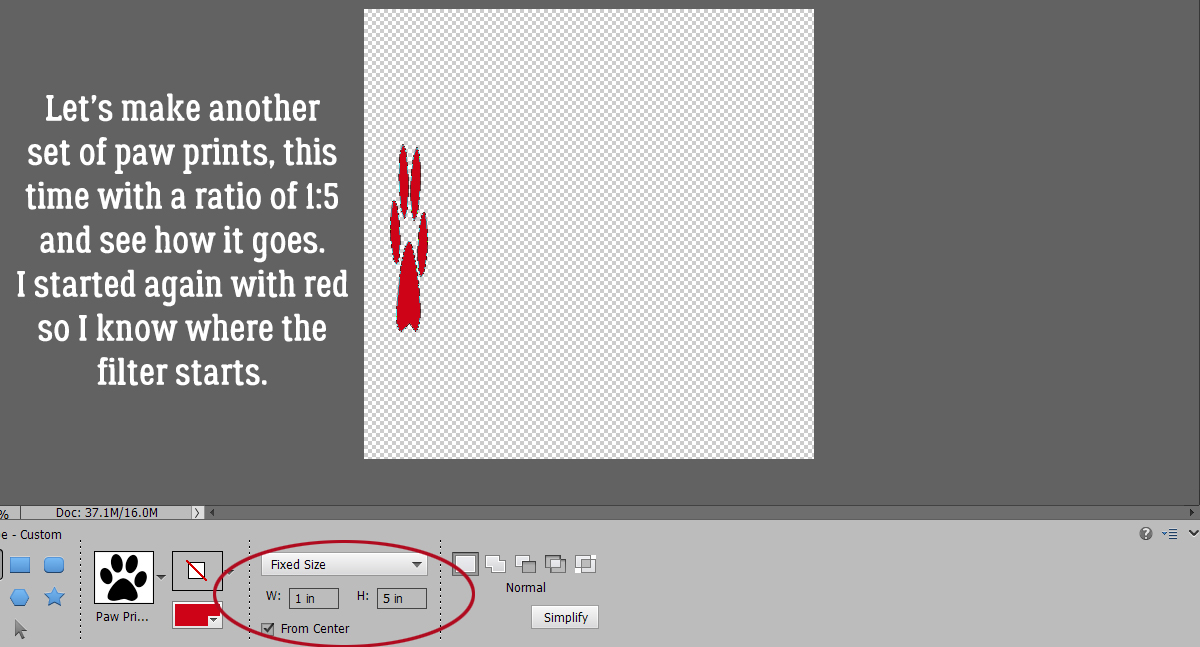
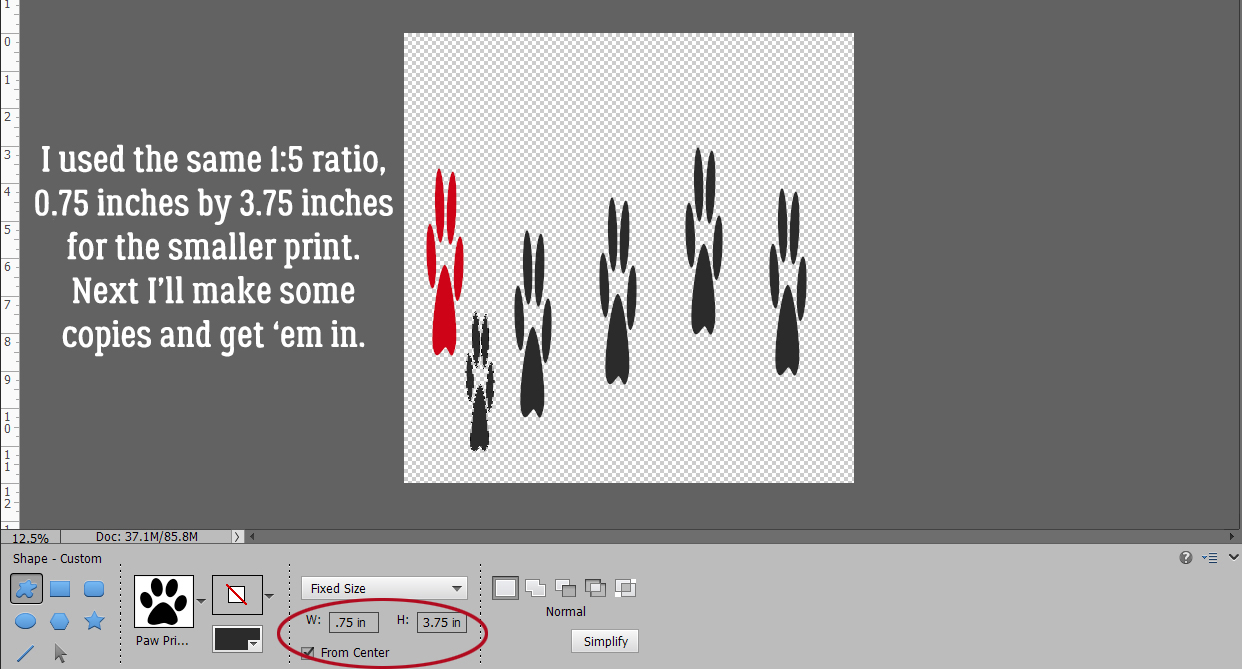
The stencil in the video has two circles of butterflies, so let’s make another, bigger circle. I’m going to use my estimated ratio for this set, 1:5.
For this ring, I added an extra large print. As you can see in the screenshot, I’ve turned visibility for the original circle to off, but it’s still there.
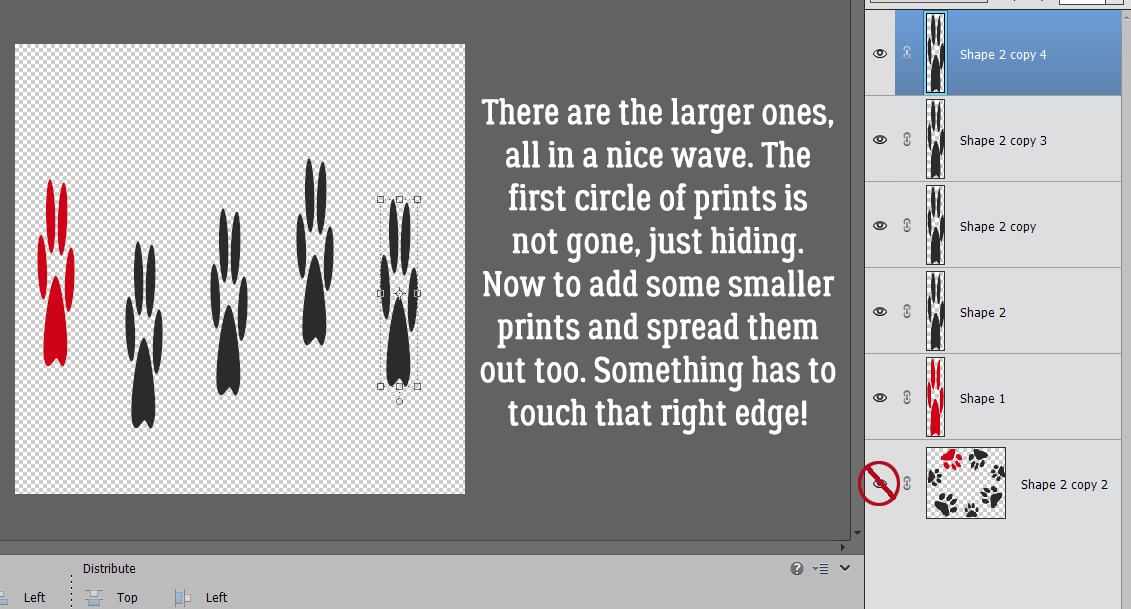
Then I put in a few smaller prints too.
Until I apply the B, I won’t know if this steep wave will be okay or not.
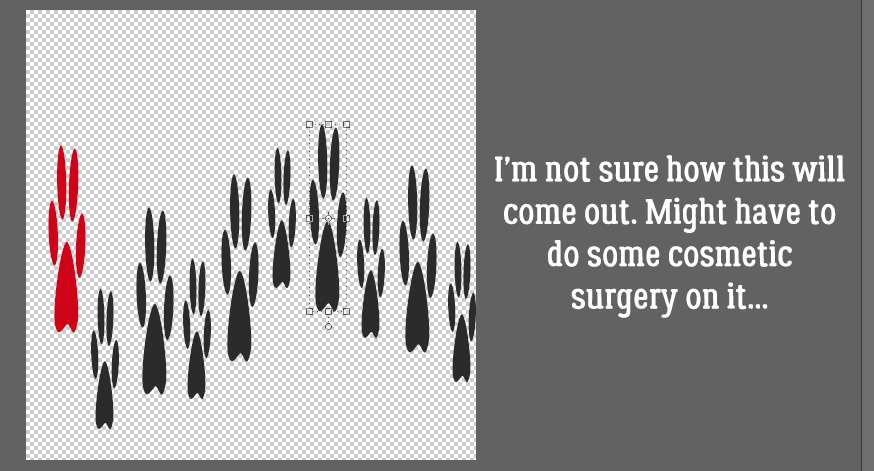
Umm. Cosmetic surgery needed! But do I start all over, or do I take what I have and work with it? I think Copy–Cut-and-Paste will be the easiest path.
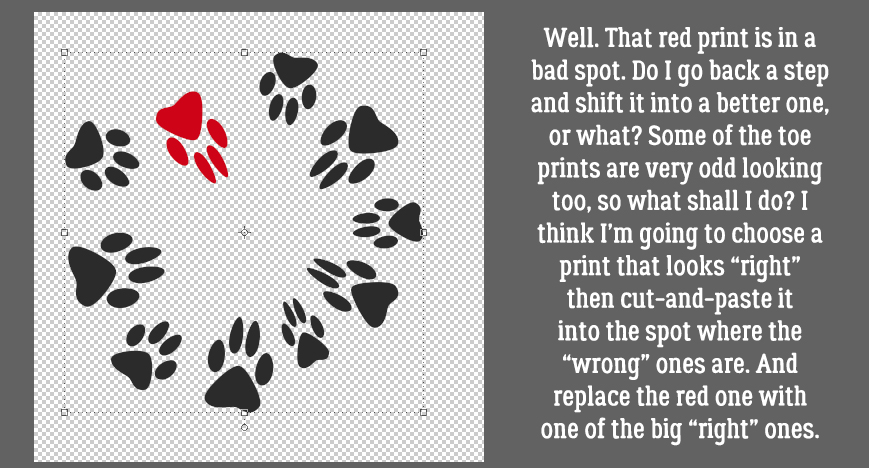
Okay! That’s much better. I Cut (CTRL/CMD>X) out the prints that were too distorted, Copied (CTRL/CMD>C) and Pasted (CTRL/CMD>V) one of the large and one of the small prints in their place. Now to see the two rings of prints together so I know what other tweaks are needed…
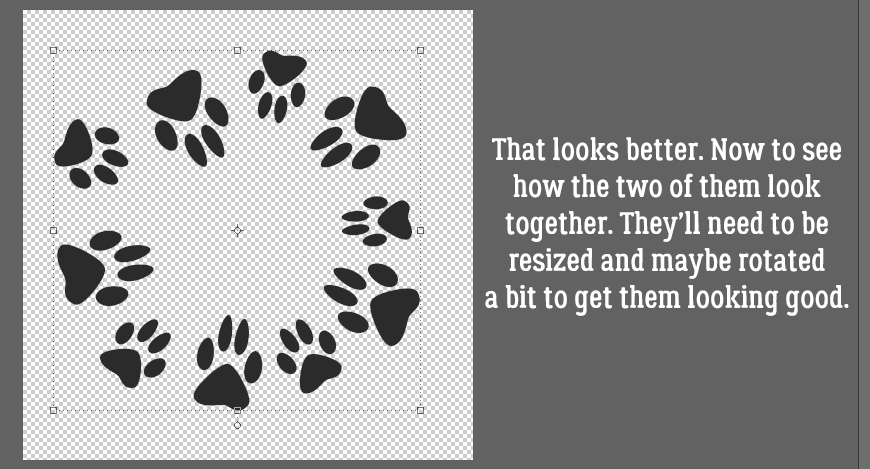
I Resized and Rotated the rings a bit, using the Move Tool and I like the result.
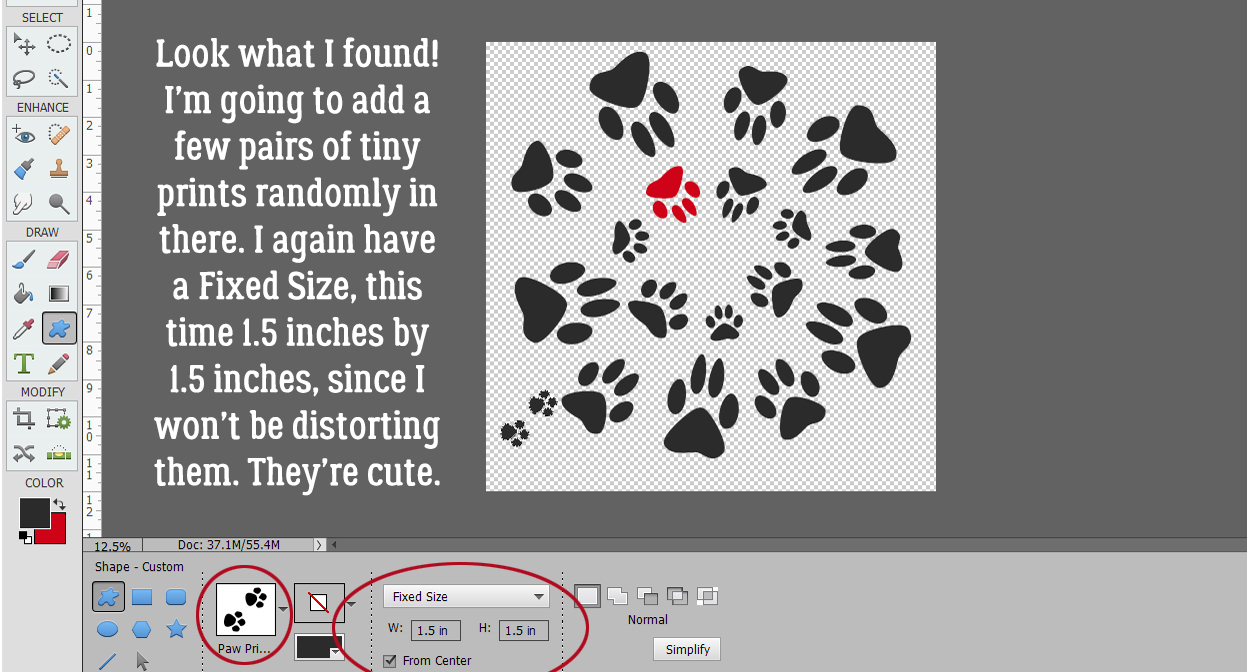
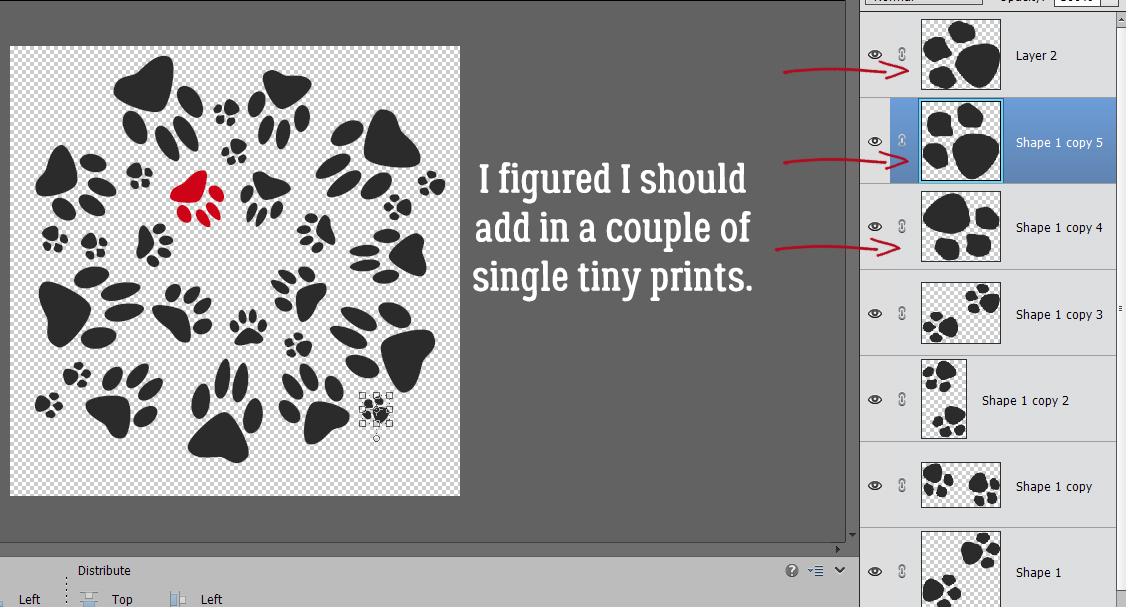
But wait, there’s more! In the Custom Shapes menu I found this pair of tiny paw prints. I’m going to pop some of them into the mix. Because they’re not going to be filtered, I used a symmetrical setting of 1.5:1.5 inches.
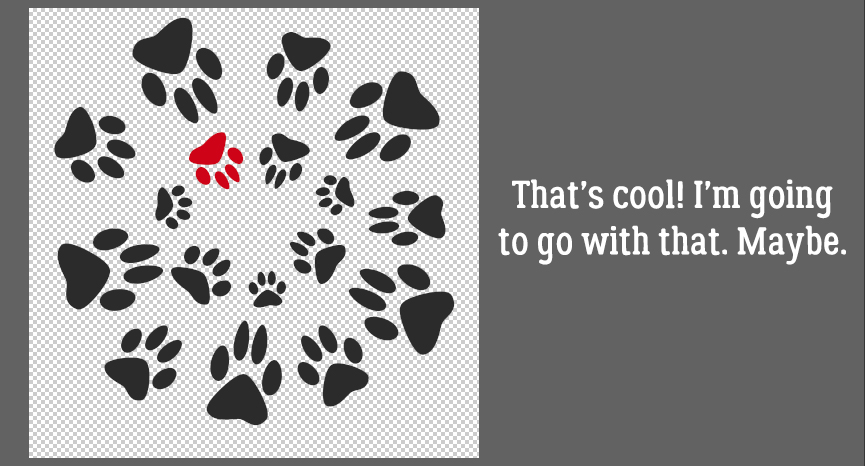
Okay, so I also added a couple (3) single prints too. But this looks a lot like the stencil in the video so I’m very satisfied with my result. If you want to add a circle in the centre, you can do that quite easily.
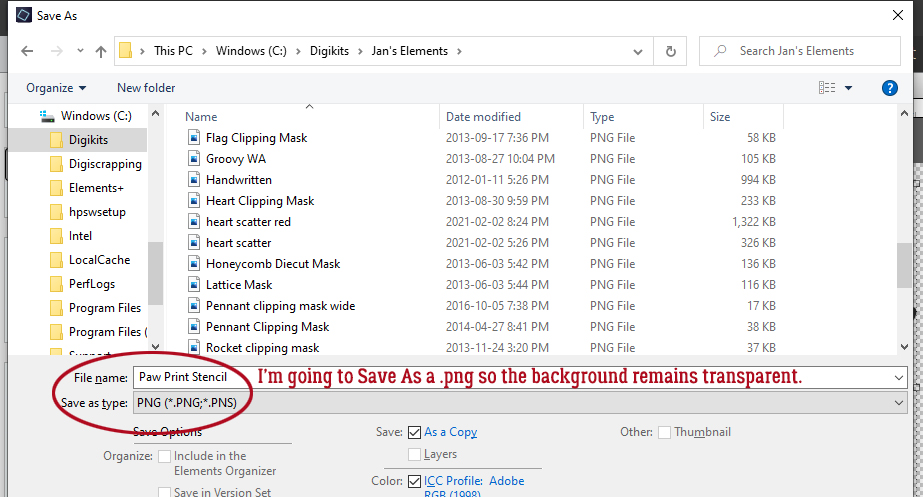
I want to Save my stencil As “Paw Print Stencil” in my personal digital elements folder. The format is .png so the background will remain transparent. That way I can use it in a variety of techniques later.
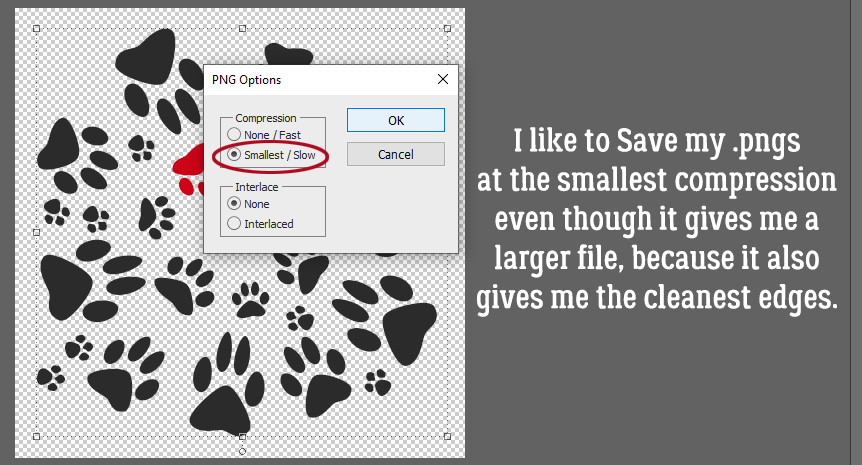
And for Compression, I’ll go with Smallest/Slow non-Interlaced so it retains its crisp edges. Yes, the file will be bigger, but the quality will be better, so it’s a sacrifice I’m willing to make.
Start thinking about the different options I have for using this stencil. Will I find a way to make it look like I’ve used texture paste? You won’t know unless you come back next Tuesday!
Here is a link to the PDF version of this tutorial: https://bit.ly/3rGYILY
![]()
Wow, Jan! It amazes me how you can look at something & know just which tools to use to get the desired result. I remember using that Distort/Polar Coordinates filter on a project a few years back … but I never would have thought to use it. Can’t wait to see how you use the stencil.
Looks amazing !!! I haven’t had time to play with it yet…..hoping to have some time next week 🙂
I can’t wait to see next week’s conclusion.
Jan, do you have a PDF for this circular stencil tutorial?
That’s Ginger’s department. I’ll check with her.
Jan, I have started following your instructions and I am confused. In moving from page 7 to 8 ( I downloaded a pdf using an app), it seems like a step was skipped.
pg. 7 : “And then after I’ve applied the Filter, this is the look. But I’m jumping ahead….” Picture of circular design.
pg. 8: Picture of shapes in a Sine wave
It is not clear where the sine wave pattern came from.
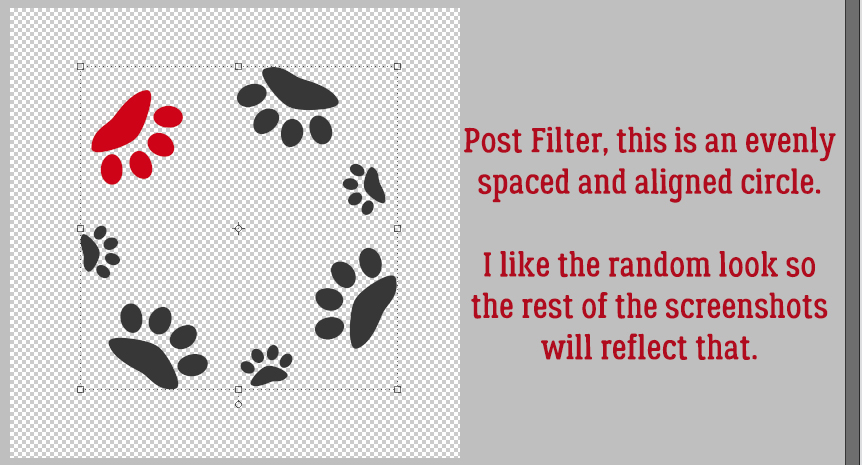
Steph, if you read the text on the screenshots, the one with the Filter applied shows the effect of aligning all the prints and says, “I like the random look so the rest of the screenshots will reflect that.” It’s followed by a screenshot of all the prints in a sine wave pattern rather than aligned. Pre-Filter.
The PDF link is up!
https://bit.ly/3rGYILY
I used my first attempt at a circular shamrock design on my page in the Use It All Challenge.
https://gallery.gingerscraps.net/showphoto.php?photo=544920&title=my-lucky-charm&cat=1089
I love it!!