Digitize your Handwriting!
![]()
Last week’s digital colouring tutorial had me thinking about how I could make better use of some of my digital stamps. If you recall, I talked about the ones with white backgrounds and how that would make the technique I showed you very difficult. So I did a little snooping and found a terrific tutorial on digitizing handwriting that would work perfectly for those stamps of mine. It’s from the blog of Kelly Leigh (herecomesthesunblog.net) and it’s easy to follow, although I’ve expanded on a few steps for the beginners in our midst. Let’s proceed!
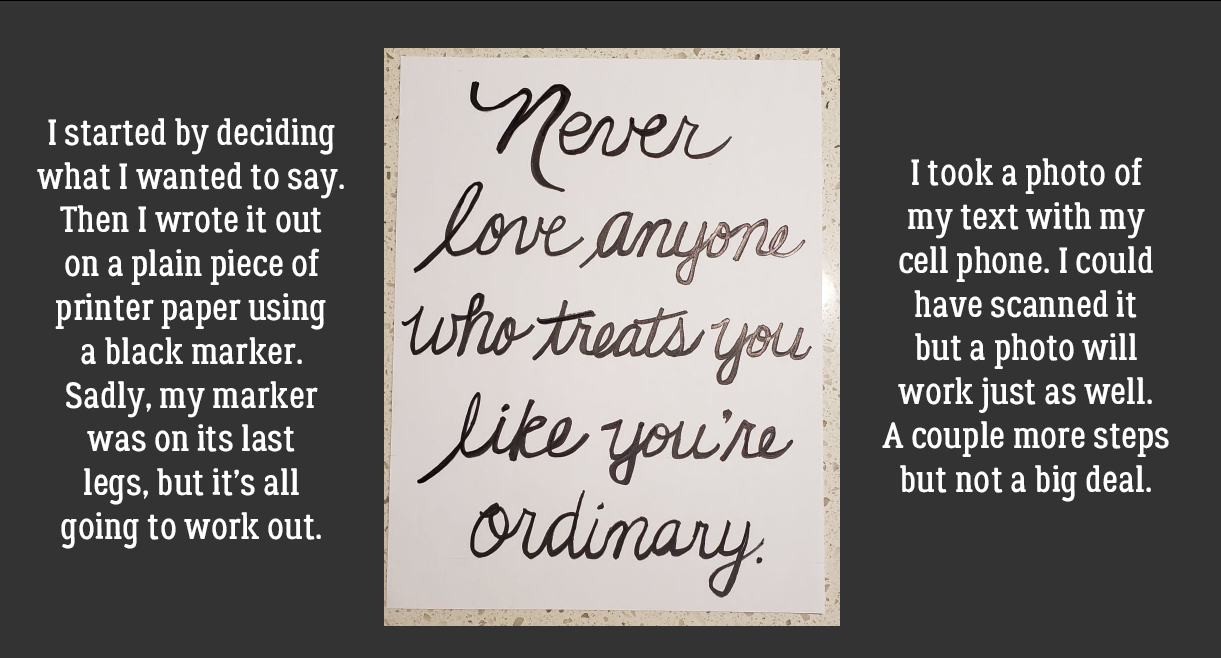
How many of you have really wanted to have journaling in your own handwriting on your digital layouts but not had a clue how to do it? This is for you! But it’s not only good for journaling… if you’ve got some mad calligraphy skills you can create your own inspirational word art, titles and whatever your imagination comes up with. All you need are a piece of white paper and a (new) black marker. And Photoshop Elements, of course. I chose a message that resonated with me for my demo. I wrote it out on my paper; my marker had seen better days and I was writing much larger than I usually do, so it’s a little ragged looking, but as a demo, it’ll work just fine. Then I took a photo of my finished writing with my cellphone. It might have looked better and been a bit less work if I’d scanned it, but that would have meant a trip downstairs and after I’d moved my (not inconsiderable) weight in potting soil yesterday, I just didn’t want to do that.
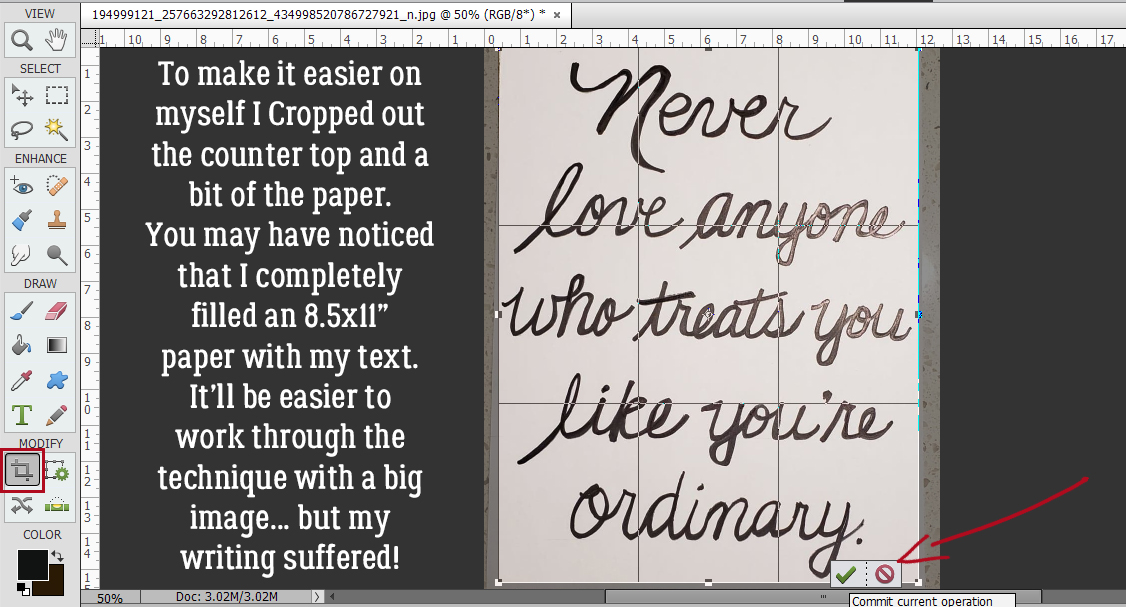
I Cropped away as much of the paper and my countertop as I could. I wanted the demo image to be large and easy to work with so I filled the entire 8.5×11″ sheet of paper. But that wouldn’t be necessary for most applications.
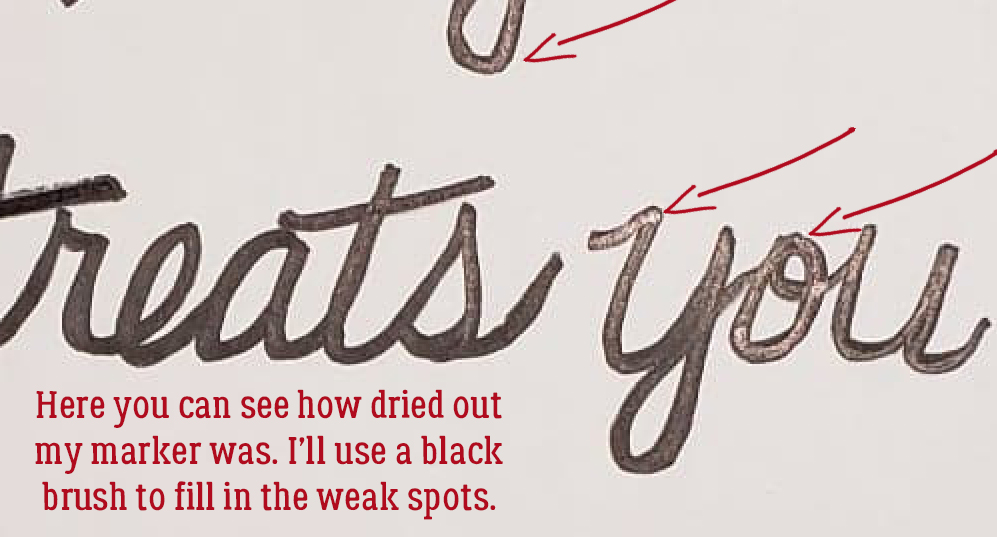
Here I’ve Zoomed in on my marker so you can see how less-than-awesome it looks up close. I’ll fix it with a black brush later; I could have saved myself a lot of work by using a new marker, but I didn’t have one at hand…
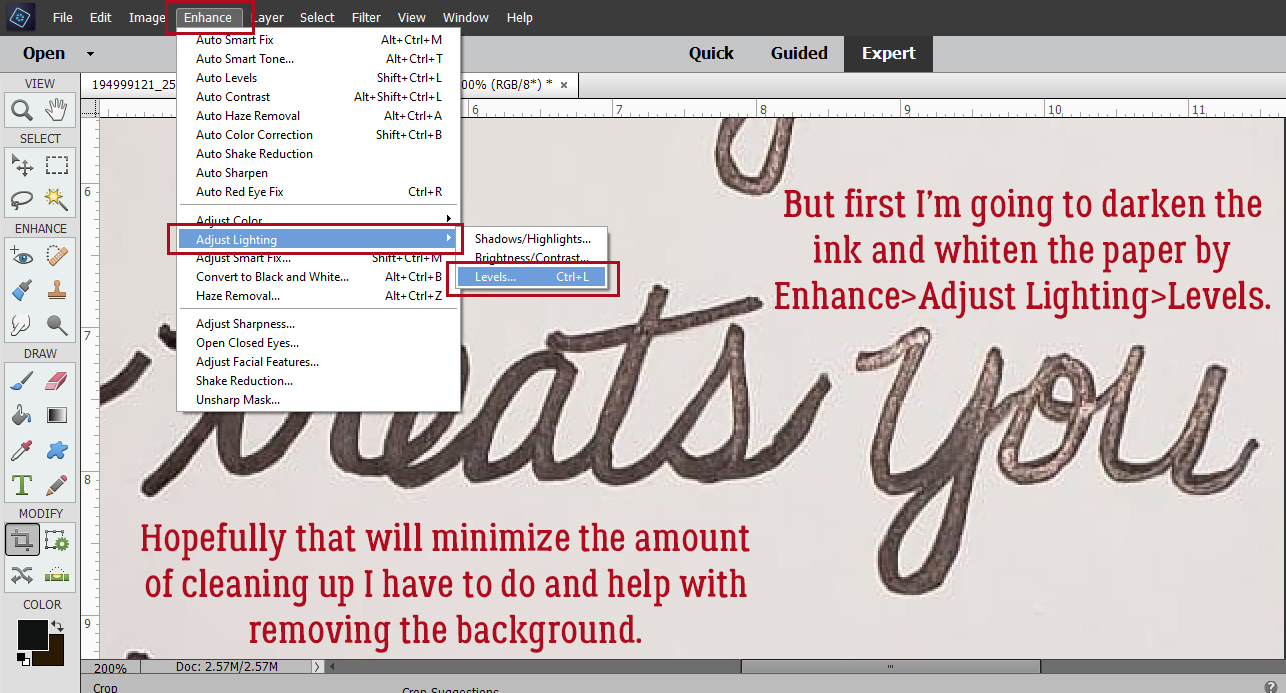
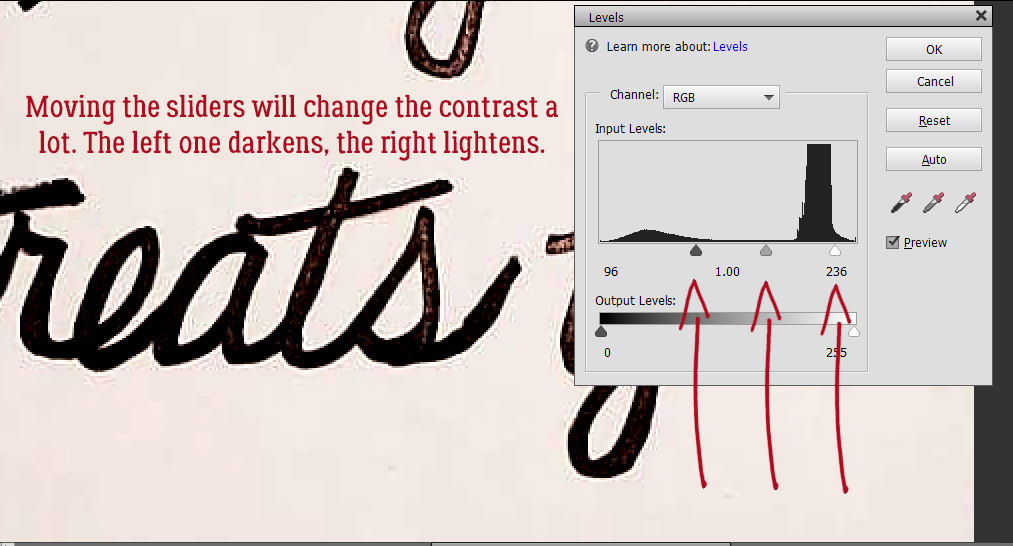
But first, I want to make what black there is as black as I can, and the white as white as I can. The better the contrast, the easier the technique is. I used Enhance>Adjust Lighting>Levels for this step.
I only adjusted the Input Levels. The left-most slider adjusts the black areas; by moving it to the right, the black gets darker. The middle slider controls the midtones, and by moving it to the right as well, it helped blacken the text too. The slider on the far right brightens the white areas so it was shifted to the left.
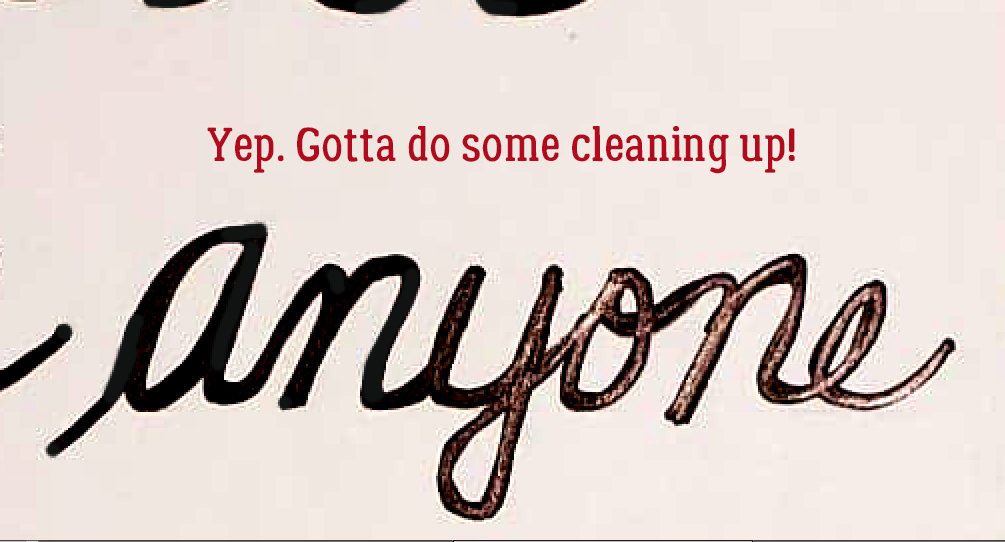
There are still gappy areas in the text, but that’s okay.
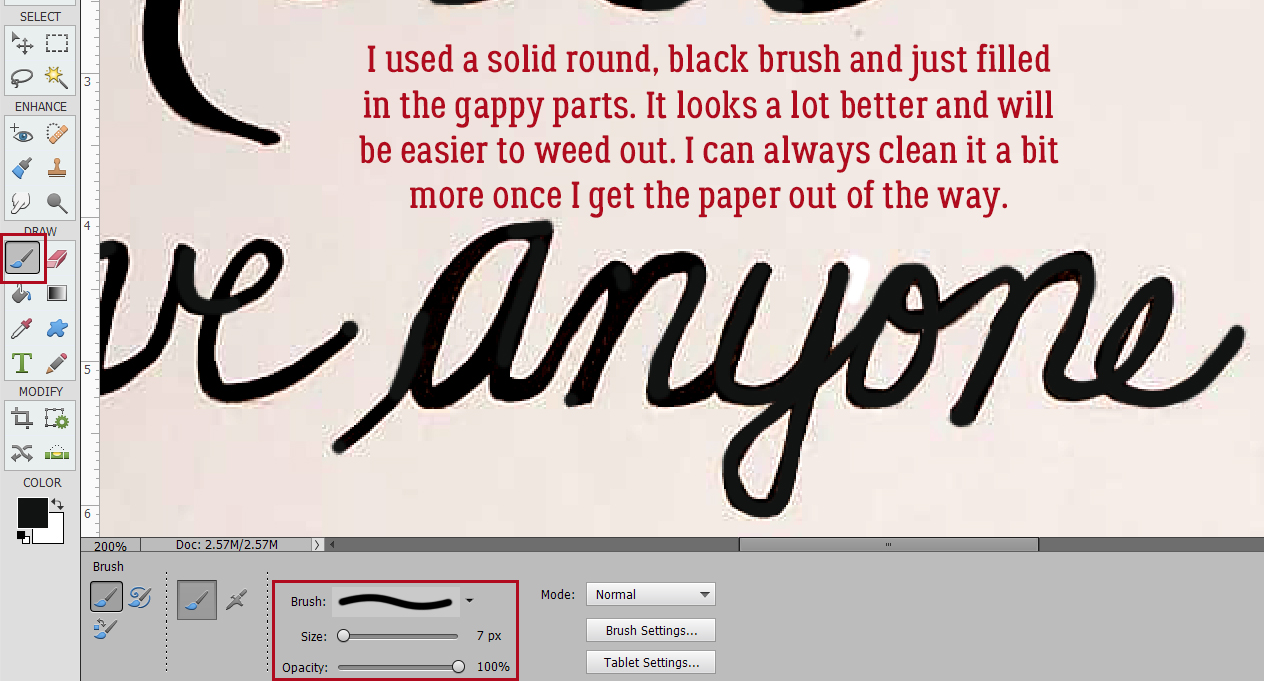
I just used a solid round black Brush at 100% Opacity to eliminate the gaps.
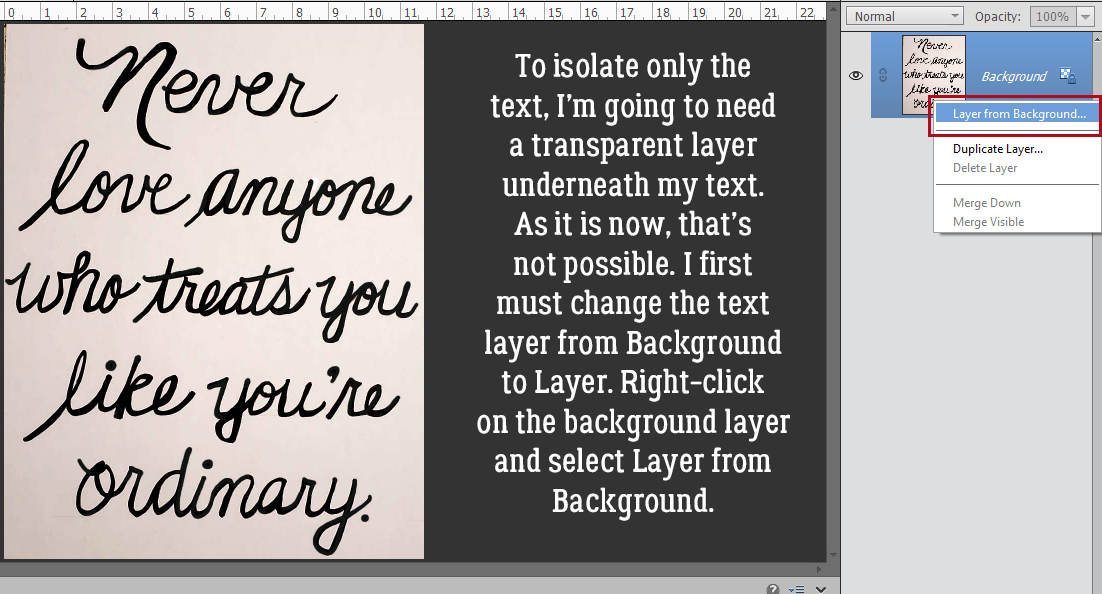
Now to the good part! To eliminate the paper, I’m going to want a transparent layer UNDER my text layer. Elements won’t allow a layer to be placed under a Background. (The italics are actually displayed for all layers Elements has determined are background layers.) So to get past that, right-click on the layer and choose Layer from Background…
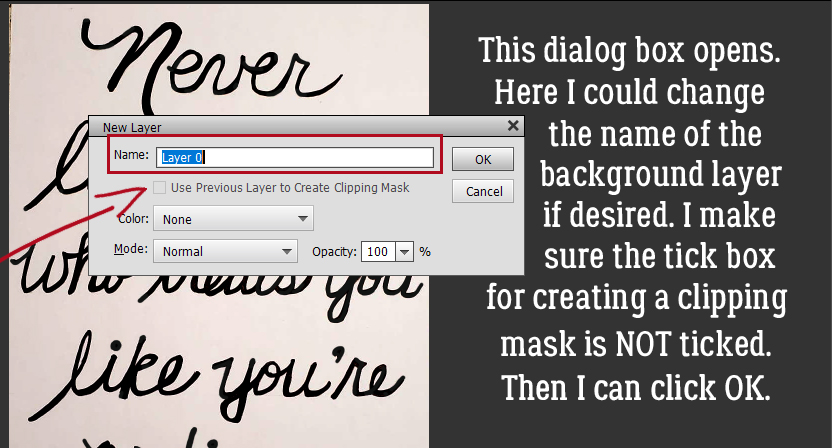
The dialog box that opens allows for the layer’s name to be changed, if desired. I’m not going to bother. Make sure the tick box for Use Previous Layer to Create Clipping Mask is NOT ticked and Color is NONE.
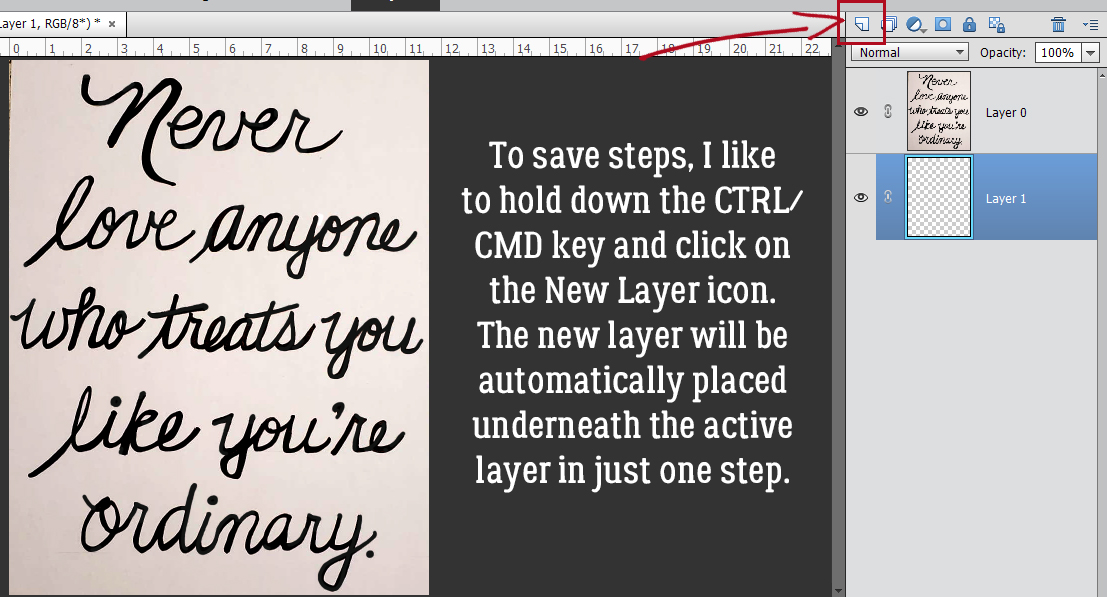
Once that’s done, it’s possible to drop a blank layer underneath the text layer. It’s quickest and easiest to hold down the CTRL/CMD key and click on the New Layer icon at the top of the Layers Panel to create a blank layer under any other active layer. Then I don’t have to move the new layer down the stack.
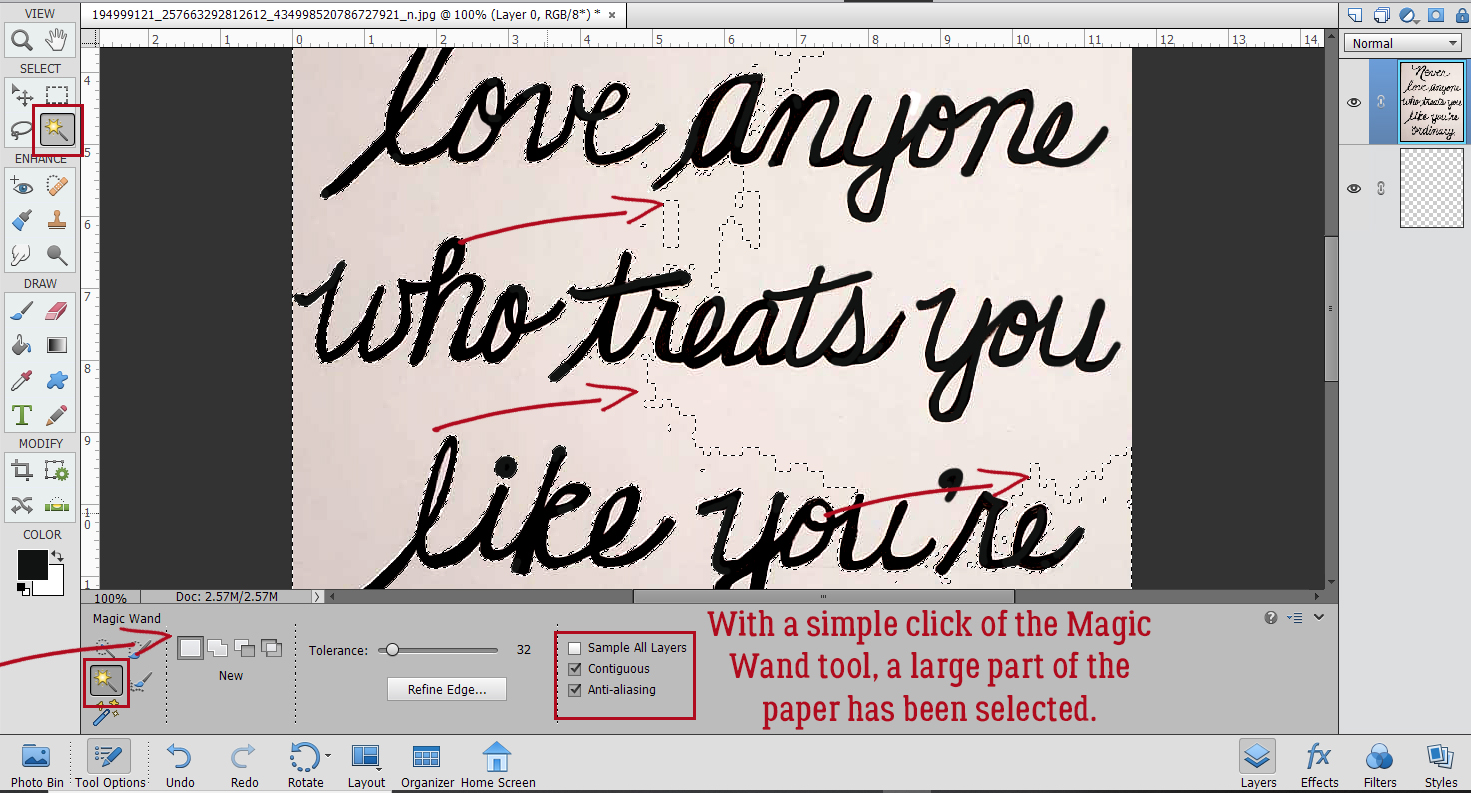
Now I’m going to use the Magic Wand tool, as shown in the Tool Panel and Tool Options menu, to remove the paper. Click in the white area and it Selects a chunk of the paper. If my paper was perfectly clean and my image too was perfectly clean, this step would probably Select ALL of the paper, But my paper and image aren’t so this will take a few clicks.
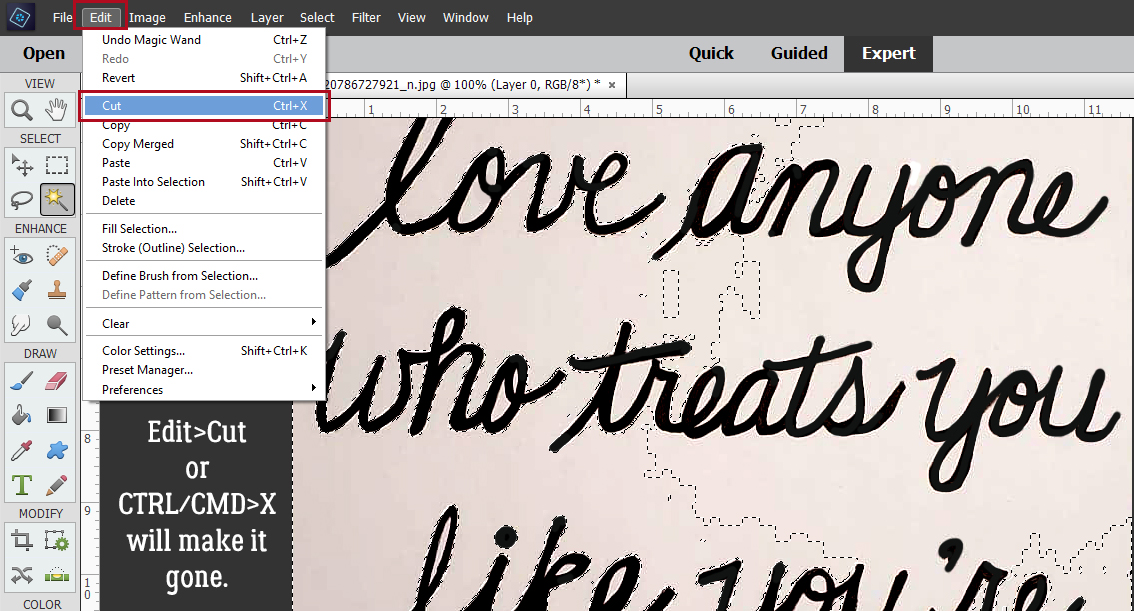
Edit>Cut or CTRL/CMD>X removes all the paper that the Magic Wand Selected!
I went over the rest of the image and removed the paper. Where there are loops in my letters, the paper was a bit clingy, but after a few minutes I had all the paper removed. The edges of the text looked a little raggedy up close, so I CTRL/CMD>Clicked on the text layer’s thumbnail to Select the edges of the text then clicked Select>Refine Edge…
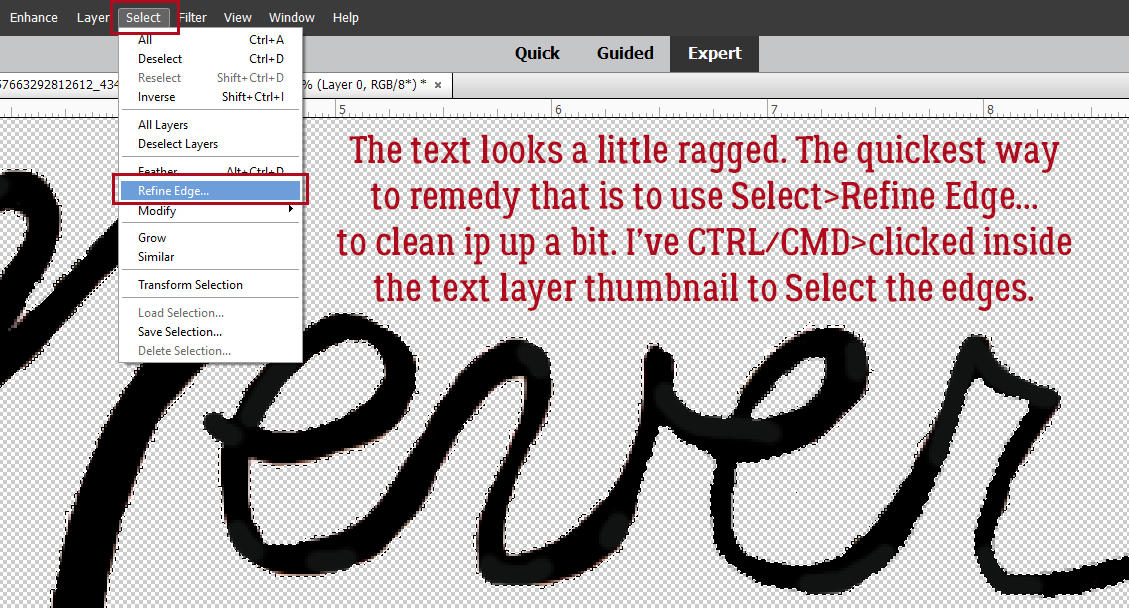
This menu looks intimidating but it really isn’t. Experiment a bit by pulling the sliders and watch what happens in the Preview pane. Don’t worry, the white you see here isn’t actually there, it’s only part of the Preview so you can see what the adjustments are doing.
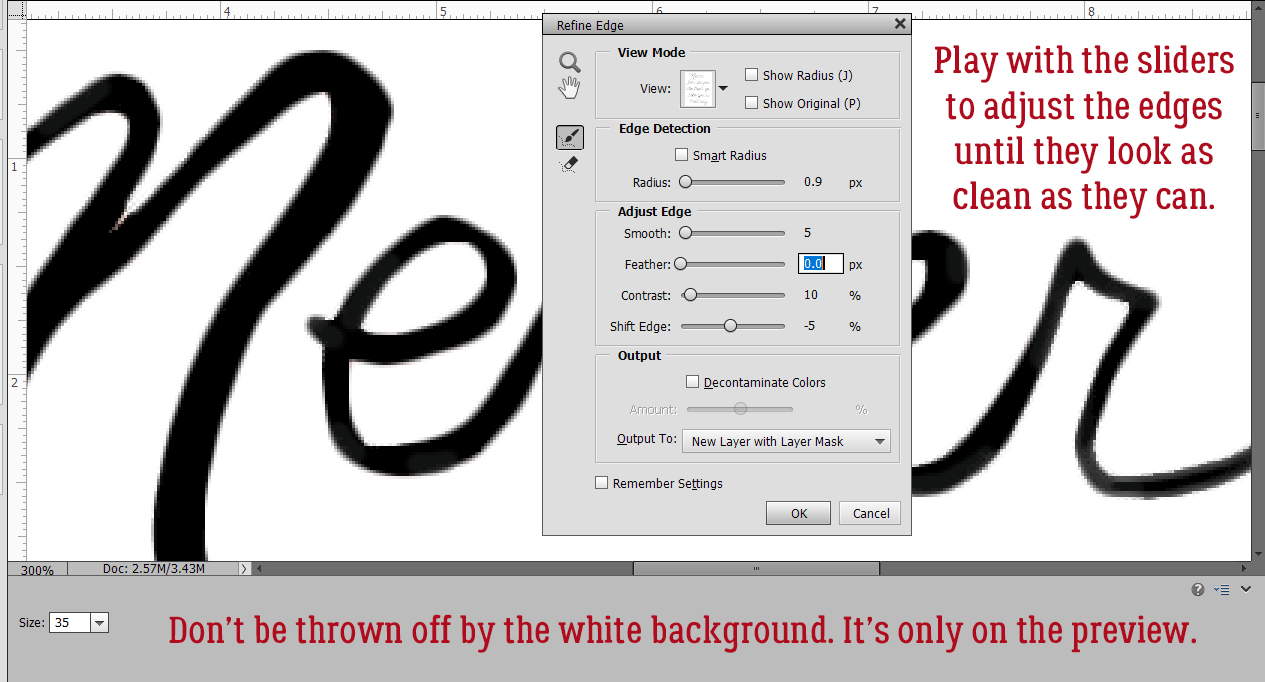
However… this method of adjustment DOES produce a new layer with a Layer Mask attached. Also notice that the original text layer’s visibility is turned off. To make things easier, right-click on the new layer and choose Simplify Layer. That adds the layer mask to the layer.

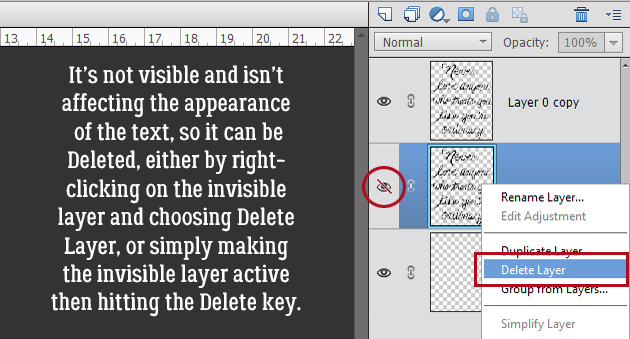
What about the original layer? It’s not visible, and its invisibility doesn’t affect the text at all, so it can just be Deleted, either by right-clicking on the invisible layer then Delete Layer, or just by hitting the Delete key.
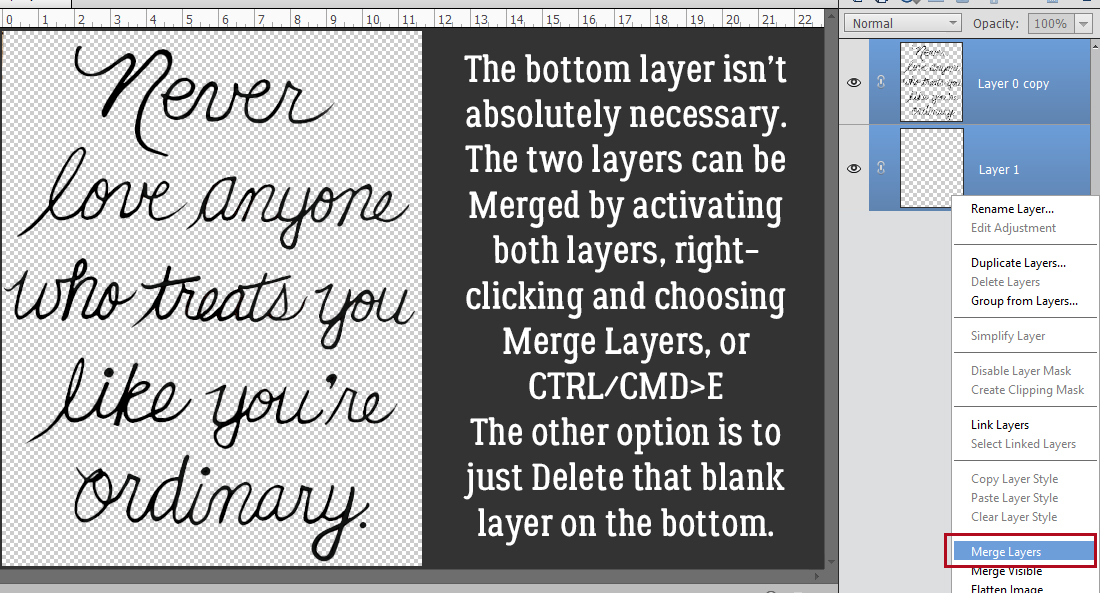
Again, that layer we added underneath the text layer isn’t necessary any more (although it was VITAL when we were removing the paper) so it can either be Merged (CTRL/CMD>E) with the text layer or just Deleted.
There! That’s all you need to know to digitize your handwriting, or to remove the background of a digital stamp. I spent some time cleaning up the text using the Brush tool and the Eraser tool but you might not need to do any of that.
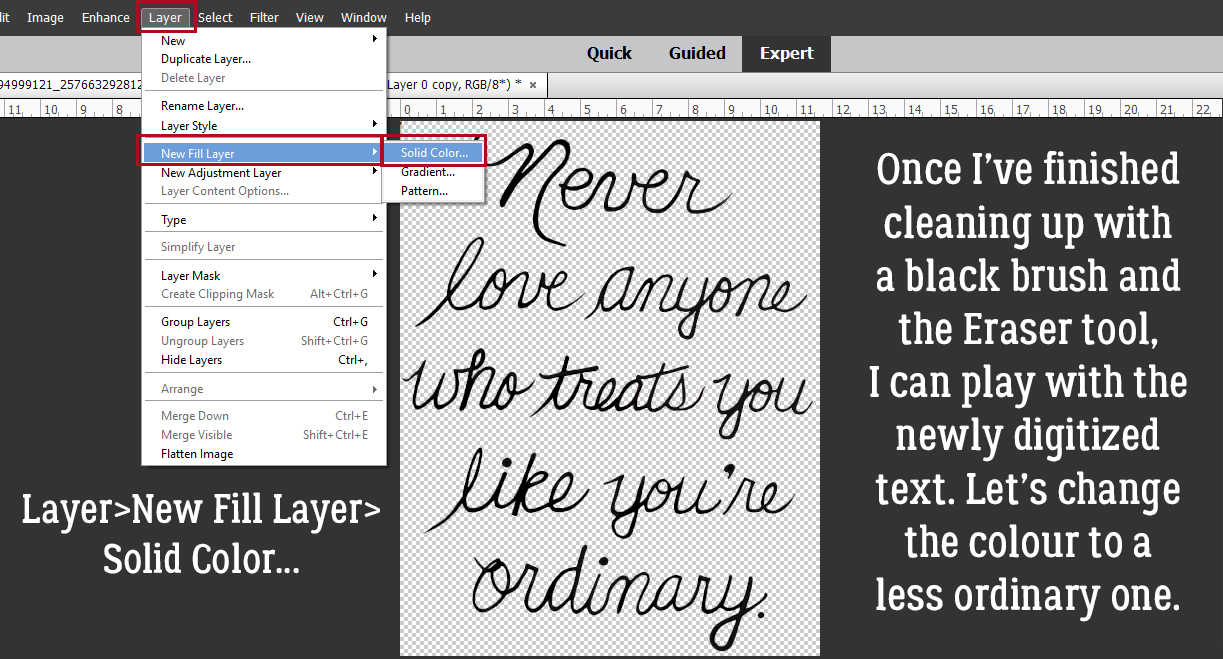
If you want to change the text’s colour, that’s easy to do by filling the layer with your new colour. Layer>New Fill Layer>Solid Color
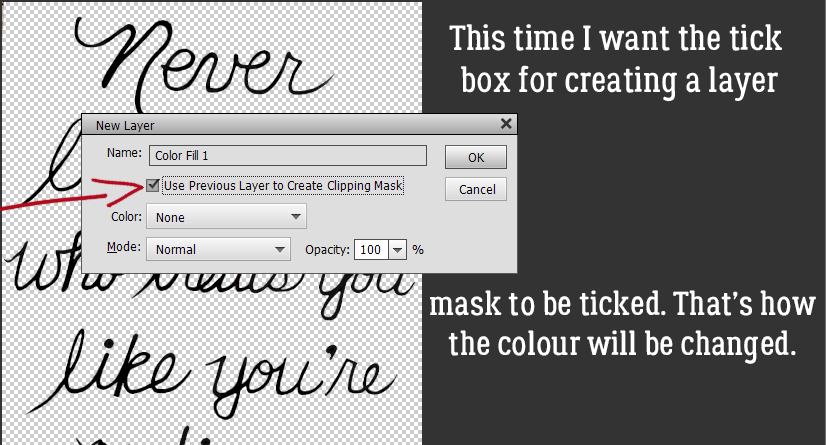
This time check the tick box for Use Previous Layer to Create Clipping Mask so that your new colour is applied to the text without any extra steps.
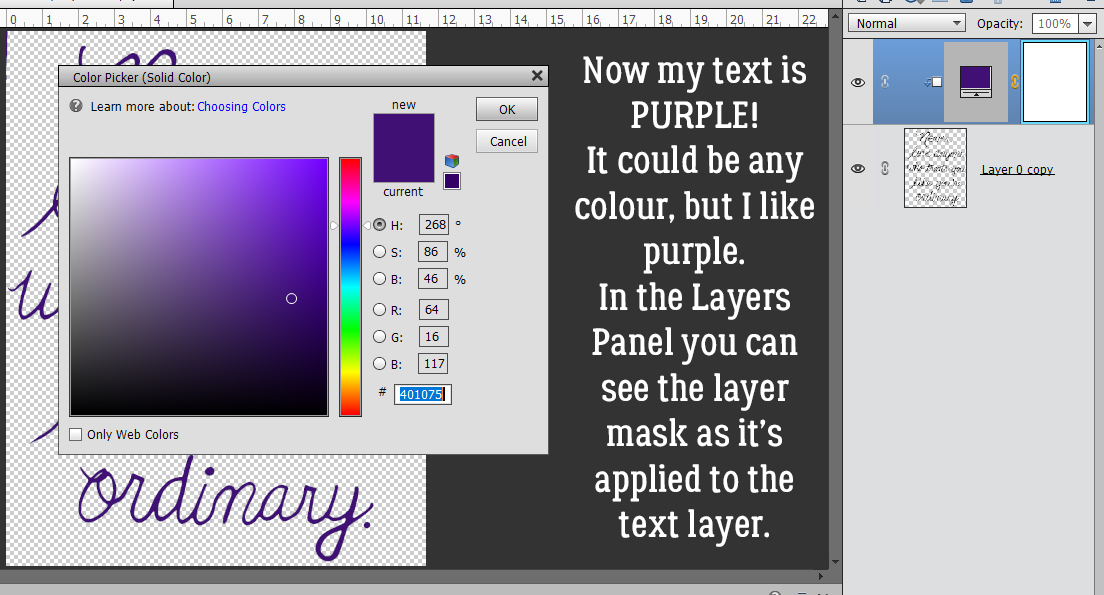
When the Color Picker opens up, go nuts! I like purple. The colour is applied to the text via Clipping Mask as you can see in the Layers Panel.
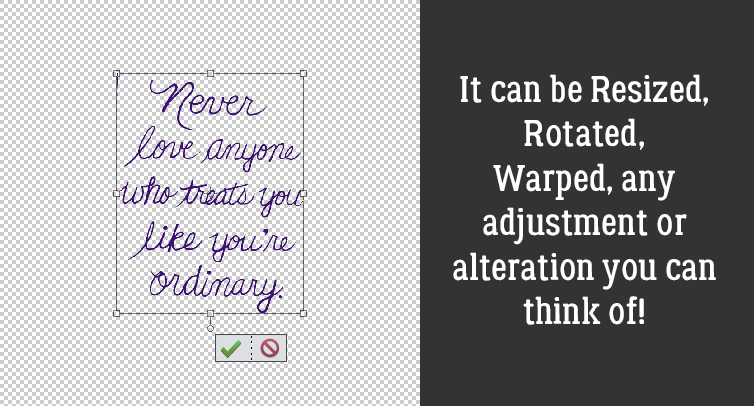
The digitized text can also be Resized, Rotated, Warped, Skewed … whatever you want!
If you want to Save your new image, it should be Saved As a PNG so the background stays transparent. Save it to a folder where you can find it again, and give it a good name.
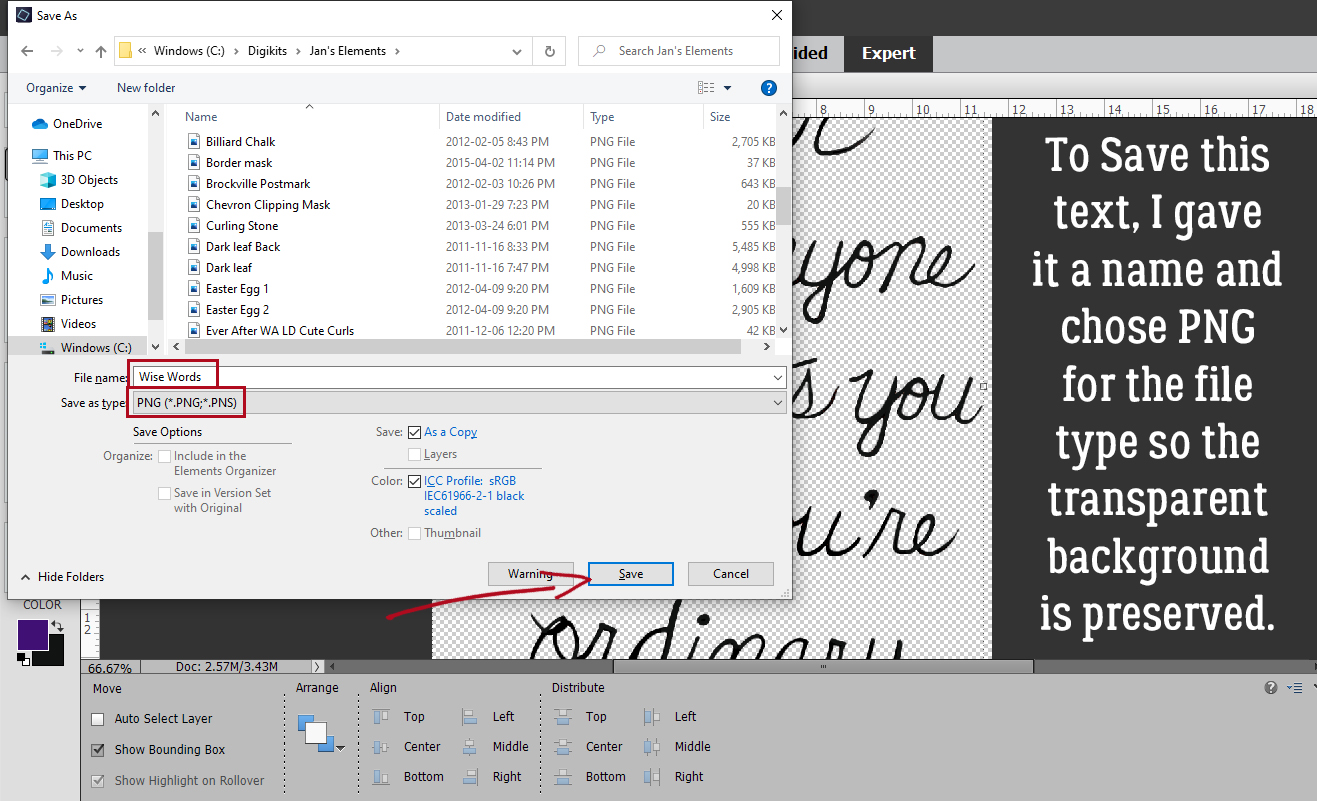
Compression should be Smallest/Slow so the details are preserved. And it doesn’t need Interlacing.

That’s all there is to it! I think I should digitize my signature so I can add it to documents. Give it a try!
PDF Link: https://bit.ly/2Ug19cH
![]()
Thank you so much for sharing your expertise! Will there be any more downloadable Tutorial Tuesday files? I have downloaded every one containing a link. and screenshots/photos are hard to work with for future referencing. I would really appreciate pdf files for these instructions, if possible.
Thank you for your kind words. Ginger, the owner of the site, is the PDF person. I just create the tutorials! (Each tutorial takes me roughly 8 hours to put together.) She, like all of us, is a busy person and sometimes doesn’t get to converting the tutorials right away. She’s told me she’s hoping to eventually convert all 216 tutorials (to date) to PDFs for all our valued scrappers.
Thanks for this tutorial, Jan! My mom has beautiful handwriting & I’ve been wondering how I could use it on a LO with having it on a journal card. I didn’t realize this could be done in PSE.
What a great way to use this tut! I have several postcards with ancestors’ handwriting on them that I should try it out on. Some of them are over a hundred years old, written during WWI, so they’re quite precious to me.