Taking Those Shapes to the Next Level
![]()
I don’t know about you, but I’ve been doom-scrolling Twitter, with MSNBC on in the background, continually since the Russians invaded Ukraine. As if things weren’t already awful enough… Two of my mom’s sisters and one of her cousins married three Ukrainian-Canadian young men back in the 50s. My dad’s mom was Polish. This invasion feels personal to me and it’s hard to shift gears. But I’ve succeeded – I have a tutorial for you that builds on last week’s Custom Shapes clipping masks. This time I’m going to show you some ways of turning those shapes into 3-D frames – it’s simple and so much fun! Rather than reinvent the wheel and go into obsessive detail with every step, I’m going to assume you’ve got some Elements chops and sort of start in the middle.
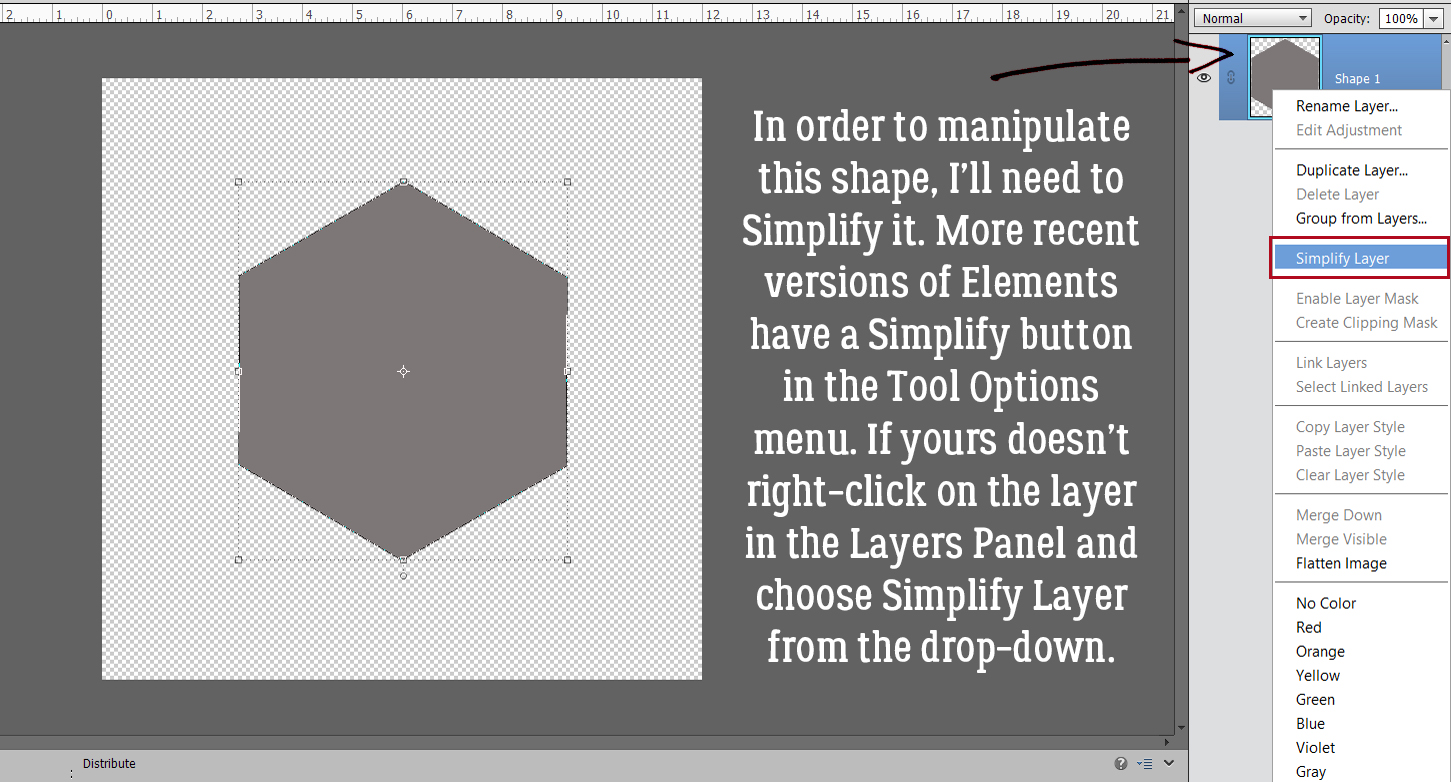
Each of these Shape frames will start out the same way, with choosing the Custom Shape and dragging it out on the canvas. As usual, I’m working on a 12×12 canvas so I have lots of room. I started with a hexagon.

I’ll always remind you that Custom Shapes begin life as Smart Objects and don’t have a lot of flexibility. So before you can manipulate them, you’ll need to Simplify them… dumb them down, so to speak. If your version of Elements has the Simplify button in the Tool Options panel, just click it. If you DON’T have that button, you’ll need to right-click on the layer then choose Simplify Layer from the dropdown menu.
To create the frame’s opening, first we need a Copy layer. Either right-click on the layer and choose Duplicate Layer>OK or use the keyboard shortcut CTRL/CMD>J to quickly make that Copy. (I LOVE Copy layers and recommend you come to love them too. When you play with a Copy, you’ll still have the original if you make a booboo.) (Second editorial comment: CTRL refers to Windows-based systems, CMD to Macs.)

Obviously, a Copy is identical to the original and that’s not going to work to make a hole. So the Copy layer will need to be Resized. The easiest way to do that in this context is to click on one of the handles on the Bounding Box, which opens up the Move tool‘s Tool Options menu. Then, with the Constrain Proportions box ticked and the centre of the layer as the reference point, type a numeric value into one of the boxes as shown. I went with 85%, which will give a nicely solid frame.

In this screenshot you can see the outline of the smaller hexagon. Now it can be used to remove the middle of the frame.

Ensure your large hexagon layer is active and then click Edit>Cut, or use the keyboard shortcut CTRL/CMD>X.  We’ll come back to the hexagon in a minute. What if you chose a more complicated shape, like this seal? You can use all the controls in the Tool Options, like using Defined Size, and if you tick the From Center box, Elements will put the shape right in the centre of the canvas. Here, I’ve shown the Simplify button (the one you may not have). Experiment with your software; the more you play with it, the better you’ll understand what it can do and what it can’t. (And these tutorials will make more sense…) You’ll find a system and a rhythm that works for you.

So. What if you didn’t tick the From Center box and now your two shapes aren’t positioned precisely like you want them to be? Elements has a fix for that! Activate both layers by clicking>Shift>clicking on them in the Layers Panel. You’ll see the Move tool Tool Options menu over on the left. Where it says Align, click on the Center button – Elements will move both layers so their centres are aligned. Then right away click the Middle button, and Elements moves both layers so the middles are aligned. Easy peasy!

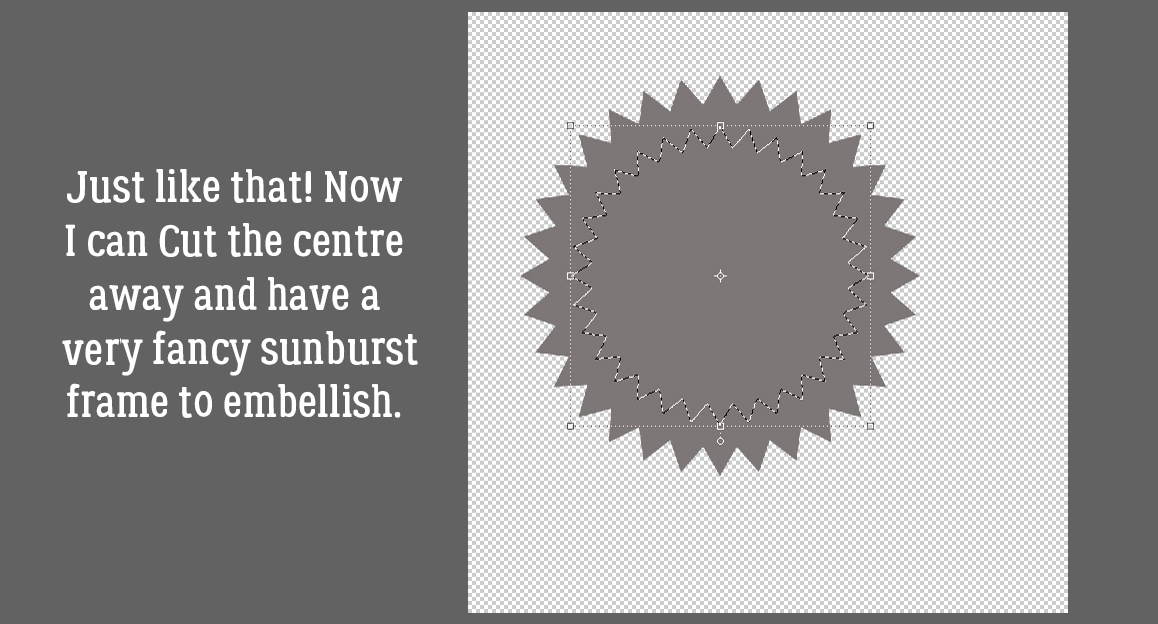
CTRL/CMD>X and now I’ve got a nice starburst frame.
Okay, back to the hexagon! When I was thinking about this technique, my mind’s eye saw a shiny green frame with glittery gold edges. Making that a reality will take a couple of additional steps. I’ll need to create the border first, because once I alter the frame itself it’ll be harder. The border needs to be completely separate from the frame so I can jazz them up in different ways. That means it goes on its own layer. (Of course!!) So I added a new blank layer to the Layers Panel by clicking on the sheet-of-paper icon in the strip across the top of the Panel.
 Quick-and-easy border making uses the Stroke Edit. CTRL/CMD>click on the Layer Thumbnail to “Select” the edges of the hexagon, inside and out. Make sure you’re on the blank layer, then Edit>Stroke (Outline) Selection.

I want the glittery border to be visible but not overpowering so I went with 35 pixels for my width. The colour can be anything – the glitter will hide it anyway. I chose the Outside setting; it’s not going to round the hexagon’s corners enough to worry about.

This is something I sometimes forget when I’m doing something on the fly. If there are marching ants – something has been Selected – none of the things I try to do that don’t involve the Selected area will actually happen. They need to go away. Select>Deselect or CTRL/CMD>D will do that.

I’m going to use some Styles now. Have you bought some Styles – .ASL files – but don’t know how to get them into Elements so you can use them? Some of the GingerBread Ladies collaborations include Styles (usually glitter, but not always; Craft Fair is a good example) so you could have some and not even know! I’m going to show you quickly how to access them. 
I’ve renamed all my Styles files and Copied them into the Elements Program Files for easy retrieval but you don’t have to worry about that, you can grab them from anywhere. If you don’t know where they are, run a Search using .asl as your search term, then let your computer do the work.

I chose a green acrylic gel Style from Just So Scrappy‘s Lucky Me… seemed appropriate for March, however cheesy. The Style added colour, a bevel and highlights all in one move! If the one you choose doesn’t look like you want it to, CTRL/CMD>Z it and try again.

I like this darker gold glitter Style from the same collection. (I’ve gotta say, Katie [Just So Scrappy and Ooh La La Scraps] makes perfect Styles of all descriptions. Check them out! I’ve linked to her shop for you.)

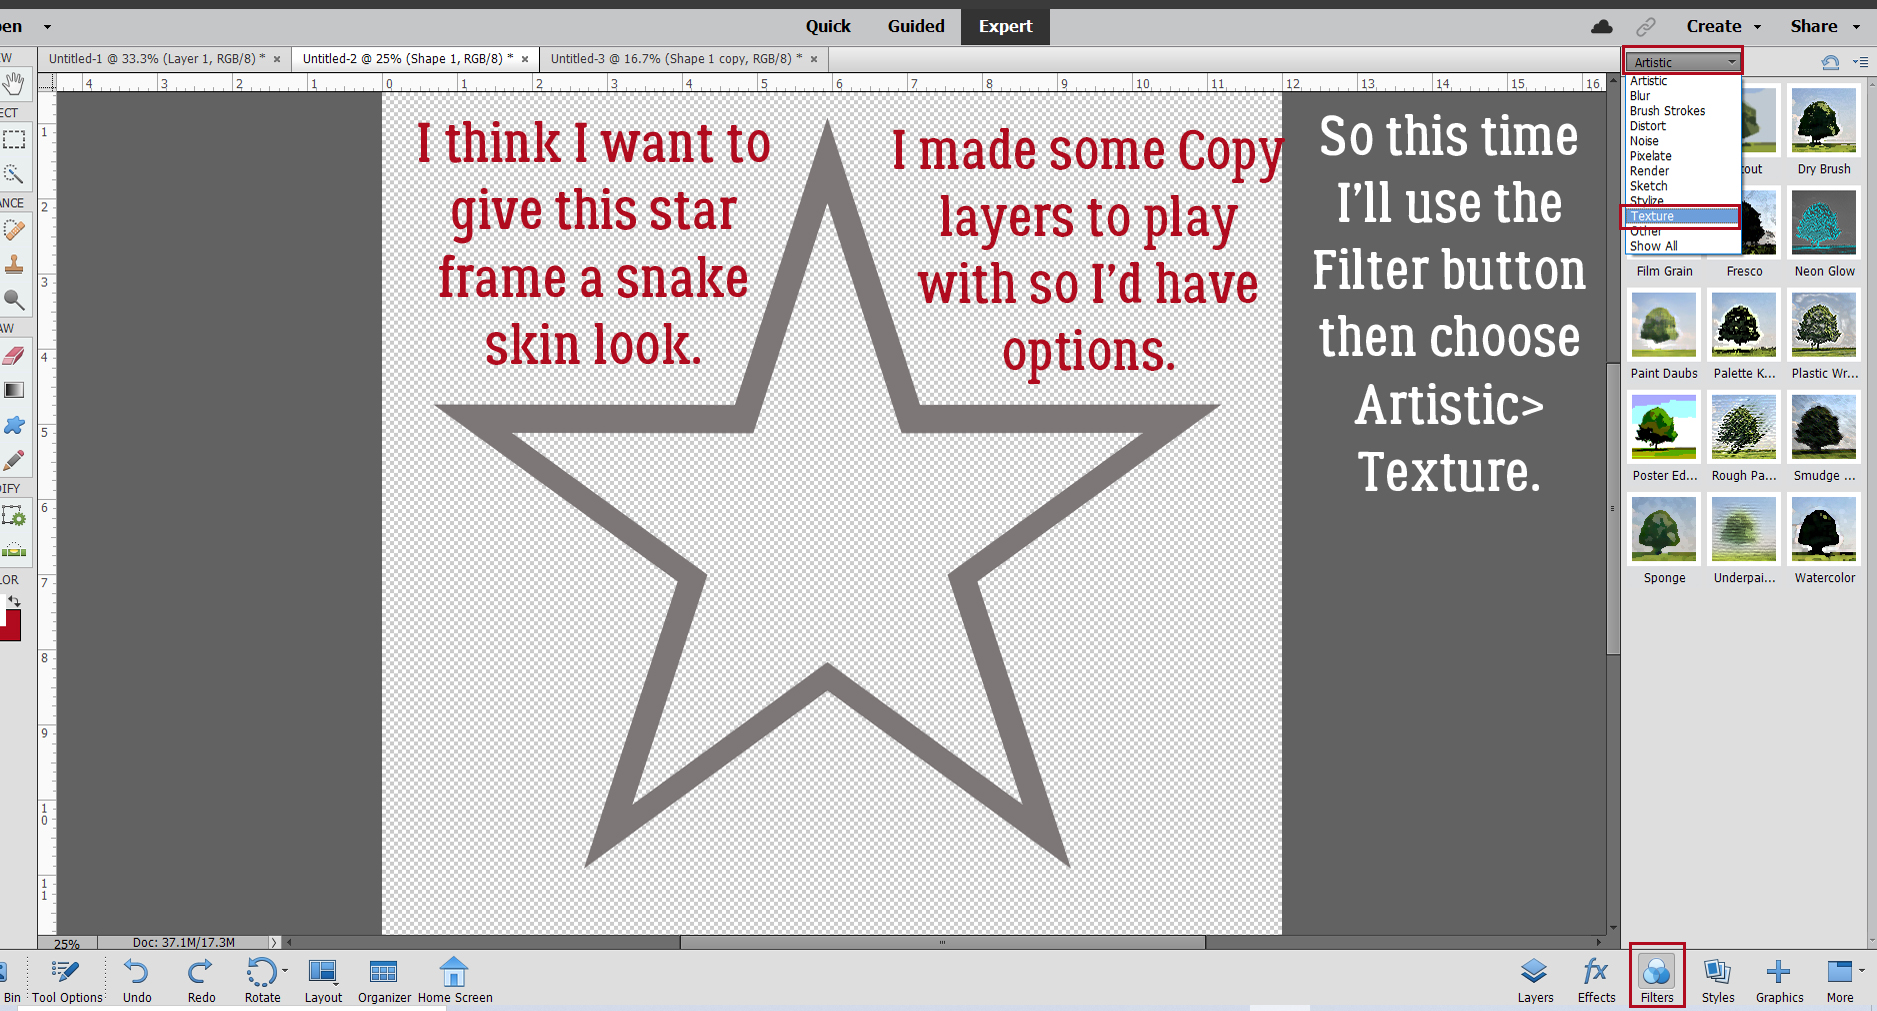
I didn’t do a step-by-step for the star in this image, since it’s done exactly the same way as the others. Stars offer a masculine option so I’m going to give this frame a leather look. Snake skin, to be exact. I made some Copy layers so I’d have back-up and this time I’m going to use a Filter. From the Filters menu I chose Artistic>Textures. I’ll be using Mosaic Tile.
Here are the default settings for Mosaic Tile. I think the “scales” are a bit to insignificant for a manly frame though.

You can see what’s happening with your Filters as you make your adjustments, so it’s not too hard to find the right combo.

I think it needs a touch of colour and a bit of sheen too, so I’ll use a Chrome Style on a Copy layer – flexibility!
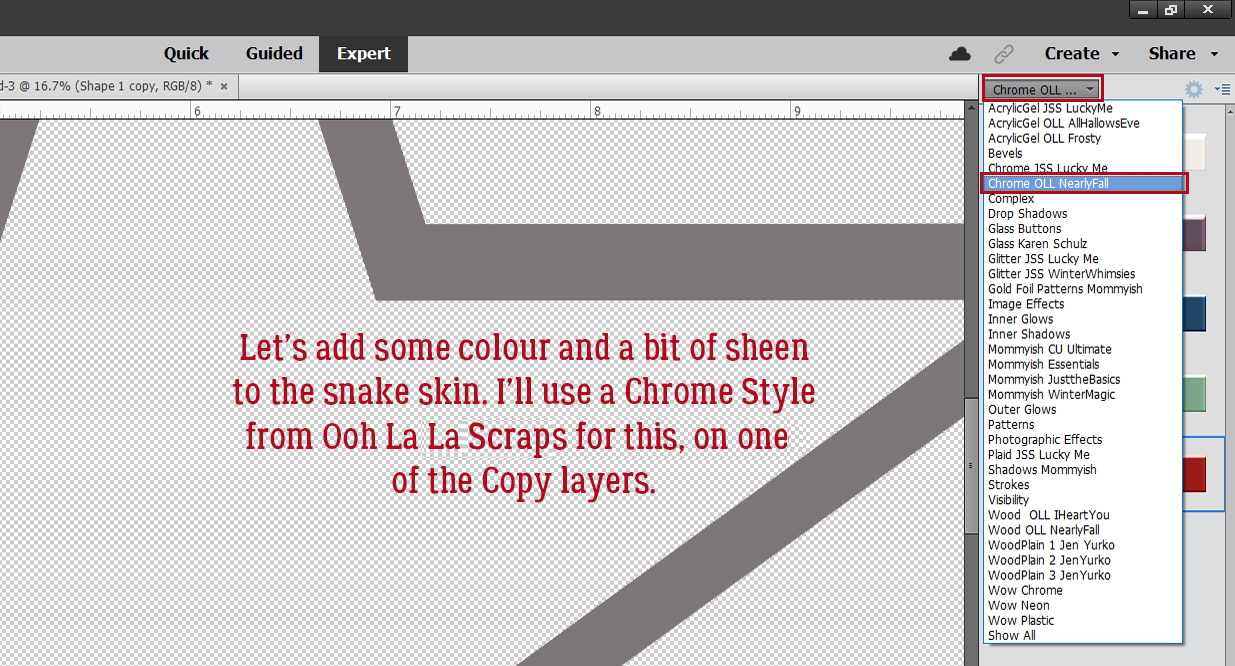
When I was a kid, I had one pair of leather shoes. My mom said they weren’t brown, they were “ox-blood”. This reminds me of them. So I’ll use this dark red one.

The Chrome Style will be opaque, so the mosaic tile texture won’t be visible unless I decrease the Opacity of the Chrome layer. 50% looks good.
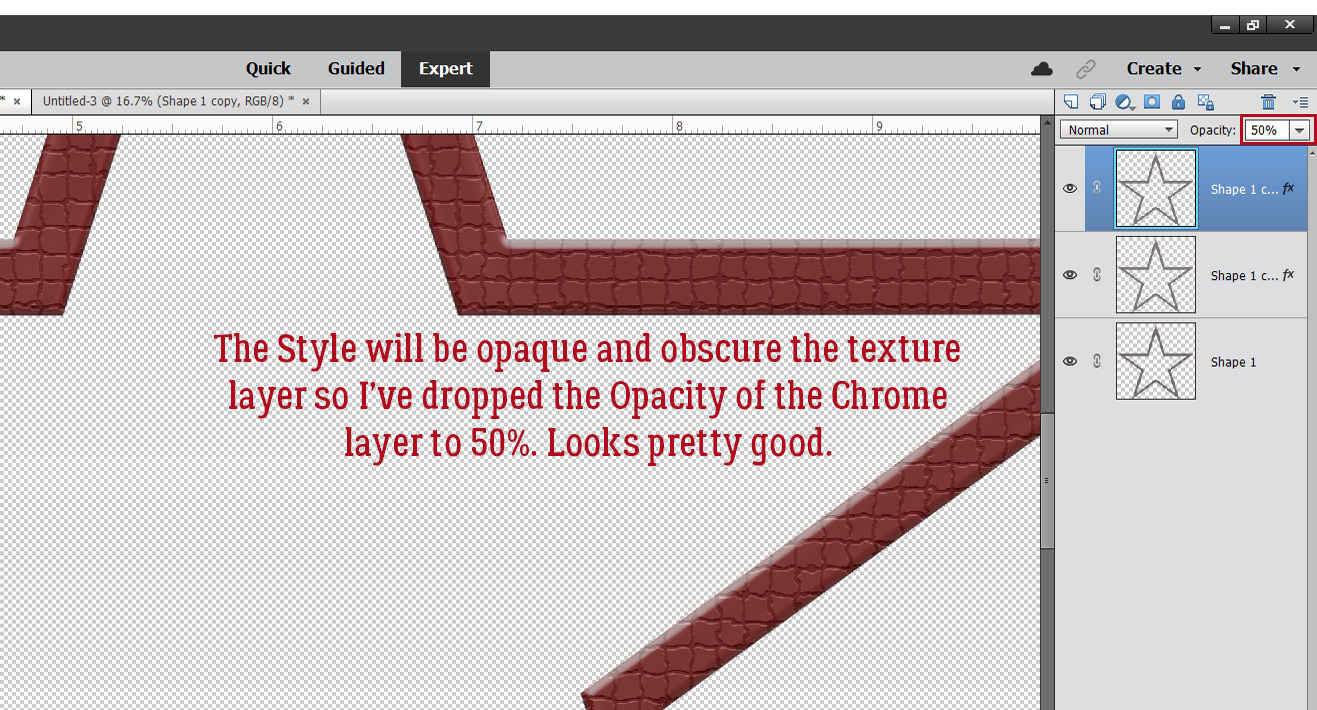
I wanted to make a few more tweaks so I double-clicked on the fx icon on the Chrome layer and played with this menu.

Were you wondering what I had planned for the sunburst? I made some Copy layers and added a Wood Style to one of them. I’d like a gold edge on it, but not on the inside. So I Resized the bottom original layer by going to 105%. See the gray border there now? It’s just enough.

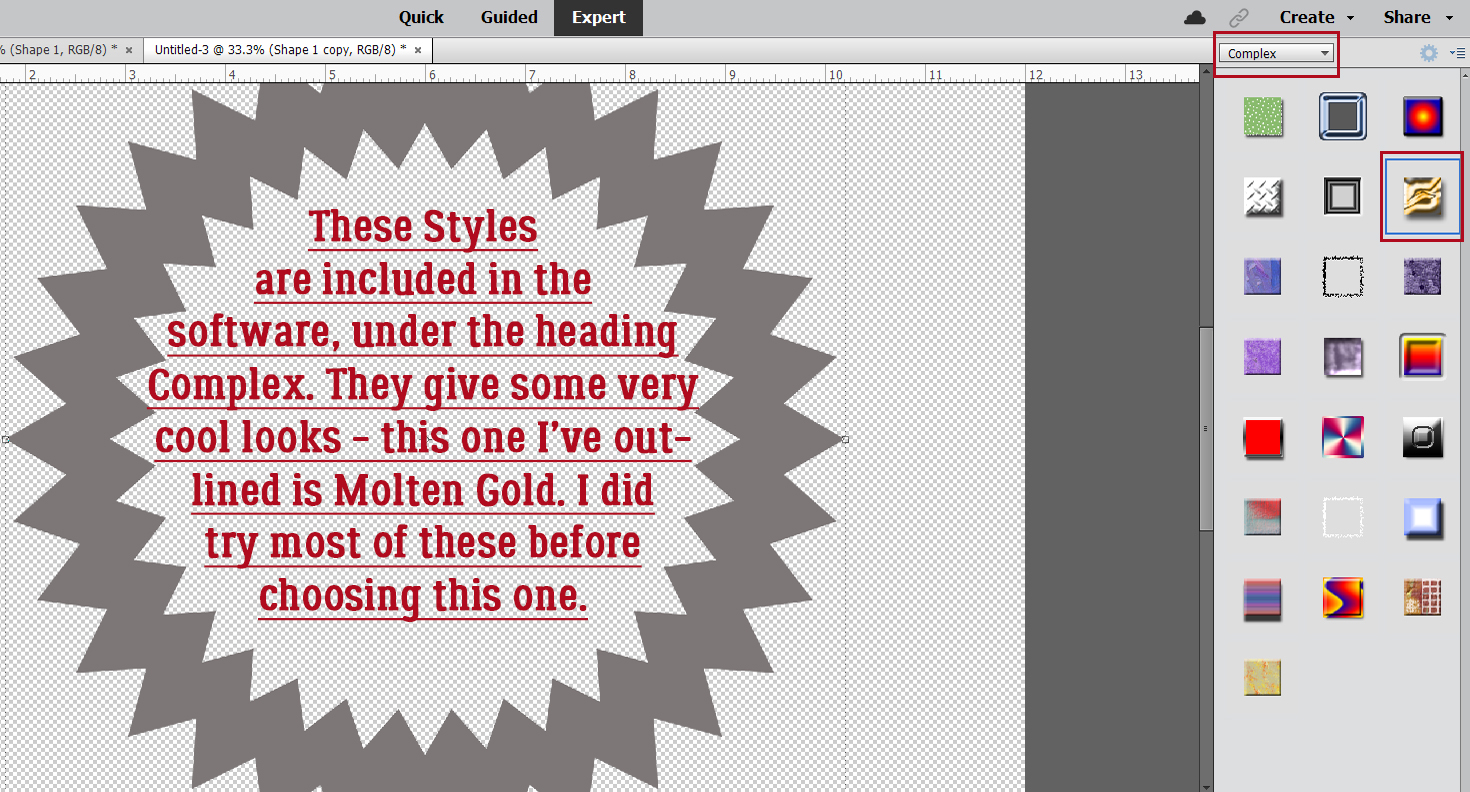
So far, I’ve only shown you Styles that are purchased. But Elements has some basic Styles included that most of us never even look at. I like this Molten Gold one, I think? It’s in the Complex folder along with a bunch of very intriguing others.
So this is what it looks like before I bend it to my will. It’s pretty in-your-face!
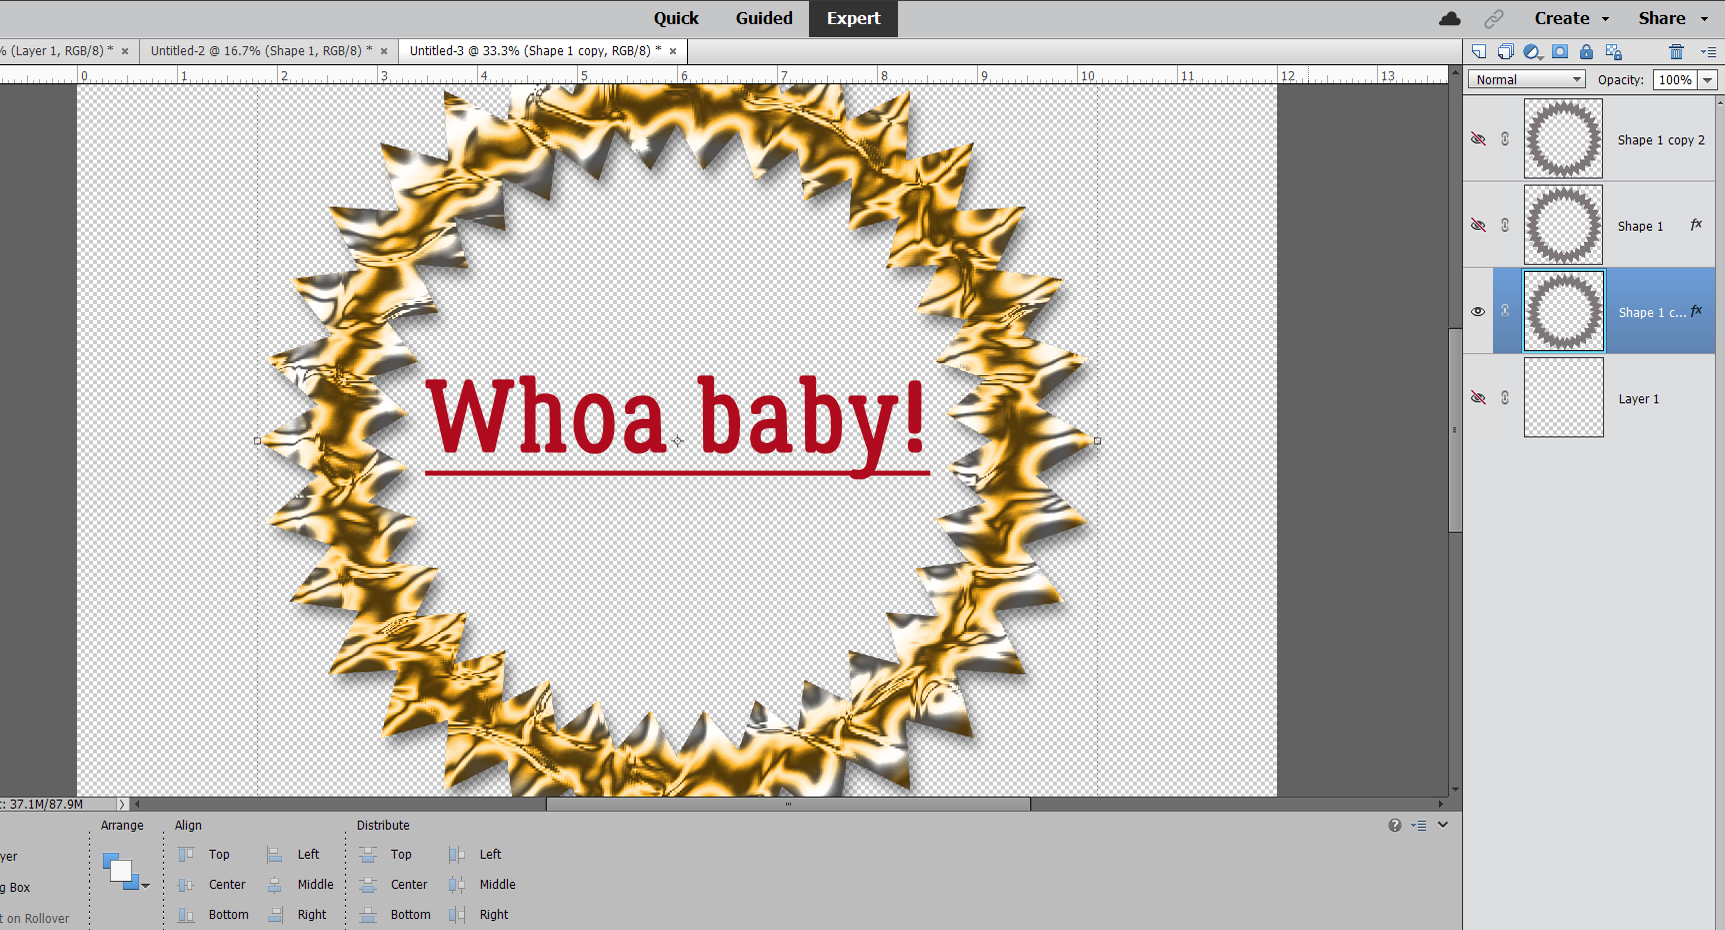
I toned it down a bit.

What do you think? I love it!!

I popped a photo into the hexagon frame. But first I added a bit of a shadow to the green section then Merged the glitter border with the acrylic gel centre so it’s all one piece. (Looks like I forgot to turn the underline off! Oh well. Not a disaster. I apologize for the formatting issues; when I was editing the screenshots I forgot to crop some of them until after I’d already inserted them into the post. Fixing that made the gaps. Sorry!)

I’ve got some great ideas for tutorials in my pocket and will need the distraction this month. Слава Україні!
PDF Version : https://bit.ly/3tn2goD
![]()
Thank you for the tutorials. I have learned a lot viewing your tutorials.