A Simple Photo Border with Label
![]()
Whew. The last few tutorials have been challenging, haven’t they? Today I think we need a nice, easy, basic technique that even the least experienced scrapper can succeed in doing. (Or, you could say I lacked inspiration this week, and you wouldn’t be wrong.)
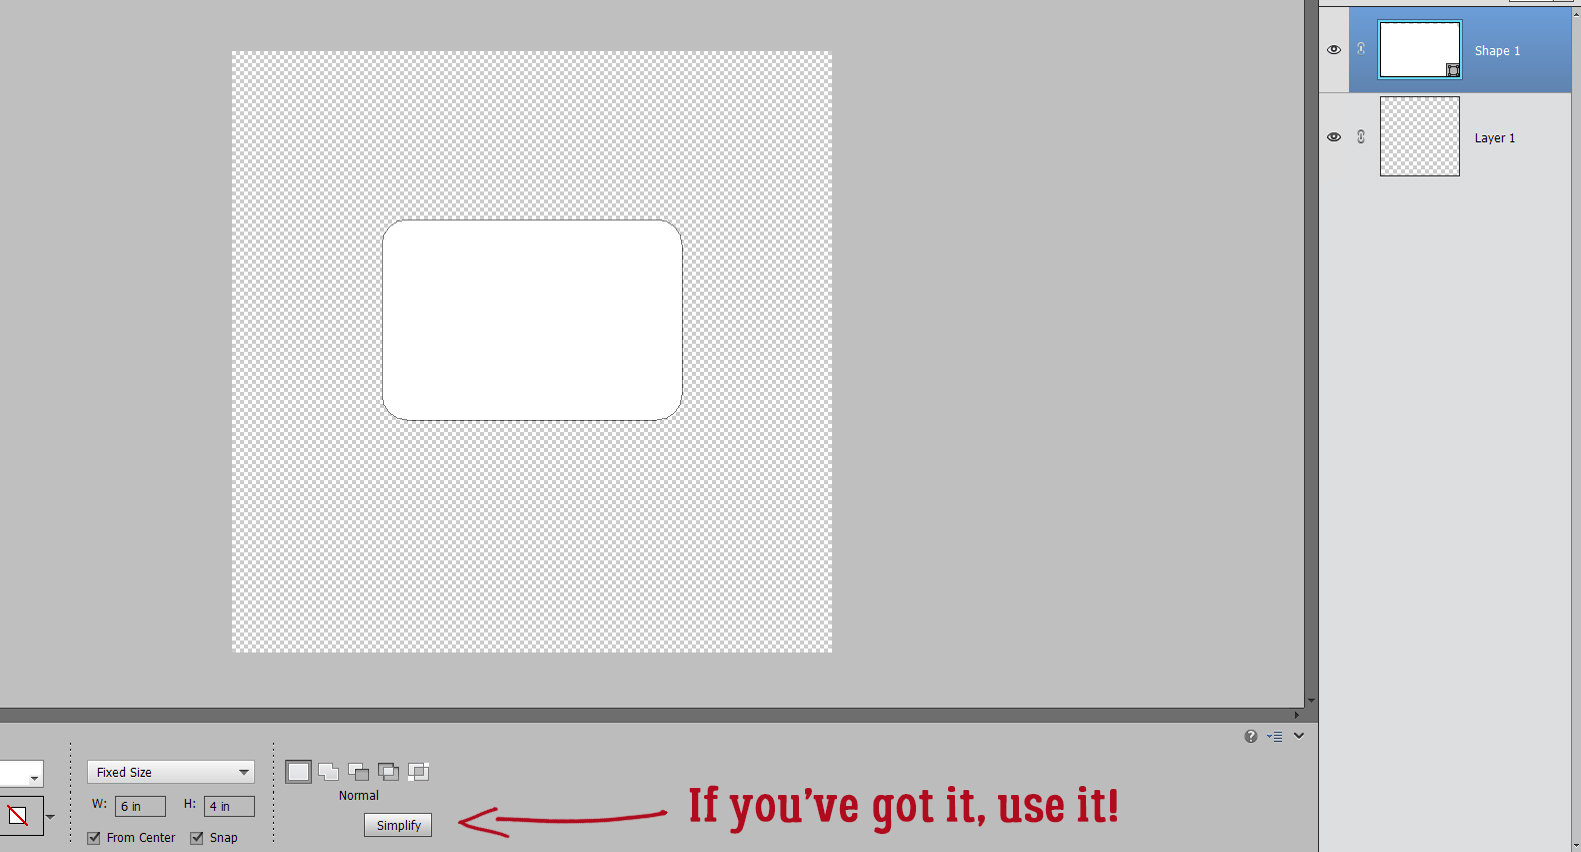
The first step, as always, is to open a new. blank canvas on the workspace. As you can see, I’m predictably going 12 x 12, with lots of room to work. If you’d rather use a smaller canvas, it’s still going to work perfectly fine. I’ve chosen the Rounded Rectangle Custom Shape tool, with a 150 pixel Radius for the rounded corners. I’ve also set a Fixed Size of 6 inches wide, 4 inches high – standard landscape print dimensions. I’ve ticked the From Center and Snap boxes as well. Some tools have a lot of options that make for fewer steps, so why not make use of them?

With a single click in the middle of my canvas, I’ve created a 4 x 6 rounded rectangle shape. Custom Shapes are always Smart Objects when they’re first created. That means the only alteration they’ll permit is to resize.

If you want to do anything else to a Custom Shape, the Smart Object needs to be rendered dumb, or Simplified. If you’ve got a newer version of Elements, you’ll have a Simplify button right there in the Tool Options.
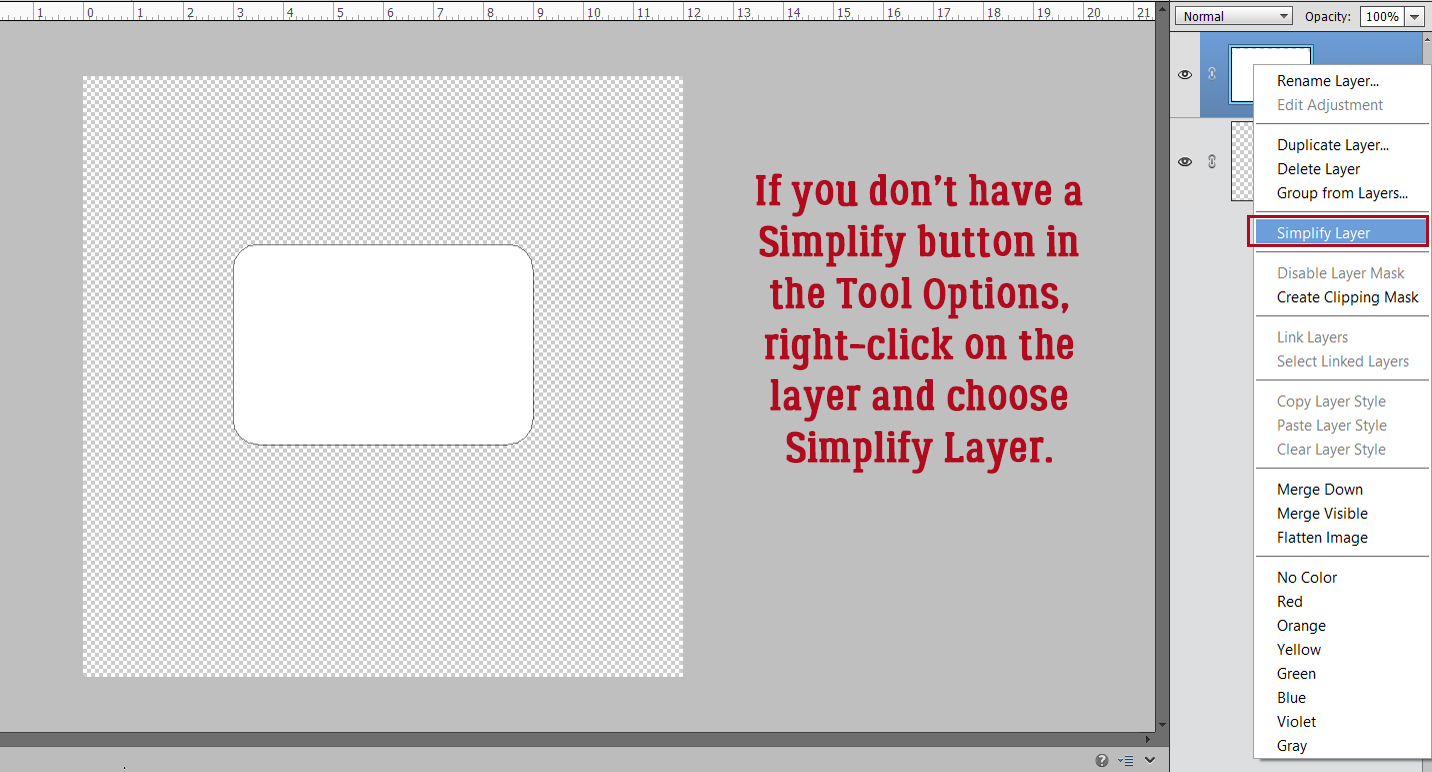
If you’re working with an older version you’ll have to do it the old-school way. Right-click on the layer in the Layers panel and choose Simplify Layer from the drop-down menu.
To create a border/frame that follows the contours of your rounded rectangle CTRL/CMD>click on the shape’s layer thumbnail in the Layers panel. That will Select the edge of the rectangle. Then click Select>Modify>Contract… to shift the marching ants inside the rectangle.
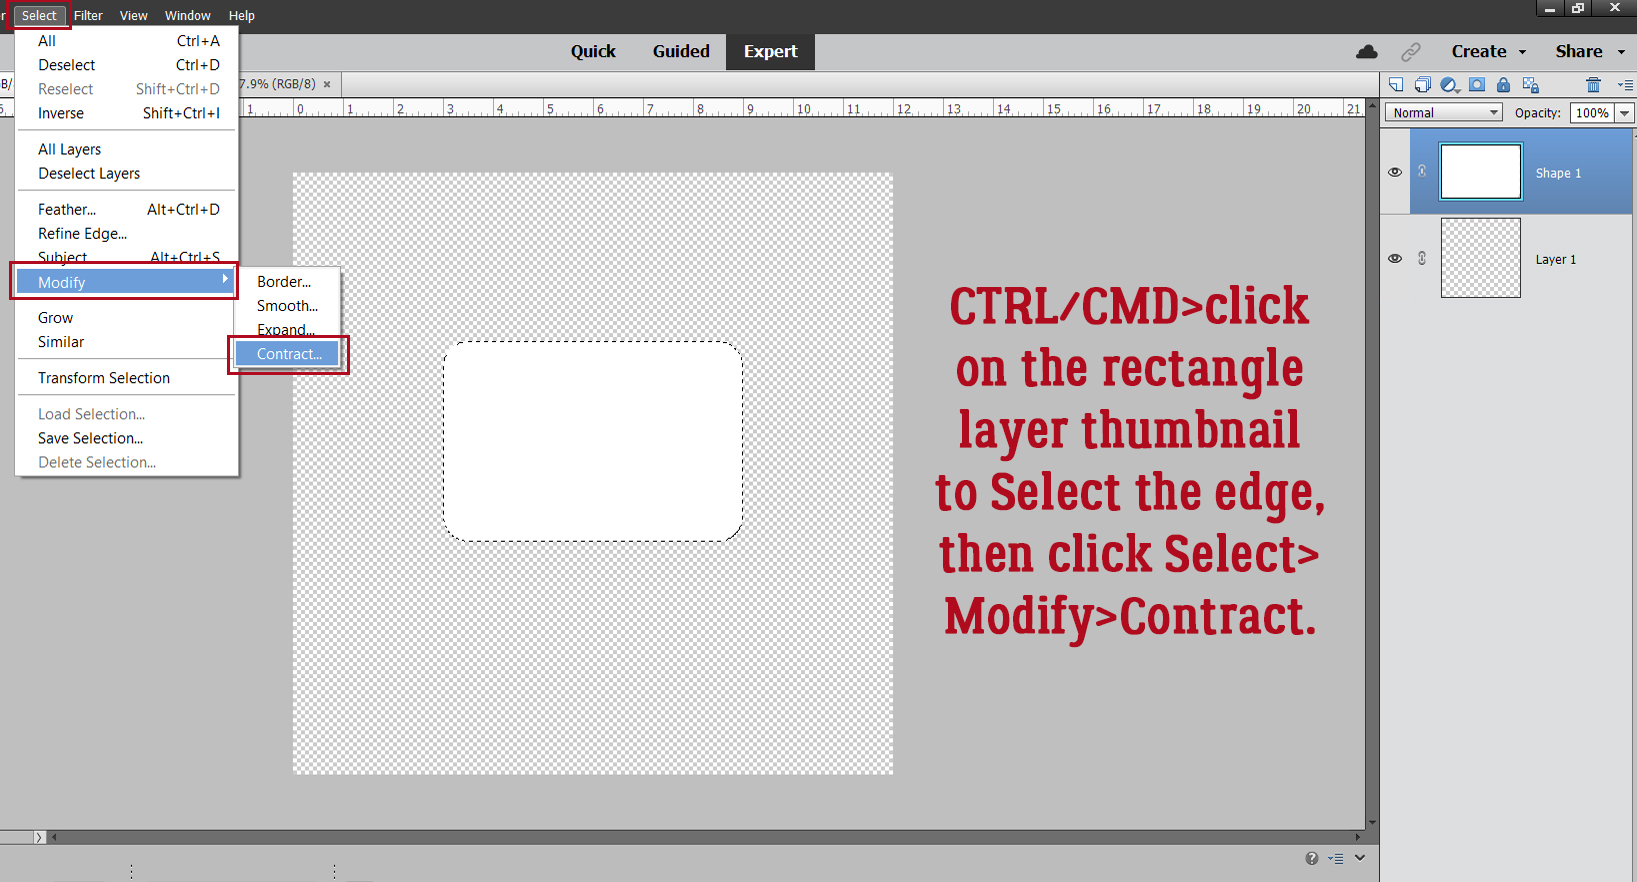
You might want to experiment a bit with this step. I tried a few possibilities for how far over I wanted the edge to move. I want a gap between the Selection and the edge of the rectangle deep enough to add some text in a large enough font that it’s easily read. I settled on 65 pixels.

The marching ants can be hard to see on these screenshots. Trust me when I say they round the corners cleanly.

Now to create the border. It needs to go on its own layer, so add a blank layer to the top of the stack in the Layers panel by clicking on the sheet-of-paper icon at the upper left corner of the panel. Then click Edit>Stroke (Outline) Selection…

Again, this step might take some trial-and-error. I opted to go with a 25 pixel Stroke applied on Center of the Selection.

Here’s a close-up of my 25 pixel Stroke inside my 65 pixel gap. To eliminate the marching ants that outline the Selection, click Select>Deselect, or CTRL/CMD>D.

Now to add the label. I chose a clean, sans-serif (no ‘extra’ extending features) font, but you can choose any font you like. I wanted simple but eye-catching so I went with Caneletter Sans for my label.

It was a bit insipid, so I highlighted the text and clicked the B for faux bold and made it a bit more meaty.

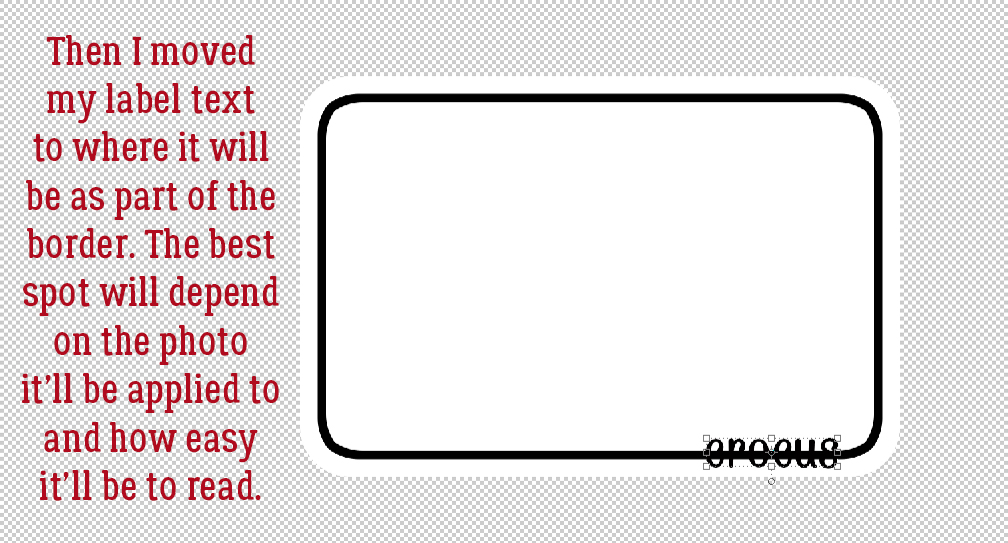
Then I moved the text to a spot on the border/frame. Where your label goes will depend on the photo you’re using. You’ll want it to go somewhere that won’t obscure any focal point, and where it won’t get lost in the photo itself.
I’m going to cut an opening in the border to sandwich the label, so I used the Rectangle Marquee tool to drag out a box around the text as shown. The active layer is the one with the border on it.

Edit>Cut or CTRL/CMD>X will take that chunk out of the border.

Because the label is on a separate layer, if it doesn’t look centered in the opening, it’s easy enough to nudge it so it does look right.

Once I was happy with the border and label, I activated both layers by click>SHIFT>clicking on them, then right-clicked and chose Merge Layers. Shortcut: CTRL/CMD>E.

Now to fine-tune. I dragged my photo onto the workspace, positioning it between the rounded rectangle shape and the border/label layers.

But first, I’m going to Clip the photo to the shape, by right-clicking and choosing Create Clipping Mask. Shortcut: for versions 15 and up, CTRL>ALT>G. For earlier versions, CTRL/CMD>G.
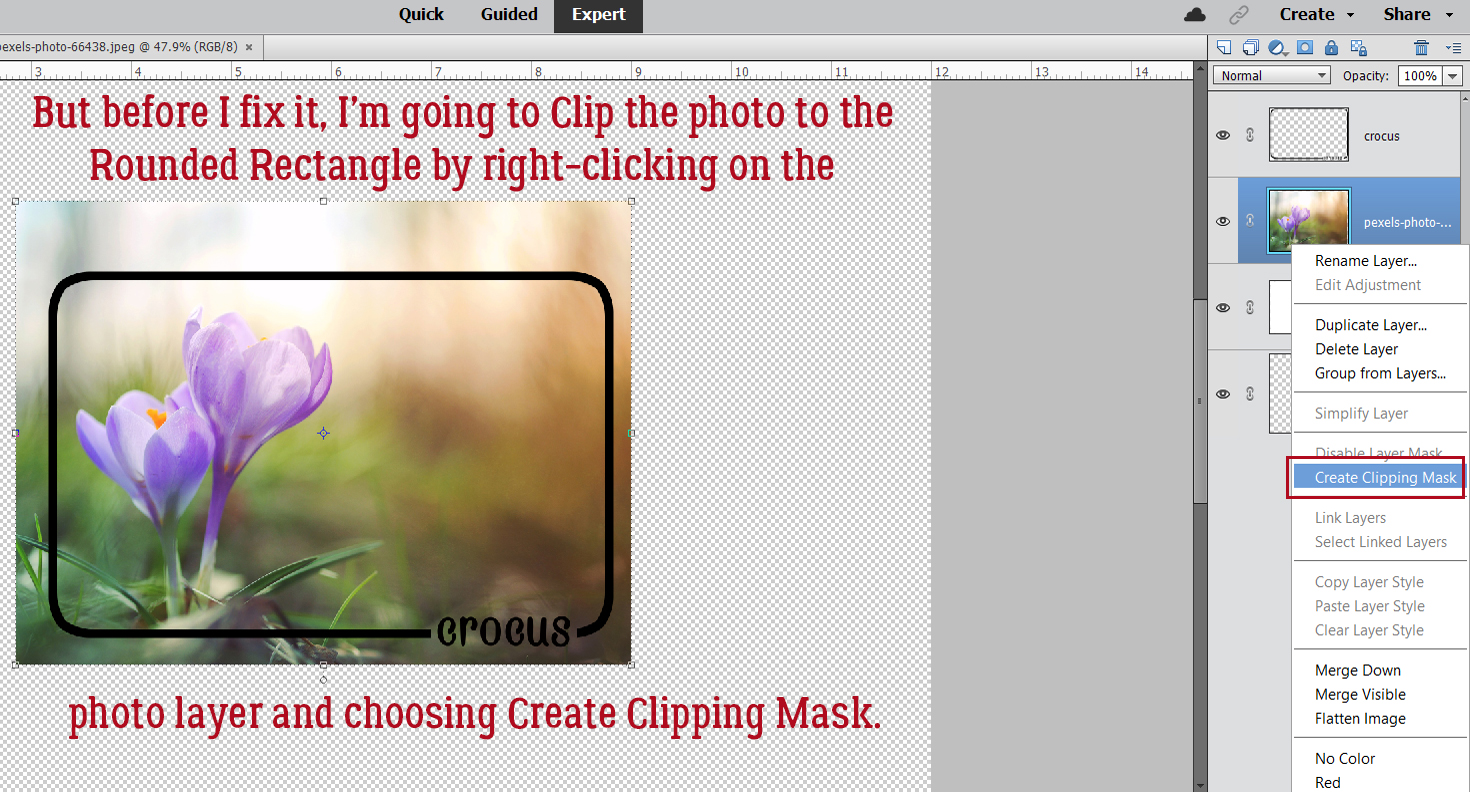
Elements indents the layer once it has been Clipped to the layer below it, as shown.

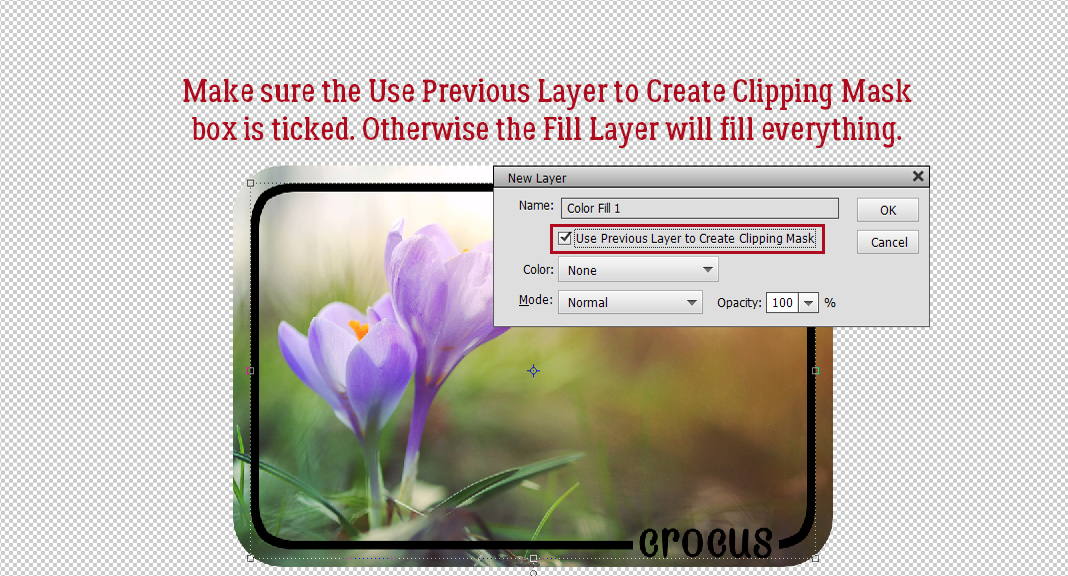
The black border/label gets lost a bit against the photo. So I’m going to change the color to something more visible. The cleanest way to do that is to add a Solid Color Fill Layer. Click Layer>New Fill Layer>Solid Color…

Make sure the box is ticked to Use Previous Layer to Create Clipping Mask to save yourself some steps.
For the most flexibility I Merge the two layers together.

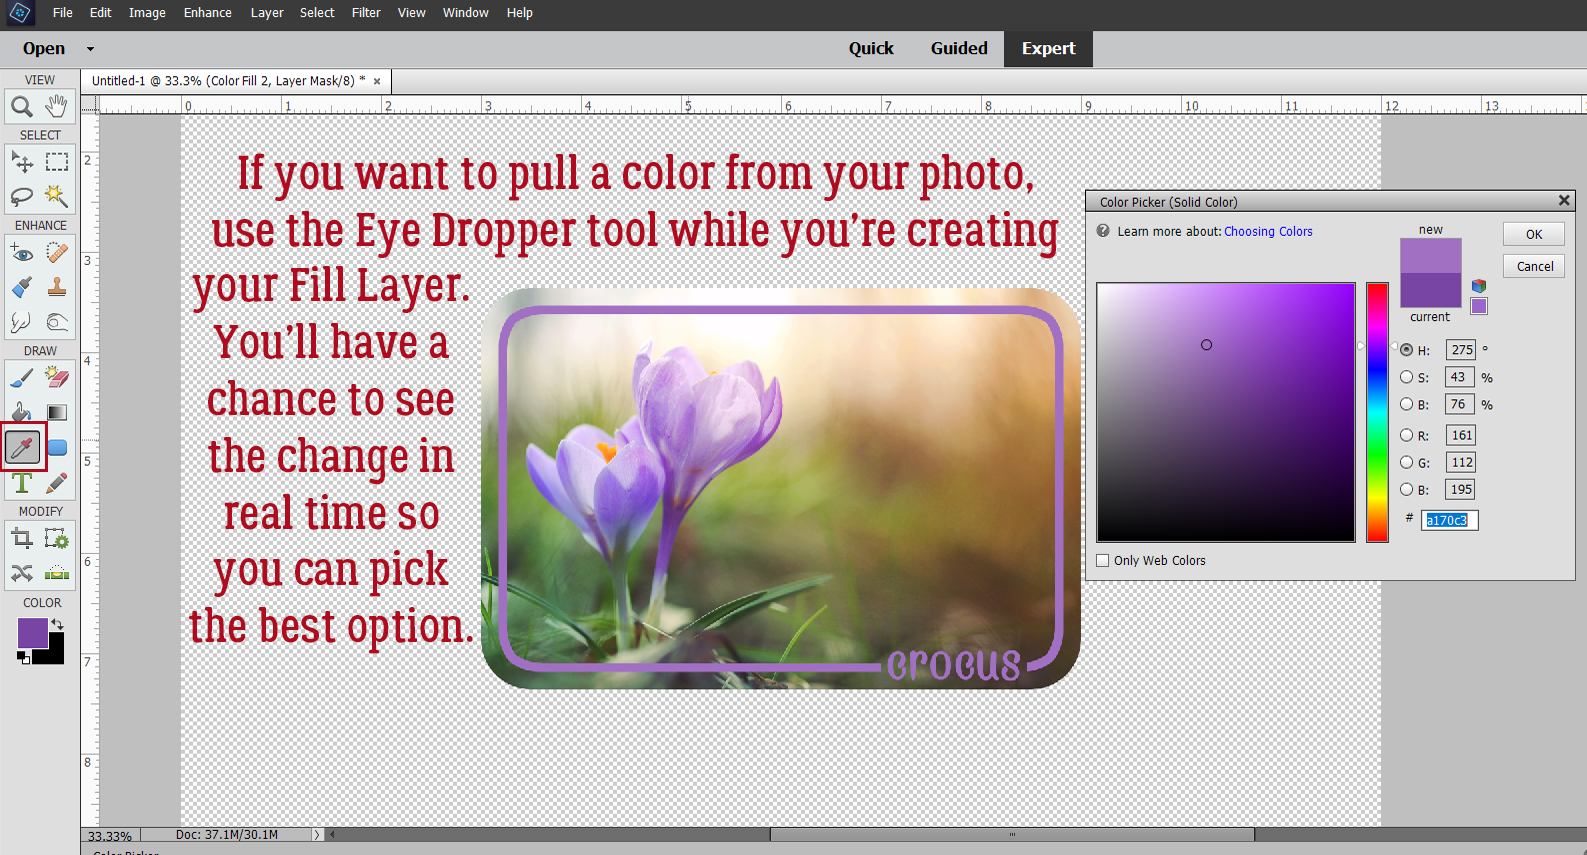
Elements will use the foreground color in the Color Picker, but you can always choose to pull a color from your photo. Activate the Eye Dropper tool and click it on any color you like. You can see the changes happening in real time, and that guarantees you’ll find the look you like best.
What color would you go with?

I can’t believe I managed to create 20 new layouts this month. I’m greedy… I want both the Challenge Reward kit AND the Shine Your Light mega-collab. (That might mean our next tutorial is about moving kits and layouts onto an external hard drive and changing some workflow but it’ll be worth it…) March is almost gone, it’s 61°F outside and the orchards are greening up. Makes me feel like I can do anything!
PDF Version: https://bit.ly/3qOm97N
![]()
Awesome tutorial Jan!
Definitely, a go-to technique that I will use often.