Importing a Tear
![]()
PDF Version : https://bit.ly/38jCIlt
I’ve been eagerly waiting for an opportunity to share this little trick with you but certain aspects had to fall into place. And now they have. This technique is so easy and rewarding that I think you’ll use it right away…
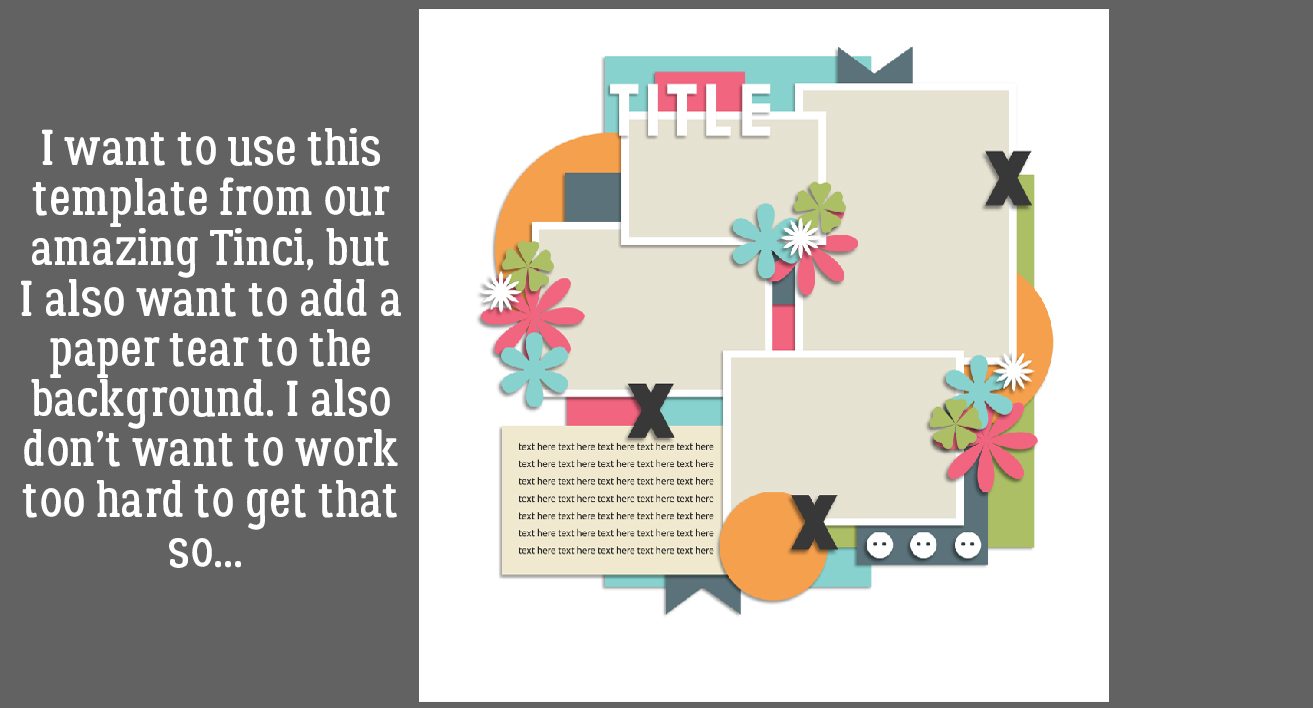
Have you ever wanted to add a paper tear to your layout but felt overwhelmed by all the steps to get there? Then this one is for you. There’s a way to import a paper tear from a template into a layout-in-progress that only takes a few easy steps and very little time. However, you must have a template with a paper tear on its own layer, or a commercial-use paper tear template. They have their own limitations, and may not give you the look you’re after. So try this.
I started out with this template from Tinci Designs’ Second Chances V.2 collection. I resized all of the layers (except the background paper) to allow for adding a tear.
I was waiting to find a template like this one from CarolW Designs’ Spring Dawn. That tear is moveable!! But how can I move it onto Krizstina’s template?
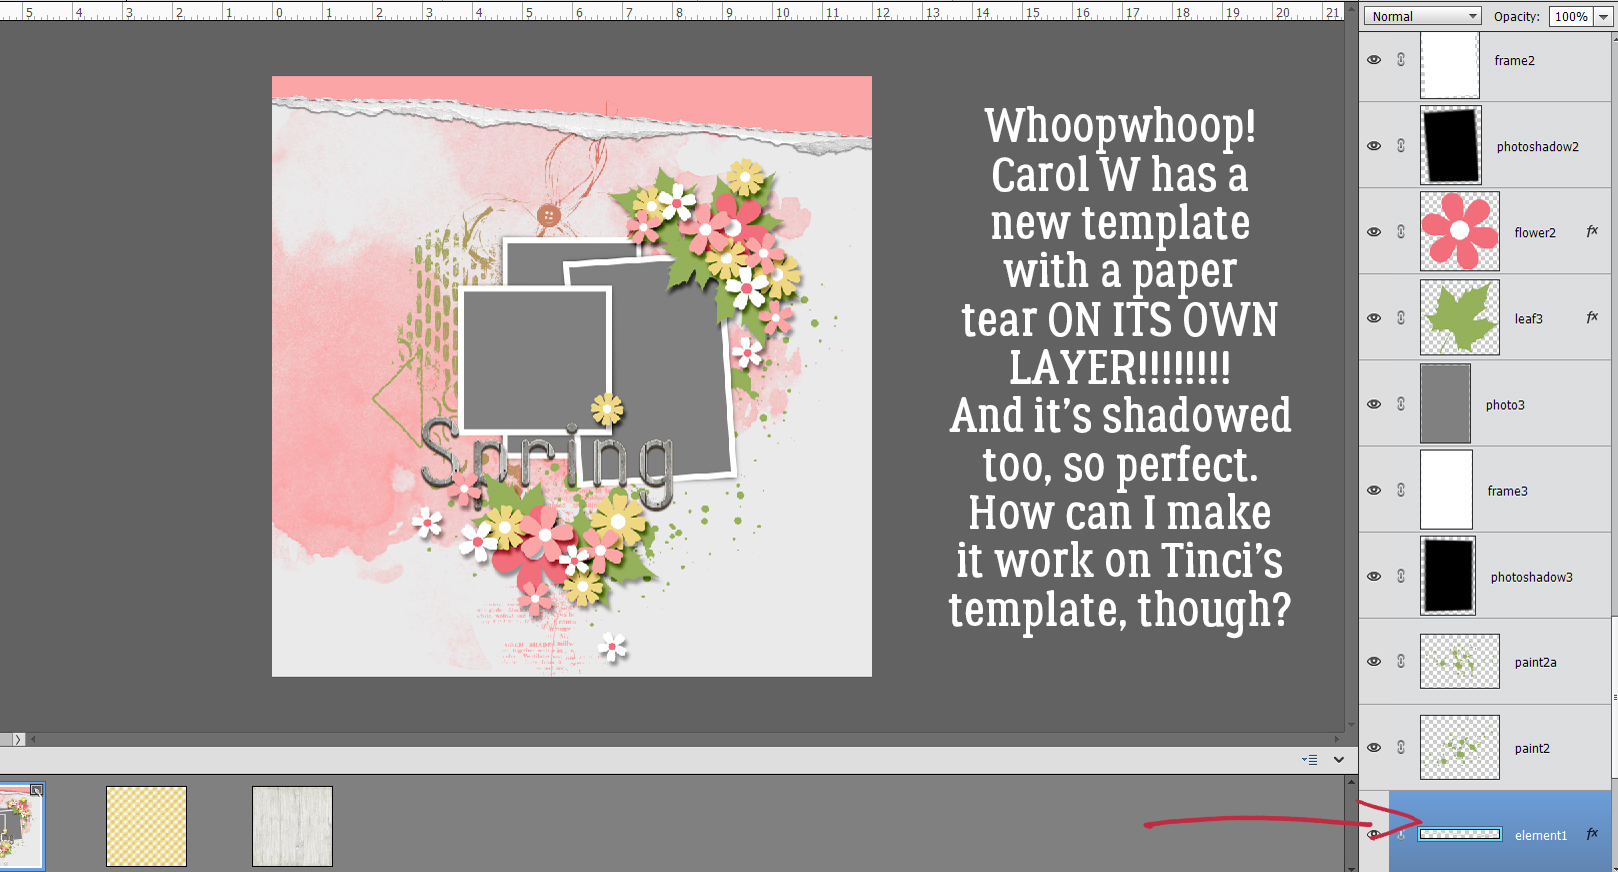
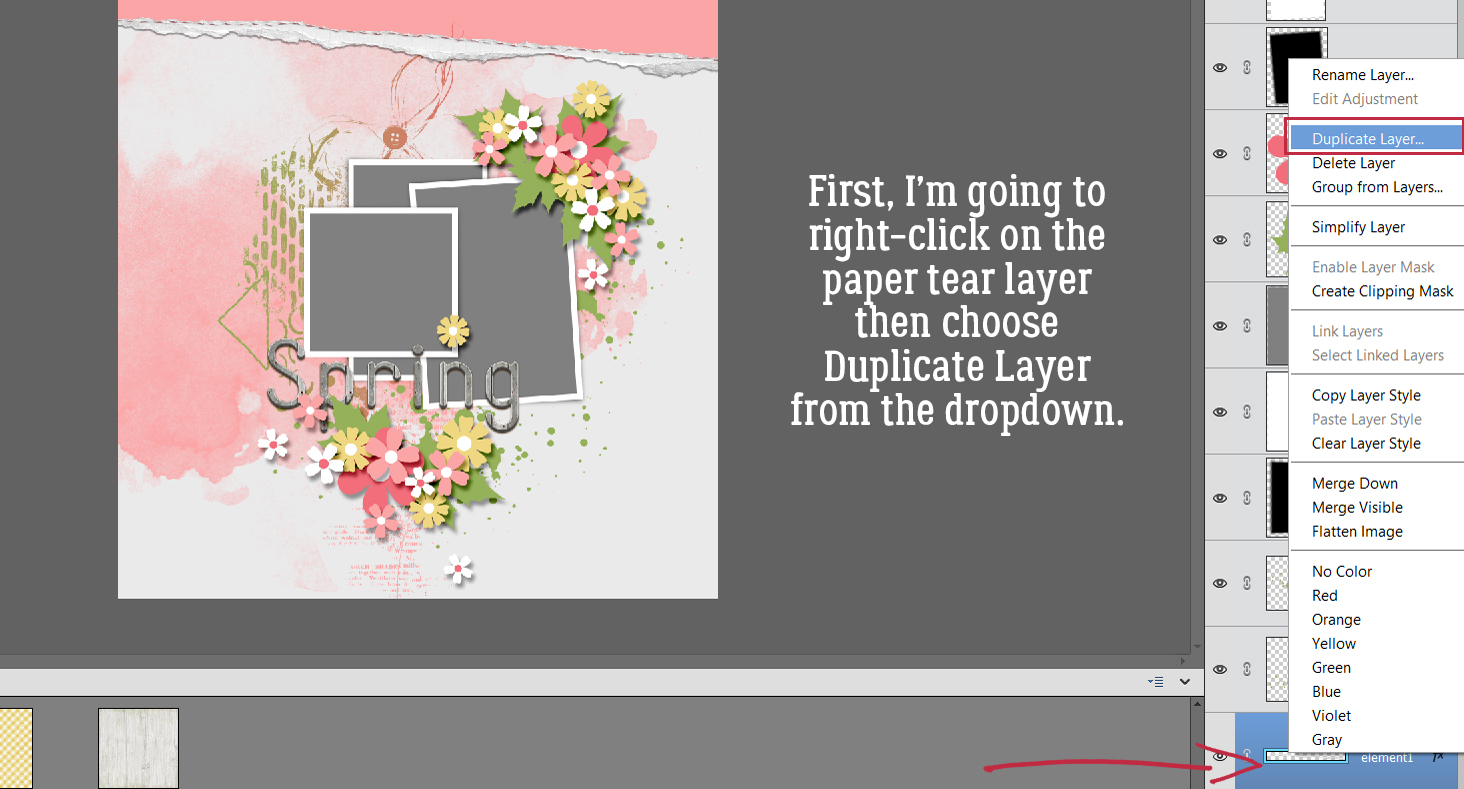
There are a couple of steps that need doing first. But to start, I found the tear layer in Carol’s template, right-clicked on the layer and chose Duplicate Layer from the dropdown menu.
Now Elements needs to know where to put it. The new menu shows all the files currently open in the Photo Box, and offers the option of creating a New Document. That’s what I’m going to do.
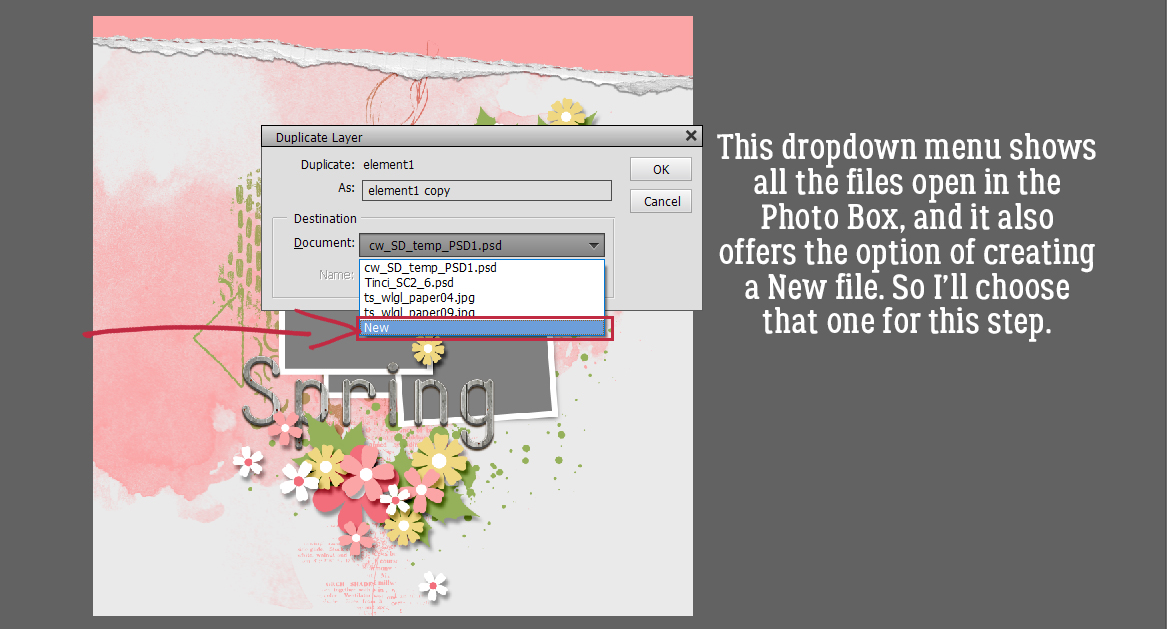
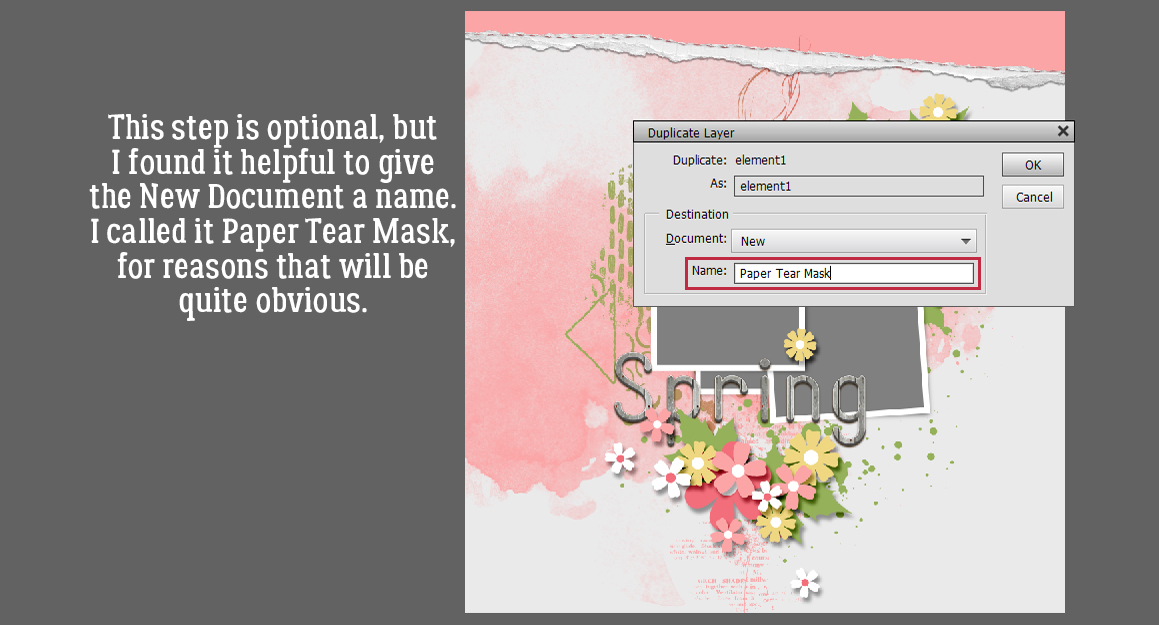
This step is completely optional. I chose to give my new document file a name, Paper Tear Mask, for clarity.
And this is what happens.

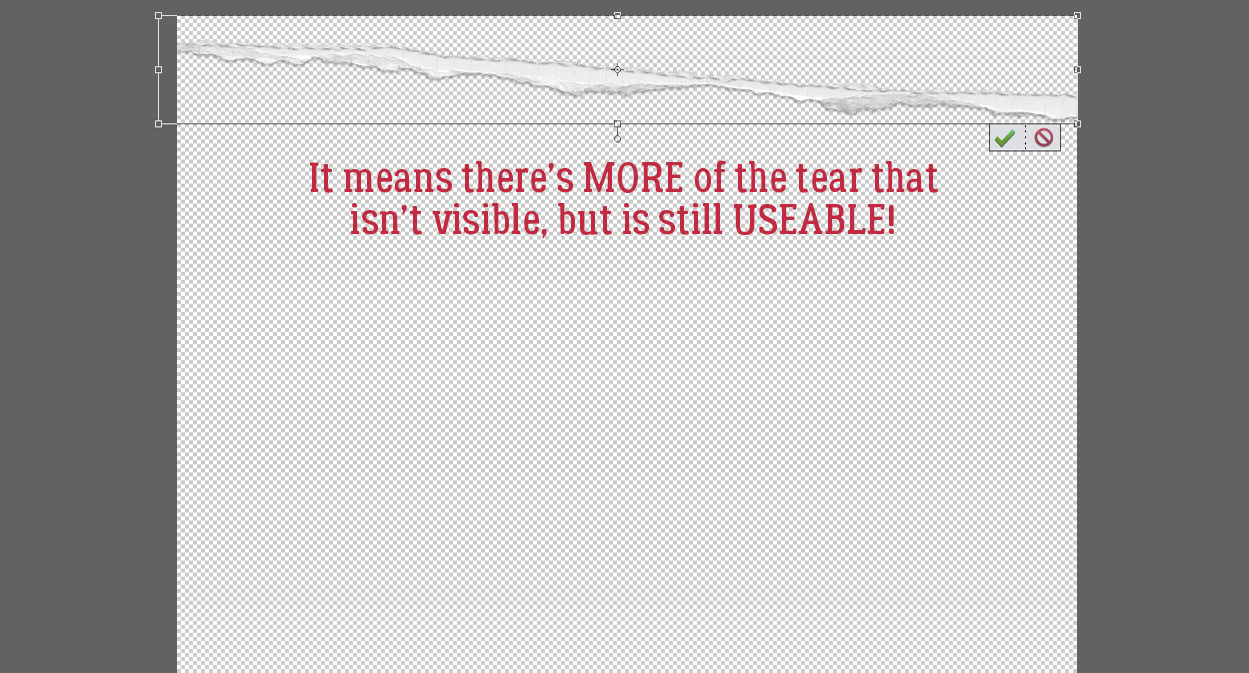
But look at that Bounding Box! I was thrilled to see there’s more to the tear that can be used just by Resizing it.
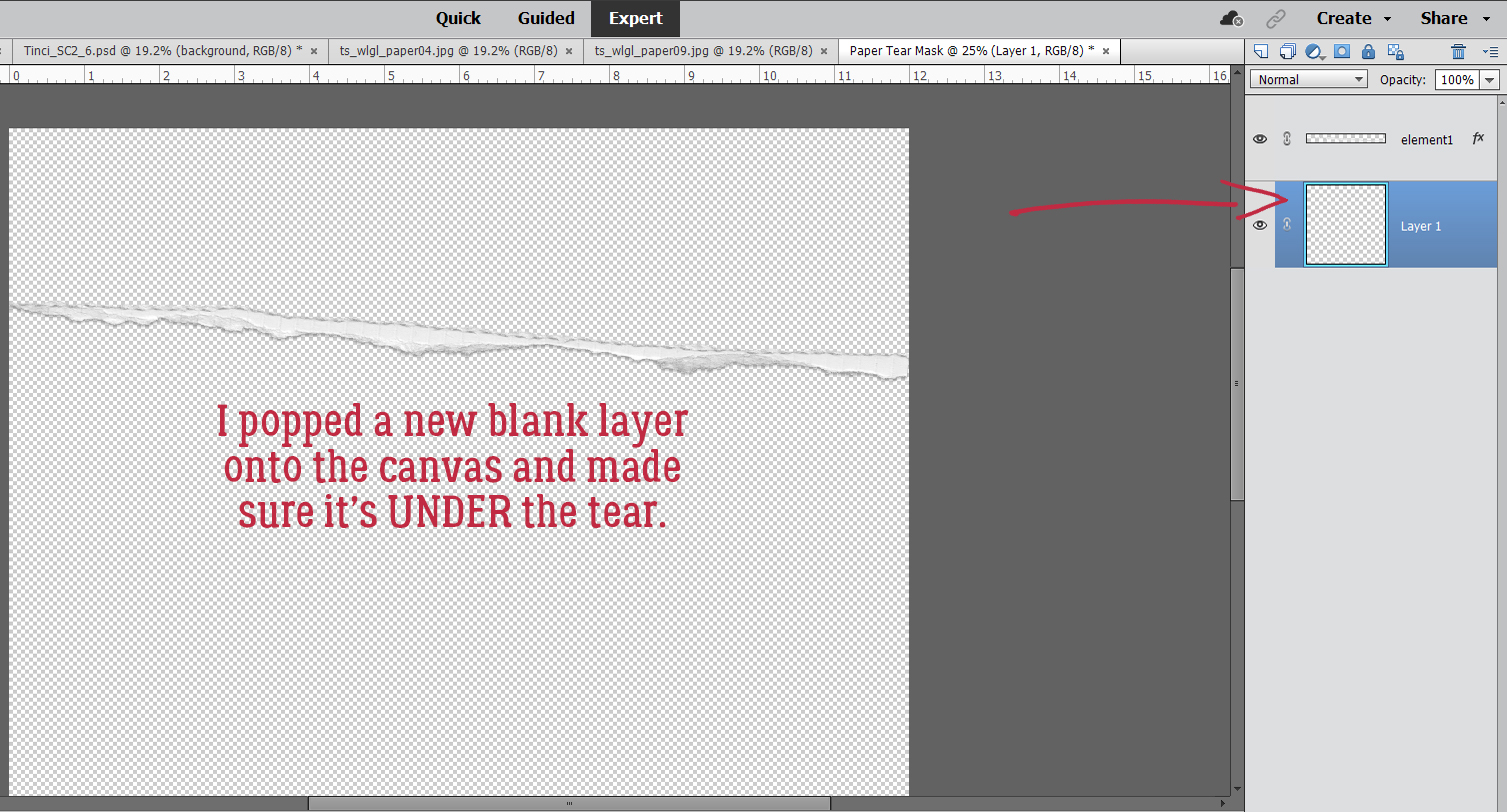
Now to make it useful and not work too hard while I’m at it. I added a new blank layer underneath the tear layer. Just hold down the CTRL/CMD key and click the sheet-of-paper icon at the upper left of the Layers Panel.
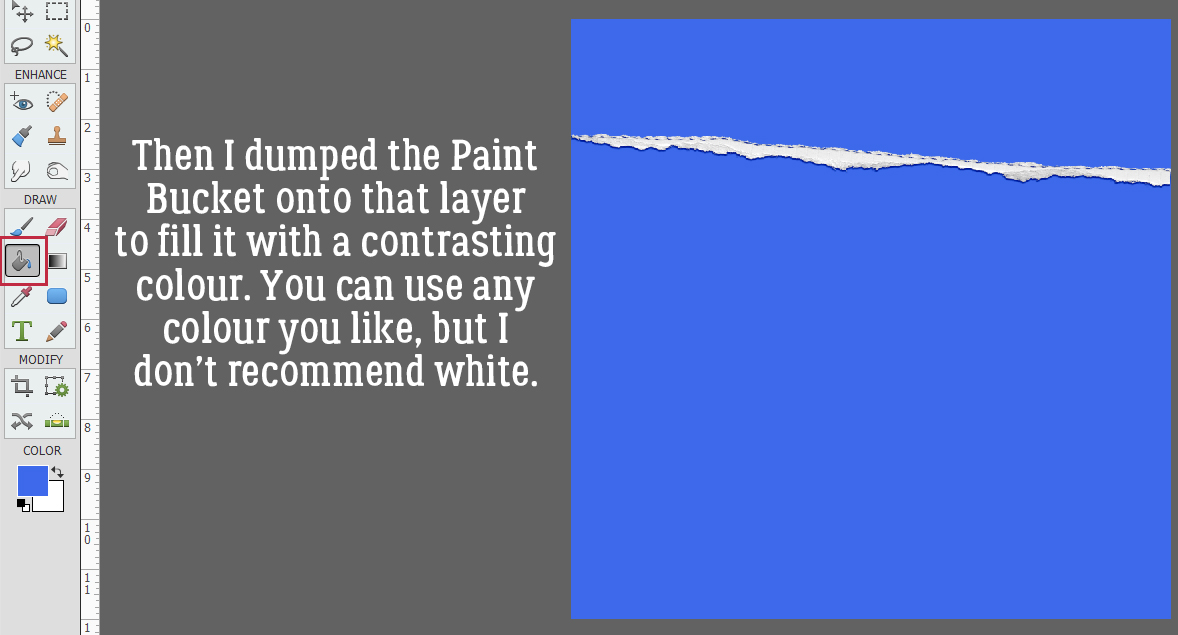
Next, I used the Paint Bucket Tool to fill the whole of the blank layer I just created. Pick any colour you like (but not white) for this step.
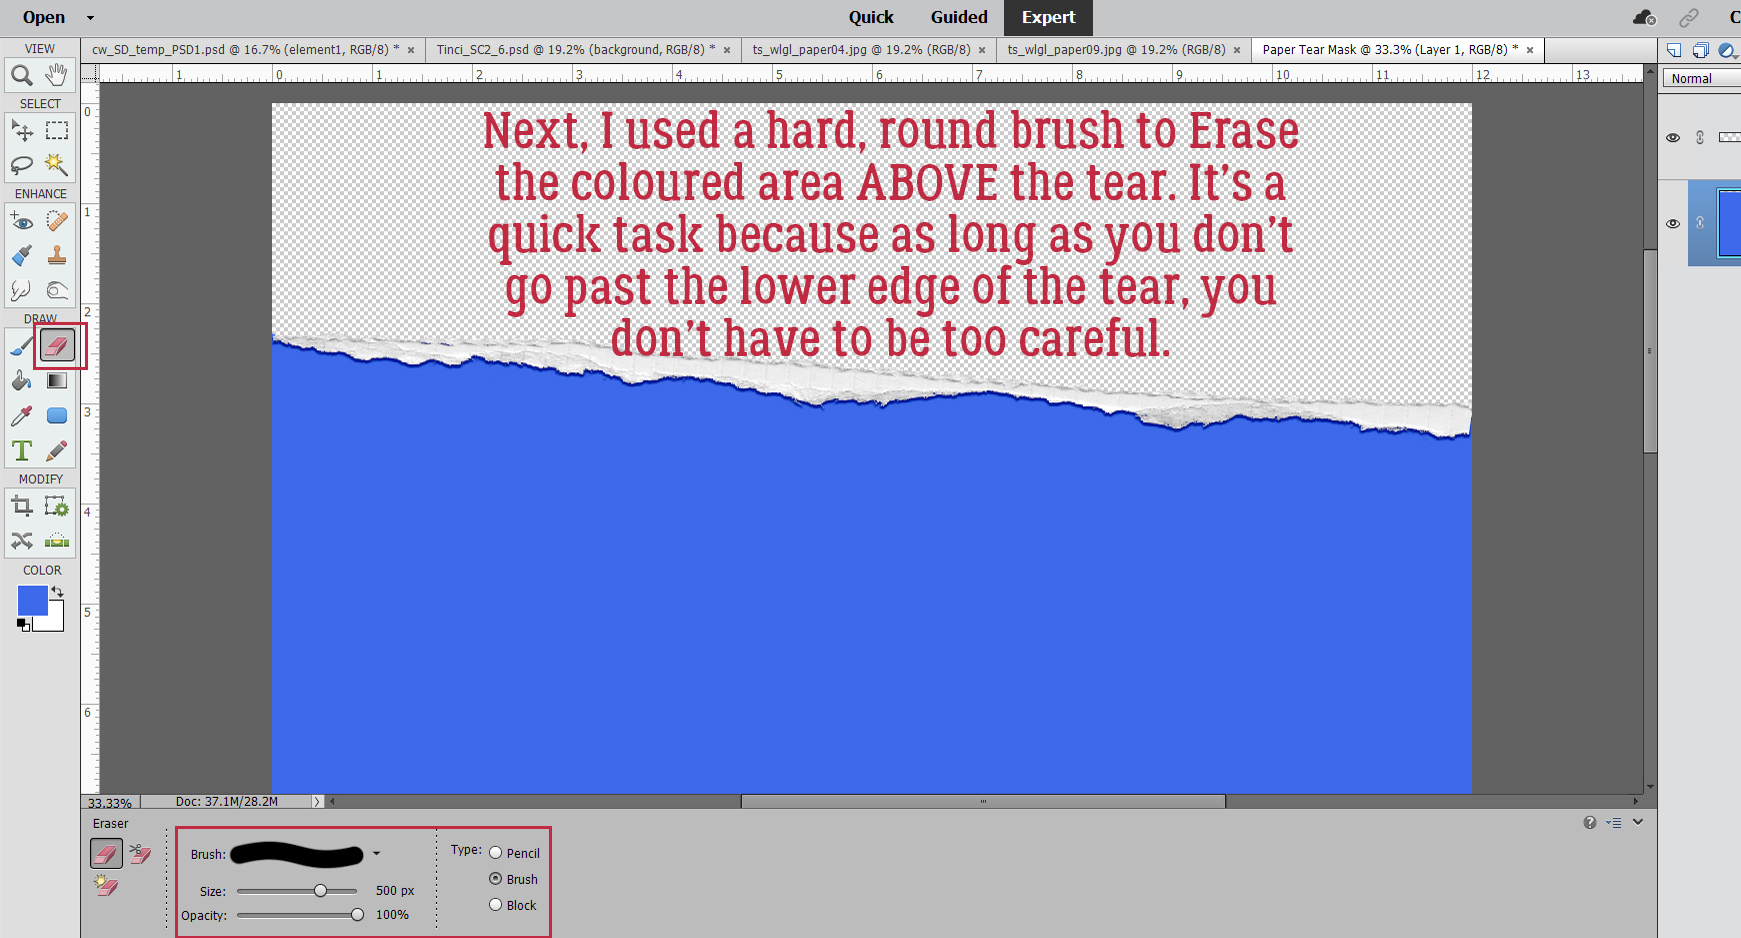
To turn the coloured part into a Layer Mask so papers can be Clipped to it, I used a hard, round brush within the Eraser Tool to remove the coloured part above the tear. This can be done quickly because as long as I don’t cross over the tear into the lower part of the coloured area, I can just scrub it away.
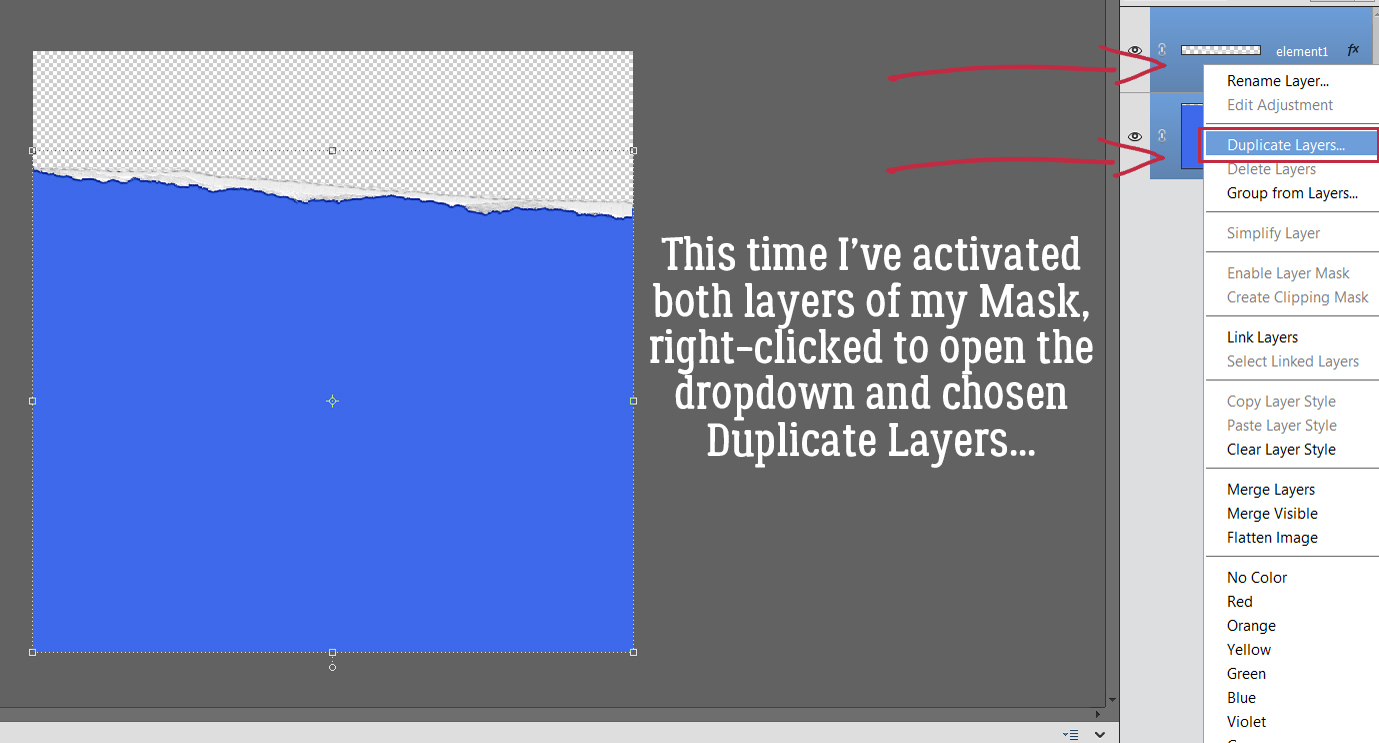
And that’s it for creating the tear mask! To move it over onto Krizstina’s template, I’m going to Activate both layers by click-shift-clicking on each of them, then right-click to open the dropdown menu to Duplicate Layers…
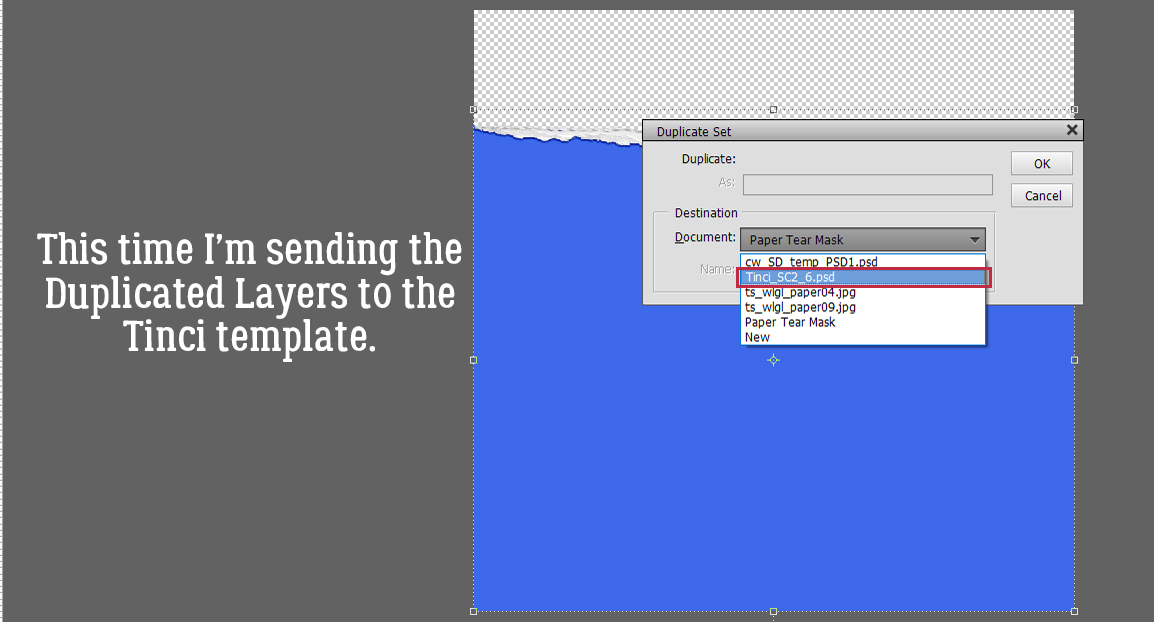
This time, I’m going to send them onto the Tinci template.
‘MKay. there are the tear and the mask, placed on top of the background paper and underneath the rest of the layers.
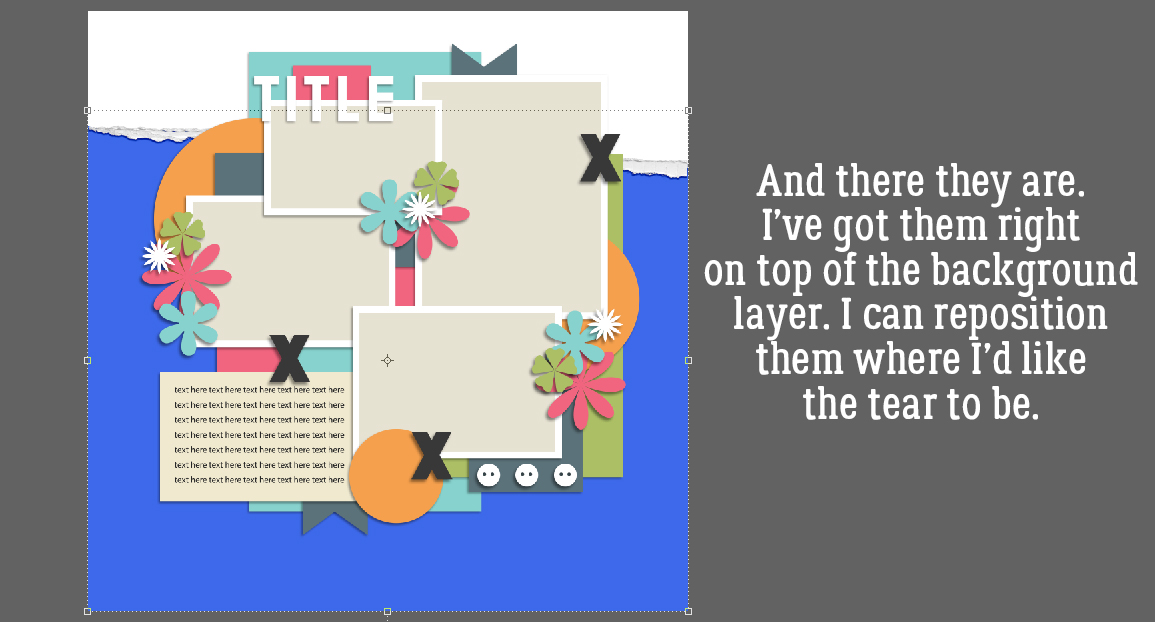
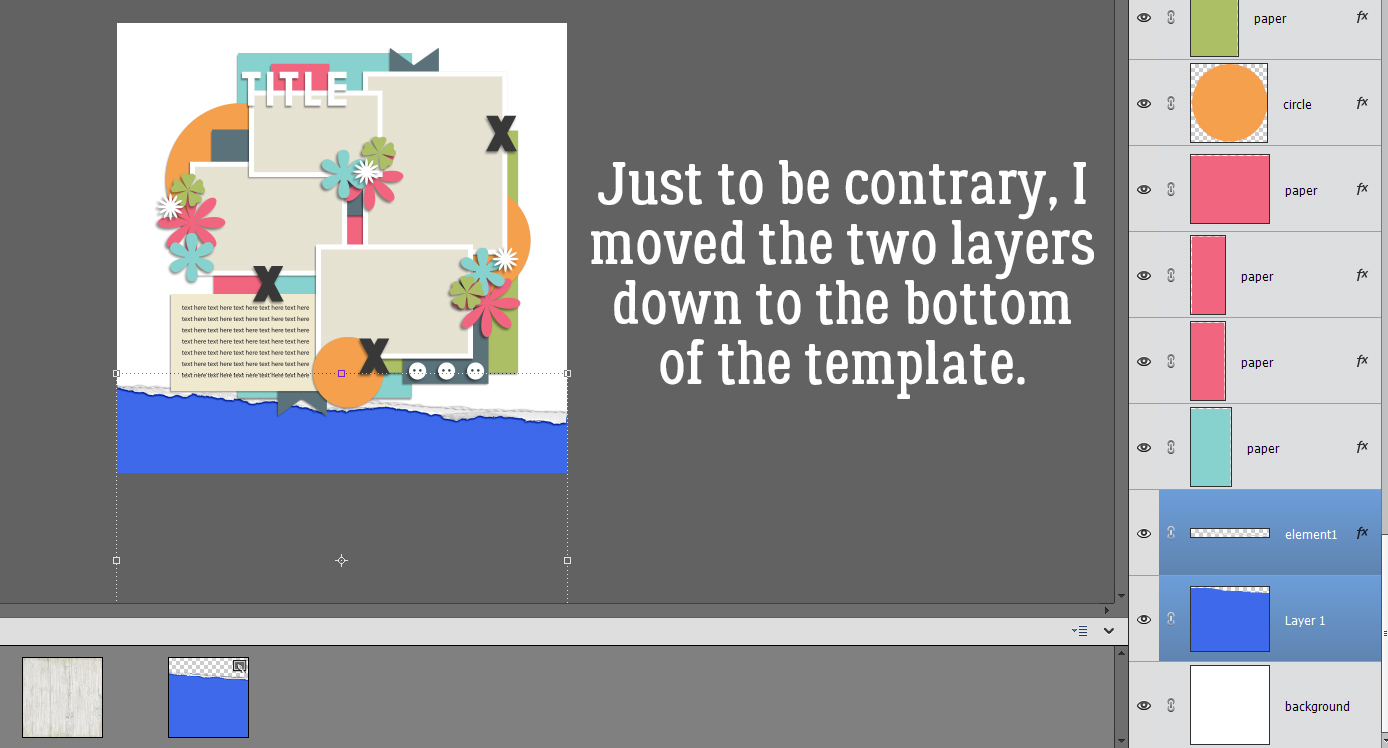
I don’t like the tear up there, just to be a non-conformist. So I’ll move it.
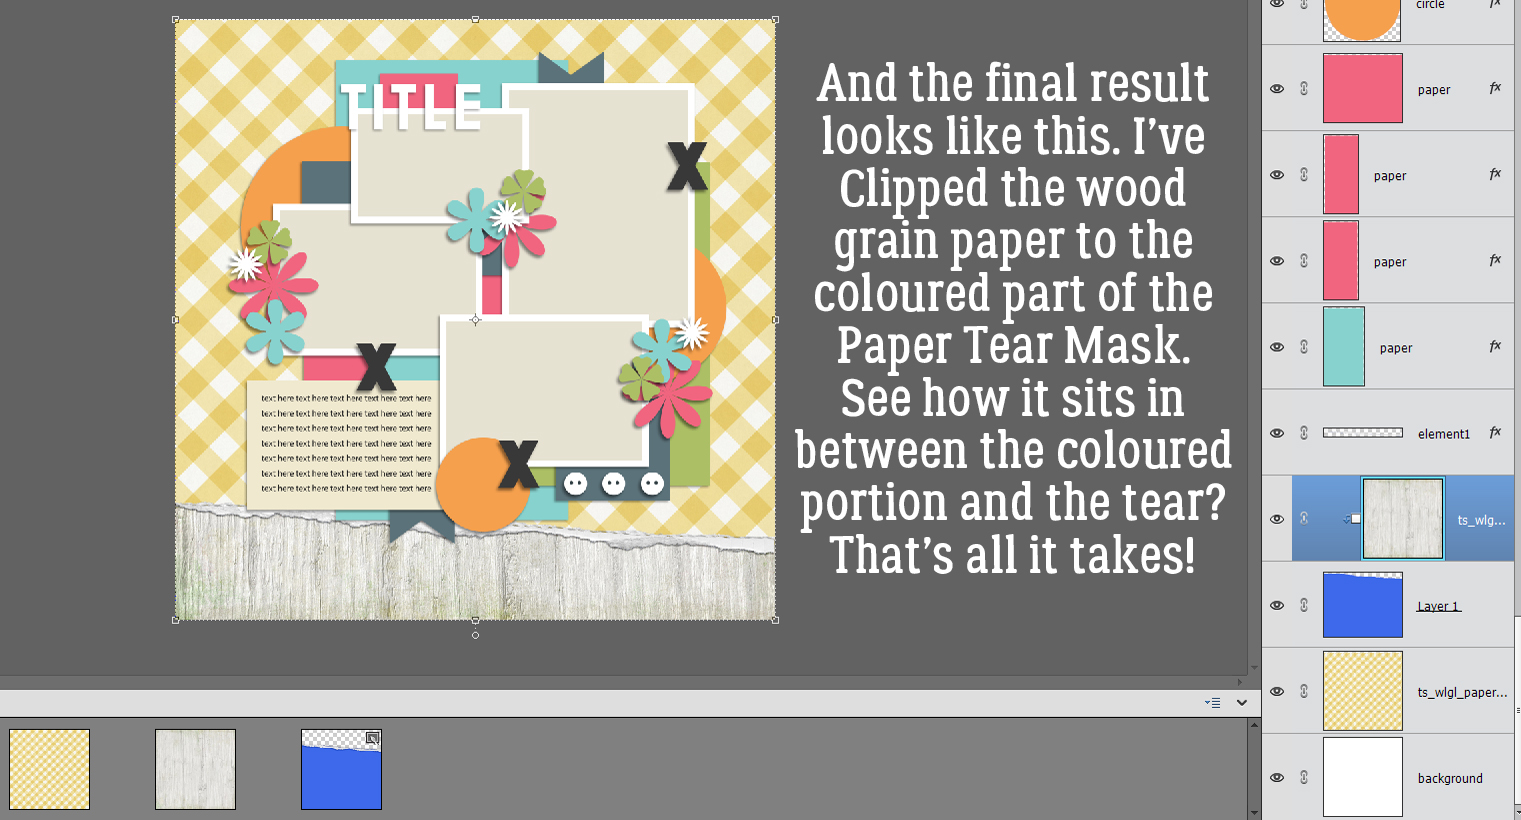
And all that’s left is to add the papers. I’ve used North Meets South Studios’ March Daily Download kit, When Life Gives Lemons. (It’s not available in the store yet, but if you weren’t able to collect all of the files last month, don’t worry. It’ll be in the store soon.) I want the woodgrain paper to be my background and the yellow gingham to be a tablecloth, sort of – maybe one of those vinyl ones with the fuzzy background and now it’s torn 😉 . By Clipping the woodgrain paper to the coloured part I added to the tear, that’s what I get. Cool, right?
Now, if you’d like to do this technique again sometime, you can Save your work As a .psd or .tiff file and reuse it again and again. By having all that coloured area, you can pretty much put the tear anywhere!
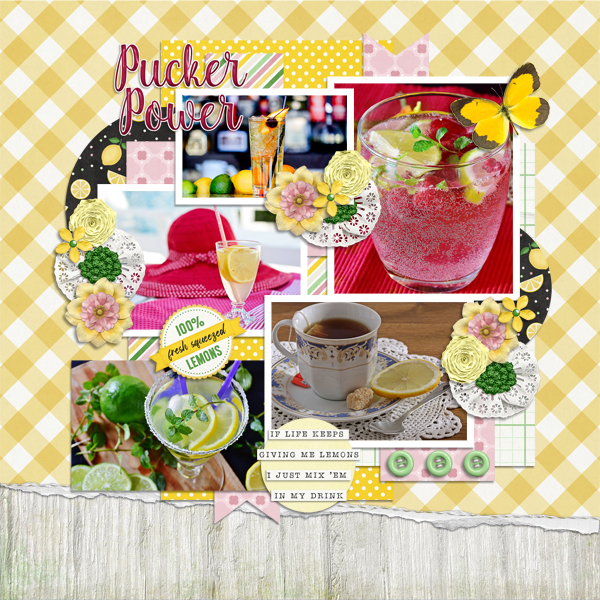
This is my finished layout, photos courtesy of Pixabay.
Last week I forgot to mention that Ginger-the-Magnificent has created a special Gallery where layouts you’ve created with these tutorials can be shared. You asked, she answered!! I’ll be swinging by every so often to check it out and leave some love.
PDF Version : https://bit.ly/38jCIlt
![]()
Congrats on your very own tutorial Gallery !!!! 🙂
Great tutorial on importing products from another template to your current project.
Great way to stretch your stash!!
Thanks 🙂
Great tutorial. I tried to add 3 tutorials from following you but the are not showing in the gallery. Karen
Why not just drag the tear and the layers over to the template ? I’m curious why the extra steps?
That’s a great question! To be honest, I didn’t look at the paper layers on CarolW’s template. And you’re correct, I could just drag both the tear and the “white” paper layers from the template over onto my layout. Thanks for pointing that out… All the extra steps aren’t necessary.
Karen, please send me a link to your Member Gallery via private message and I’ll see if we can fix that.
Thanks for the tip, Jan! I love the torn paper look!! I’ve done what Courtney suggested & copied over both layers … but now I’m wondering if I just copy the tear I can manipulate it a bit & create a different “tear” shape. Love your tutorials … but I often miss them now that you post them a bit later in the day. I will try to remember to intentionally look for them each week. 😉
Good thinking, Pam! Experimenting can be a whole lot of fun.
Blog posts do tend to get lost when there’s a lot going on so if you’ve forgotten to check on Tuesday, you can just put “Tutorial Tuesday” in the search bar and the most recent tutorial will be the first result. I make sure all the tuts are tagged so they can be quickly located. 🙂