Quick Trick: Anchor Points Revisited
![]()
PDF Version : https://bit.ly/3R3tSdC
June is rapidly running out here… on Friday we’ll be at the halfway point of 2022. Time for a Quick Trick! In a previous tutorial I showed you how to change the anchor point of an object in Elements, and I thought that was genius. Then I saw THIS tip and knew it could be very useful. Let’s review the basics first.
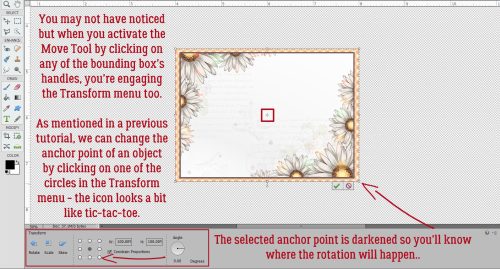
For my demos, I’m using a journaling blank from Karen Schulz‘s Backyard Party kit. I think this could be a great tip for things like word strips, photos, journal cards and so many others. For those of you still finding your way around your software, you may not have noticed that when you activate the Move Tool by clicking on one of the handles on the Bounding Box to reposition an object on your layout, you also activate the Transform options in your Tool Box. This is different from using Image>Transform or the keyboard shortcut CTRL/CMD>T. The shortcut only opens up the Free Transform option so we’re not using it. (And it’s an extra step…) The default anchor point is the centre of the object. In the Transform control panel you can see that the centre circle in the tic-tac-toe icon is darkened. That’s how you know where the anchor point is.
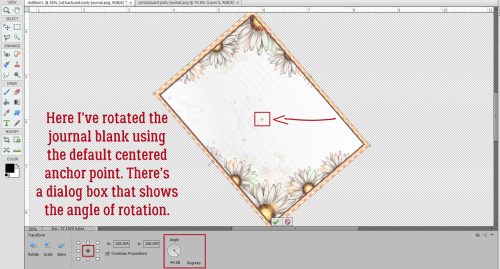
I’ve rotated the journaling blank on that centre anchor point in this image. You can see in the Tool Box that the angle of rotation is displayed.
In this demo, I’ve chosen the upper centre as my anchor point. First I clicked on one of the Bounding Box handles to activate the Move Tool and open up the Transform options. Then I clicked on the upper centre circle to lock in the anchor point and gave the blank a spin.

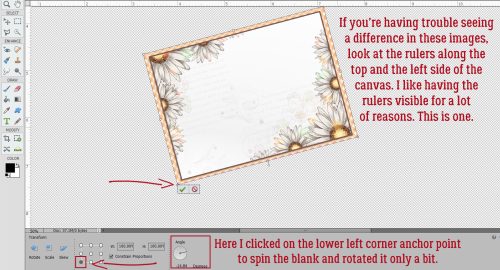
Here’s one more demo of the basic tip using the lower left as the anchor.
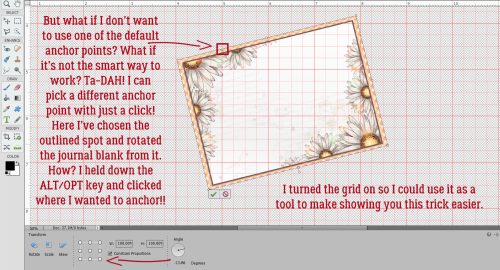
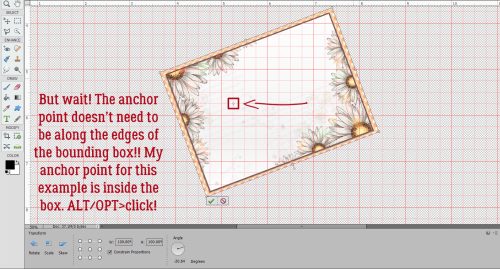
Now, I want to show you what to do if none of the predetermined anchor points will work for you. YES! You CAN choose a random spot as your anchor. And it’s simple. Really simple. Just hold down the ALT/OPT key and click your cursor where you want to anchor your object. Then give it a whirl. Notice that there’s no darkened dot in the tic-tac-toe. In this demo I’ve selected a spot along the upper edge where two of my grid lines intersect. ( The grid was just useful to help me find where I put the anchor points when it was time to edit the screenshots. It may or may not be helpful when you’re scrapping.)
I really DID mean ANYWHERE. ALT/OPT>click where you want to anchor and go.
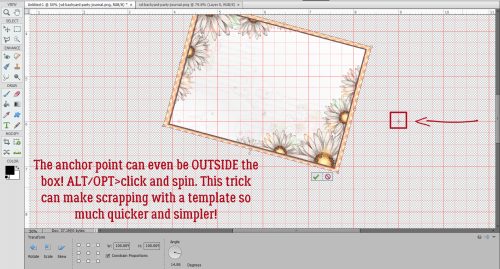
You can even have the anchor point OUTSIDE the object’s bounding box. How handy is that?
I’ve gotten some great new topics for future tuts via Private Message. Keep them coming! (My handle is ObiJanKenobi.)
PDF Version : https://bit.ly/3R3tSdC
![]()