Quick Trick: Select SUBJECT
![]()
PDF Version : https://bit.ly/3ZGrH2z
Gradually, oh-so-gradually, Adobe is adding more functionality to Photoshop Elements and bringing it closer to Photoshop itself. Today I’ll show you one of these game-changing tools. It’s one that I’ve used a LOT in the last few weeks. For this tutorial I’m going to selectively edit a photo by lightening and brightening the sculpture while making other adjustments to the rest of the image.
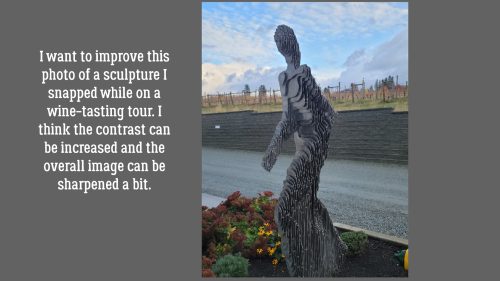
Introduced in Elements 2020, there’s now a Select>Subject option! There are two other ways to access this function: CTRL/CMD>ALT/OPT>S is the keyboard shortcut. I’ll show you the second way in a moment.
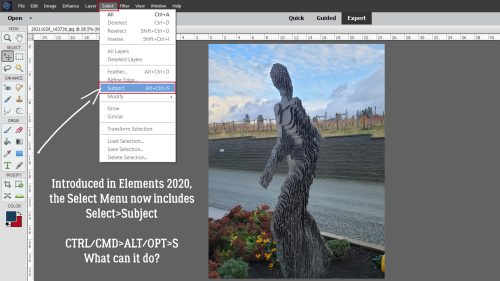
Elements uses AI to decide what the subject of the image is, and that takes a few seconds. It’s not always perfect, as you can see here – it missed the lower corner of the sculpture. But that’s easy enough to fix.
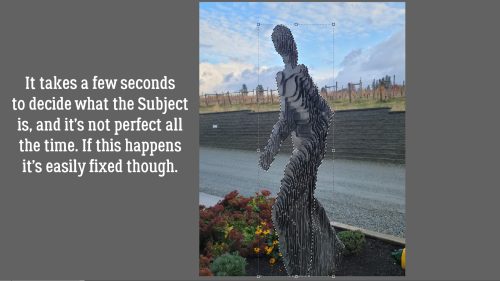
Here’s another back door into the function: the Quick Selection (aka the Magic Wand) Tool. See the Select Subject button? This is also where you can add or subtract the parts Elements didn’t get right. There’s a lot of power in these Tool Options, but we don’t need them for today’s purpose.
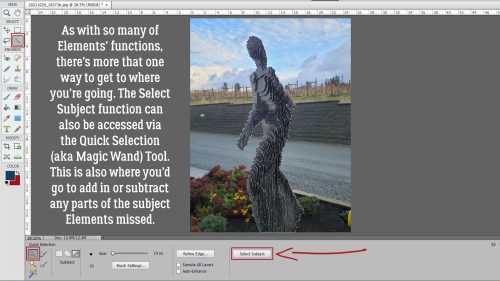
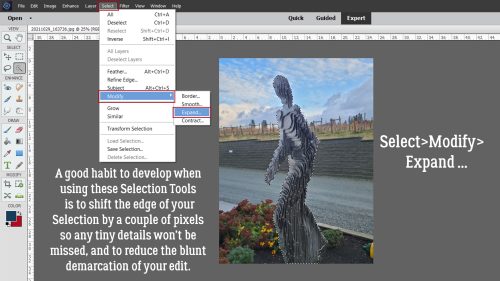
I’ve discovered it’s a good habit to develop to shift the edge of my Selection by a few pixels to make sure all the tiny details are included and to keep the actual edge of the Selection from being too visible later. Select>Modify>Expand is the choice I make most often. 5 pixels is usually enough.
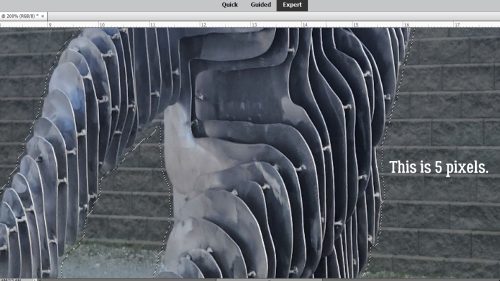
Here’s and extreme close-up of that 5 pixel shift.
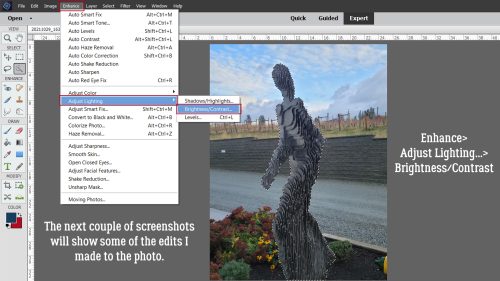
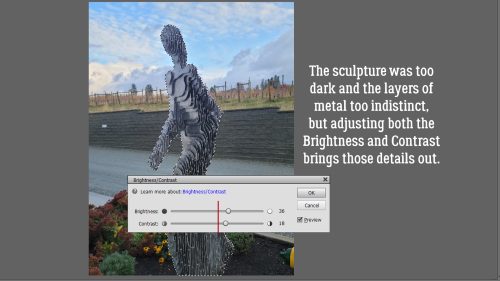
The next few screenshots will show the specific adjustments I made to my image. There are as many other possibilities as there are Edits: blurring the background, changing the background, removing the background, moving objects in the image around, copying the subject onto another image… wherever your imagination takes you. But let’s see if we can bring out the detail in the sculpture a bit using Enhance>Adjust Lighting>Brightness/Contrast…
Oh THERE you are!
Once I had the sculpture looking better, I turned my attention to the background. The tweaks it needs are different from the sculpture. All I needed to do was Select>Inverse (CTRL/CMD>SHIFT>I).
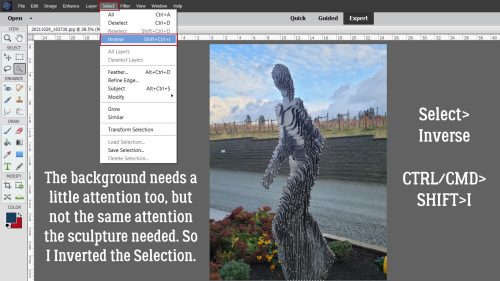
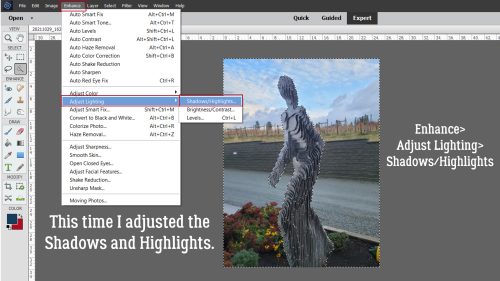
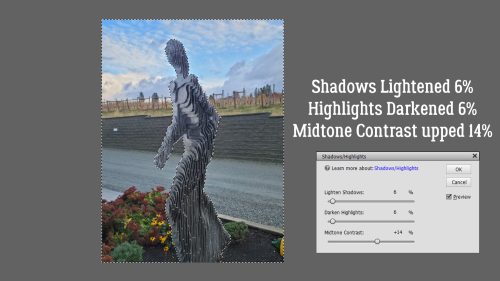
This time I used Enhance>Adjust Lighting>Shadows/Highlights…
It really didn’t need much.
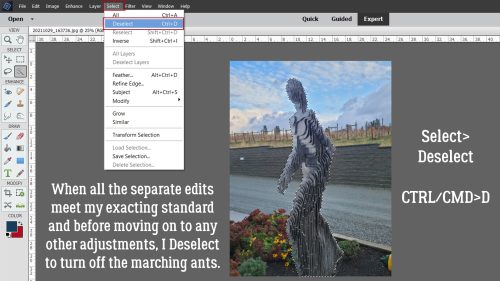
Once I was satisfied with the separate adjustments, I hit Select>Deselect (CTRL/CMD>D). I subsequently made a few more slight adjustments using some of the things we’ve talked about previously: Fill Selection>Content Aware to remove the fire hydrant and the light on the wall in the background, Shake Reduction… and Haze Removal…
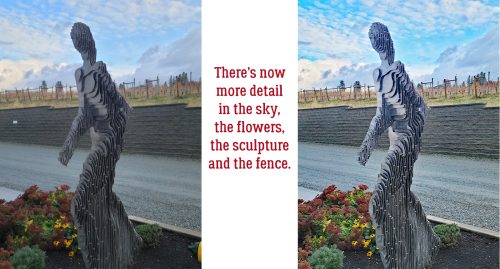
Here are the Before and After images. Thoughts?
See you in April!
![]()