Users’ Guide to the New Forum and Gallery
![]()
[Link to PDF version will go here when Ginger has time to convert.]
Have you had a chance to take the new Forum and Gallery for a spin yet? The Store and the Blog are unchanged, so they should feel pretty comfortable. But the new Forum and Gallery are REALLY awesome! The look is so clean and shiny! But some things have different names and some processes are a little different, so here’s a quick User’s Guide.
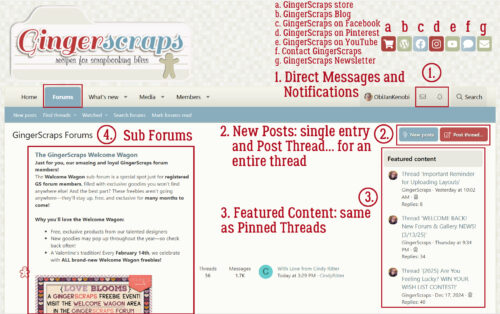
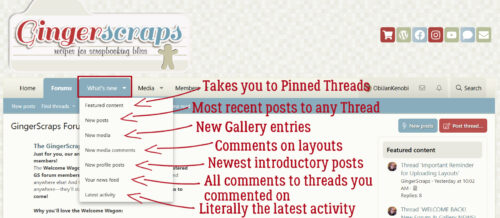
Let’s start with the Forum‘s home page. This screenshot is pretty busy, but it needed to be. Across the upper right side of the screen there are 7 icons that are direct links; I’ve labeled them in case they’re not familiar to you. From left to right, the link to the GingerScraps Store, the GingerScraps Blog, GingerScraps on Facebook, Pinterest and YouTube, a Contact Us button and a link to the GingerScraps Newsletter.
Right below them at #1, there’s a box where your Forum user name will appear (so you’ll know you’re logged in), with a Direct Messages (renamed from Private Messages) button and a Notifications button so you can quickly check what’s specifically yours. Direct Messages are only viewable by you and the sender, and Notifications lets you know when someone has Liked, Thanked or replied/commented to something you posted.
At #2, you’ll find the Forum access buttons. The New Posts button takes you to all the most recent posts to any Thread; you can click on the thread to see the comments and to make your own. If you’re a self-starter, you can start a new Thread by clicking the red New Thread button and you’ll see a list of all the topic SubForums, which are unchanged from our old Forum.
Featured Content #3 shows the top 3 pinned posts – those our Admins want to make readily visible and available; click on the coloured text and you’ll zip into the Thread without having to look for it. This is where you’d look for info on special events, like the St Patrick’s Day contest.
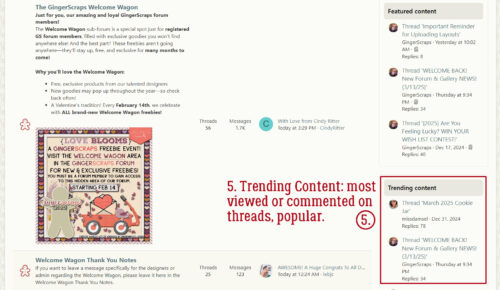
#4 is where you’ll find all the SubForums. For example the Welcome Wagon Forum contains multiple threads started by our GingerBread Ladies where they share links to little freebies they’ve created for us. As you scroll down the home page, you’ll see all of the SubForums listed.
Just below the Featured Content you’ll find #5, Trending Content. Here’s where you can see at a glance what’s catching other GingerScrappers‘ eyes.
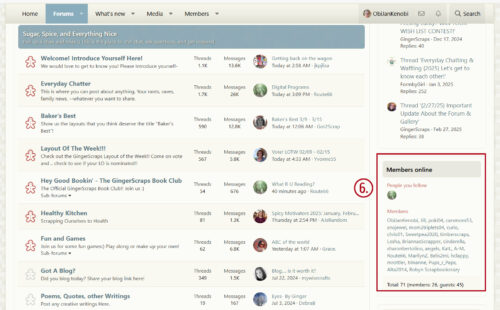
Right at the bottom of the screen you’ll see #6, a list of all members currently online. This might be helpful if you’re wanting to message somebody with a time-sensitive message, or if you just want to know who’s up as late as you are. 😀
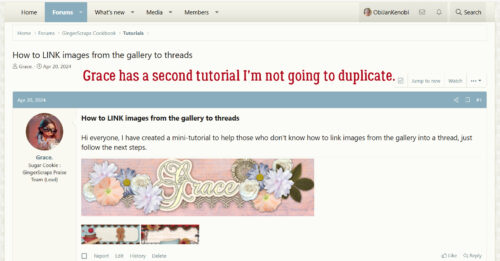
I dipped into the Home>Forums>GingerScraps Cookbook>Tutorials just to see what’s been happening there and discovered Grace has whipped up a couple of tutorials: How to LINK products from the Gallery to the Store and…

How to LINK images from the Gallery to threads. These two quick tutorials are important, especially to Creative Team members, so if you need to know how to handle these tasks, they’re right there for you.
I scrolled down to the Challenge Yourself SubForum and opened up the Cookie Jar. It’s laid out really nicely!
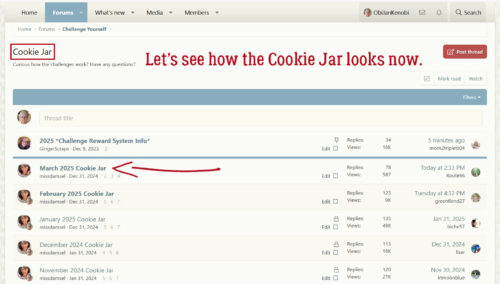
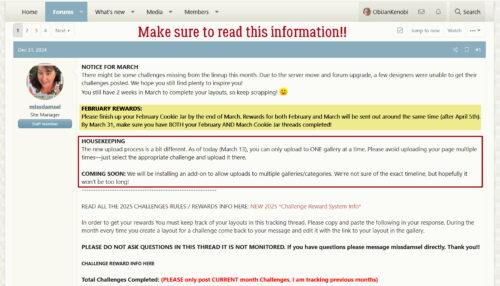
Go into the March 2025 Cookie Jar and read Missi‘s post about how the February Challenges will be managed. Right below it is information about Gallery posting to multiple albums, which isn’t currently possible.
While I was there, I figured I’d start my own Cookie Jar post so I could later add the layouts I (might) complete this month. I always Copy Missi‘s text and Paste it into my post. In the old Forum, the colours also Copied, but here they don’t so I changed the number in brackets to my usual red. Oh, and before I forget, look at all the places we can share our posts!! Facebook, X, Bluesky, LinkedIn, Reddit, Tumblr, WhatsApp, email and a direct link are all there.
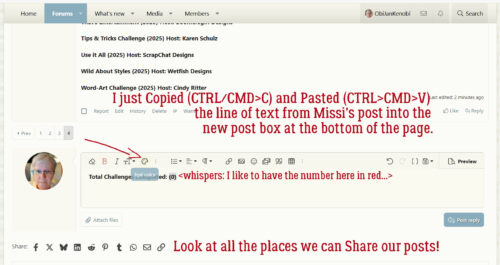
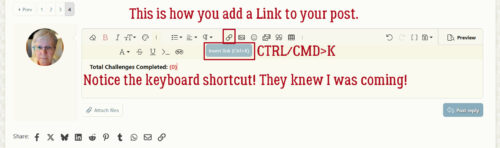
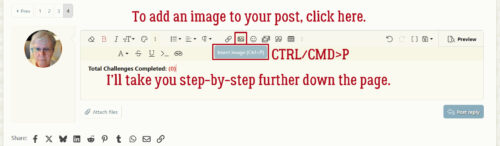
These icons in the top centre of the post box are going to be crazy helpful! To add a LINK to your post, click the little side-lying figure 8. Ooh, and there’s a keyboard shortcut, as if they knew I was coming. [Another thing to note: This new laptop of mine doesn’t disappear the descriptors seen when the cursor is hovered over an icon when I make a screenshot! I did a Snoopy happy dance when I saw that!]
Add an IMAGE, click the photo icon.
There’s even a SMILIES button.

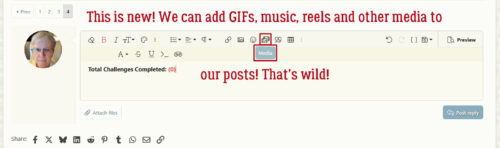
I didn’t expect to see this! Sometimes a GIF speaks far more eloquently than words do.
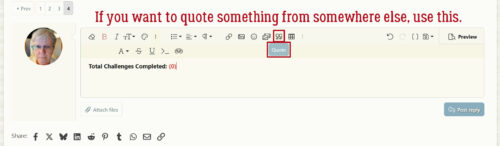
This is a formatting icon that sets your Quoted text apart from the rest of the text. It’s very handy.
Let’s take a quick peek at the What’s New tab. Clicking on the little upside down tent symbol opens a drop-down menu. This Forum server has multiple ways to do almost anything.
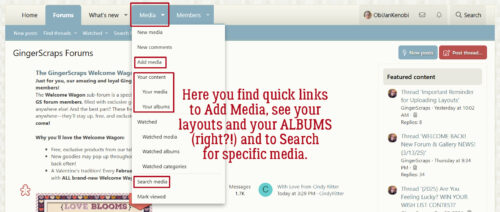
The Media tab is where you’ll find what we used to call the Gallery. The drop-down lets you access a variety of Media related options. We have our own ALBUMS now!!
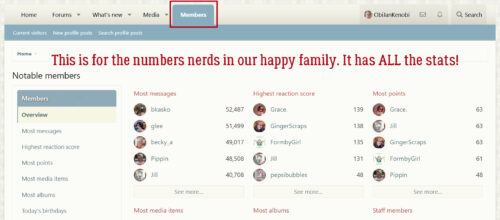
Have you ever wondered who posts the most? Or who has the most layouts in the Gallery? Or just how active you are here? Members has got you!
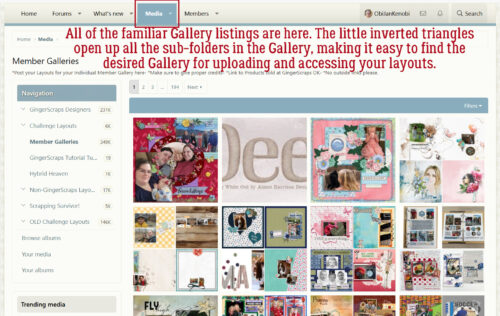
So, back to the Media tab. If you click on the tab itself, rather than the upside-down tent, the left side of the screen will have a list of all the Albums there are in the Gallery. I clicked on Member Galleries, but could have chosen any of the Designers or Challenges just by clicking on the inverted triangle to the left of the album title. That makes navigation really easy.
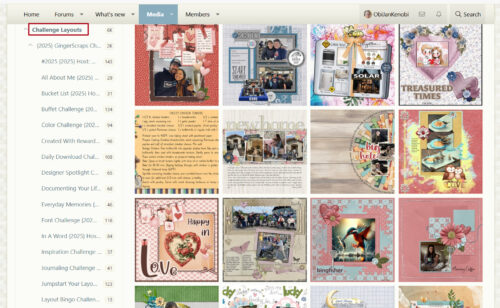
I opened up the Challenge Layouts Album and you can see the list is right there. Clickclickclick!
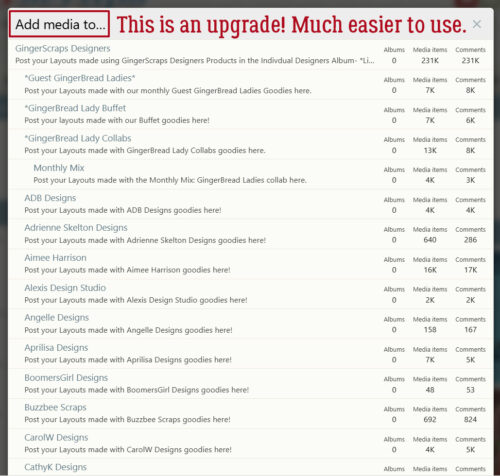
If you click on the Add Media subtab on the blue strip at the top of the Media screen, this menu opens. You can scroll down through the Albums list until you find the one you’re looking for. Remember, for now, add your Challenge layouts ONLY in the Challenge Album. Don’t upload your layout more than once. Wait for the add-on extension that Ginger and the tech team are working on.
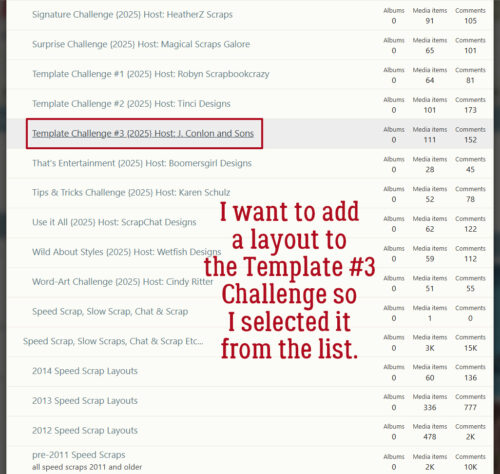
I’m going to add a layout to the Template #3 J Conlon and Sons Challenge Album for February.
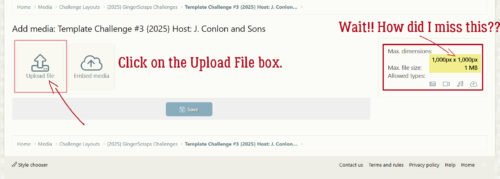
This is the upload screen. I totally missed the change in allowable image size when I was doing this. I only saw it when I was editing my screenshots. We can go up to 1000×1000 pixels and 1MB now!!
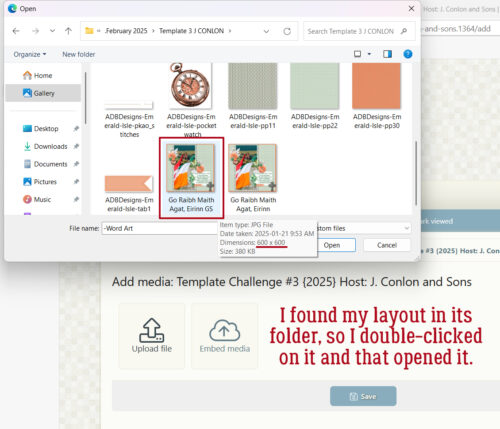
Clicking on the Upload File box took me to the last folder of mine that I used. I found the correct folder and the version I saved for the Gallery. I could click on it then the Open button, or just double-click on the image. Notice all the ways I can verify I’m putting my layout where I want it to go.
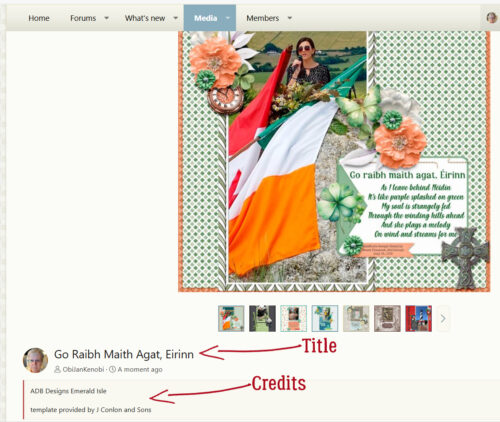
When the Upload screen reappears, there’s a thumbnail of the layout but it shows the file name I gave it, which is a version of my title. I’ll change the entry so it’s exactly the title. Then I typed all my credits into the Description box. [Please don’t forget to include your credits. Our Designers deserve to be given credit for their work.] When everything I needed to include was there, I clicked Save.

And that’s it! My layout is posted. The title is correct, the credits are there. Fabulous!
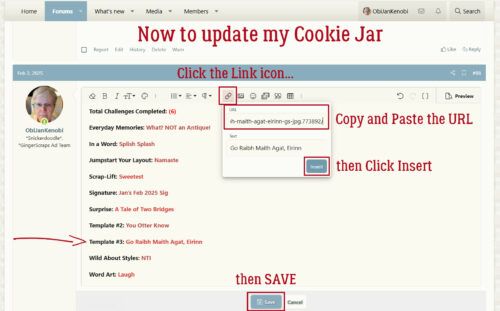
There are still tasks I need to do before I’m finished. SO let’s update my Cookie Jar. I always have at least 2 GingerScraps tabs open on my desktop so I can move back and forth between them quickly and easily. I added the Challenge to my list on the Forum tab, then highlighted the name of my layout by click-dragging the cursor over it. I flipped back to the Media tab, Copied the Universal Resource Locator for my layout then back on the Forum tab, clicked on the Link icon as shown. Next, I Pasted the URL into the appropriately labeled box. Then I clicked Insert, and Save.
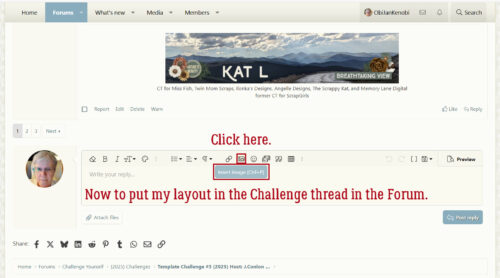
To add a Copy of my layout to the Challenge thread, I navigated my way to it in the Forum; the Media tab is still open to my layout. I right-clicked my mouse INSIDE the image in the Media tab and chose Copy Image Link from the pop-up menu. Next, I flipped back to the Forum tab, where I’ve got the correct Challenge thread open and waiting. This time I clicked on the photo icon as shown.
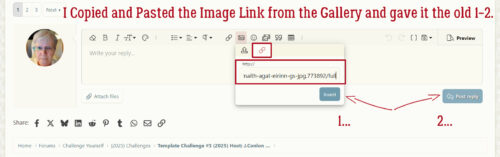
I usually don’t Drag and Drop, so I used the Link icon to add my Image Link URL. Feel free to do you, 😉
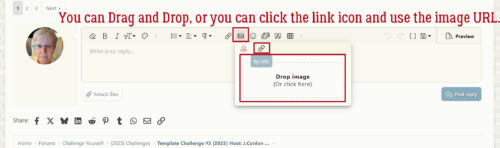
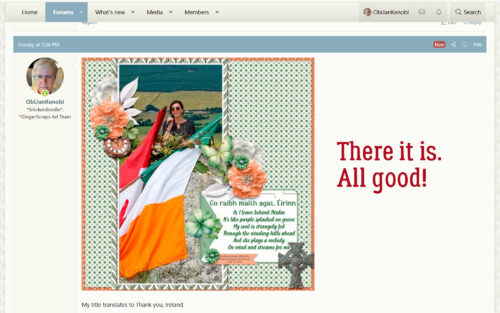
Once the URL appeared in the box, I clicked Insert then Post Reply.
And that’s how you add your Layouts to the new Gallery, top up your Cookie Jar and make sure your layout joins the proper thread.
I actually haven’t done any scrapping since I finished this layout back in February. I sprained the ring finger on my left hand… buddy-taped fingers really get in the way! Finger’s almost back to normal; although the knuckle is still swollen the pain is pretty much gone. As for the laptop setup, I still have a lot of MIA fonts, and I may end up not worrying about them. I’m finding out all the good things the machine does and getting comfortable with the keyboard. Those kinds of things I can do with just one hand! We have company coming for the weekend and I’m hoping to have a TON of great photos to work with afterward.
Next week, now that I know how the Media tab is laid out, I’ll bring you a Challenge Spotlight. Get ready to shine!!
![]()
This is excellent!! Thank you so much! Have fun with your new computer and I hope your finger heals well.
Thanks for putting this together. It is so helpful!