Digital Zen Doodling (Part 3 of maybe 5)
![]()
I’m thinking maybe nobody’s really gung-ho about digital Zen doodling, but I’m going to press on. Can’t possibly just leave it unfinished, right? I didn’t get any guidance on which space to fill next so I made an executive decision.
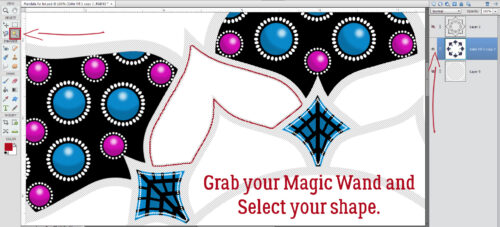
Many of the steps for this shape are the same as for the others, so I probably won’t be as wordy as I can be. 😉 The Magic Wand Tool option I used here is the one that has the fairy-princess-looking icon with the yellow six-pointed star at the tip. I just clicked inside the desired target on the main Mandala layer with it to Select the edges of it. (I’ve outlined it in red just for visibility – the marching ants are hard to see.)
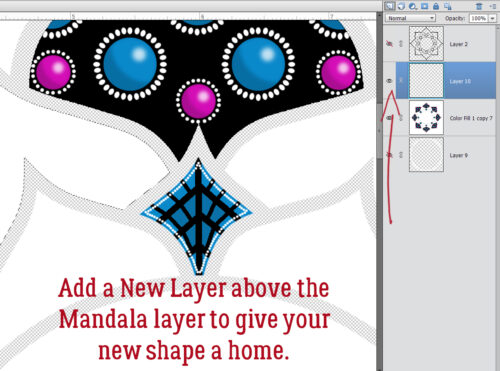
Yep, you guessed it. I popped a New Layer above the Mandala layer for the changes I want to make on this shape.
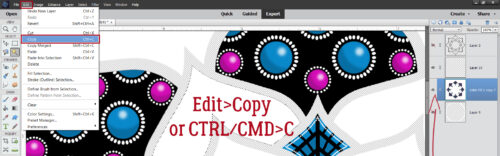
By using Edit>Copy (CTRL/CMD>C) I can Duplicate only the shape inside the marching ants. The active layer for this step must be the Mandala layer.
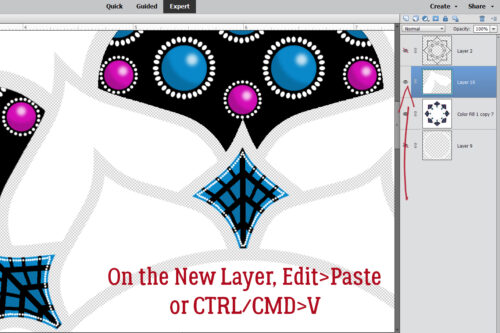
With the New Layer active Edit>Paste (CTRL/CMD>V) will drop a perfect Copy of the shape right there.
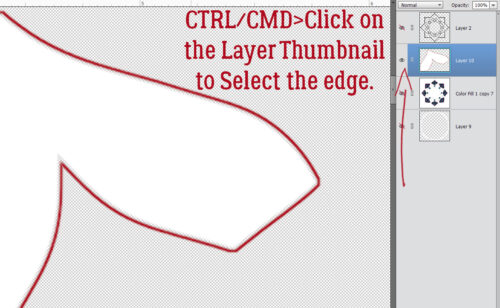
I’m going to make some um… concentric isn’t quite the right word, but let’s go with it… lines inside the shape. So again, I CTRL/CMD>Clicked on the Layer Thumbnail to Select the edges of the shape (in red for visibility only).
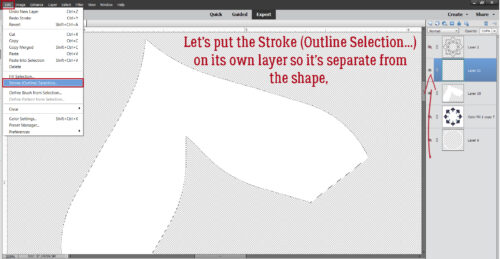
For ultimate Editability (did I make up a new word?) the Stroke (Outline Selection) should be on its own Layer.
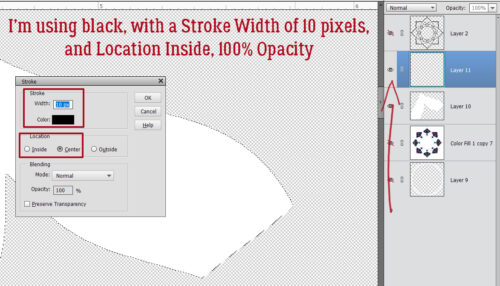
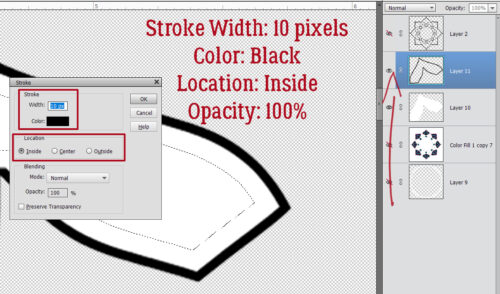
Let’s use Black (hex code 000000), 10 pixels for the Width and put it Inside the Selection at 100% Opacity.
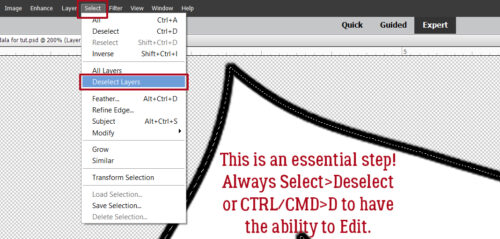
This may seem repetitious (duh!) but you really can’t do anything else unless you Select>Deselect (CTRL/CMD>D) whatever is surrounded by marching ants.
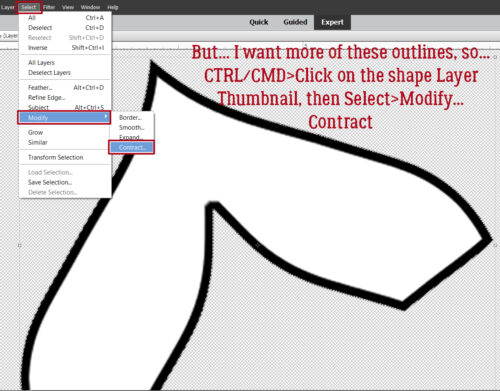
Yeah, you guessed it. I’m just going to Select those edges again… so that I can make more outlines. CTRL/CMD>Click the Thumbnail, then Select>Modify…>Contract to make the Selection smaller.
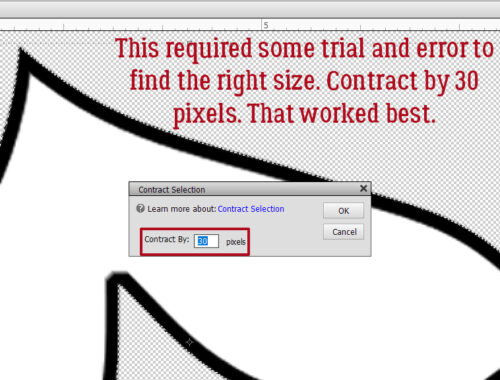
I want the new outline to be smaller, but still leave room for at least one more decrease, so I had to try a couple of numbers in the box before I settled on 30 pixels. (Remember, CTRL/CMD>Z is always there to Undo whatever isn’t working.)
I’m keeping all these outline Strokes on the same layer. Elements has remembered my settings so I can just Edit>Stroke (Outline Selection…)
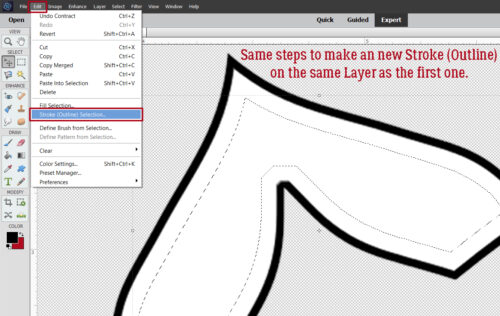
… and click OK.
I repeated those steps one more time.
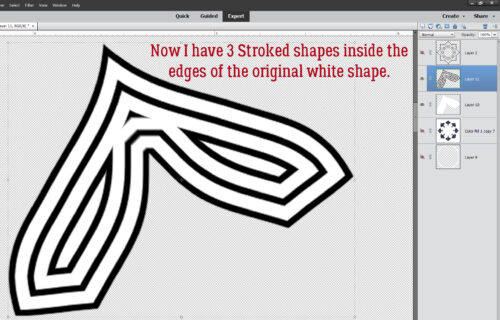
Let’s add some colour. I tried with the Paint Bucket, filling in the gaps between the black outlines, and it was UGLY. So I went down to the white shape Layer and tried again. Fail.
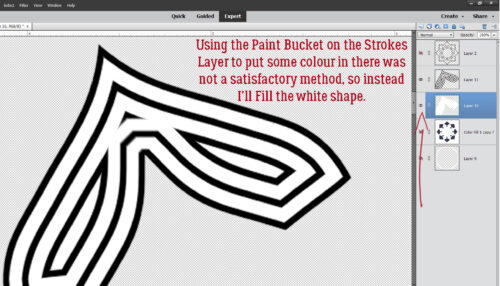
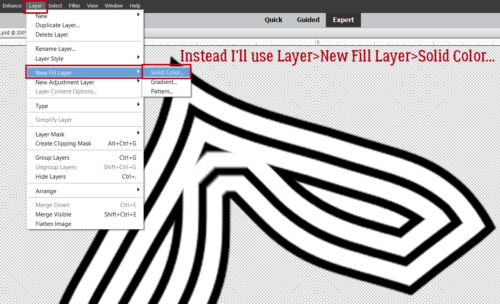
This method has never let me down. 😉 Layer>New Fill Layer>Solid Color…
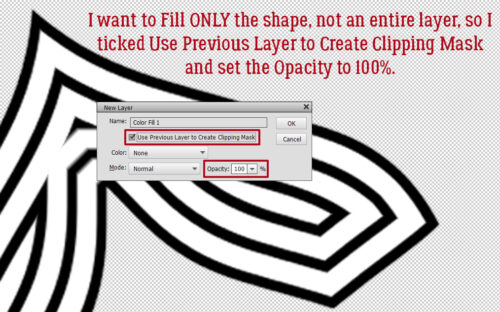
This menu opens. I know from previous fails that I have to tick the Use Previous Layer to Create Clipping Mask box, otherwise I’ll just have a solid colour fill the whole screen.
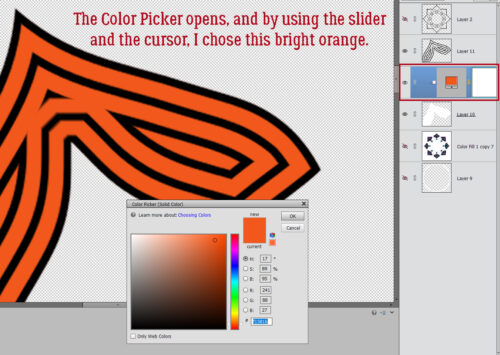
When the Color Picker opened I chose a bright orange.
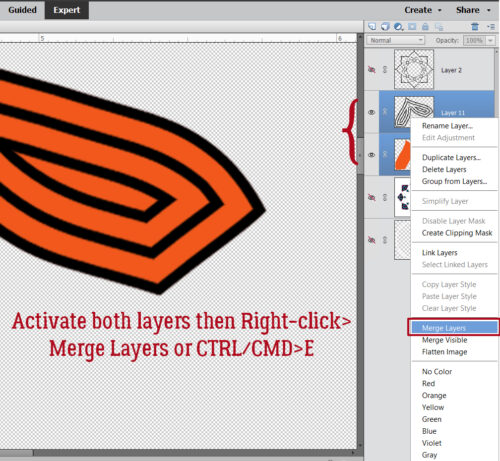
To solidify everything I Activated both the orange and the striped layers and Merged them.
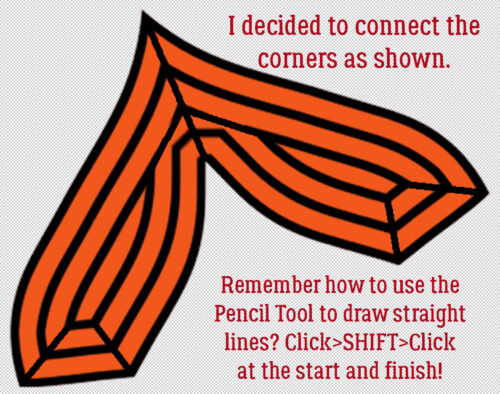
Then I decided I should connect up the corners. I used the Pencil Tool the same way as in the last installment. Click the Tool at the starting point, hold down the SHIFT key then click at the end point.
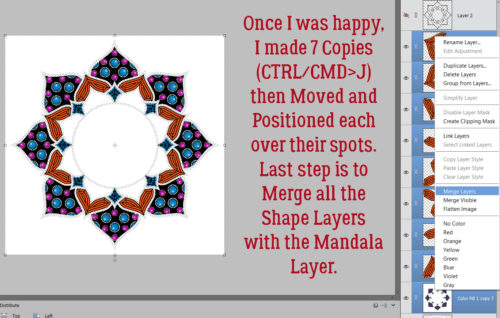
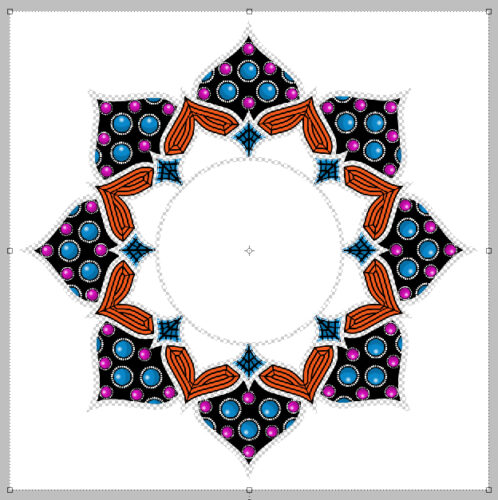
Last steps were to make 7 Copies of the orange stripy shape, Move and position them into their assigned spots and Merge the whole kit and caboodle.
Progress to this point. I like it a lot! I’m thinking hard about how to fill the large centre circle. Could be fun!
If there’s one thing I’ve learned from this experiment, it’s that my vision is really not what it used to be, even with appropriate correction. The cursor is getting harder and harder to see… and giving me mild headaches. There may be some hard choices coming for me. 🙁 But I can absolutely see well enough for a Challenge Spotlight next week! Will one of your layouts be given a starring role?
![]()
Whoa! Looks so involved. Thank you for all the tutorials for this. Love this one especially.
Thank you so much for all your hard work Jan. I love your detailed tutorials and am so happy that you are doing one again . Digital Zen Doodling is definitely not for me, it seems more like torture than relaxing . However, I am learning so many new skills that can be applied to other aspects of my scrapbooking. I particularly loved how you made a circle look like a 3D sphere.
i totally agree with Theresa. You have shown many techniques that can be used elsewhere. So even if Zen Doodling isn’t your thing, we have many things to practice.
As a former hobby artist, I once tried my hand at Zen drawings because I like ornamental art and wanted to get back into the swing of things. Now, however, I’m working with the free Affinity V3 and would like to try creating a drawing like that in 3D. I think the process can be transferred from PSE to Affinity, or adapted to work there.
Thanks for the tutorial.
Doska
Thanks so much, Jan!!! This looks really fun and something I’ll have to try in my mis-named “copious” free time, lol!!!
I use Photoshop and Paint Shop Pro, so there will be some translating involved but still definitely something I want to work through. 🙂 Thanks again for pulling it all together for us!!!