Paper Folds with a Twist

Alright, you can pick your jaws up off the floor. Yes, I’m here with FRESH content! And I’m late… So. Many. Appointments this month! Anyhoo, Ginger got in touch with me about a tutorial request she received. The GingerScrapper asked about creating a paper fold, but to give the appearance that the paper is double-sided with patterns on both sides. I don’t know who made the request, but I’m happy to refresh a previous tutorial on paper folds for double-sided paper. This is the image the GingerScrapper shared with Ginger.

Let’s get on with it! The screenshot says what to do…
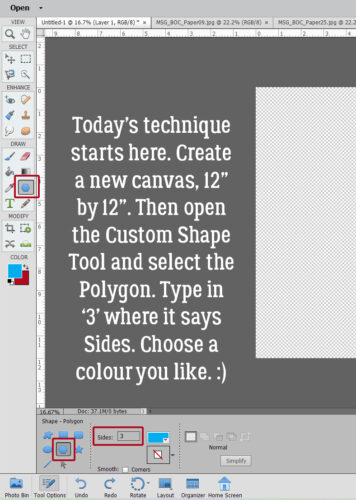
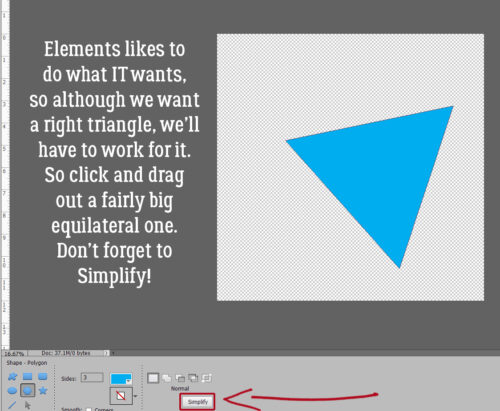
It would be so wonderful if Elements could read our minds and just give us what we want. 😀 The default for three-sided Polygons is to give you an equilateral one. So we’ll have to force it to make a right-angled one. As always, remember to Simplify your Custom Shapes so that you can manipulate them.
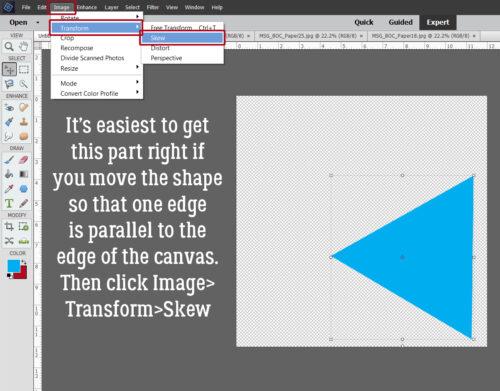
In the screenshot below, I’ve Rotated and Moved the shape over so that one edge is (almost) parallel with the right side of the canvas. It’ll make sense when you see how the next steps work. Click Image>Transform>Skew to change the angles.
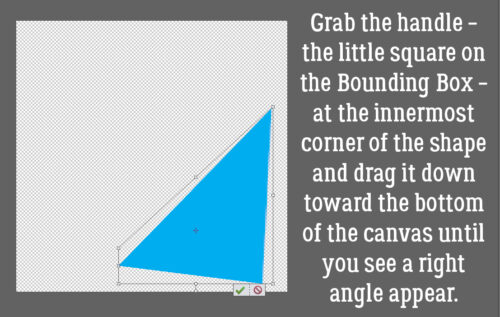
To make the Transformation, grab the handle – the little square at the upper left corner of the Bounding Box – and drag it down toward the bottom of the canvas. You’ll see the bottom right corner gradually shift to a right angle.
So. The base of the triangle is a LOT wider than the one in the sample layout. So to fix that, go back to Image>Transform>Distort.
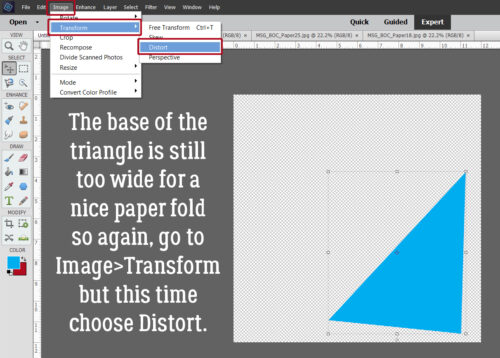
Now grab the bottom left handle and drag it down and toward the right corner of the canvas. That move squares up the angle and narrows the fold.
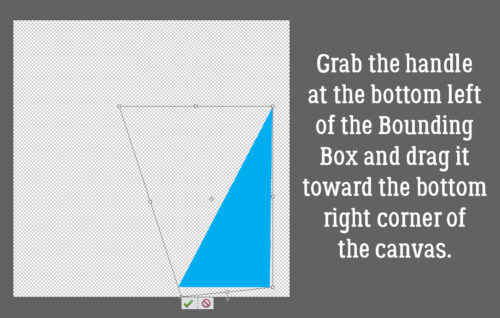
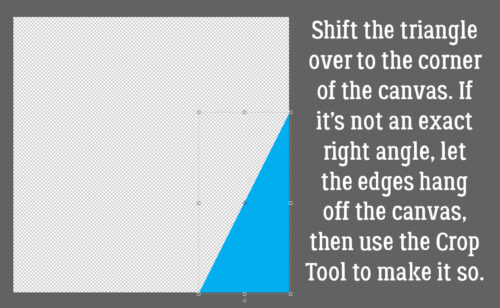
Don’t fret if the triangle isn’t perfectly square. That’s an easy fix. Move the shape right into the corner and let it hang over the edges of the canvas. Then use the Crop Tool to make it perfect.
Drag and drop your background paper onto the canvas underneath the shape layer. I’m using Magical Scraps Galore’s Best of Canada papers.
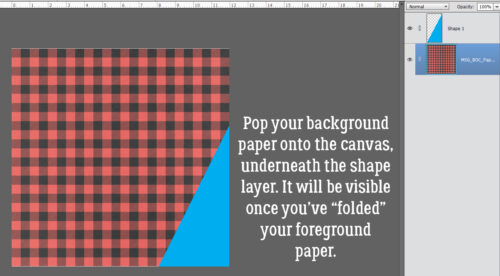
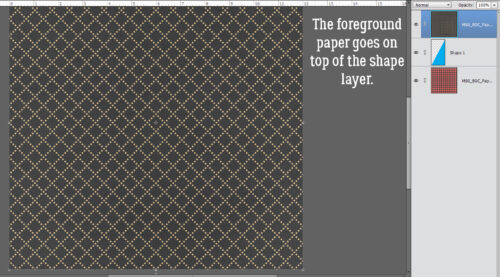
Then the foreground paper goes ON TOP of the shape layer.
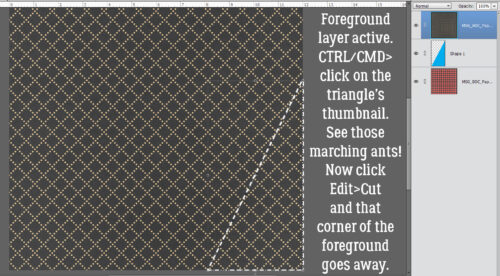
With the foreground paper layer active, Select the edges of the shape by CTRL/CMD>clicking on the shape layer thumbnail. The marching ants will appear. Then Edit>Cut [or CTRL/CMD>X]
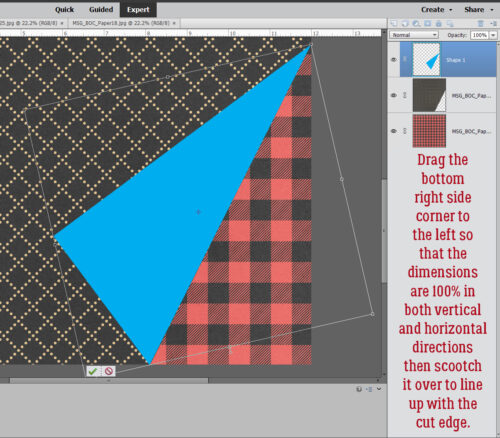
Move the foreground layer underneath the shape layer. Then drag the right bottom corner over to the left. Using the Tool Options make sure the triangle is the same size both horizontally and vertically, but flipped. Then line the two long edges up as shown.
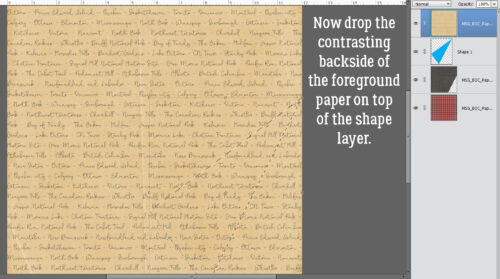
The sample layout shows the backside of the foreground paper as a newsprint. Logically, the print should be backwards but we’re going to ignore that. Drop the paper you’ve chosen for the reverse onto the canvas on top of the shape layer.
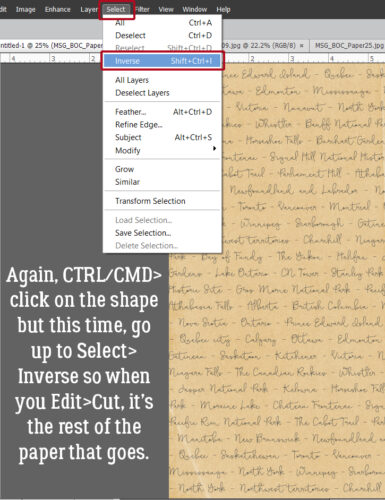
Once again, Select the edges of the shape layer, but this time, go up to Select>Inverse so that when you Edit>Cut, you’re removing the rest of the paper, leaving the triangle shape there.
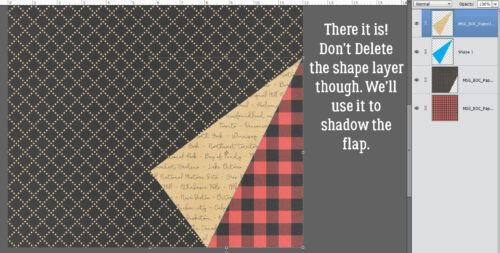
There. Now it looks like the tan pattern is on the reverse side of the black diamond patterned paper. Don’t Delete the shape layer though! It’s going to become the shadow layer!
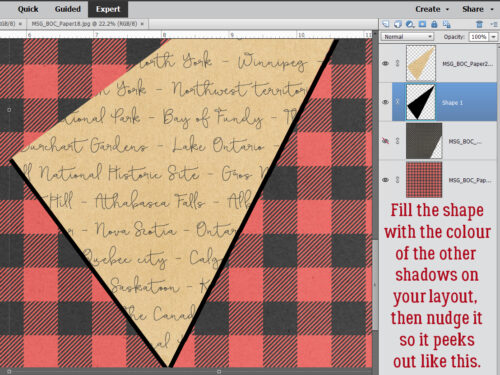
Use the Paint Bucket to Fill the shape layer with the shadow colour of the Style you’re using. (To find out that colour, right-click on the fx icon on any shadow layer of your template or layout then click on the Color Picker box that appears. CTRL/CMD>C will Copy the hex code.) My shadows are black so I used the hex code 000000. Then I nudged the shape so it creates a border as shown.
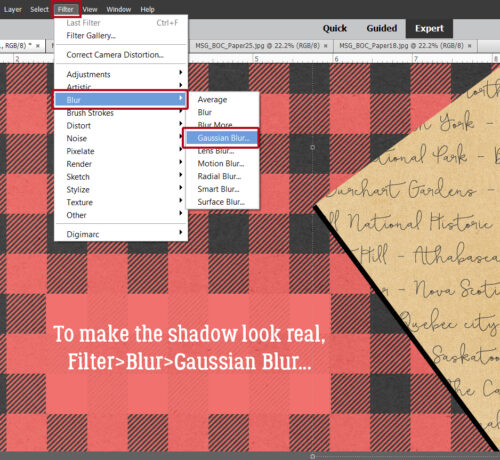
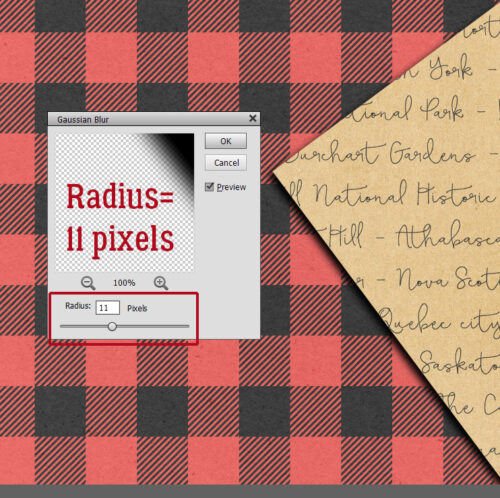
For a realistic shadow, the shape needs to be softened a bit. To do that, click Filter>Blur>Gaussian Blur.
This dialog box opens. I pulled my Radius slider over to the right and stopped at 11 pixels.
Shadows don’t completely obscure whatever is under them. To achieve that transparency, change the Blend Mode to Linear Burn by clicking on that bar labeled Normal just at the top left of the Layers Panel and scrolling down.
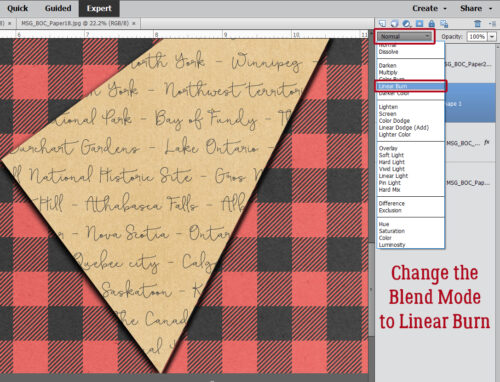
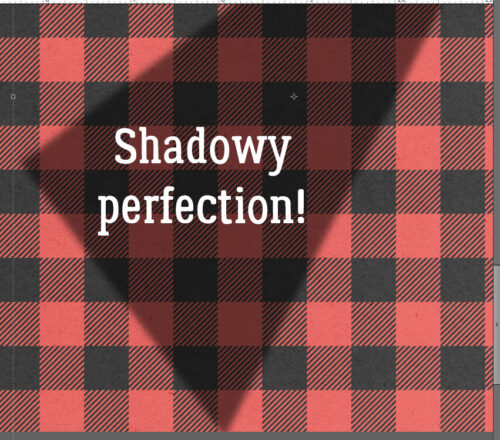
Adjust the Opacity. I went to 50% here.
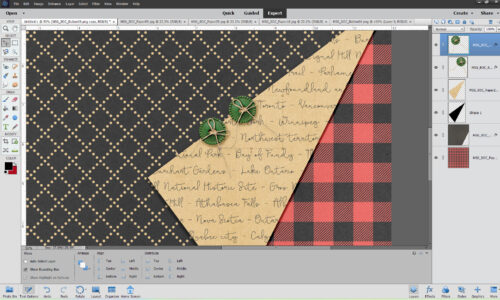
Just for fun, I added a couple of buttons so this looks more like the sample layout. Now, wasn’t that easy?
Next week is Challenge Spotlight Tuesday! See you then.

It was me!!! Thank you so much!!!! I can’t wait to try it!
You’re welcome!
Great tutorial!
I just love these tutorials! Thanks so much!!
What a fantastic tutorial Jan – do helpful and I’ve always wanted to perfect this! Thank you 🙂