Paper Tears and Curls – Advanced (Part 1)

I hope you had a chance to review the paper tear tutorial I recently updated. Today we’re going to build on that and the end result will be another shadowbox look with lots of texture. There are quite a few screenshots but they’re mostly recapping and expanding. Let’s jump in. Today’s technique will create the appearance of tearing thick, heavy, multi-ply cardstock. When you choose your papers, make sure they have visible texture. [The two kits I’ve pulled from have been retired, but there are lots of others that will work beautifully.]
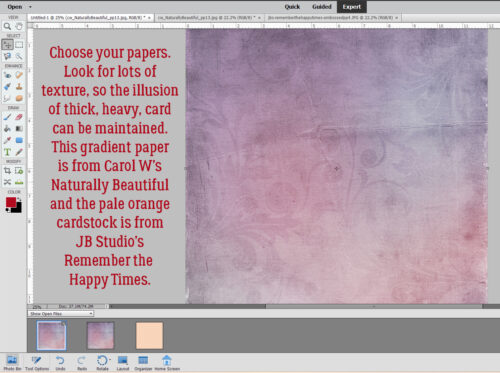
There are a couple of ways to reveal the background paper; you could just shift the top paper layer to expose the background (which can create problems with shadows later), or you can use the Rectangle Marquee Tool to outline the part you want to remove, then use the Edit>Cut or CTRL/CMD>X command. Then make a Copy – right-click>Duplicate Layer>OK or CTRL/CMD>J of the top layer, which will become the white paper core.
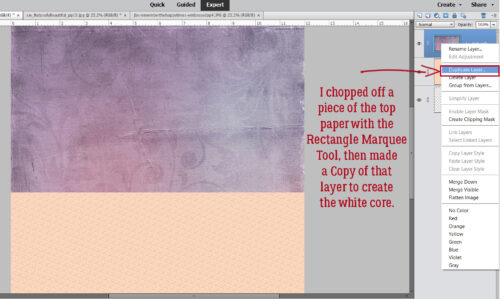
It could be my rapidly-deserting-me vision, or it could be the screenshot – it’s blurry. But what you need to know is that when you’ve used a paper like this one with an irregular surface, just dumping some white paint onto with the Paint Bucket isn’t going to work. Instead, I clicked Layer>New Fill Layer>Solid Color.
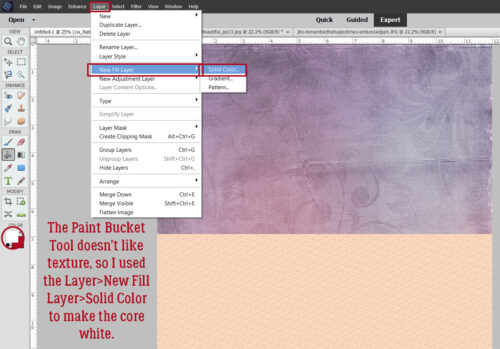
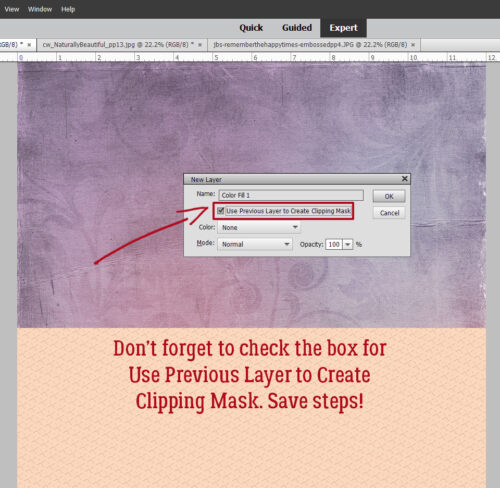
Turn off visibility for the top purple paper layer while you do the next steps. Make sure you’re only adding the solid colour to the piece, not the whole canvas. Check the box for Use Previous Layer to Create Clipping Mask.
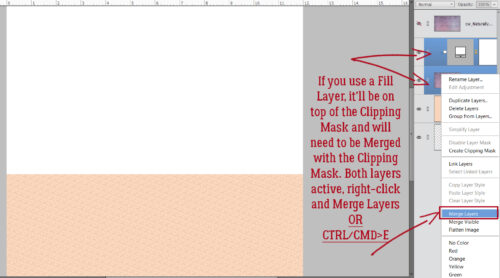
Of course, the Fill Layer isn’t firmly attached to the paper layer underneath it until you Merge the two layers. Click>SHIFT>click on the two layers then right-click and choose Merge Layers, or CTRL/CMD>E.
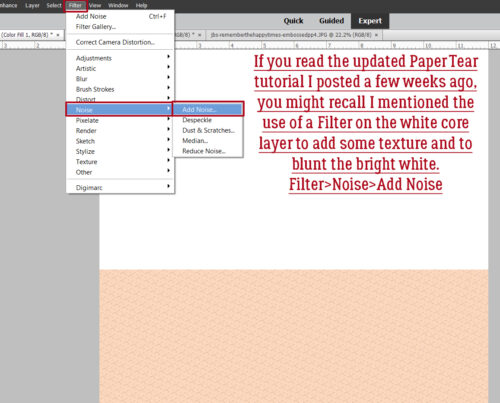
This step is optional. To knock down some of that bright whiteness and add a bit more interest, I’ve added some noise: Filter>Noise>Add Noise
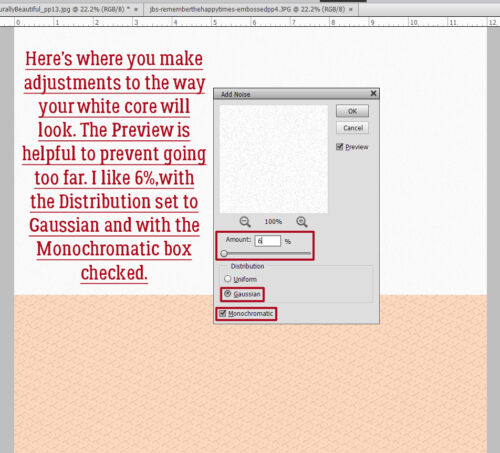
The speckled appearance can be adjusted. Play with the slider until the Preview looks good to you, with Distribution set to Gaussian and tick that box for Monochromatic. (Otherwise, the noise will have some psychedelic qualities. 😉 )
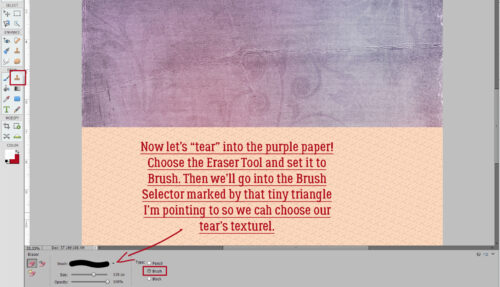
Time to tear it up! Turn on visibility for the top purple paper layer and make sure it’s active. Choose the Eraser Tool and set it to Brush. Go into the Brush Selector by clicking on the tiny triangle to the right of the thumbnail. (And pretend there isn’t a typo in the screenshot. 😀 )
Look near the top of the list that opens for Artistic Brushes. They’re PSE-integrated Brushes, so they will be there. Select the one indicated.
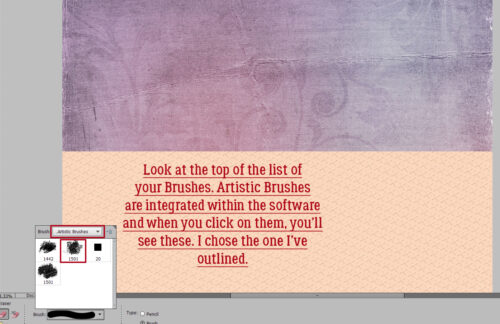
Using a combination of random clicks and some click-dragging, tear a strip off that purple paper. 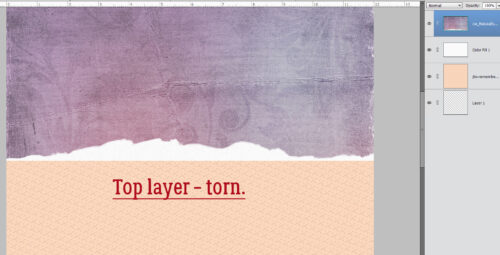
I’ve zoomed in so you can see the texture the Artistic Brush and the Noise Filter add to the image.
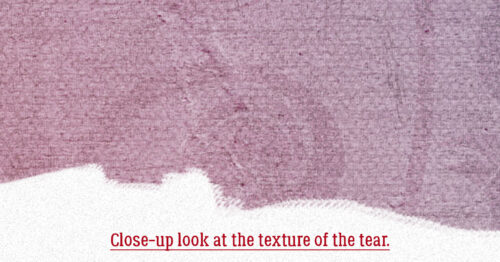
Then repeat the process on the white core layer. Be messy!
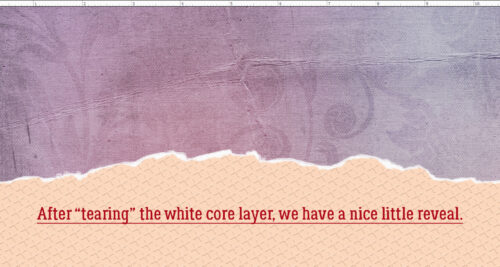
Zoom in on a nice, wide spot in your white core. Add a new blank Layer on top. This is where the delamination of your multi-ply cardstock happens.
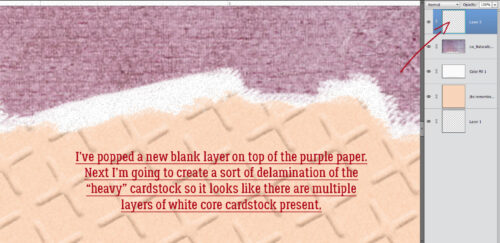
Set your foreground colour to whatever colour you prefer for your shadows. I used black here. Go to the Brush Tool, and select the Drop Shadows set. They’re also PSE-integrated Brushes. I chose an 8 pixel square Drop Shadow Brush at 100% Opacity to add a squiggle. Don’t worry if it hangs over onto your coloured paper.
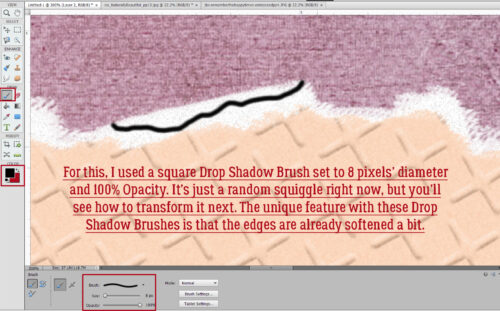
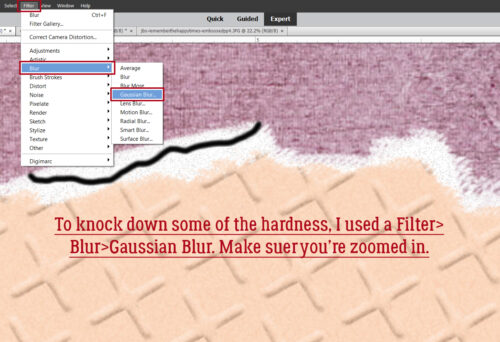
Oops! Another typo! That’s what I get for editing screenshots when there’s a lot of glare. I can’t always see what I’m typing. Anyway… although the Drop Shadow Brushes have softer edges that Basic Brushes do, this is still too harsh, so I added a Filter>Blur>Gaussian Blur
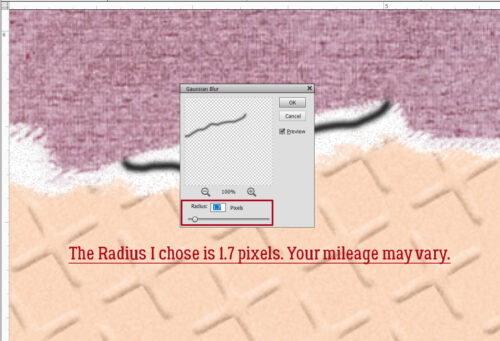
I decided a Radius of 1.7 pixels was good, but you might want more, or less. Watch the Preview. You do you!
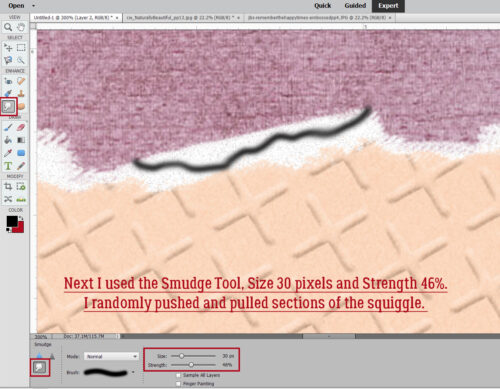
Adjusting the depth and angle of the shadow is done with the Smudge Tool; I used Size 30 pixels, Strength 46%. I pushed and pulled spots randomly to make a more realistic shadow.
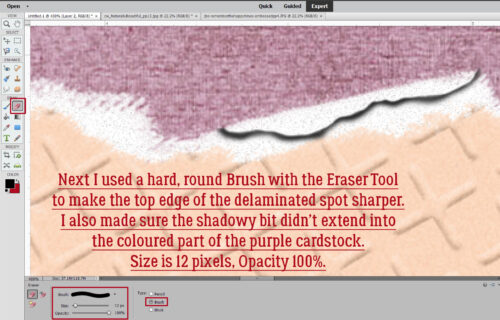
To put a cleaner, sharper edge on the delaminated spot, I used a hard, round Brush, 12 pixels and 100% Opacity with the Eraser Tool. I also cleaned up where the squiggle overlapped the purple paper.
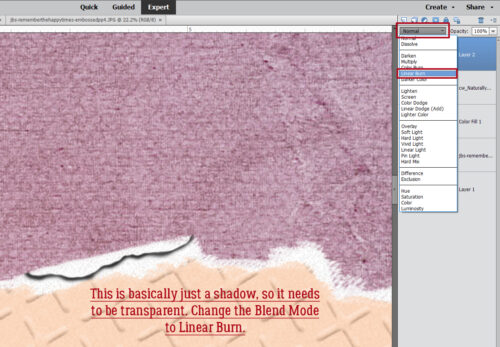
Last thing is to make sure the shadow lets what’s underneath it show through. Change the Blend Mode to Linear Burn. And you have another type of paper tear! You can adjust the Opacity of the squiggle until you’re happy with the look – but zoom out first so you can see the actual change.
Next time I’ll turn some of the white core tears into curls and we’ll shadow up the paper layers. As soon as I figure out an easier way to do that… Pray for overcast skies here so I can see what I’m doing!

Speak Your Mind