Making Templates Work For You!
![]()
You’ve probably heard a million times that templates really speed up your scrapping, but if you’re new to digiscrapping you might wonder when that kicks in. October’s first Challenge Template from Kimberly of Leaving a Legacy Designs is a perfect way for me to show you how. Why? Because it has several repeating paper blocks!
Once again, I’m going to tell you how I do things but of course you’re going to follow your own practices and do things in your own way. When I’m getting ready to create a (non-CT) layout, I select my photos first. I create a new folder for the layout so everything I plan to use is in one spot. (Later I delete the copied files and just keep the finished layout. Otherwise I’d need a million EHDs to store everything!) Then I search my (enormous) stash for a template that will work with them and copy it into the folder. Once I’ve decided, I choose the kit I want to use. For this layout I used Ooh La La Scraps’ October Buffet kit Creepy. I count up the number of different papers, represented by different coloured blocks or circles, the preview shows, and then add one or two more to that number just in case my selections don’t work the way I want them to. Then I go to my kit and start selecting papers, flowers, leaves, stitches, staples, and whatever else I want to include. They’re all copied into my working folder… this is the longest part of the process. Then I’m ready to go! I open the folder contents into PSE and get going.
As I mentioned before I start at the bottom. Feel free to do whatever works for you.
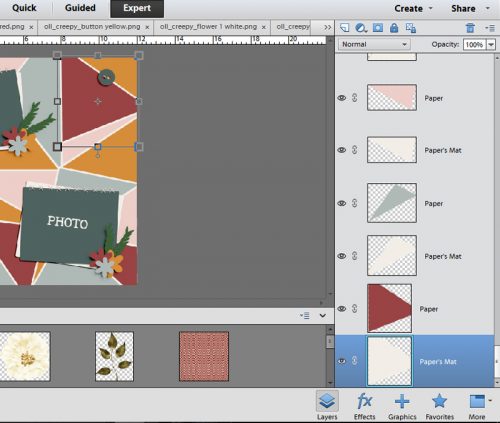
In the screenshot above you’ll see there are 3 papers and 3 paper mats in the layers panel. Below, you’ll see I’ve started clipping papers to the various shapes in the template.
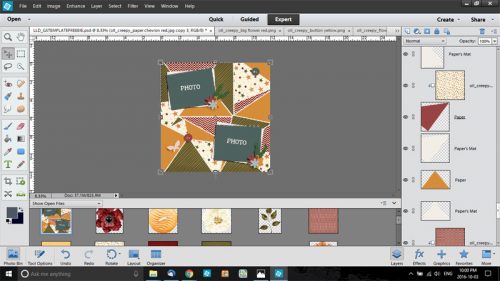
This is where the time saving comes in. The process is the same for whatever is repeated on the template. Remember I said I use keyboard shortcuts? This is where they really come in handy. Rather than right-clicking on my paper layer then selecting Create Clipping Mask I use CTRL/CMD+G to clip the paper to the shape. The next step is to duplicate my paper layer. Rather than right-clicking on the paper and selecting Duplicate Layer.. or selecting it from the drop-down menu from the task bar, I use CTRL/CMD+J and get the same result.
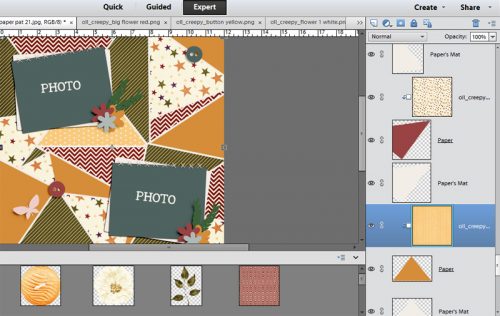
The screenshot below shows you the duplicated paper just above the previous paper shape. Drag and drop the new paper onto the layer just above the next template shape of the same colour, in this case, a dark yellow gold. The keyboard shortcut for that is CTRL/CMD+] (Can you guess how to move the layer back down? 😉 )
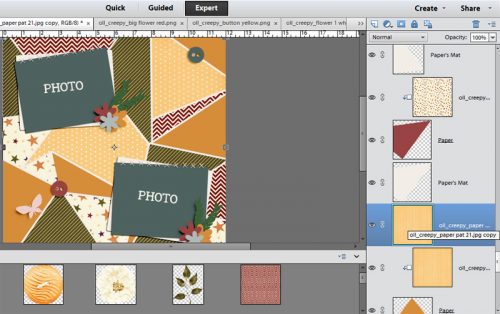
Keep doing this series of steps > Copy, Move Up, Clip > until all the template shapes of the same colour have the same paper clipped to them. Then continue to clip papers to shapes in this manner until all the shapes have papers clipped to them. The screenshot below shows what your workspace looks like once the duplicated paper has been created but before it’s been moved into place and clipped. See how it covers up a lot of the template?
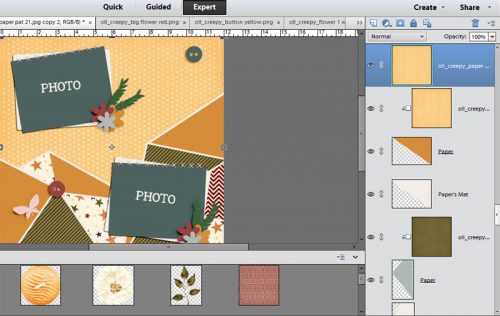
Here’s where there’s another speedy tip that comes in handy. As I mentioned, you can follow the exact same process for those flower shapes, stitching lines, ribbons and so on. The template’s symbols are more for size and placement of objects rather than carved-in-stone directions, so you can cover those shapes with just about anything. Drag and drop your element into place on the template and size it to your liking. Here I’m using a white flower. The speedy secret?
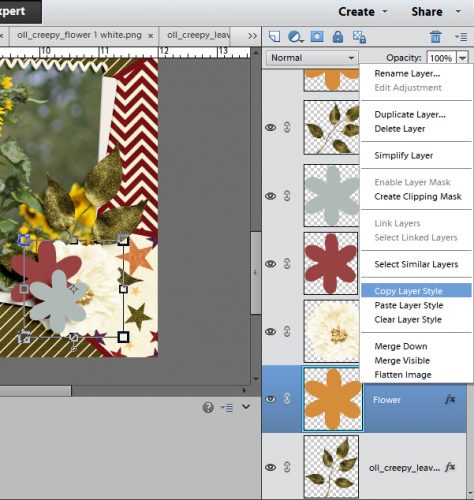
Copy the layer style > right-click on the shape layer and select Copy Layer Style > from the template’s symbol layer then paste it > right-click on your element layer and select Paste Layer Style > to your element. Do this the first time you add an element to the layout and then you won’t have to do it again later for each individual item.
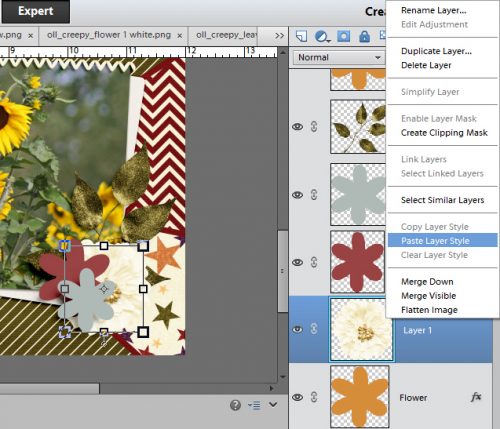
This template has a number of identical flower shapes so I copied the white flower – WITH the shadow layer style included – and moved them into place on the template, moving them up the layers panel so they’re in the right order in the cluster or stack. I also adjust the angles on some of them so they look more naturally arranged (shown in the second screenshot below).
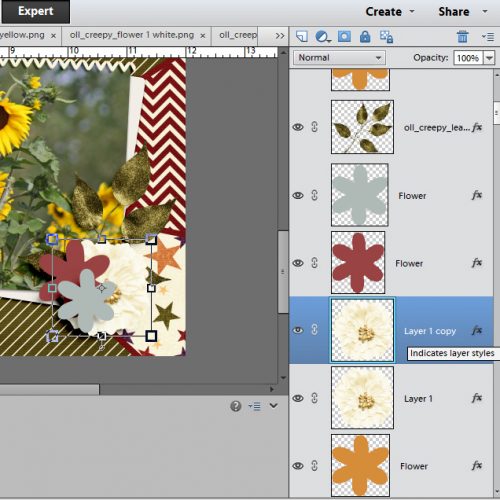
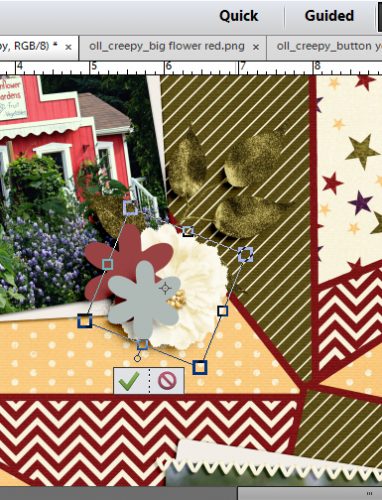
Once the elements I want are in place on the template, I delete the template’s symbol. (Remember to work on a copy so you don’t end up throwing out the whole template!)
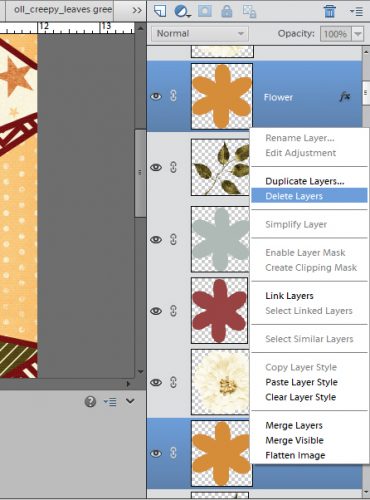
Speedy tip – you can delete multiple layers at one time by selecting them all in the layers panel > CTRL/CMD+click on the layers until they’re all selected > then right-click on any one of them to select Delete Layers from the drop-down menu.
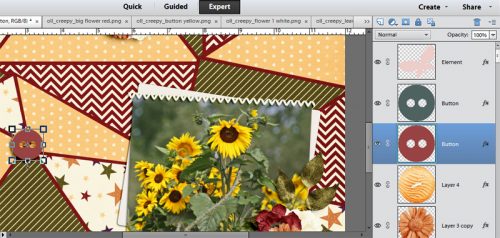
When positioning small items like buttons on templates, it sometimes helps to put them underneath the symbol’s layer in the template so you can have a better idea of size. I like my buttons small so this tip is one I use a lot.
When you’ve added all your chosen papers and elements to the template, you’re done! All of your layers are shadowed (as long as you’re using a pre-shadowed template like this one, of course) and it’s probably taken you under an hour. My final version of this layout is in the gallery. I hope you’re able to follow along with this speedy tut and come to love templates as much as I do!
![]()