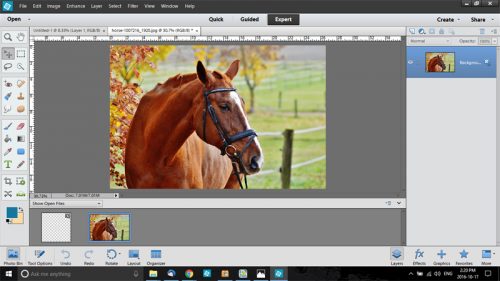
Extractions… Choose your method
![]()
When Stephanie first proposed this series of tutorials, we decided to ask the GS community what sorts of things they’d like to learn about. Danica‘s comment was, ” I would like to know the best way to extract things out of photos. I have the worst time doing it to see if there are any tips.” Digital extraction is similar to using cuticle scissors to cut out an image from a magazine or photo print – but it’s much more forgiving. Today, I’m going to show you two ways to do it… one that takes a LONG time, and one that’s a lot quicker. The photo I chose for this demonstration presents some of the issues you might come up against in your own extractions, as you see as we move through the images.
First, the choice of photos will determine how fiddly and time-consuming the task will be. For the easiest, quickest extractions, a strong contrast between the object you want to extract and its background is paramount. This photo I found on Pixabay of a beautiful chestnut horse provided that for me.
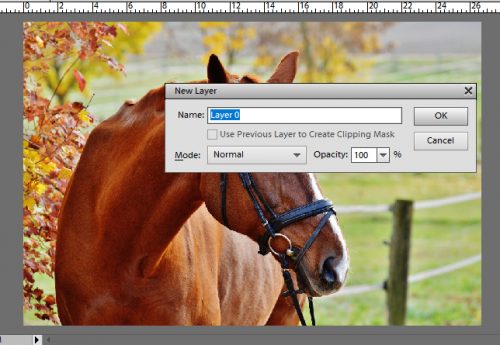
You can open a new file on your workspace or you can create a layer from the background. That’s PSE-talk for opening your photo in PSE then putting a blank layer underneath it. To do that, right-click on your photo in the layers panel and select Layer From Background. That changes the label of the photo from Background to Layer 0. Then click on the New Layer button at the top left of the layers panel – it looks like a sheet of paper with one corner turned up. Once you have that layer in the panel you can move it below your photo, either by dragging it down or by CTLR/CMD+ [ . I like to work on a transparent background, but you should do things the way you usually do. My example below shows the photo on a 12×12 workspace, enlarged to fill most of the width.

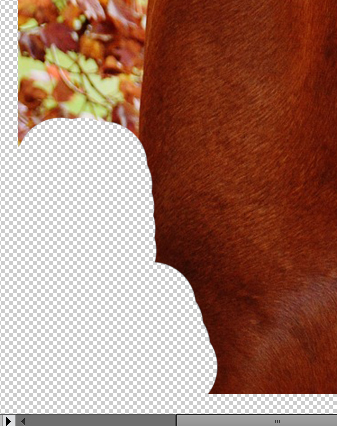
You can remove a lot of the background in the photo fairly quickly by using the Select tool, pulling out a rectangle and then cutting the enclosed section off by clicking CTRL/CMD+X.

Once you’ve chopped off a lot of the extra stuff in your photo, then you’re ready to start cutting out your image. This first method I’m showing you is quite time-consuming and exacting and will give you the most precise extraction possible. Feel free to skim through or skip over this part completely, except for this important step: make a LAYER MASK! To do that you can go to the Layers menu then select Layer Mask>Reveal All or you can click on the Layer Mask button above the layer panel. It’s the square icon with a circle in it. Your workspace will now have a white rectangle in the layers panel on the same layer as your photo. The reason for using a layer mask is so you can fix oopses. Then select a hard brush from your Brush tool. It can be quite big for this stage.

Make sure your layer mask is selected and start erasing the background, getting as close as you can without erasing anything you want to keep. You can see your progress on the layers panel as a black splotch. BLACK CONCEALS, WHITE REVEALS. If you look at the screenshot below, you’ll see the foreground colour (way over in the lower left corner) is black.

Oops!
If you accidentally erase something you didn’t want to erase, change your foreground colour to white and paint it back in. To change your foreground colour quickly and easily, just press the X key. See how I’ve painted back some of my oops below?

Getting into smaller areas where detail is important, change the size of your brush so you can get into those little spaces. Quick key: [ (In the same way, you can use ] to make the brush bigger.) Zoom in to see what you’re doing… quick keys: CTRL/CMD + +. Zoom back out (CTRL/CMD + –) frequently so you can regain your reference regarding what you’re removing and what you want to leave.
Again, get as close as you can to the edge without going over it.

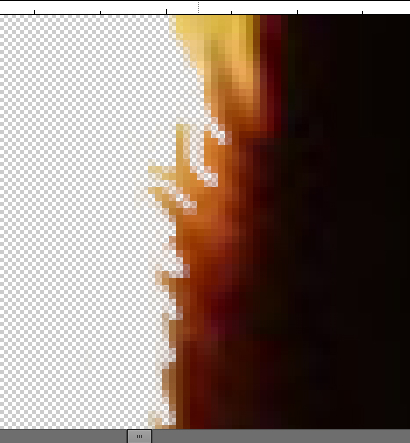
Zooming in lets you see better where you’re erasing. There’s a colour difference that may be subtle, as shown below. You can take the size of your brush down as small as a single pixel to cut those detailed spots as sharply as possible. In the screenshot below you can see each individual pixel. This is an important step if you want to keep things like hair wisps in the image. This horse has a wispy mane and a pretty hairy chin, so the detailed pixel-by-pixel erasing took a long time.

Here are some little areas of tufted hair on the horse’s ear.
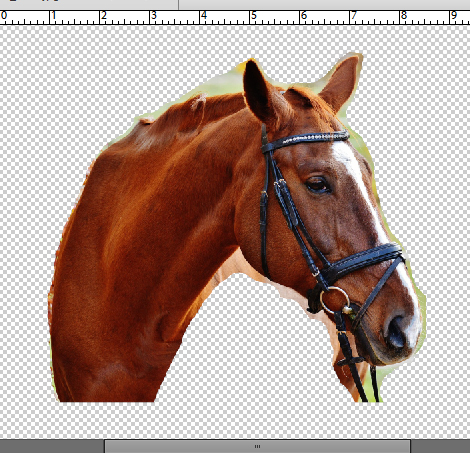
Once you’ve erased all of the background areas of your photo your workspace will look like this: see the black negative outline of the horse in the layers panel? To finalize your extraction, the next step is to apply the layer mask to the photo. You can right-click on the layer then select Apply Layer Mask and then merge down so you have a single layer. Or you can simply merge the two layers, which automatically applies the layer mask. Remember how to merge layers? Select all the layers you want to merge by holding down the CTRL/CMD key and clicking on them. Then right-click and go all the way to the bottom of the dropdown menu and select Merge Layers or use the quick keys CTRL/CMD+E.

We pause this tutorial for an important message! When colours are light it’s sometimes impossible to see them against the transparent background and you might have some stray pixels you missed. This isn’t a huge problem unless you’re planning to shadow the image later. Then those stray pixels will show up like a smudge on your layout.

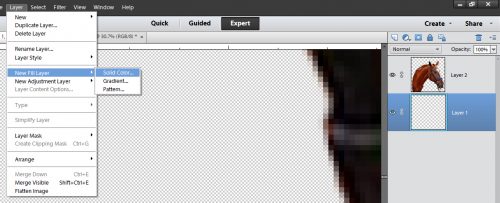
To make them visible, you can put a white or black fill layer underneath your finished extraction. There are two ways to do that. One is to go to the Layers menu and select New Fill Layer>Solid Color, as shown below, then selecting a white or black from the colour picker that pops up. The second way is to click on the Create Fill or Adjustment Layer button – that circle that’s half blue and half gray above the layers panel then selecting Solid Color from the dropdown menu.
Then you can easily see your stray pixels and erase them. When you’re happy with your extraction, delete the white/black fill layer, merge down and save your work as a png.

Okay. That was the long, finicky way. It took me about 3 hours from start to finish. I don’t know exactly how long it took because I stopped to make supper and eat, did a bit more erasing, talked to a friend on the phone then got back to it. The second method I’m going to show you takes a LOT less time! Some tutorials for this technique suggest using the Quick Selection tool as shown below. But that’s a frustrating way to do it. If the little brush icon isn’t exactly in the right spot, it selects a huge area that isn’t what you want. So I’m going to show you how to use the Lasso tool instead.

It took me a while to figure out how to make this tool my friend, but now that I’ve got that down, I’m going to use it a lot more! The trick to working with it is to make an enclosed shape that overlaps another already enclosed space, as shown below. See the marching ants? That’s the area I’d already included. You don’t have to be too precise with this step, just make sure the edge of the image is inside the enclosed area.
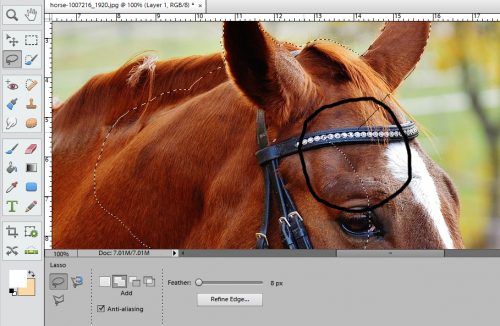
Keep making overlapping, enclosed shapes over the whole image you’re cutting out. In the screenshot below I show some detail areas where the marching ants aren’t including some of the bridle. I just made some skinny little enclosed shapes to get them into the selection. Go over the edge of the image slowly so you can see what parts aren’t selected. If you accidentally get too much of what you don’t want in the selection you can trim the excess away by selecting the icon to the right of the Add in the tool panel underneath the workspace. (See above, where the Add is selected?) The icon to the right is a Subtract command. In the same manner, enclose the area you want to subtract and close it up. Voilà! Gone! Go back to the Add command and carry on. Once you’re sure you’ve got the whole image inside the marching ants, you’re ready to move to the next step. Notice the hairs on the horse’s chin aren’t included in the selection. That’s the compromise you make with this method.


Now it’s time to refine the edge. There’s a section in the tool panel that says just that. Click on it and you’ll see a menu like shown below. Adjust the edge on your image so there’s some of the background included but not a lot. The settings I ended up with are shown. By selecting Decontaminate Colors you’ll be able to see the edge of the image a little easier. Shift the sliders a little at a time until you’ve got a nice margin of background. I recommend sending the refined edge to a New Layer and then creating a Layer Mask on it, rather than selecting New Layer with Layer Mask because it’s actually easier.

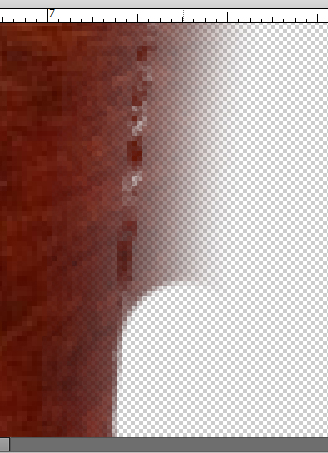
Below is what you’ll see along the edges of your image. See the area where the transparent layer shows through a little better? That’s to help you know where to cut. Make sure you’ve created a layer mask as described in the first section of the tutorial so you can still fix oopses. Then start erasing your background.

Here’s another view of the refined edge. Don’t worry too much about the hazy areas on the “good” part. They’re not really visible on the finished extraction. Keep erasing the background until you’re back where you started.
Now that you’ve erased around the entire edge, you can apply the layer mask then delete the layer with the untouched photo that was created when you refined your edge. Make very sure you’re deleting the correct layer! CTRL/CMD+Z is your best friend! When you’re done, save the image as a png so you can use it in your layout.

I’ve put the two extracted png images side-by-side here so you can see there’s no obvious difference. The main difference is that the second version, which is on the left below, took about 45 minutes instead of 3 hours. There are some very subtle differences you can see if you zoom in really tightly – the edge on the quick version is a little softer and there’s no hair on his chin- but for most purposes, this second method is more than acceptable.

Now I’ll put together a layout using my extraction and link it up so you can see it when I’m done. I hope you found some handy tips and tricks in this tutorial. Next week, I think I’ll play around with some fancy brushes.
![]()