Tiny BUBBLES!
![]()
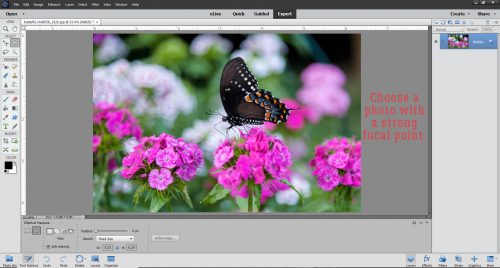
Have you ever seen a photo where it looks like there’s a soap bubble floating in front of the focal point? I’m so excited to show you how to get that effect (or maybe a crystal ball, magnifying glass or snow globe), and you’re going to love how easy it is! Don’t be intimidated by the number of images attached to this tutorial – half of them are just the “after” shot so you can see the change you just made. The first step is to choose your photo. It should have a strong focal point, like the butterfly in mine. This works with landscapes really well too.
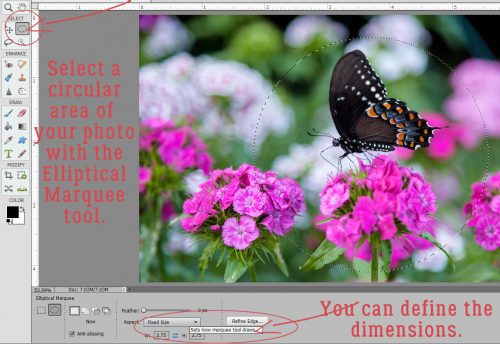
The first step is to select a circular area of your photo around that focal point. I included the cluster of phlox the butterfly is perched on in mine. You can just draw a circle shape with the Elliptical Marquee tool, but it’ll make subsequent steps more difficult, so I recommend using the Fixed Size setting and a number you can remember easily. I chose 3.75 inches. I nudged it over so it included the parts I wanted in my bubble.
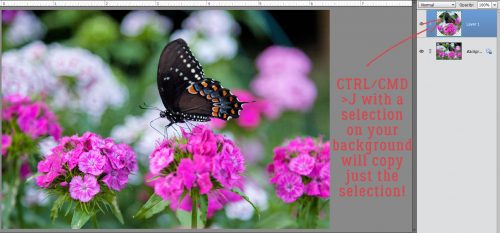
Leaving the marching ants active then CTRL/CMD>J will copy just what’s in the circle and put it on its own layer. (I learned several new things in the development of this tutorial!) Or, if you like the long way, right-click then choose Duplicate Layer, and add it to your current project.
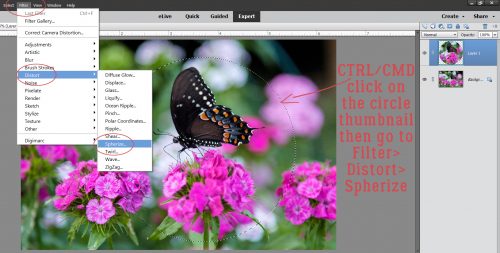
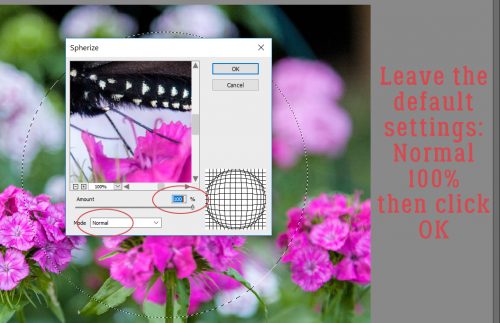
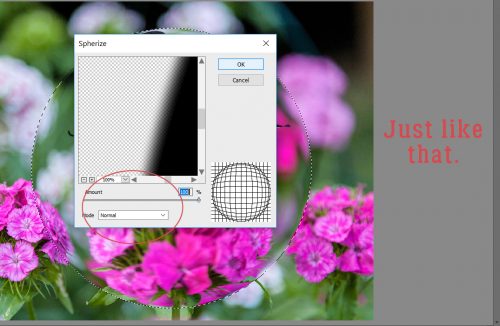
This step should be familiar to long-time readers. Select the outside of your circle layer by CTRL/CMD>clicking on the layer thumbnail. Then go to Filter>Distort>Spherize.
You don’t have to change any of the defaults Elements has already put into the pop-up menu. Leave it at Normal and 100% then click OK.
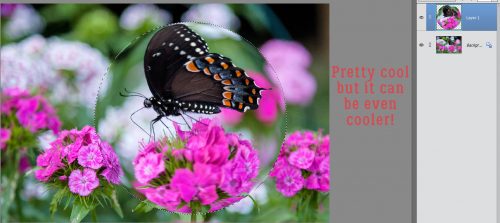
Now you can see a bit of a bubble there. But it can be SO much better!
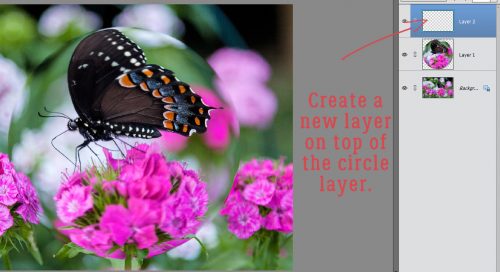
Create a new layer on top of your circle layer. Just click on the icon that looks like a piece of paper with a corner turned back.
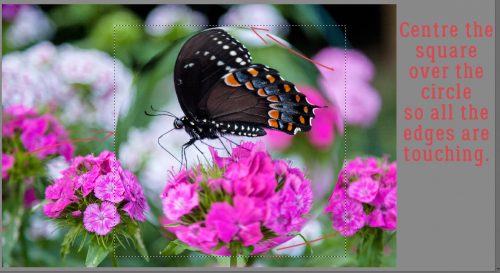
Now you’re going to use the Rectangular Marquee tool, Fixed Size and the same dimensions you used for your circle.
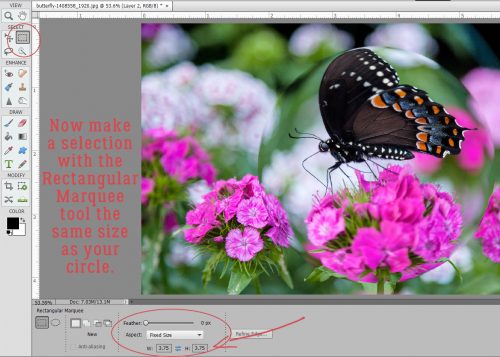
Move the square selection over on top of your circle so the edges are touching the circle.
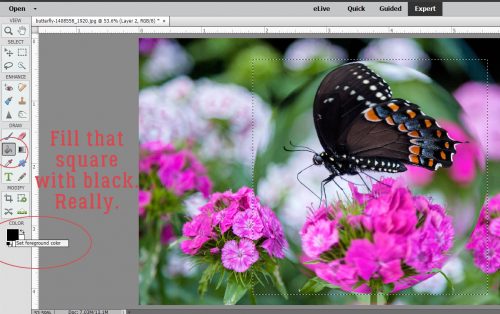
Now use the Paint Bucket tool to fill your square with black. Yes, black. Really.
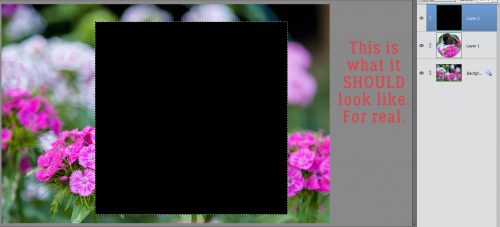
Now it looks like this, and you’re sure you’ve made a mess of it. You haven’t. It’s all good!
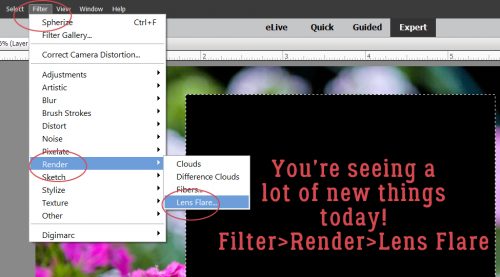
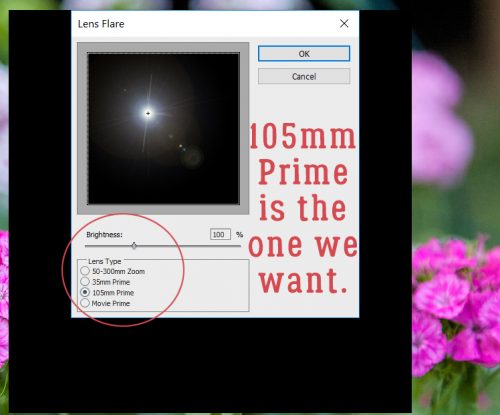
Next you’re going to use another cool tool, Filter>Render>Lens Flare.
This is what happens when you click through. Change the Lens Type to 105mm Prime. Then click OK.
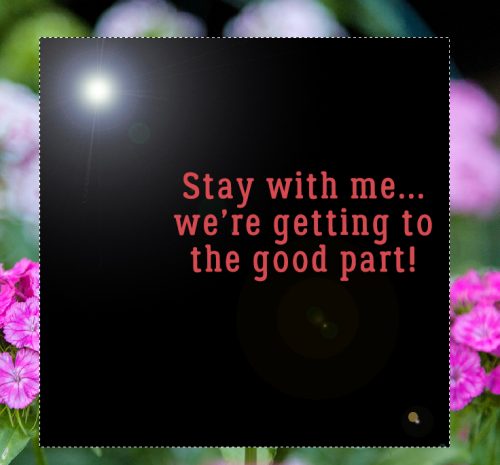
You can move that flare anywhere inside the square that you want. Take the direction of the light in your photo as your cue. Click on the + sign in the middle of the flare and holding down the left mouse button, move it to where you want it. Putting it in the corner like I’ve shown below works well.
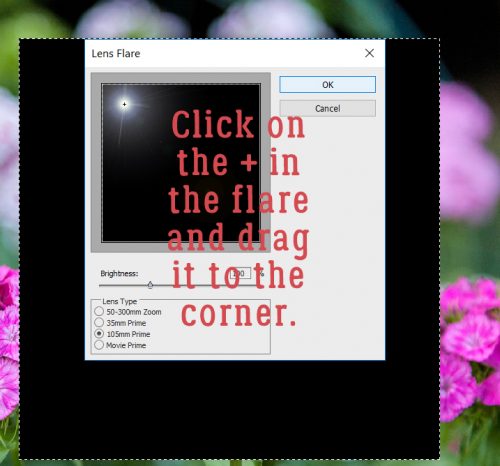
We’re getting to the really good part soon.
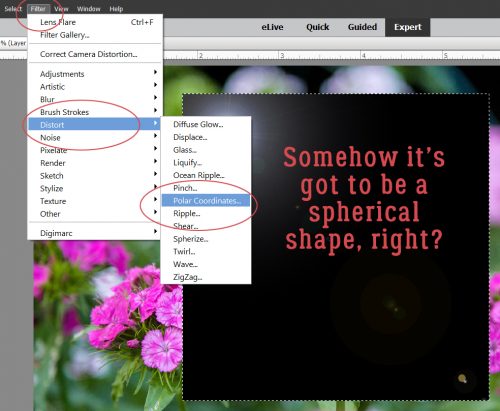
You want that bright spot to be near the middle and the image itself more like a sphere. There’s another filter that does all that for you. Filter>Distort>Polar Coordinates.
The pop-up menu looks like this. Leave it set to Rectangular to Polar and click OK.
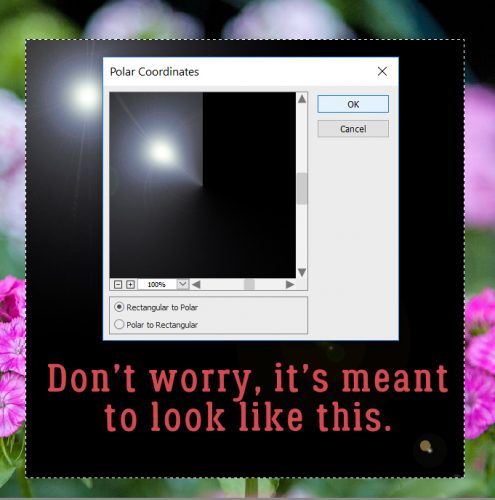
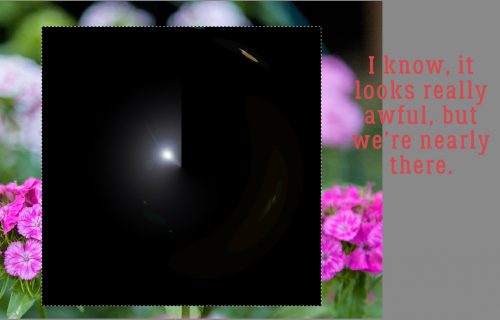
I promise you’re still on the right track. It looks quite ugly, but you’re going to do another couple of easy tweaks and it’s going to be perfect!
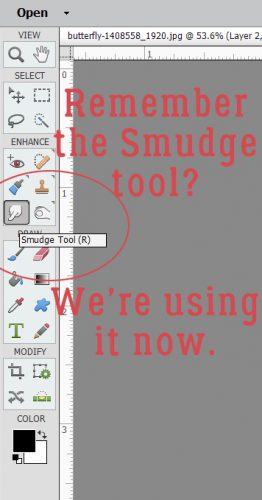
Remember when we were working with custom shadows on their own layers and I showed you the Smudge tool? Well, we’re going to use that to “fix” this flare.
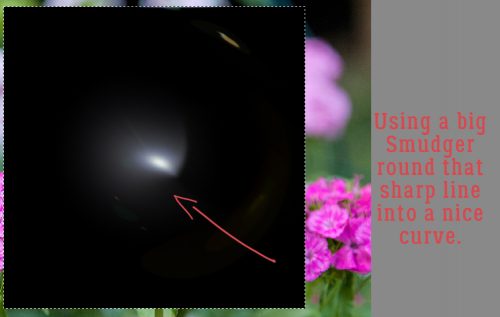
Use a fairly big Smudge brush and gently push it left to right over the harsh line. See how it makes a nice curve?
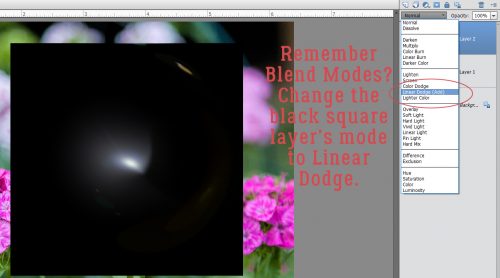
Do you also remember playing with Blend Modes? I know it was a long time ago, but I hope you’ve been experimenting with them. Right now you’re going to change the Blend Mode on the black square to Linear Dodge.
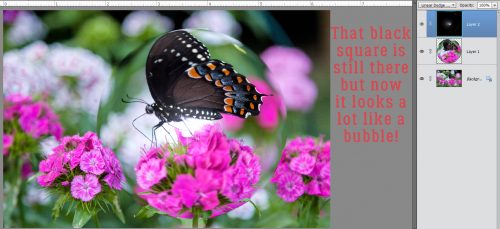
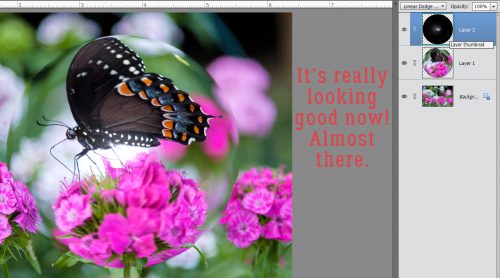
The black square is still there, but it doesn’t look like a square any more. Can you see the depth it’s adding?
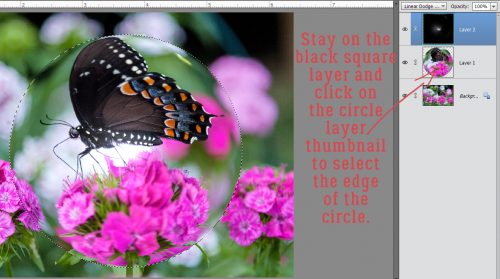
Again, Select the outside of your circle layer. CTRL/CMD>click on the layer thumbnail, but make sure you’re working on the black square layer.
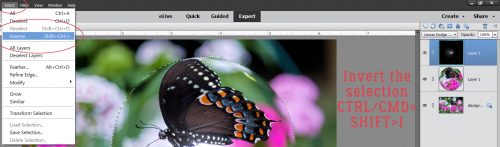
You need to Invert your selection so the selected part is what’s outside the circle. You can either Select>Inverse or you can CTRL/CMD>SHIFT>I.
Now you’re going to cut away all the stuff outside the circle. Edit>Cut or CTRL/CMD>X will do that.
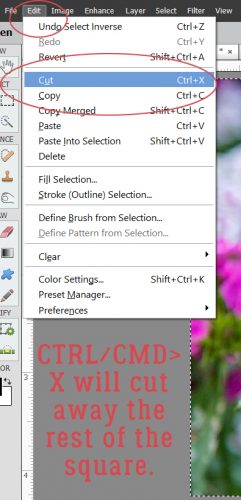
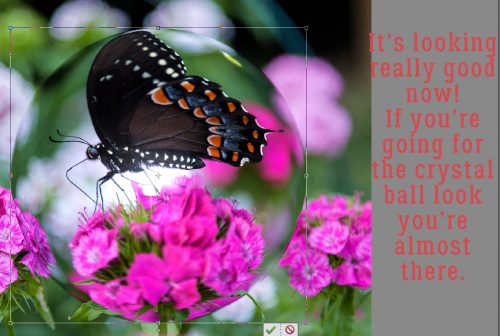
You’re almost there!
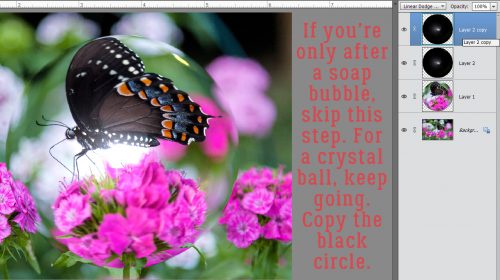
If you’re only wanting the image too look like it’s inside a **soap bubble you can skip the next few steps. But if you want a crystal ball look, or a snow globe or magnifying glass look, make a copy of the Lens Flare layer. CTRL/CMD>J or right-click>Duplicate>Layer then add it to your project.
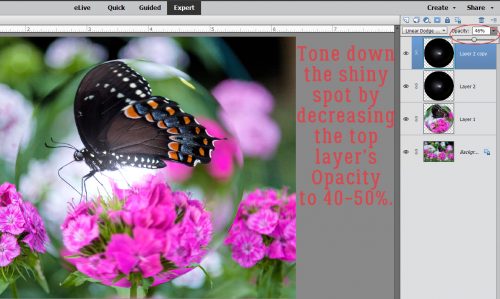
This layer needs to be paler and softer, because it’s going to be your shadow. (Bubbles don’t really cast shadows, that’s why you can skip this part for bubbles.) Decrease the Opacity to somewhere between 40 and 50%.
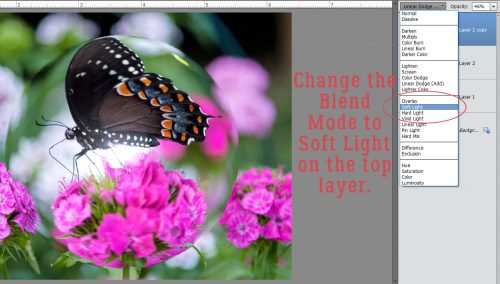
Change the Blend Mode to Soft Light.
Almost there!
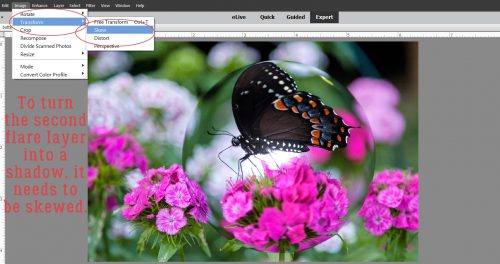
Now to make the second Lens Flare layer into a shadow. To do that Image>Transform>Skew.
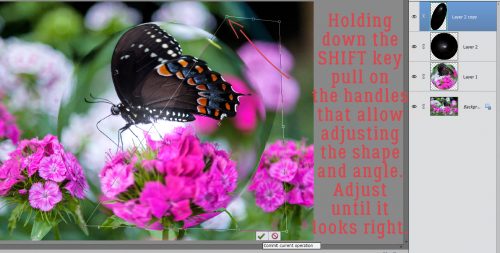
Now you can grab one of the handles on the bounding box and shift it around. You can see the bounding box in the image below. You can move each one until the shape looks right to you. And you can rotate it too.
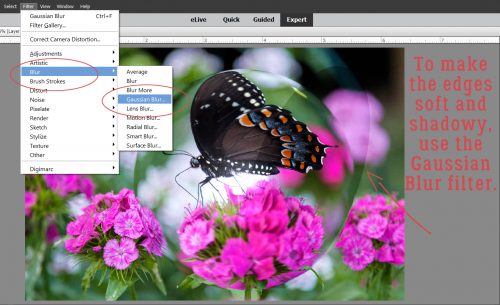
Hit that layer with a Gaussian Blur filter to make it soft and shadowy.
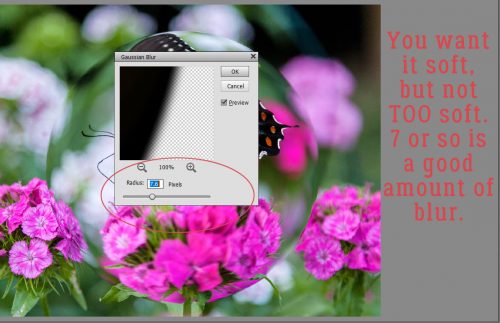
You want the edges to be soft, but not totally indistinct. A Radius of 7 or so is good. If your shadow isn’t visible in the preview box, click your cursor along the edge somewhere.
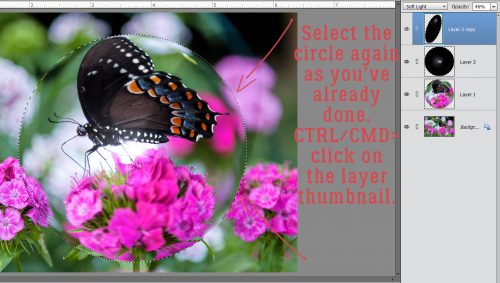
Once again, you need to Select the circle.
Then hit it again with the Filter>Distort>Spherize tool. That pushes the part inside the selection away and back so it looks like you’re seeing it through the crystal ball.
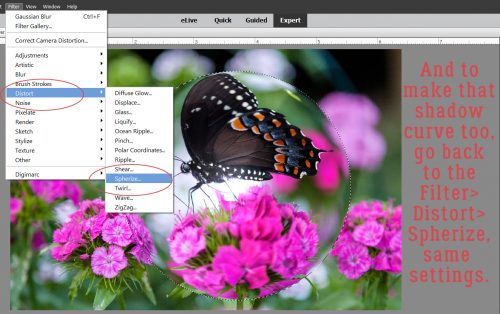
Same settings as before.
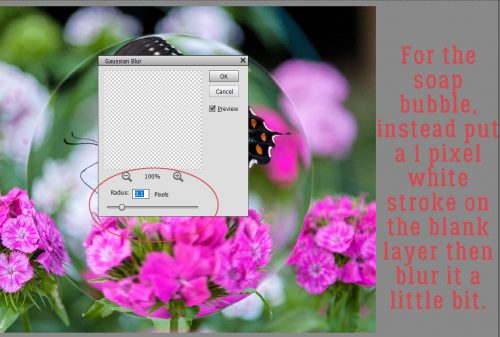
**Now, to get the look of a soap bubble, you’ve ignored the last eleven images. To get a bubble edge you need to create a new blank layer. Select the outside of your circle again by CTRL/CMD>clicking on the layer thumbnail. On that new layer, add a 1 pixel white stroke outside the circle. Then hit it with the Gaussian Blur filter at a Radius of about 4.
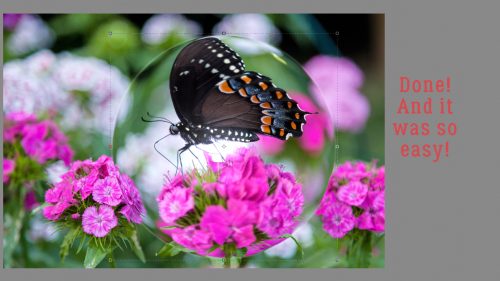
And you’re done! There are lots of steps and the first time you do this you’ll feel like you’ll never get the hang of it, but I’ve written this tutorial from memory so it IS possible. Thanks to Chuckie Delano for the excellent video tutorial I used as a basis for this.
![]()