DIAMONDS are a Girl’s Best Friend
![]()
My dear friend Glee has been very helpful in providing me with topics and this is another one that came from her. She pointed me to this GORGEOUS layout by Imperio and asked if I could tell her how the diamond-shaped frame was created. Wait until you see how easy it is… you’re going to be looking for shapes to do it with.

I started with a 12×12 canvas – everything is resizable, right? Then I opened the Pencil tool and selected a hard, round brush from the PSE-default Basic Brush menu and set the Opacity at 100%. I used black for demonstration purposes, but you can use any colour you want. Make sure you turn on the Grid (View>Grid or CTRL/CMD>’) so you have defined dimensions. You can set your parameters in the Edit>Preferences>Units & Rulers. I chose inches because although Canada has been on the metric system of more than 40 years, I still think in inches.
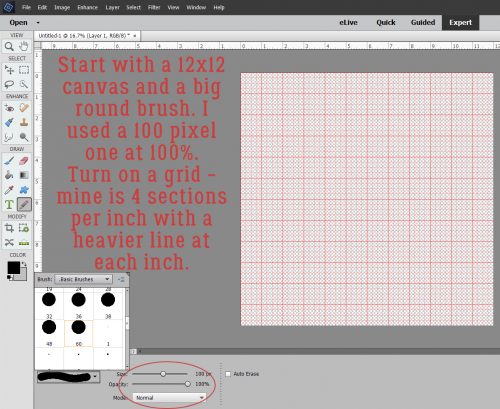
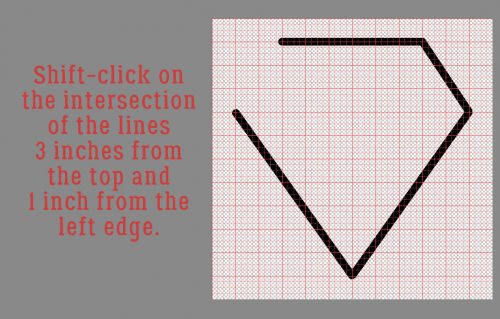
If you’ve read the tutorial about giving stickers some dimension, you might remember how to draw a straight line with Elements. It’s pretty easy. Click on the spot where you want your line to start, then hold down the Shift key and click on the spot where you want it to end. The grid will make these next steps a lot easier by giving you reference points.

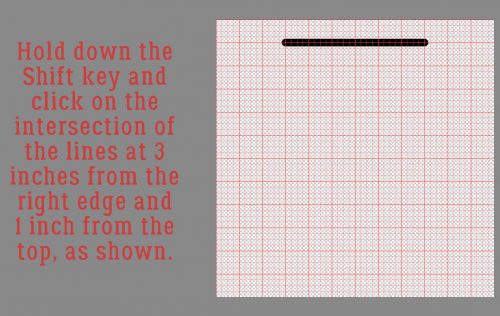
There’s my first straight line. The intersections of the major lines are obvious choices for this task.
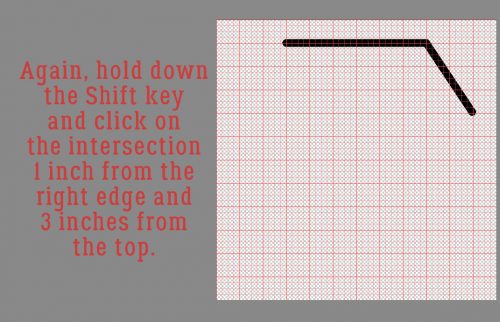
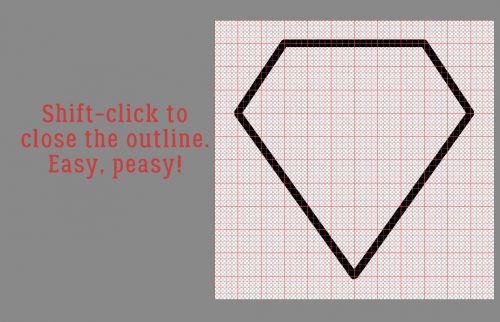
I kept moving around the outside.
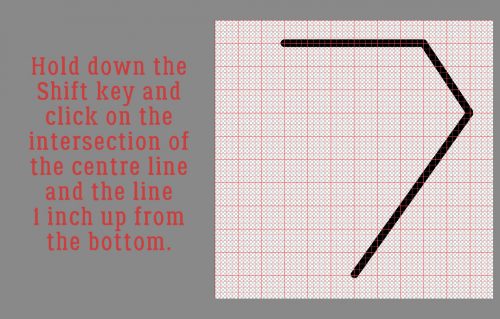
Then I took it to a point in the centre of the canvas, 1 inch from the bottom.
And back up, using the same reference points on the other side.
Now the shape is enclosed and looks kind like the insignia on Superman’s cape. (Maybe somebody wants to try that?)
I kept adding lines as shown in the screenshots.
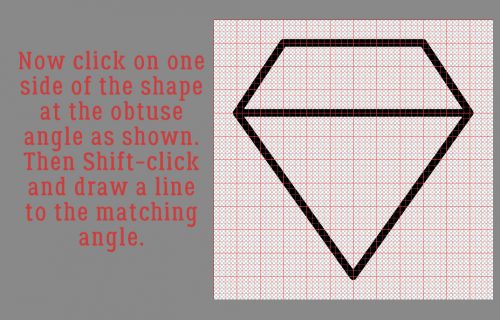
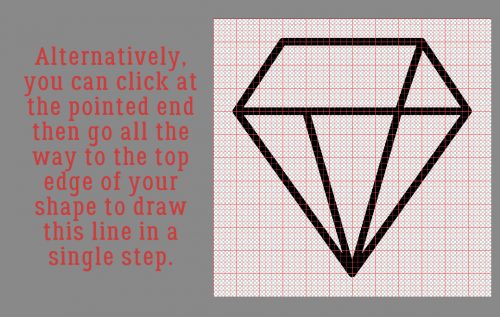
You’ll see that I didn’t quite WSNH here… see the next screenshot for proof.
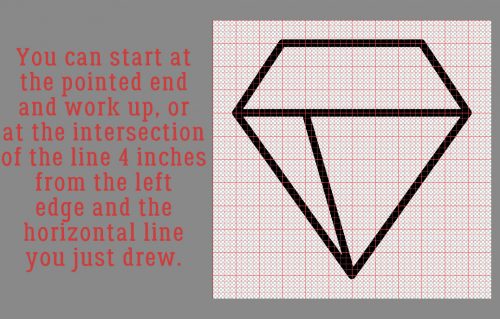
This will save you a step – just take that diagonal line all the way to the top corner.
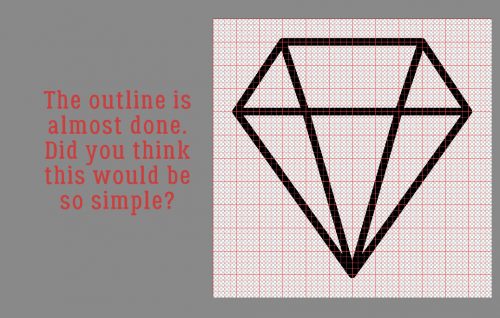
Now there are only two more lines to put in there and you have that great diamond shape.
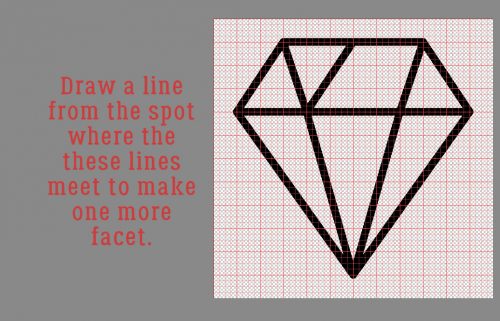
And a one-a…
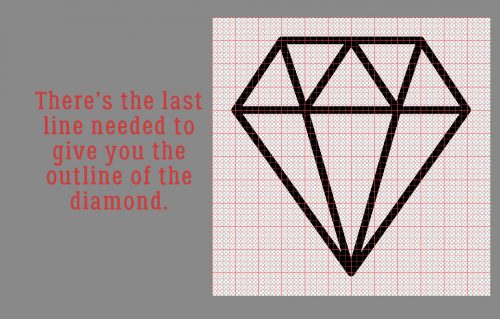
… and a two-a! (Any Lawrence Welk fans here?)
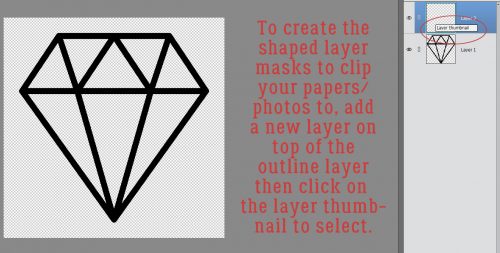
Now I’ll show you how to make the clipping masks for the different papers, as Imperio‘s layout has. Add a new layer on top of your shape layer. Then click on the Layer Thumbnail for the shape layer.
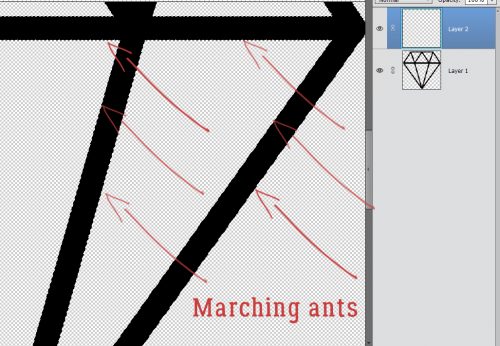
Your selection will have those marching ants.
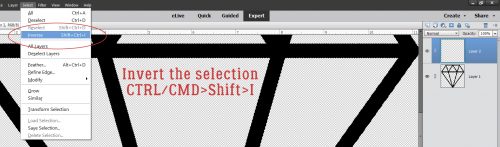
To invert the selection, either click on the Select tab and choose Inverse, or CTRL/CMD>Shift>I which will now select everything BUT the shape outline.
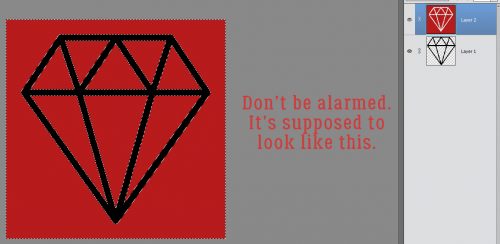
Choose another colour and fill the selected areas with the Paint Bucket tool.
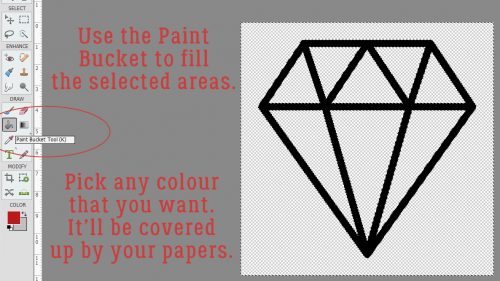
And now your canvas looks like the screenshot, but not for long.
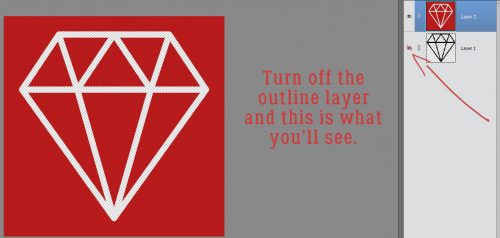
Turn off the visibility on the shape outline layer.
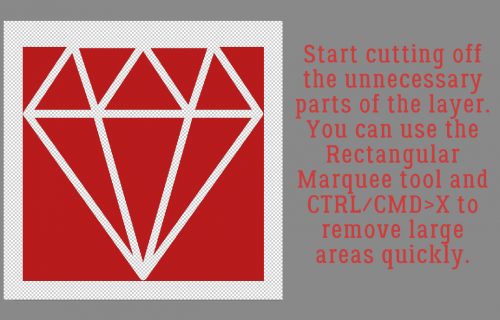
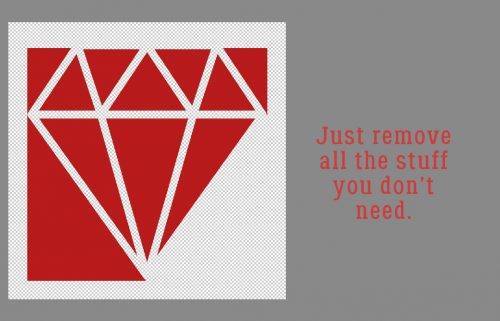
Now to get rid of the parts we don’t need to keep. I started by using the Rectangular Marquee tool and Edit>Cut or CTRL/CMD>X to cut away some of it.
Then I went to the Erase tool and used it with abandon.
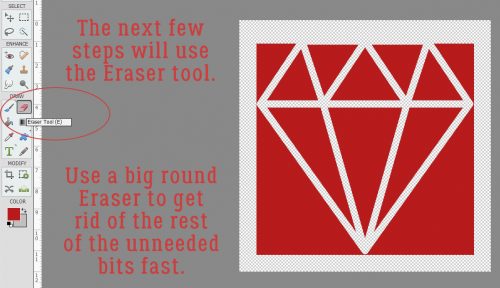
Just erase what you aren’t going to need.
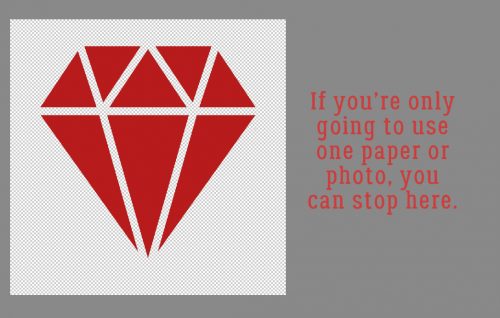
You’ll be left with something that looks like this. If you’re only going to use one paper for all the sections, you can quit now.
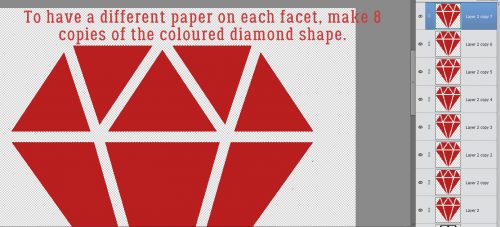
But if you want to use different papers for each section, make 8 copies of the filled-in layer as shown. CTRL/CMD>J is quick and easy, but you can right-click and select Duplicate Layer, then click OK on the pop-up menu if you’re into taking extra steps.
Turn off the visibility of all the layers but the one you’re working on. Now, go one layer at a time and erase all but one segment.
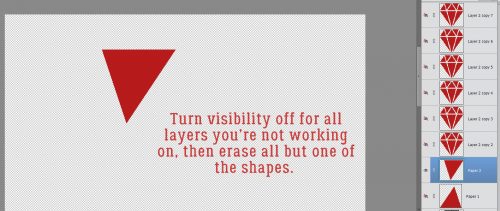
Here’s an example of two layers with only a single segment on each.

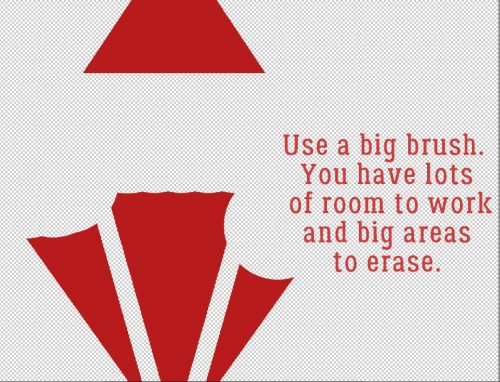
Use a BIG brush so you can do this quickly.
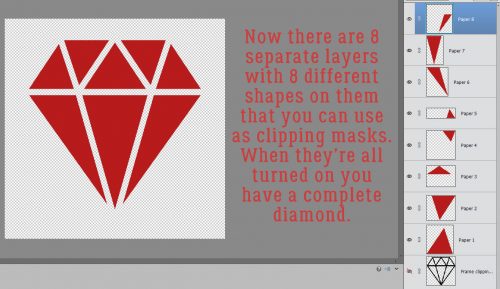
When you have only one segment on each of your 8 layers, you have a template! Each segment is its own clipping mask.
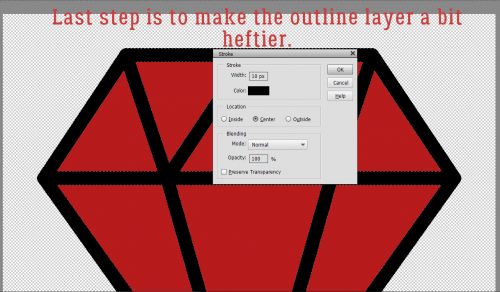
The second-to-last last step is to make the outline layer a little beefier. The easiest way is to add a stroke to it. I used 10 pixels and Centered it on the shape layer.
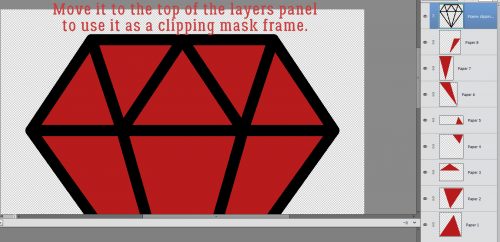
Then just move the shape outline layer to the top of the Layers panel and your template is complete. If you like, you can save it as a .psd file and use it over and over and over!
There are all kinds of ways you can make this technique work for you. Easter eggs? Flower petals? Pie? Have some fun with it… I sure did! Make sure you leave Imperio some love in the gallery. (Click on her user name anywhere in this post to go right to her layout.)
![]()
This was such a fun and informative (and EASY) tutorial to follow. I did one, step by step, along with the instructions, and it turned out so great! I saved it for future use as a template in my stash! TIP: I also saved the layer with all the fill shapes (along with all the layered individual shapes) to give myself more flexibility later in case I want to fill with one background paper or photo. Just wanted to thank you for taking the time to make this tut to teach us the technique, and thanks to Glee for suggesting it!! You are right! Now I want to make lots of these in different shapes, and I will! Much gratitude for your hard work for us!
Thank you so much for featuring my layout! I feel so honored <3 This tutorial was well explained and is easy to follow. 🙂 THANK YOU BOTH!
You’re so welcome, Maddie!
It IS fun! Thanks for your kind words.
Thanks for sharing your tutorial. I can’t wait to get home to try it. Beautiful layout too!
I learned so much on this tutorial! Thank you!
Thanks, dear. I really have to try this. Love Cherry’s star example.
I’ve been going back through some of the tutorials … I remember reading this one & I love your example. I thought I had commented, but I guess I forgot. Somedays, I just barely have time to read the tutorial & bookmark it … thank you for this one, Jan. You teach us so much!!!
Maddie (Imperio) did such an awesome job with her layout. I’m glad Glee challenged me to figure out how to do it.