Repeating Patterns – Basic
![]()
Last week’s tutorial attracted some comments, as they usually do, and thanks to Karyn Concannon I have some topics to work with for the next couple of weeks. She’d like to know how to use repeating patterns to create her own paper – let’s take a look at that one now.
I’m pretty sure this has been covered in a previous tutorial but when I went to look for it so I could link it, I couldn’t find it. So to recap… I think. To create repeating patterns you can use brushes, stamps, elements, shapes – whatever your heart desires. For my example I’m using a tribal-looking stamp from Connie Prince‘s Roar.
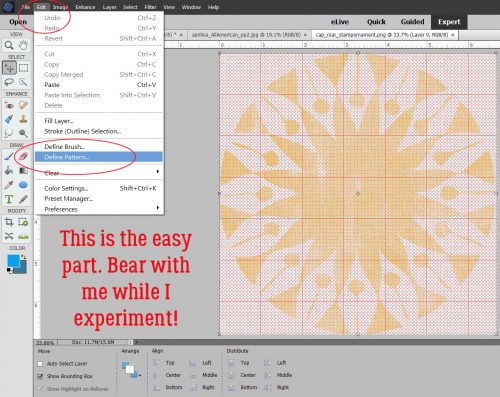
The first step is to Define the stamp as a Pattern. Click on Edit>Define Pattern. This is the easy part.
The menu opens up this box, where I named my pattern Connie’s Roar Stamp.

Next I chose a background paper (from Aprilisa‘s All American): neutral, gray with a git of texture.
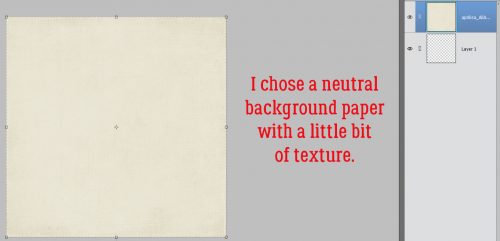
Next, I chose the Paint Bucket tool (Work Smart Not Hard shortcut is the K key); as you can see, I’ve added a blank layer on top of the paper layer. This is an important step, so don’t leave it out.

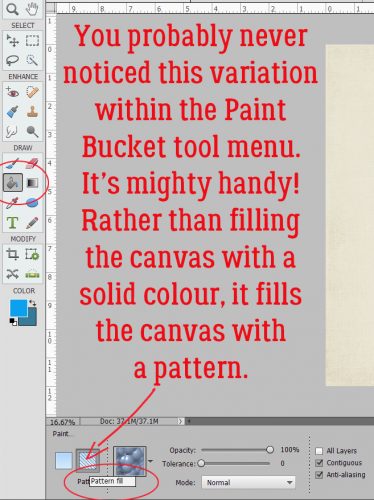
The Paint Bucket menu has two options. The one on the left is the colour fill setting, the one on the right is the pattern fill one.
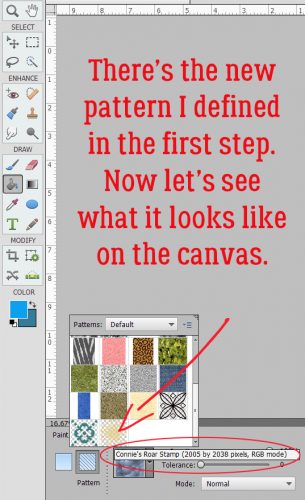
When I click on the little triangle inside the frame for the pattern fill setting, the default patterns open up, and so does the one I just defined from the stamp!
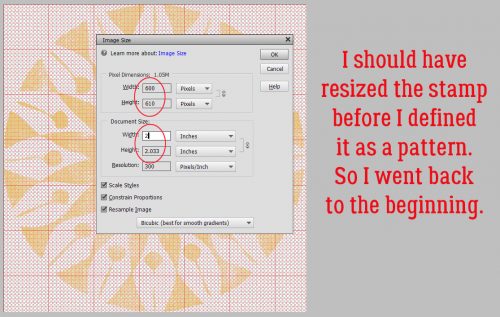
I clicked on the stamp pattern and WHOA! That wasn’t what I was ready for…

It turns out I should have resized the original stamp png BEFORE I turned it into a pattern. That can be accomplished one of two ways: Image>Resize>Resize Image or CTRL/CMD>ALT>I. Then decide how small to make it. Keep in mind your canvas size (3600×3600 pixels or 12×12 inches in my example). Once it’d been Resized, I went back and Defined Pattern with it, giving it a different name.
Then I used Pattern Fill and got what I was expecting the first time.
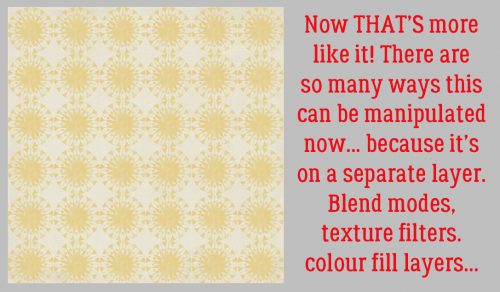
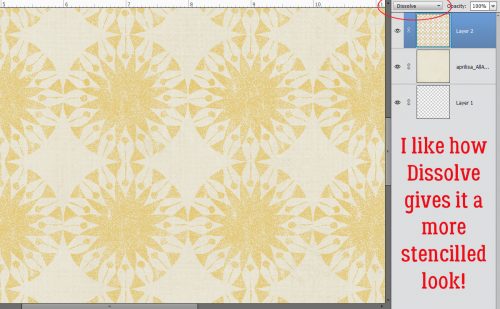
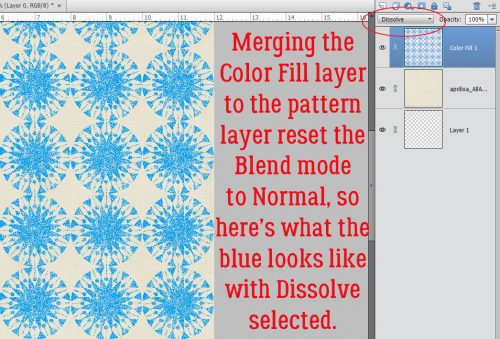
There are so many ways this can be jazzed up – Blend Modes have a lot of options, texture filters can make your paper look flocked or sponged, the colour can be changed in several ways. Give them all a whirl! For my example below, I changed the Blend Mode to Dissolve and made it look like I’d stencilled it on.
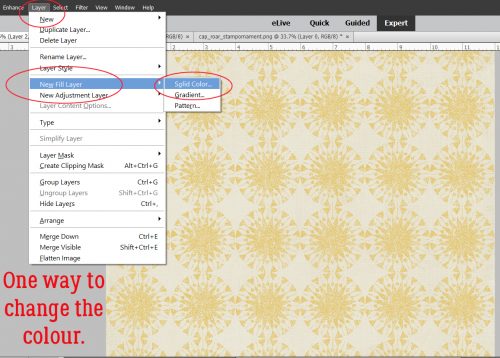
One way to change the colour is to add a Fill Layer using the Layer menu. Layer>New Fill Layer>Solid Color
By ticking that box, you’re telling PSE to clip the new colour to the layer below it.
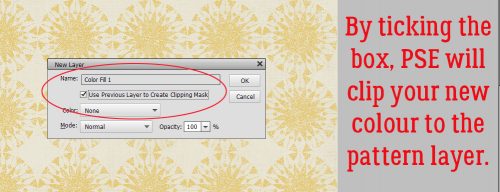
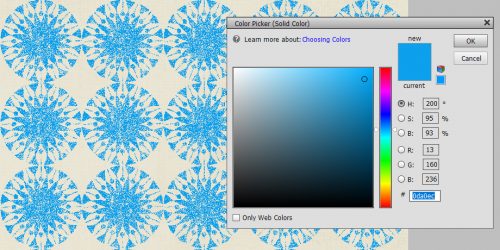
When the Color Picker opens up, you get to choose what colour you want to go with. I like this method because it’s much more reliable than using the Paint Bucket to fill the design – that usually ends up being a lot of work for a not-so-great result.
If you want to make further adjustments to the pattern layer, Merge the pattern layer and colour fill layer together. (CTRL/CMD>E)
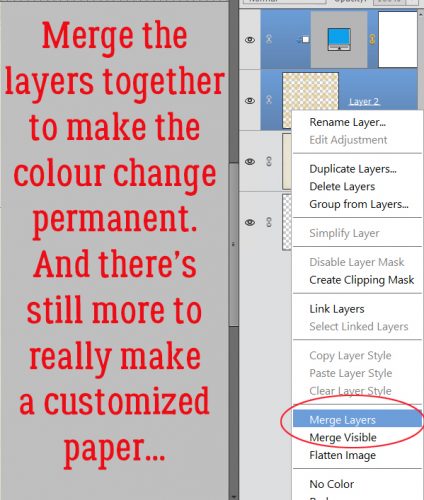
The merged layers will lose the Blend Mode so I hit it again with Dissolve.
That’s how to make a simple repeating pattern. All the control is in your hands. Next week I’ll show you how to do a staggered repeating pattern. It takes a few more steps and some experimentation…
![]()
Love this tutorial!! My mind is already swirling with ideas to try this! I look forward every week to your tutorials and have learned so much from them. Thank you!!!
Thanks for this fun tutorial. Making papers is a fun topic. More variations on this theme would be great.
I had no idea that I could do this myself! Thanks for showing me how.