Selectively Colouring Your Brushes
![]()
I apologize for the slightly-late breaking tutorial. Technical difficulties with my laptop yesterday had me at the absolute limit of my tolerance for frustration (and the limits of my attention span!). By the time I got it sorted out it was time for bed… and I’m sleeping a lot, still. Anyway, let’s see what I’ve been playing with. I hope you like it!
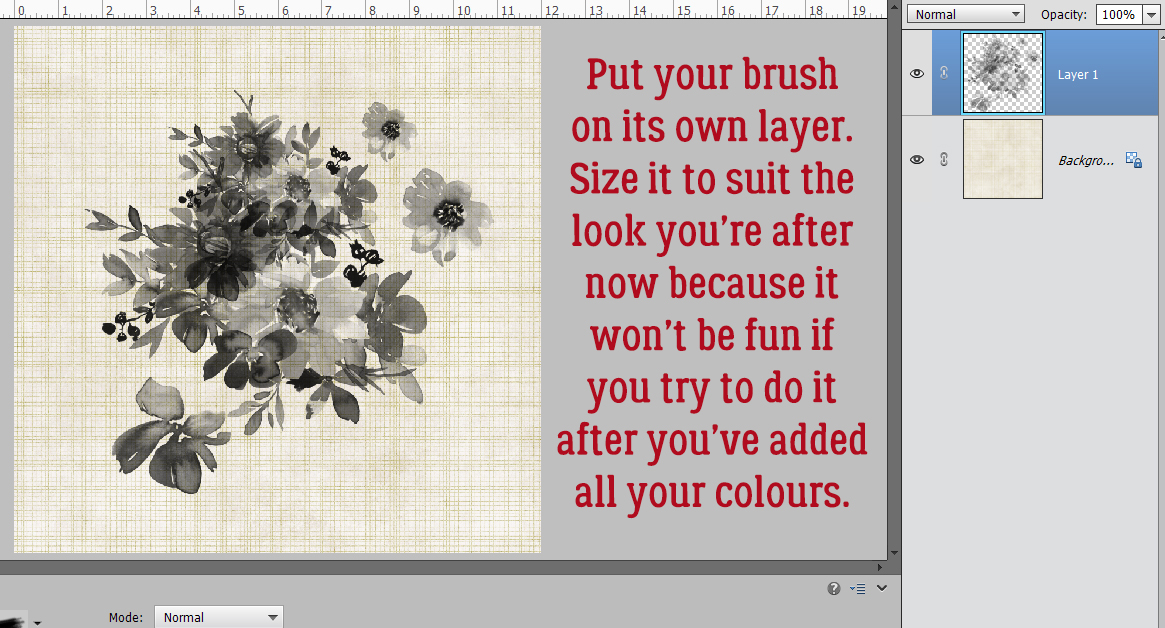
I have quite a collection of brushes in my stash; the brushes created by the designers at GS are fantastic and there’s always a free one in the Challenge forum each month. I chose one of those monthly challenge brushes from ADB Designs for this technique (and then asked myself why I picked such a complex one…) and recoloured EVERYTHING. I chose a neutral paper from the GingerBread Ladies‘ collab Christmas of Long Ago. It has s bit of glitter, and I love it. I put my brush on its own layer – it’s a really good habit to get into – so I can play with it without messing up anything else. This is the time to adjust the size of your brush image, because it’s not easy once all the colours have been added.
I added an Adjustment layer to the top of my layer stack by clicking on the two-tone circle icon at the top of the layers panel and then choosing Solid Color… from the drop-down menu.

This is where you get to be creative. The fun part. I’ve got flowers so my colour choices are flowery colours. I used the Color Picker, but the Eye Dropper tool and the colours in your photos or paper choices are also possibilities.

My brush is still there, behind the solid colour Adjustment layer. To apply the colour to the brush, I right-clicked on the Adjustment layer and chose Create Clipping Mask from the drop-down menu.

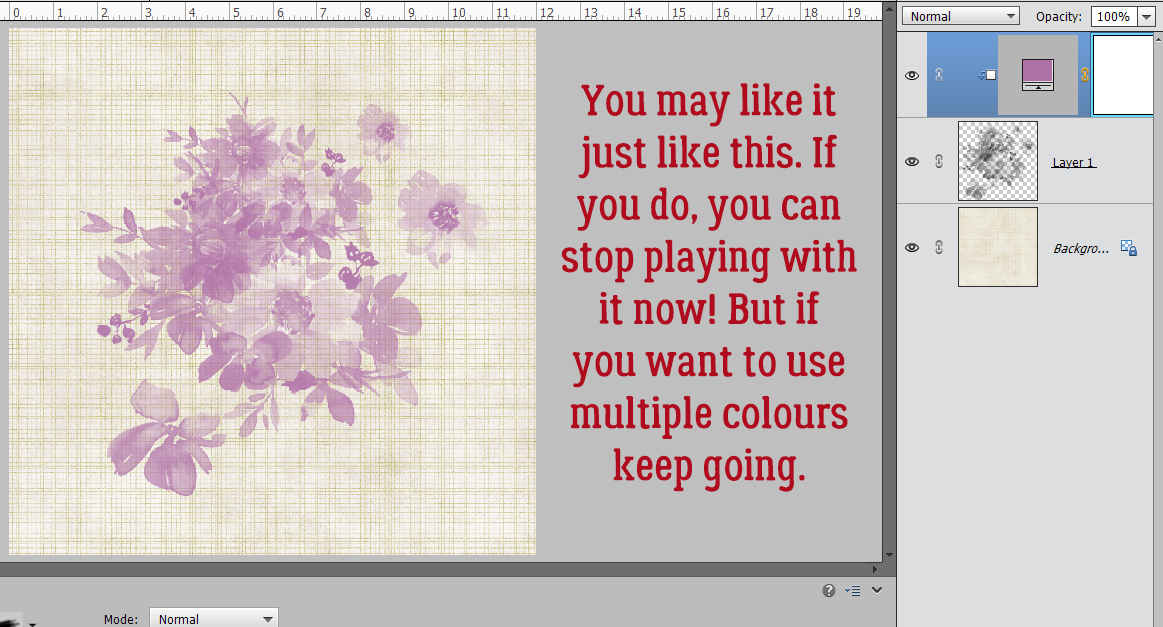
Depending on the brush you’ve chosen, this might be all you need to do to it! But if you want to add more colours, there are a few more steps.
Next I converted my Adjustment layer/clipping mask to a LAYER MASK by Inverting it. CTRL/CMD>I and the mask turns black. It’s supposed to do that.

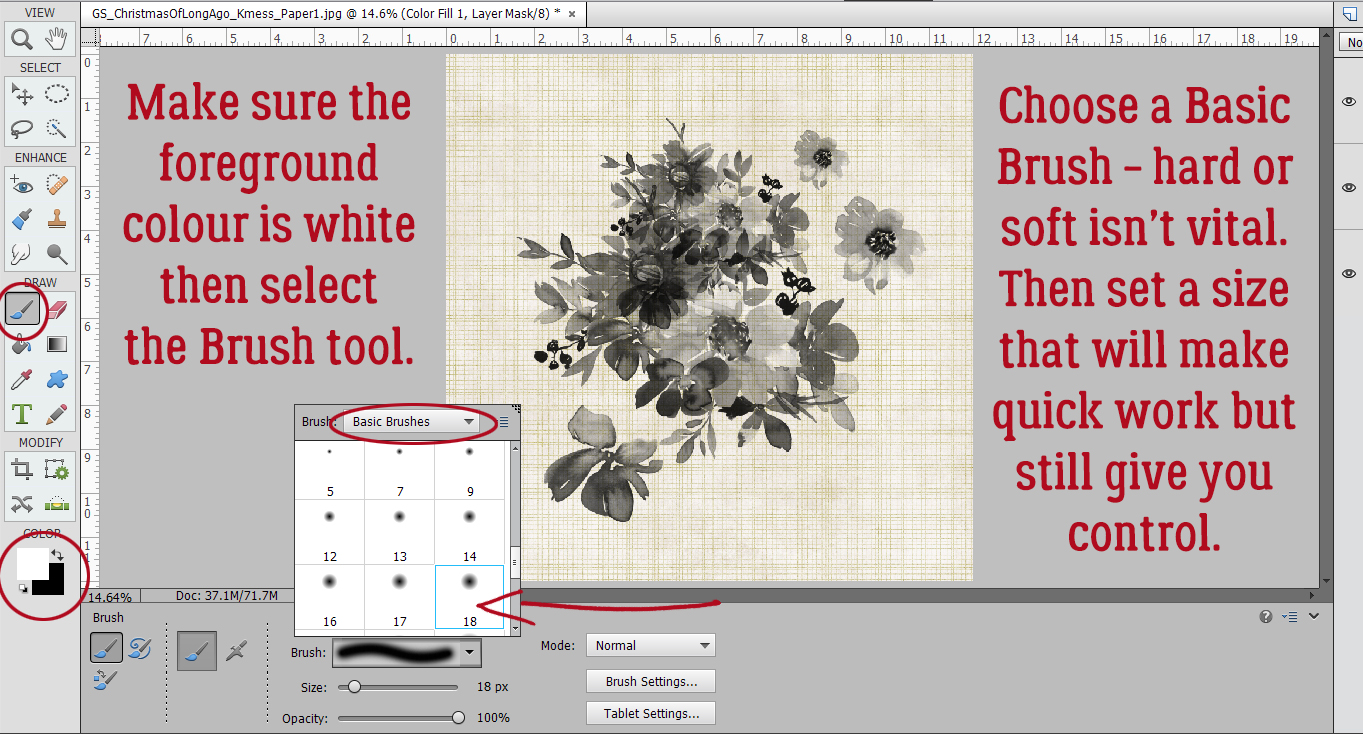
I made sure my foreground colour was white. When working with Layer Masks, white reveals and black conceals. Then I selected the Brush tool for a Basic round brush. You can use hard or soft for this part, but a hard brush will give you sharper edges and will be easier to control. You’ll need to adjust the size of the brush as needed to get you into the nooks and crannies of your brush, but use the largest size you can wherever possible to make the job go faster.
Then I decided which of my flowers would be that lilac colour and “painted” them pale purple with my brush. If you look at the layer in the layers panel you can see on the mask where I’ve recovered the colour.

Let’s do another colour. I clicked on the brush layer and then the two-tone circle icon and chose Solid Color… from the drop-down. Doing it this way eliminates the Create Clipping Mask step!

Here I chose a hot pink from the Color Picker. See how the parts of the brush I’ve already masked show up as pale purple and everything else is pink? This shows where the colour will go and where it won’t on this Adjustment layer.

Then I again Inverted the layer mask by clicking CTRL/CMD>I. Now I can choose the flowers that should be pink.

As I worked, I discovered that all the areas I’d already masked on the lilac layer stay masked on the other layers. That meant that where my pink flowers butted up to my purple flowers, I didn’t have to be as cautious and precise as I painted in my pinks. If my brush rode over into the purple it didn’t matter. But I DID still have to be careful around the black and gray areas.

Time for a new colour! To recap: Click on the brush layer, then the two-tone circle icon and choose Solid Color… from the drop-down menu.

This time I decided on a golden-brown for some of the foliage.

With the mask layer Inverted (CTRL/CMD>I) I painted back in the frondy-looking foliage.

Then I added some blue… Look at the layer masks and see all the areas I’ve already masked. Each layer is a little less fiddly because more and more of the brush is masked.

I found parts of the brush that I’d overlooked that should have been one or another of the colours I’d already used, so I clicked on the LAYER MASK of the layer with the colour I should have used and added those bits to the existing mask.

The result wasn’t as awesome as I’d hoped it would be, but I learned a bunch about this technique. So I found a different brush I could play with and when it was time to paint in the colours I chose, I used a misty water-colour brush. I adjusted the size and angle of the brush as I randomly painted in the colour areas. Now THIS I love!

Can you see yourself giving this one a try? I’m going to make it part of my automatic activities, I think!
The PDF version of today’s tutorial is HERE.
![]()
Thank you so much for this tutorial Master Jan, this young Padawan appreciates it very much 🙂
Yes, this one I will definitely try. I recently wondered how to do this exact technique. Thanks so much Jan.
Oh wow! Thanks for a super tutorial Jan! These things makes me realize how little I know how my program works 🙂 so I am super grateful for this! <3
I’m trying it now! Great tut. Thanks. There are a lot of tiny leaves in Alexis’s current May Brush Challenge. So, instead of trying to color each of those teeny tiny ones, my last color was a dark green that I just let color all of those tiny leaves!
Strategic planning!! Love it! WSNH, right?!
That’s my goal, Carina! I learn all kinds of new things, sometimes from others, sometimes by trial and error, and then I pass it on to all of you.
It’s so super-simple! And so versatile, too. It can be as detailed or as abstract as you like.
My pleasure!
Wow! Thank you for this tutorial! I hope to try it soon. I usually steer away from most brushes due to the coloring factor. Now I can color away!