Quick Trick: Correcting Colour Cast
![]()
PDF Version: https://bit.ly/3lWUZsm
It happens to all of us. We shoot a whole whack of photos on a special occasion or on a vacation, thinking we’ve got a great collection of memories. But then when we look at them, a bunch of them are just… ugh. Yellow, orange, red or blue casting a pall over the whole image, and every attempt made to fix it gives equally ugh results. Colour casts are usually the result of moving from indoors to outdoors and not changing the white balance setting on our cameras, and vice versa; it can also be caused by light reflecting off nearby surfaces. I’ve shown you some simple ways to improve lighting and exposure, but until just a couple of days ago I didn’t know there was an equally simple way to deal with colour cast. Trying to click on the exact white, black or gray pixel in an otherwise orange image can be enormously frustrating, right? When I tried this trick, I was gob-smacked! Let’s take it out for a run.
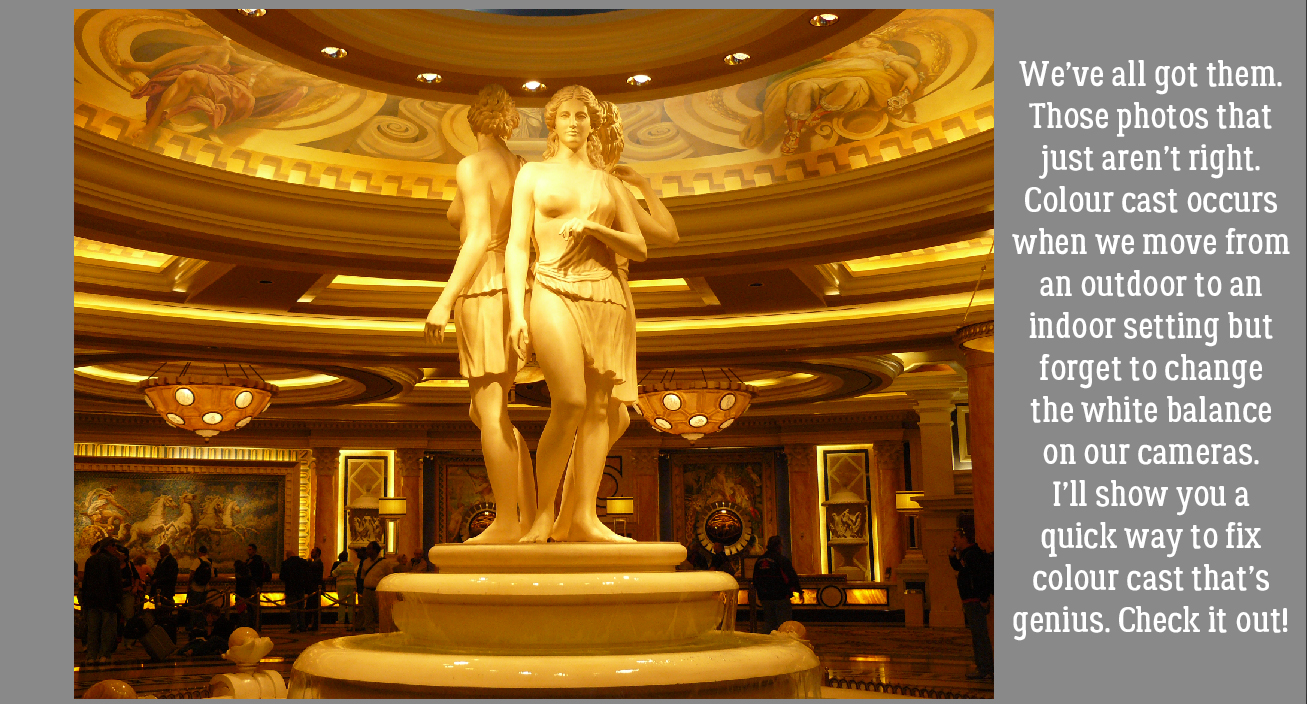
This photo was taken at Caesar’s Palace in March 2009. I’ve long-since forgotten what colours were actually present in this lobby, but I’m positive this ghastly golden glow isn’t right.
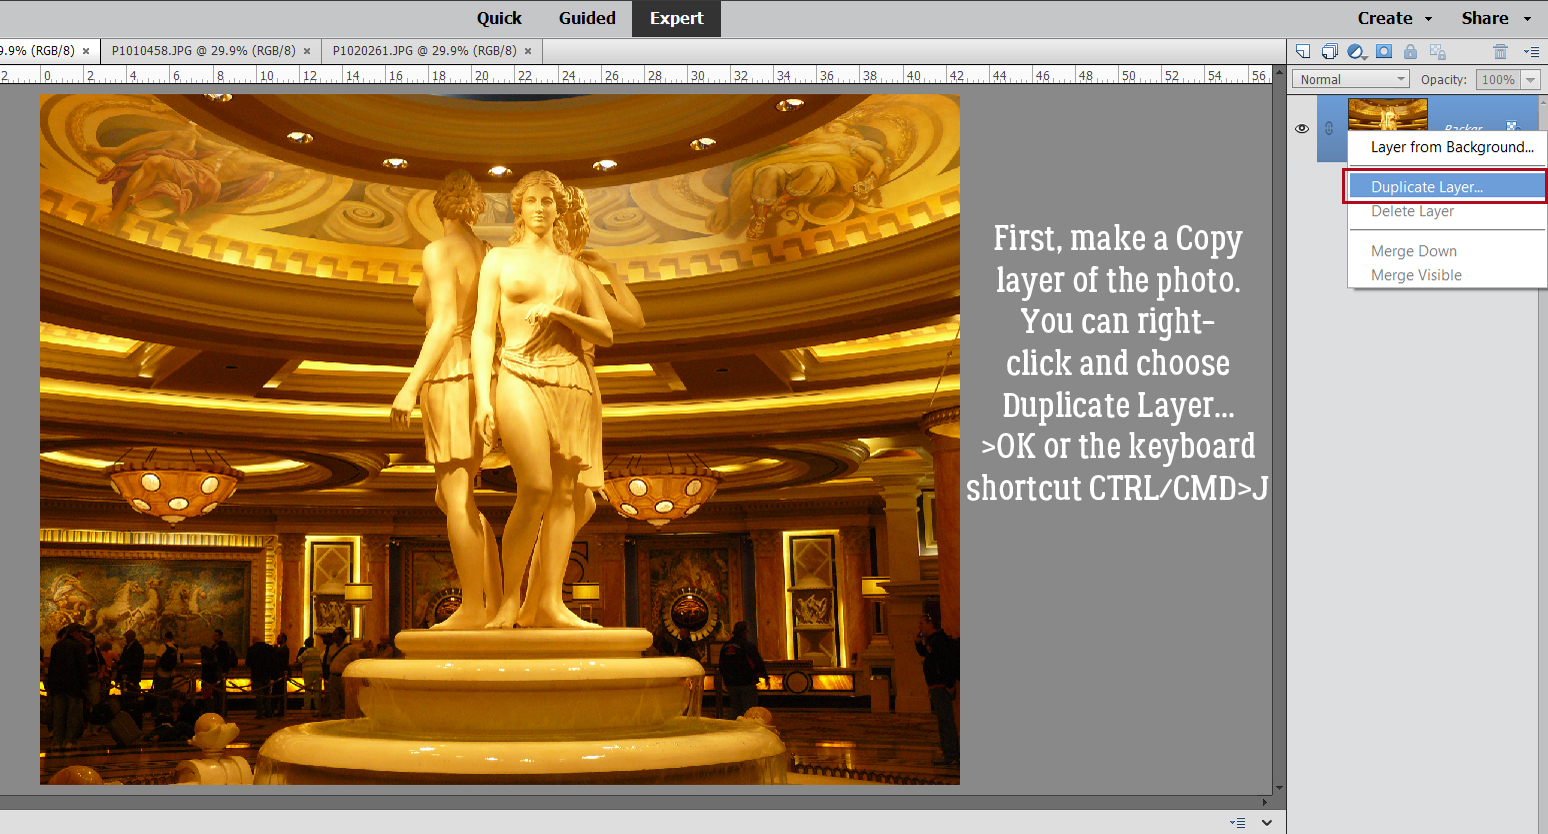
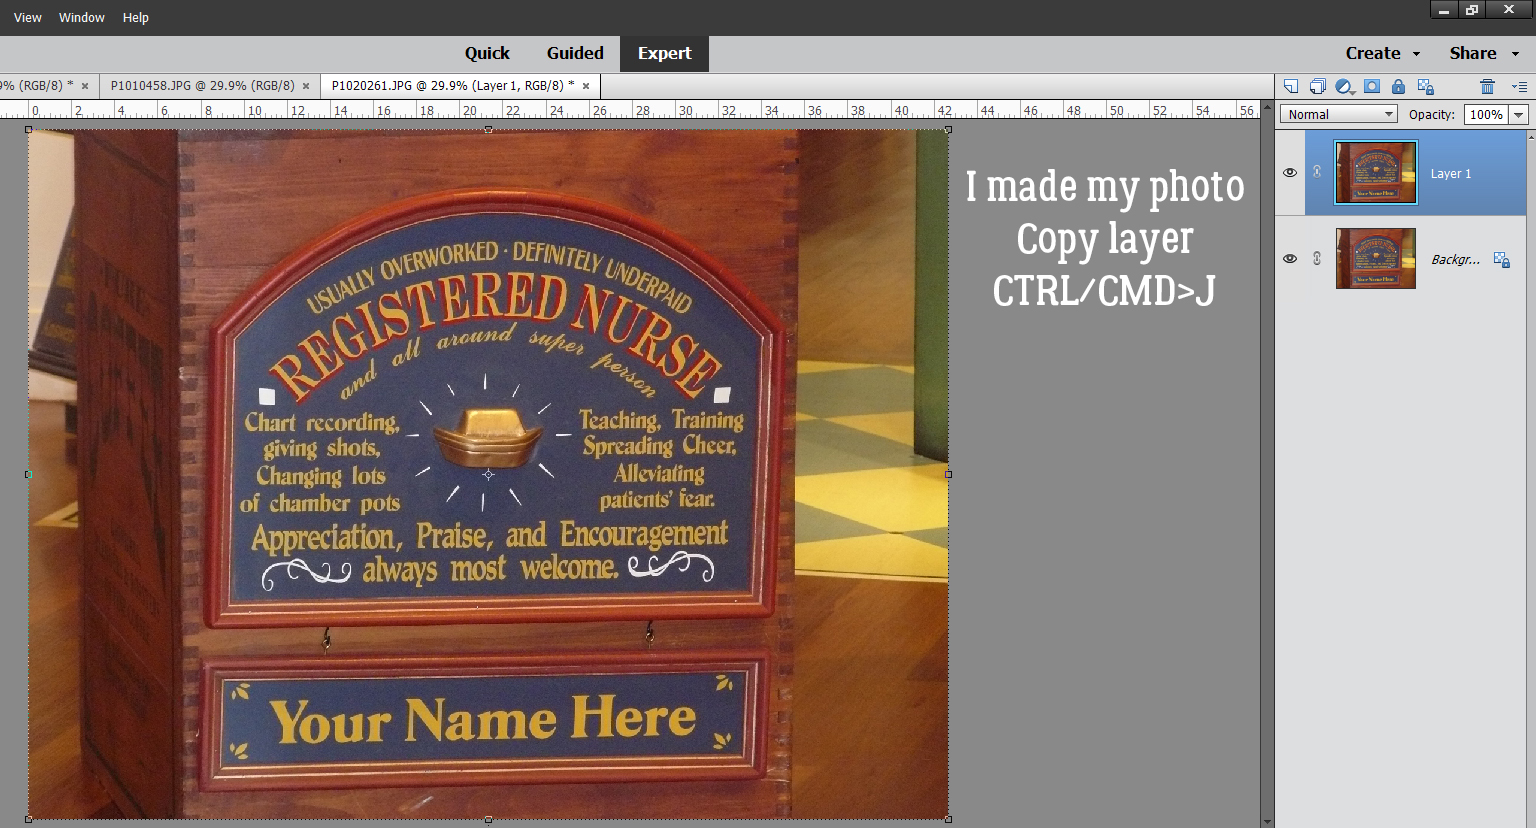
First step is to make a Copy layer of the photo. This step is ESSENTIAL. You can either right-click on the photo layer and choose Duplicate Layer… then click OK, or use the keyboard shortcut CTRL/CMD>J.
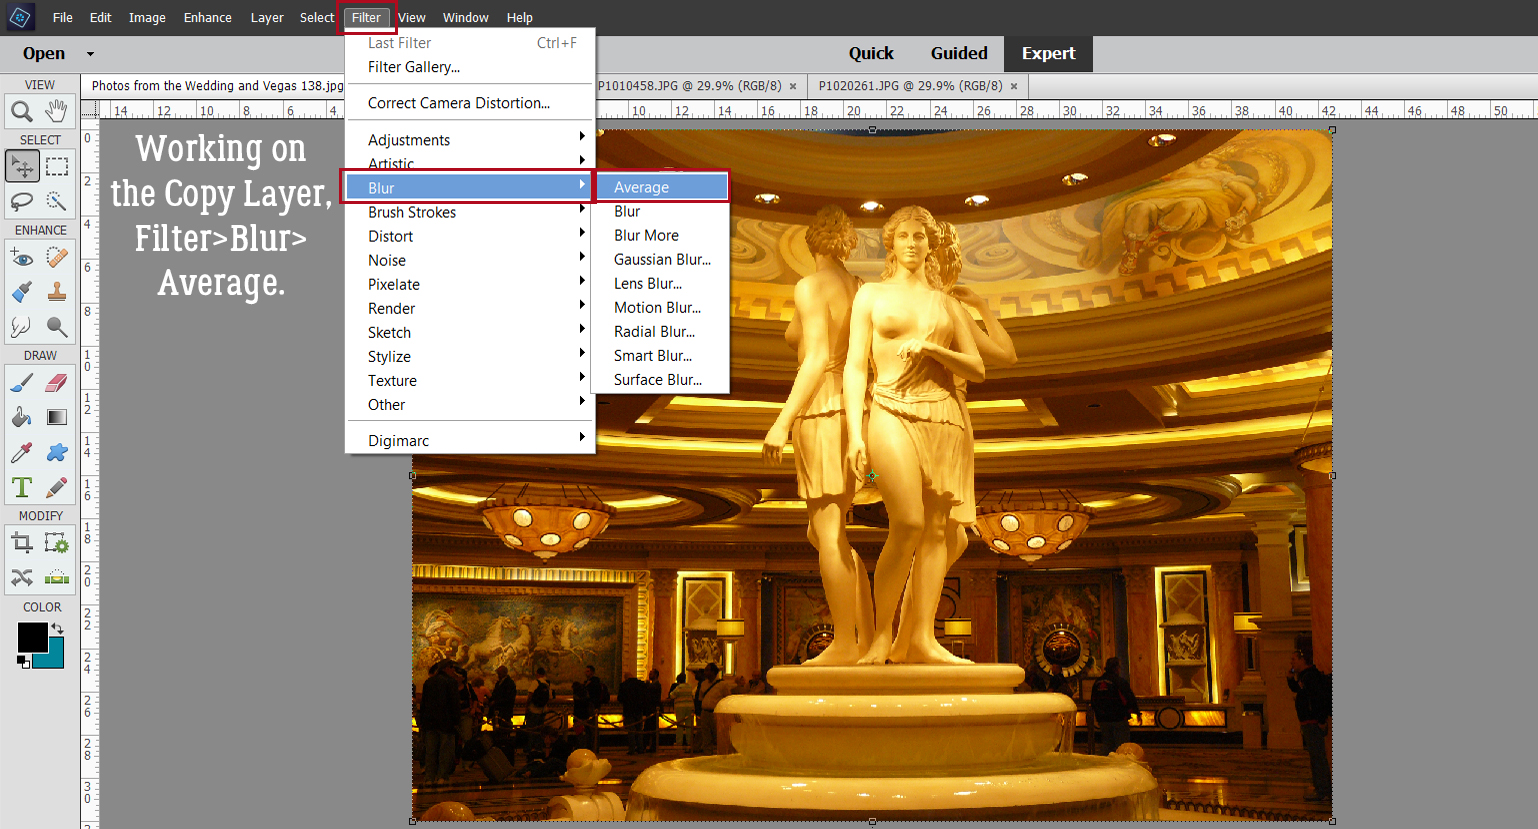
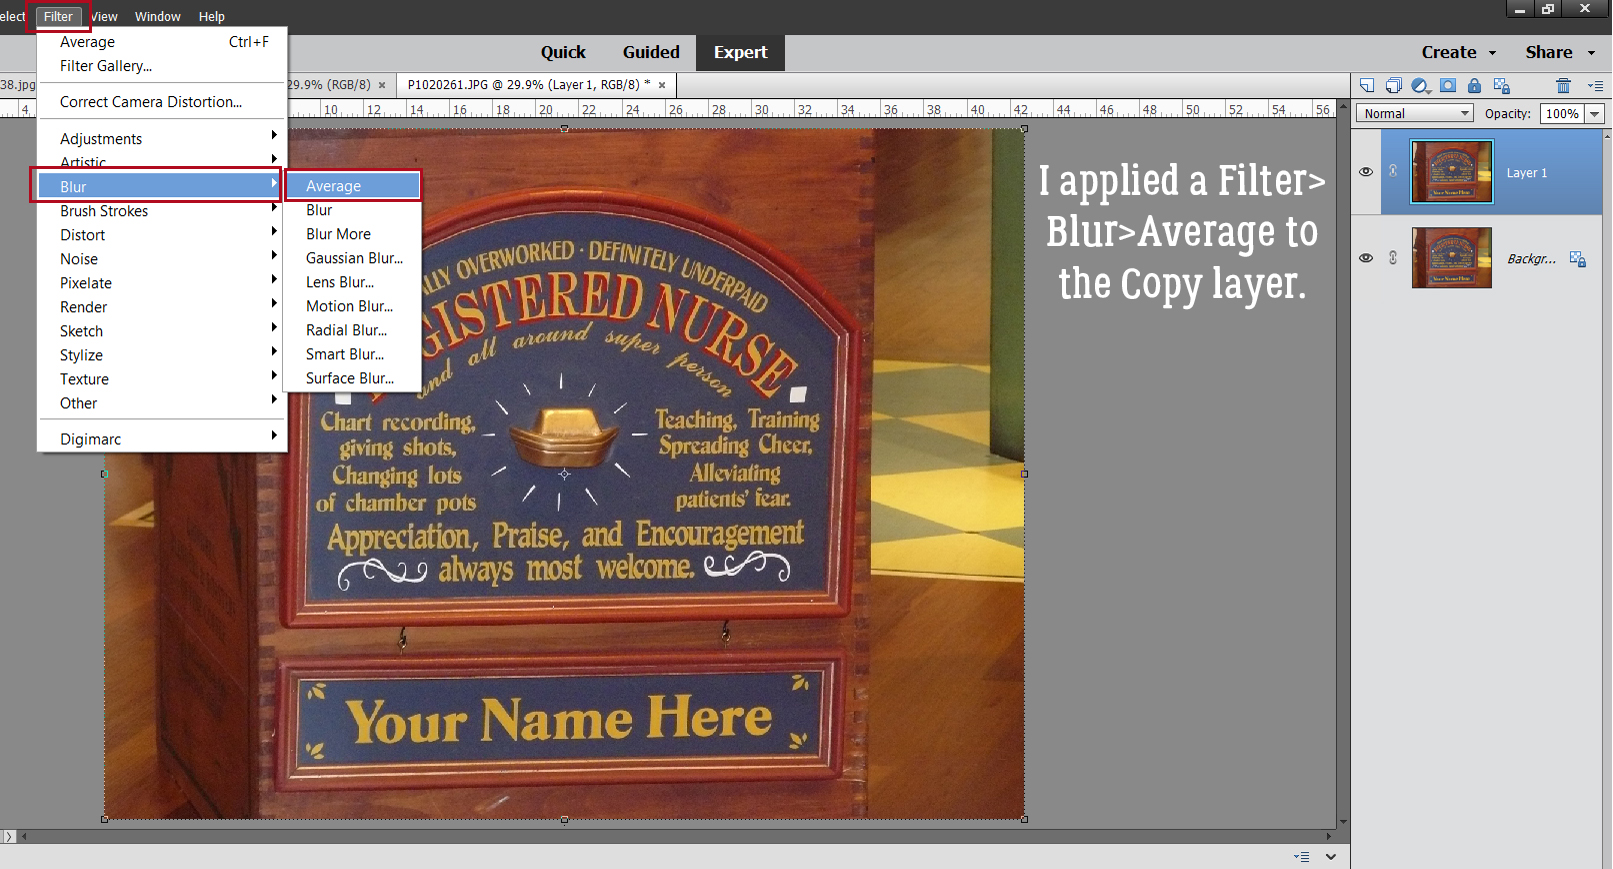
On the Copy layer, apply a Filter>Blur>Average. (I had no clue what this command did until I played with this trick!)
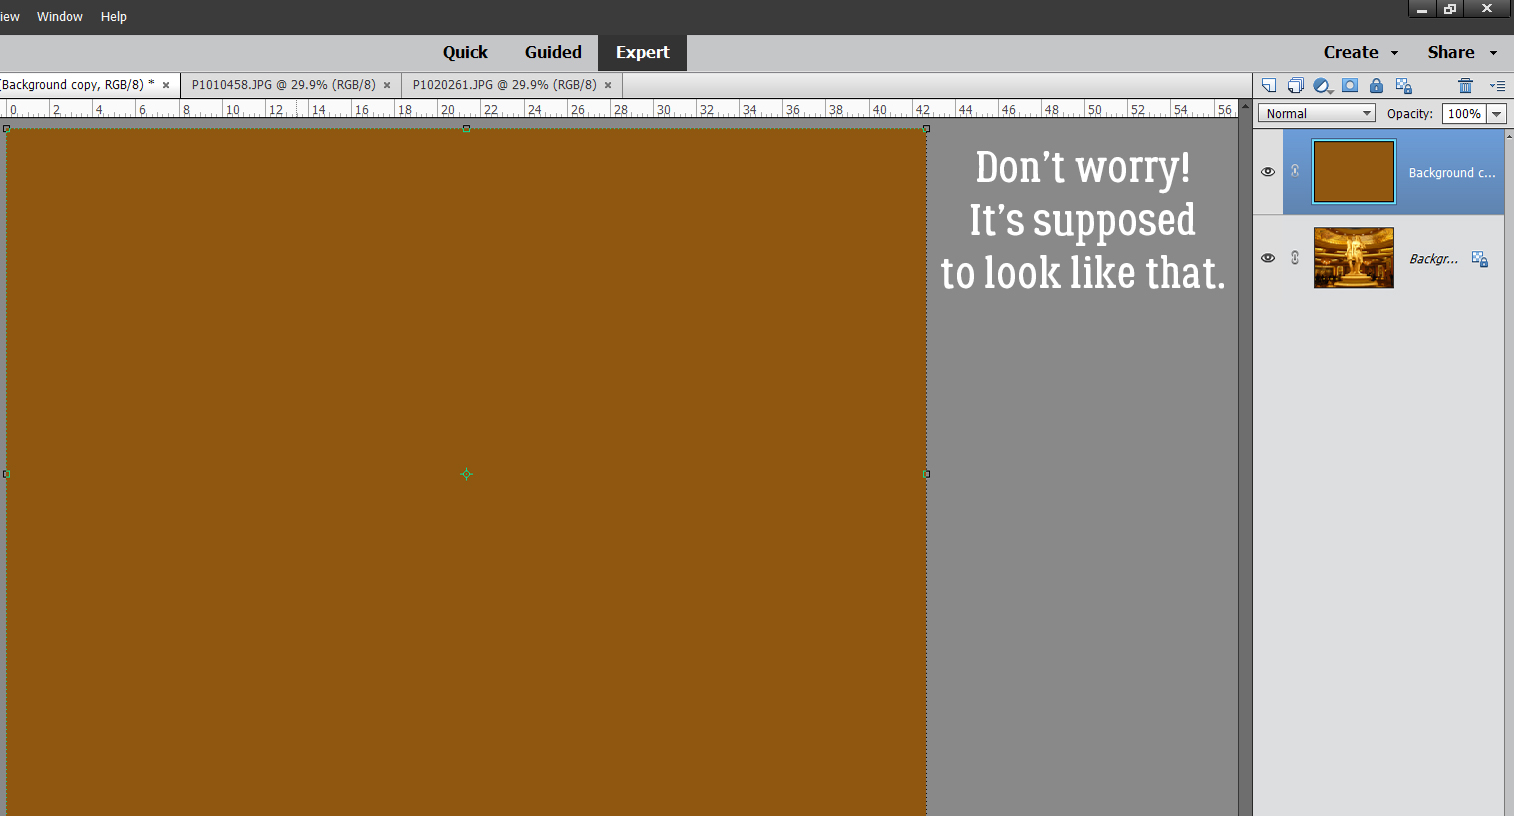
Did you guess it did THIS? (Me neither!) It’s supposed to do this, so don’t panic.
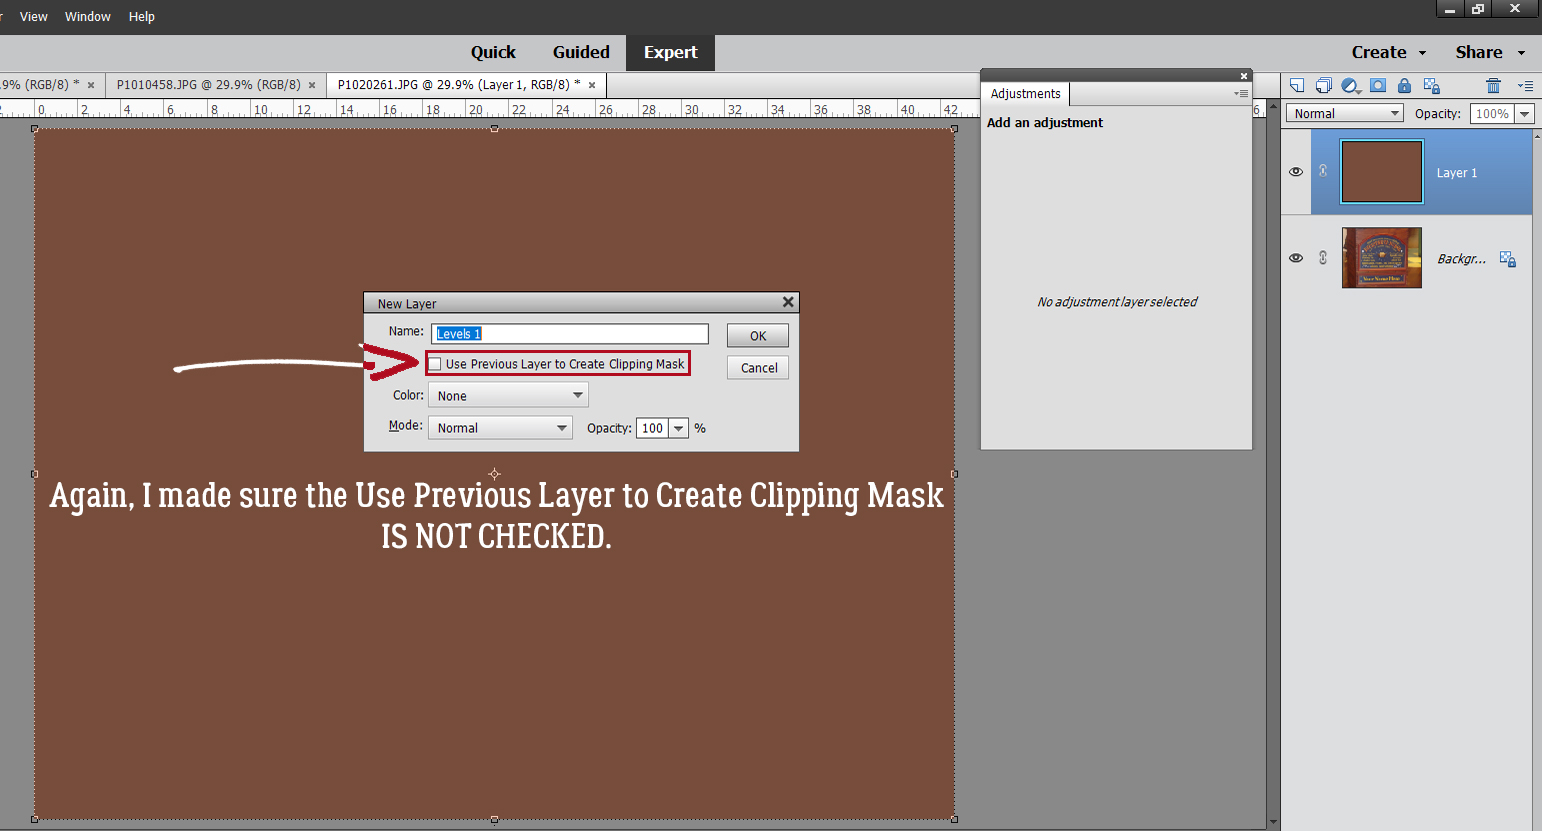
This step is another thing we’ve never played with… Adjustment Layers. Click Layer>New Adjustment Layer>Levels…
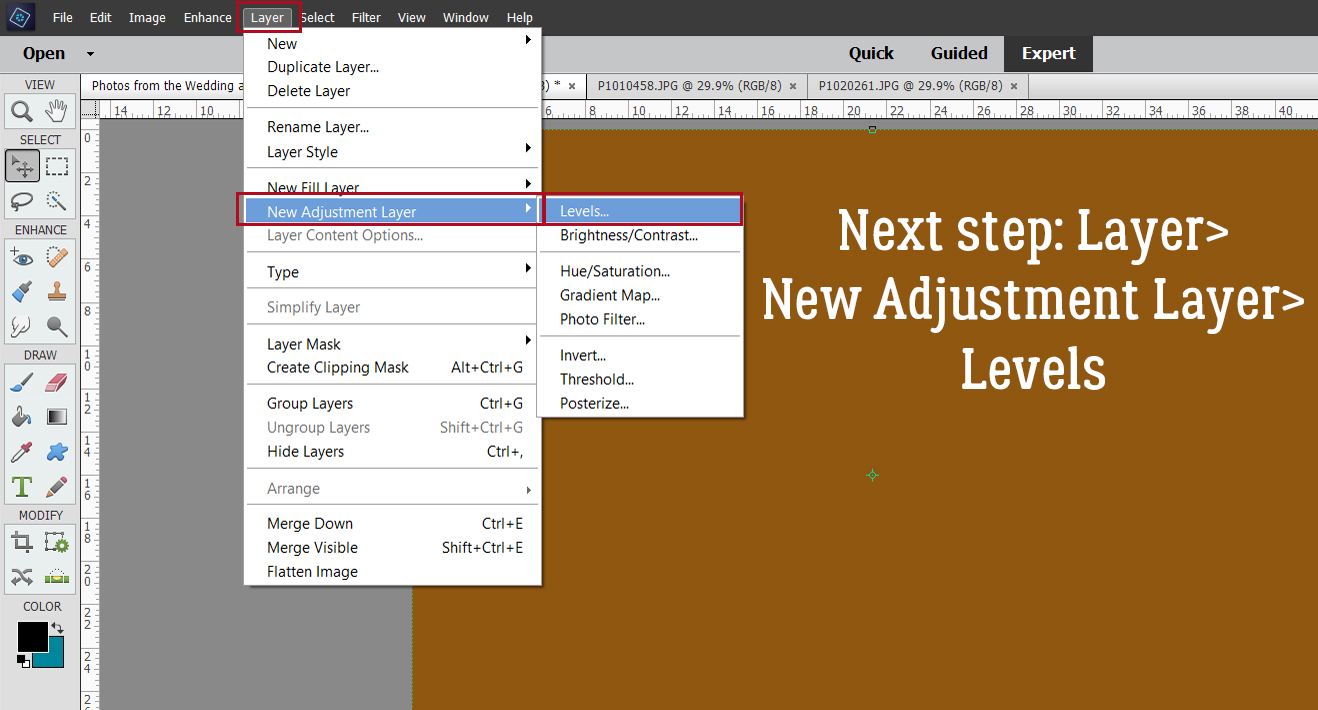
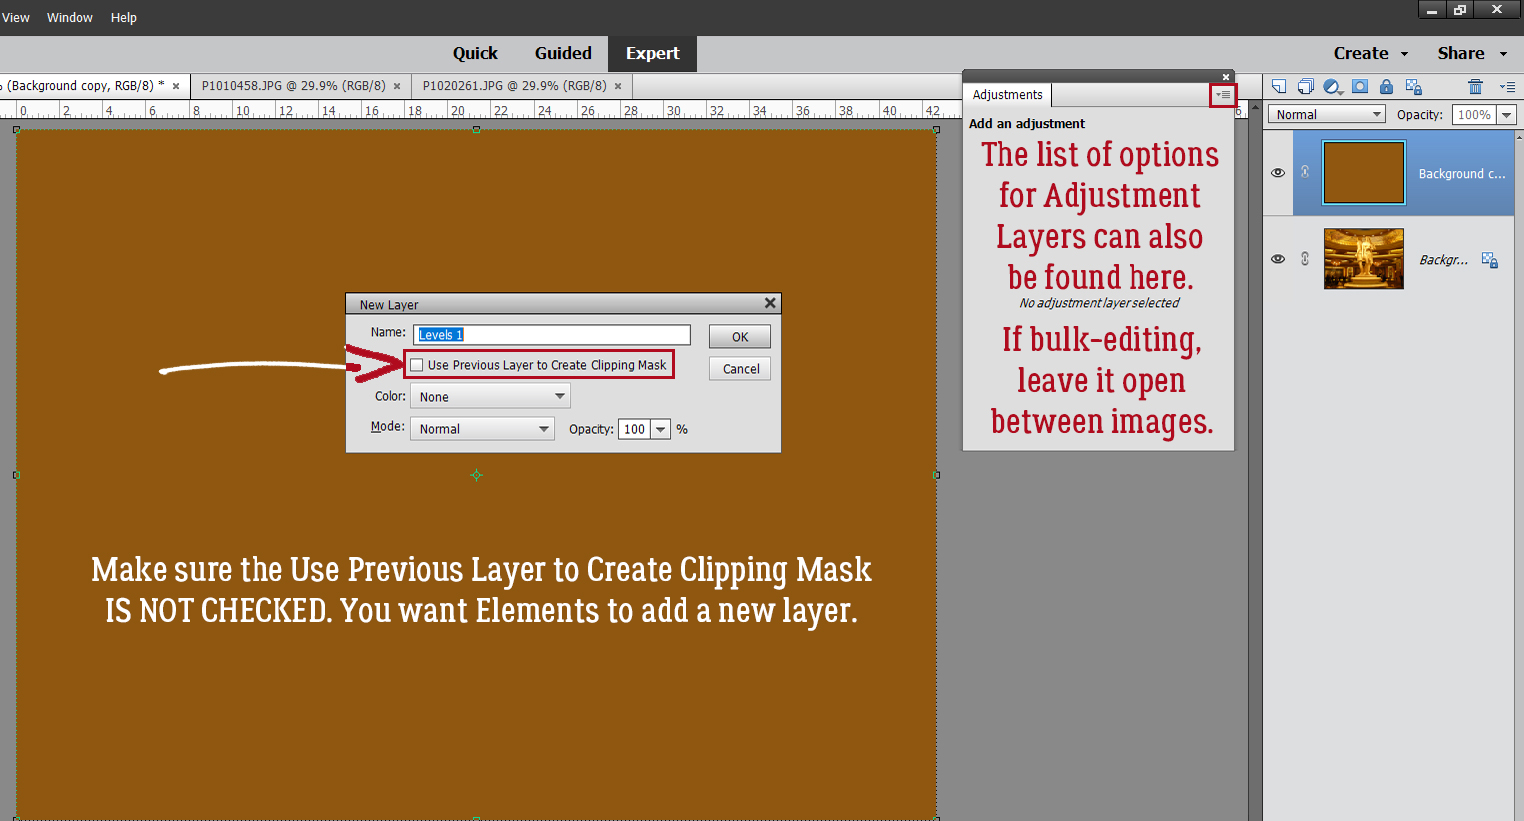
Make absolutely sure the Use Previous Layer to Create Clipping Mask IS NOT CHECKED!! The adjustment layer has to be free-floating.
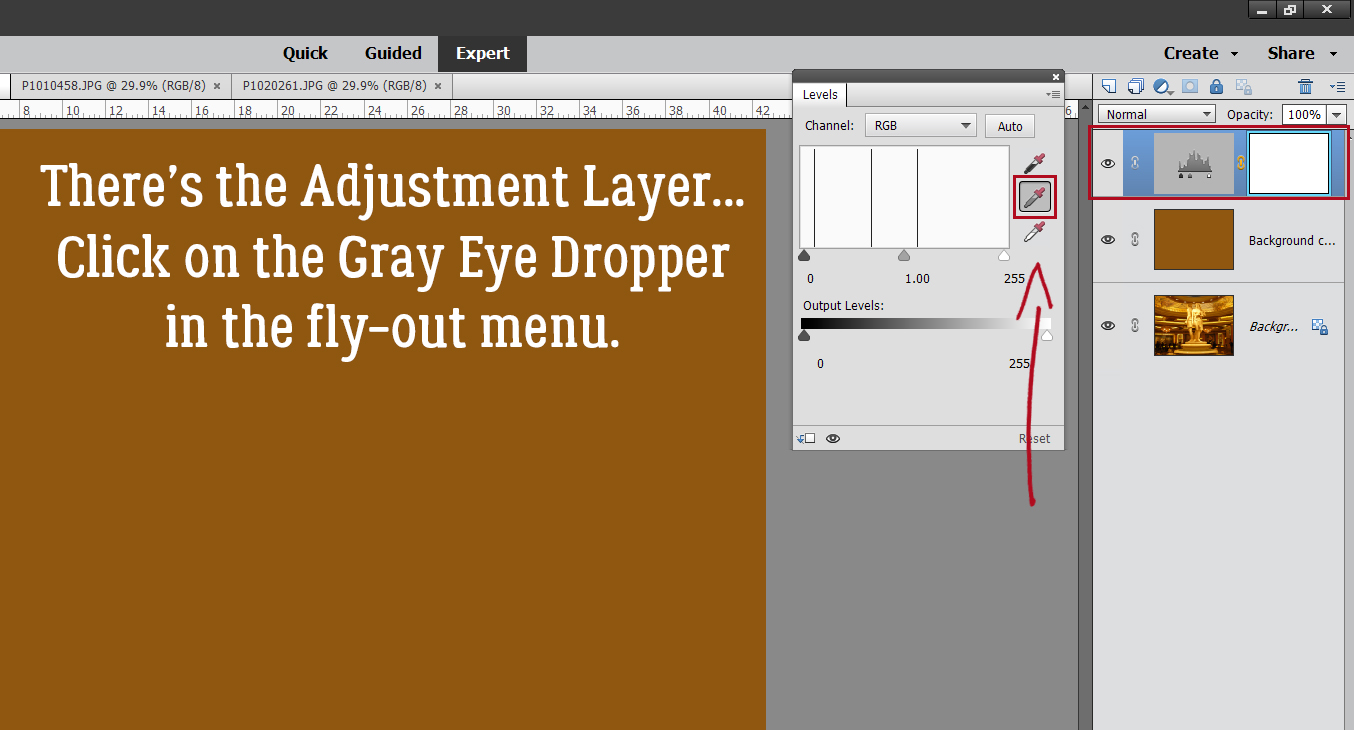
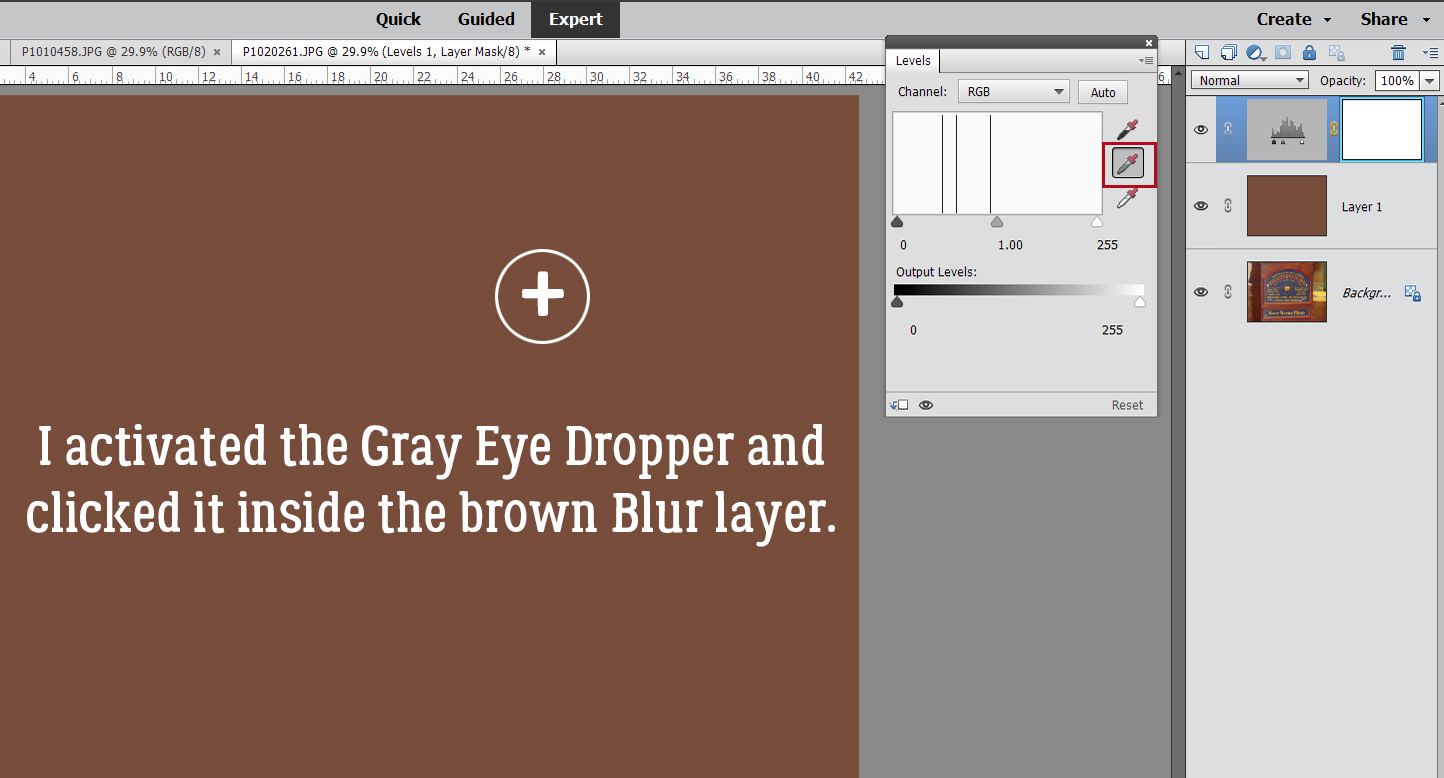
The fly-out menu looks like this. Click on the Gray Eye Dropper icon as shown.
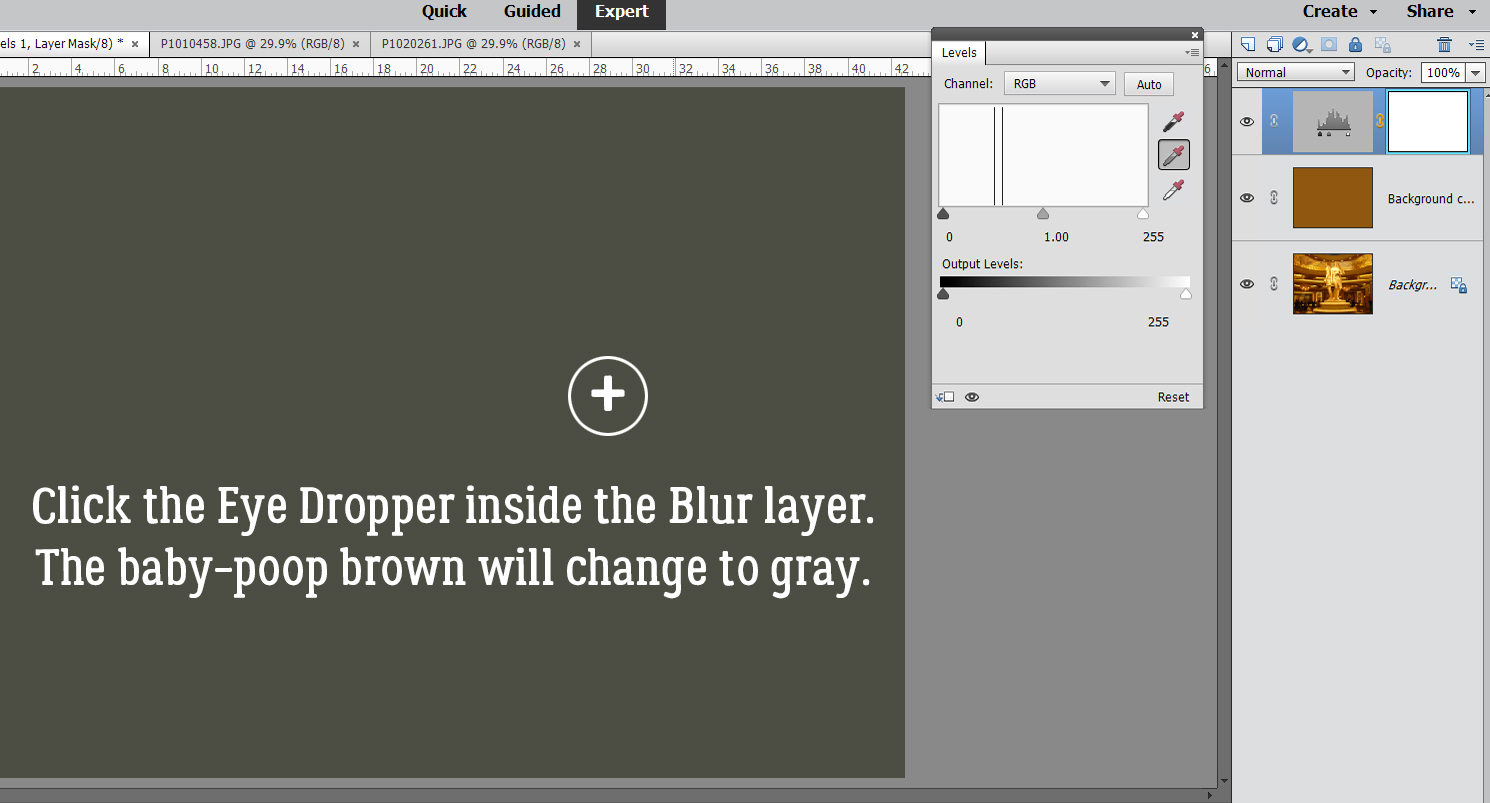
With the Adjustment Layer active, click anywhere inside the photo. The baby poop brown changes to medium gray.
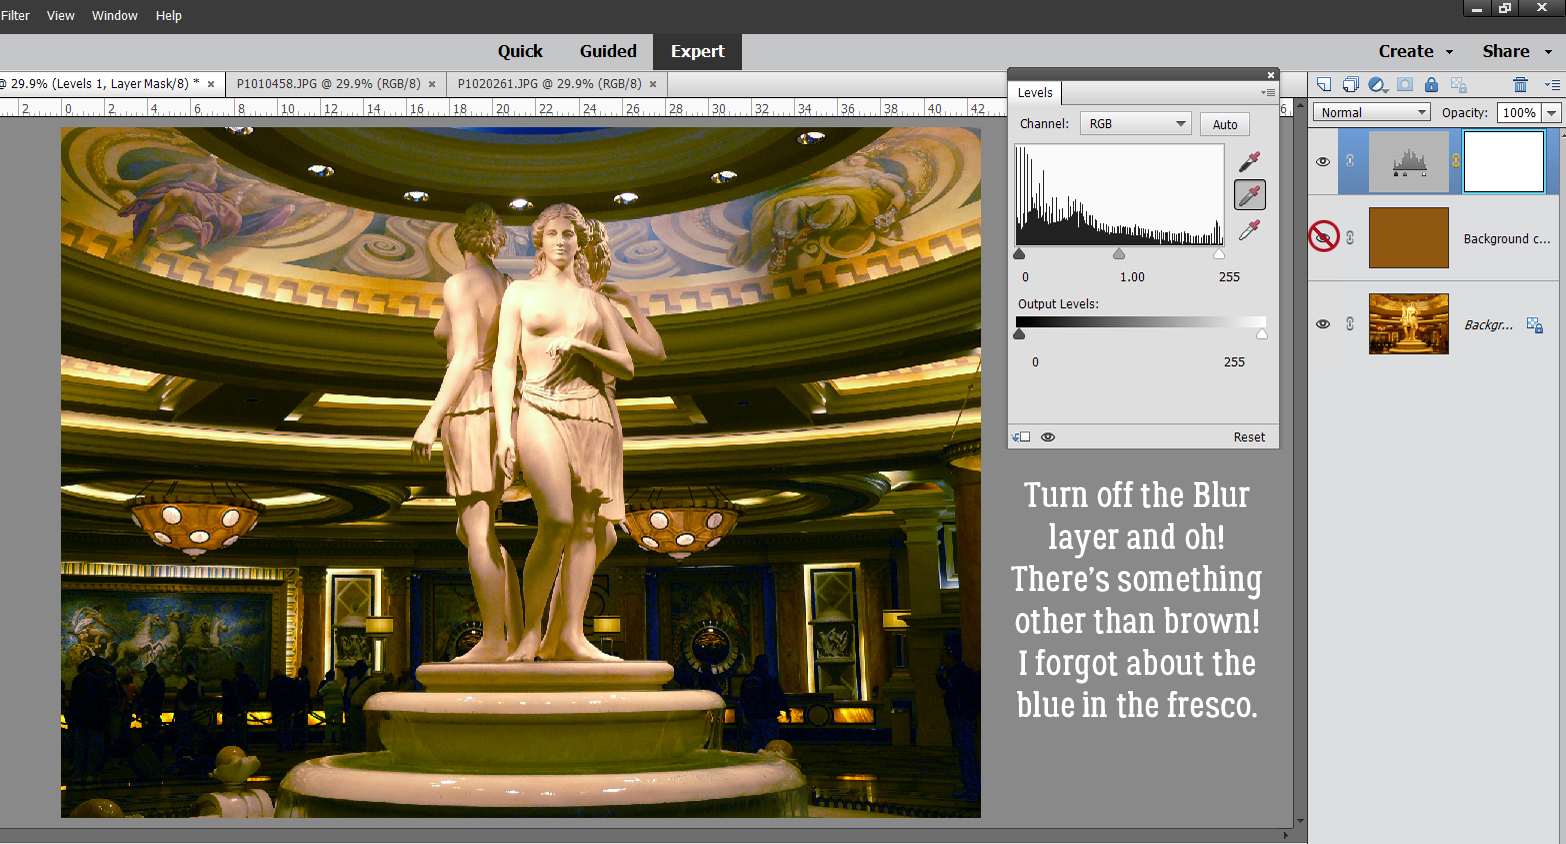
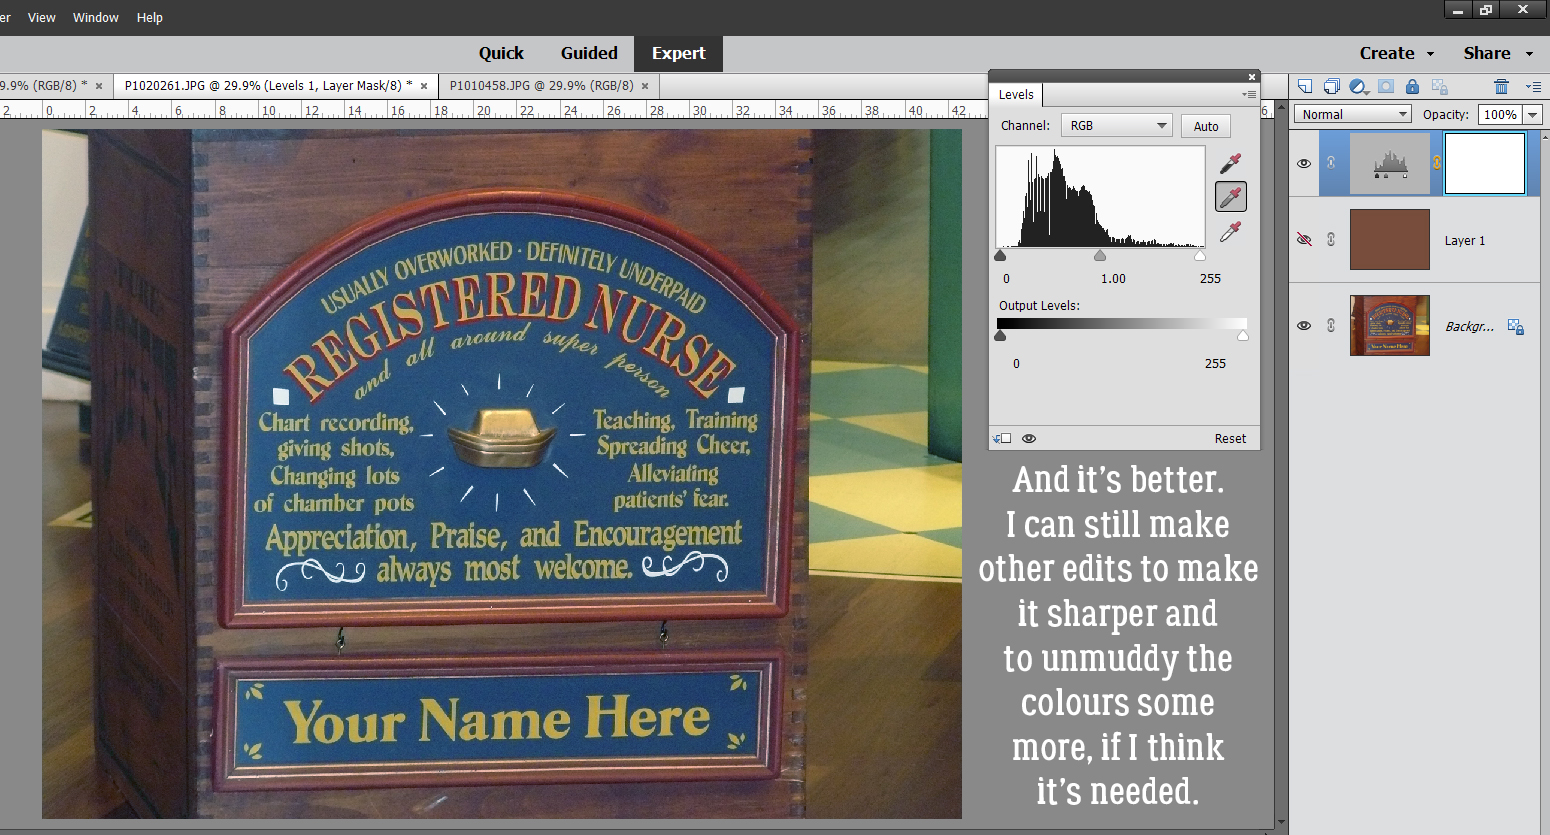
To reveal the new-and-improved image, turn off Visibility to the Blur layer and there it is! It’s magic, y’all!!
To turn all of this into a useable photo, select all three layers by Click>shift>clicking on the top and bottom layers. Then right-clicking, choose Merge Layers or CTRL/CMD>E. If you feel the photo needs a bit more editing, you can do it now.

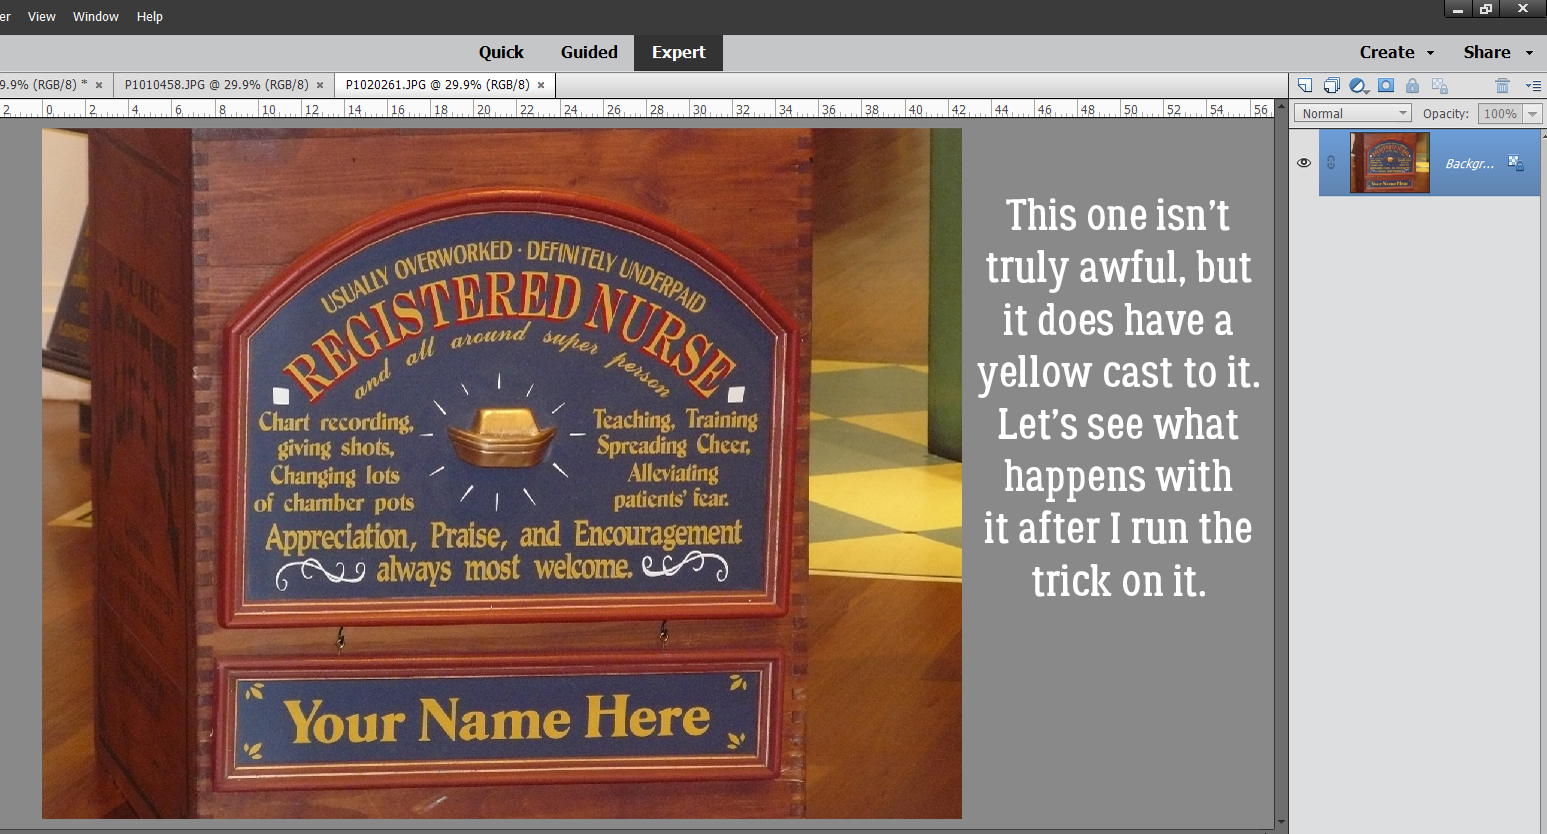
Let’s do another one. This photo is horrible, but it’s not awesome either. The yellow cast is unattractive.
Copy the photo layer.
Apply the Filter>Blur>Average.
Create a Layer>New Adjustment Layer>Levels.

Make sure that box is UNCHECKED.
Activate the Gray Eye Dropper and click on the photo.
Turn off Visibility for the Blur Layer and check out your results. See how much brighter the blue looks?
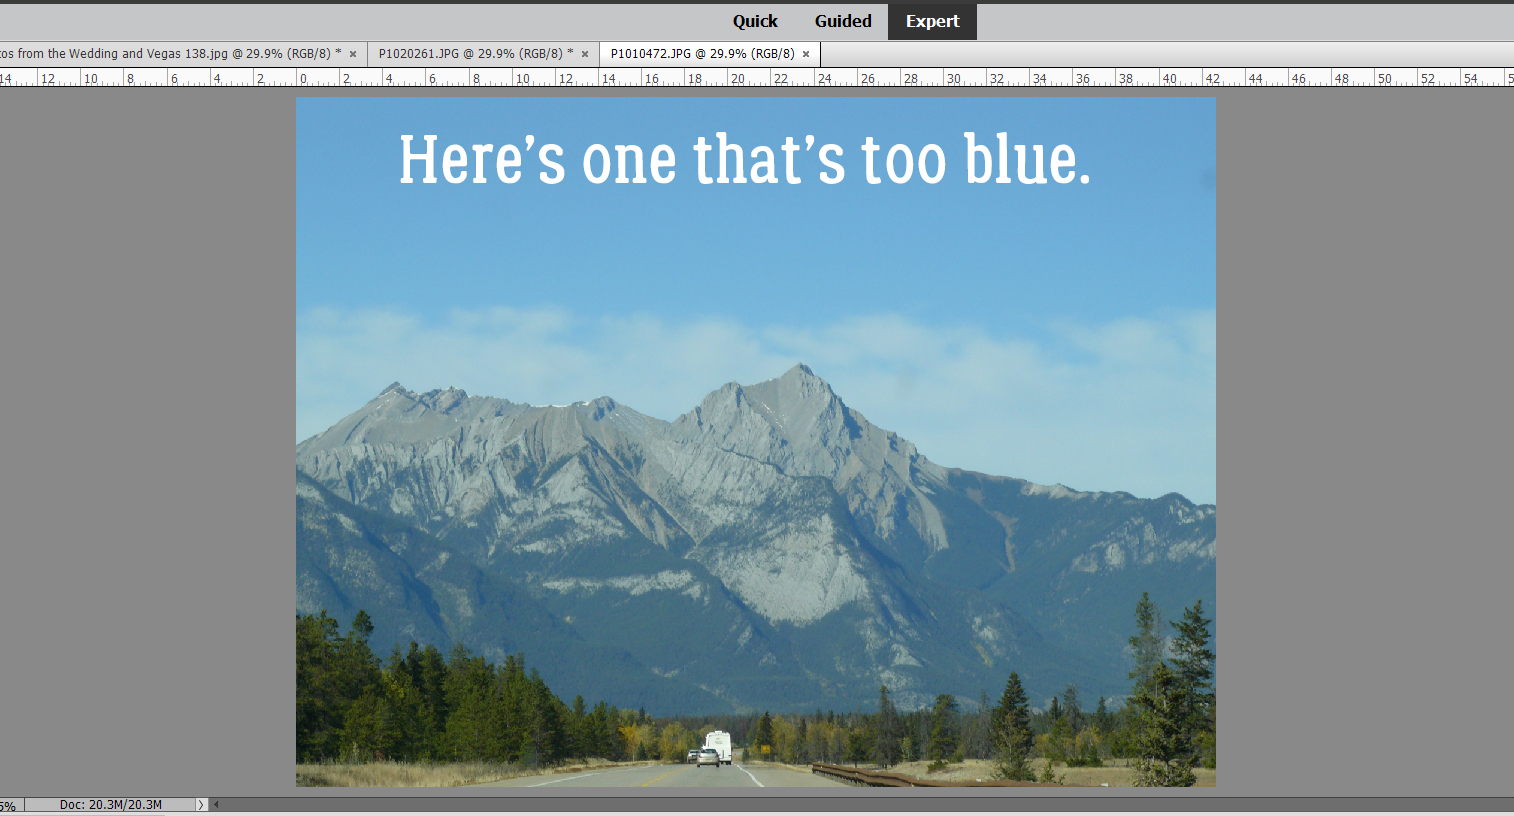
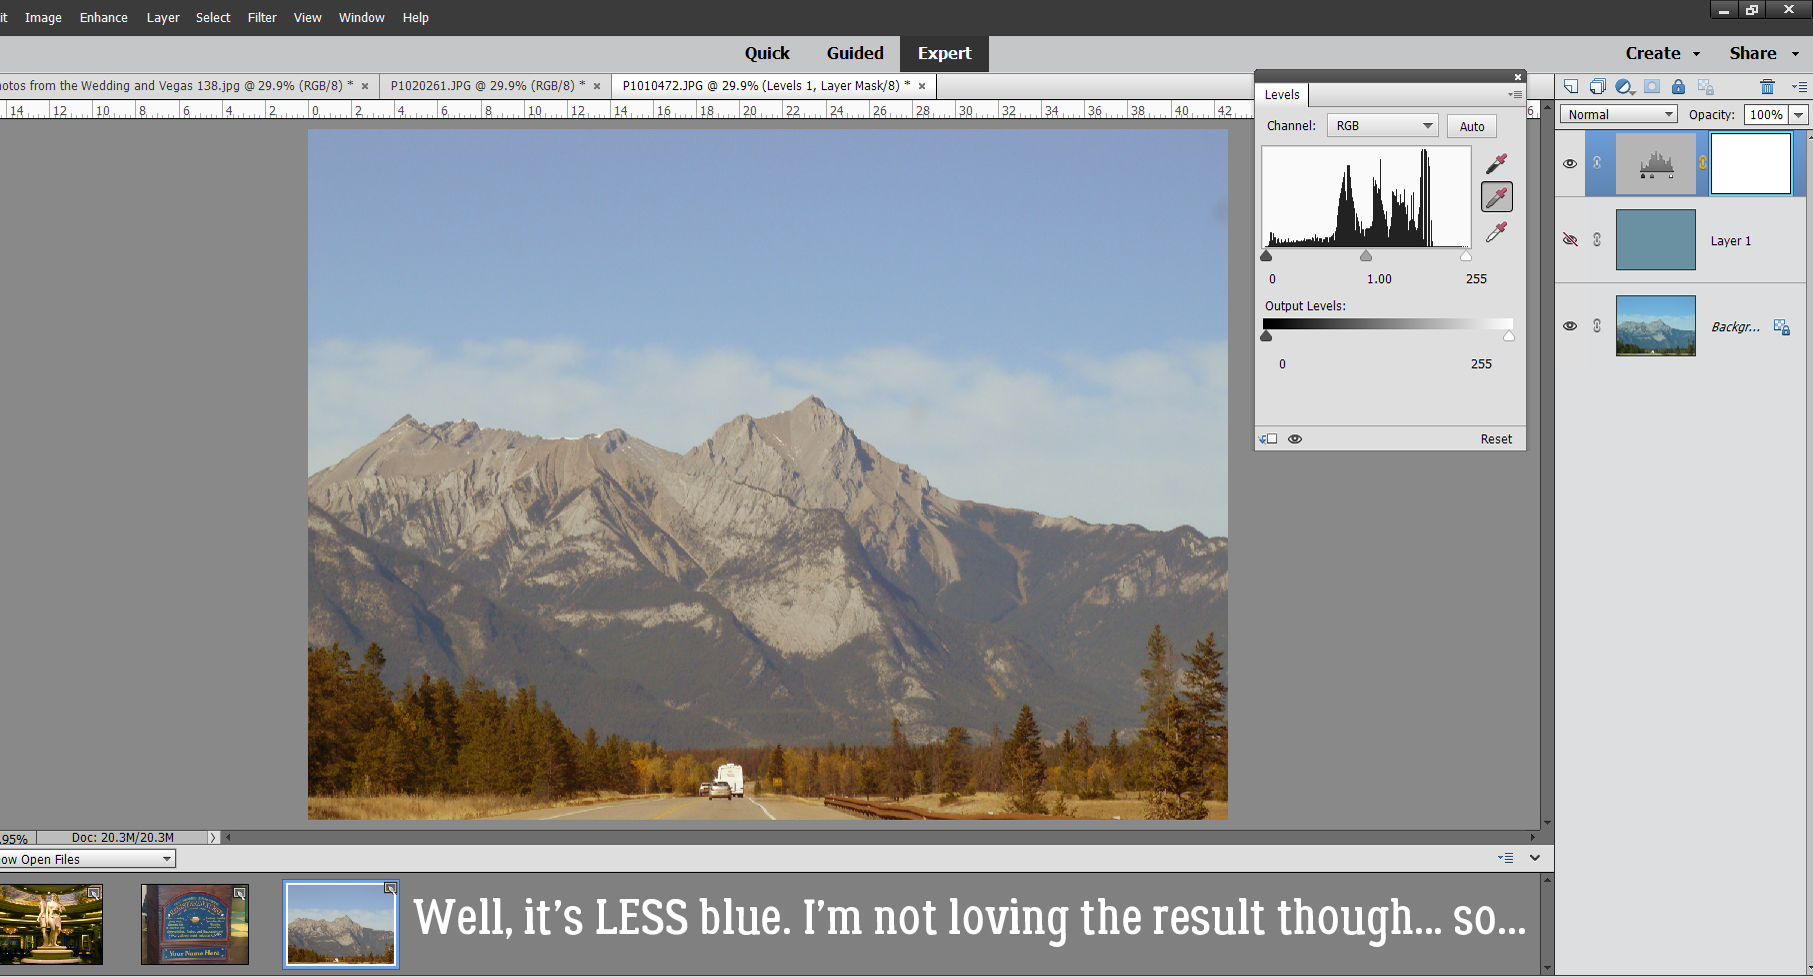
I’ll show you what this trick does to a too-blue photo now.
Hmm. It’s better, but I’m still not thrilled by it. So I’ll Merge the layers and do some more tweaking.
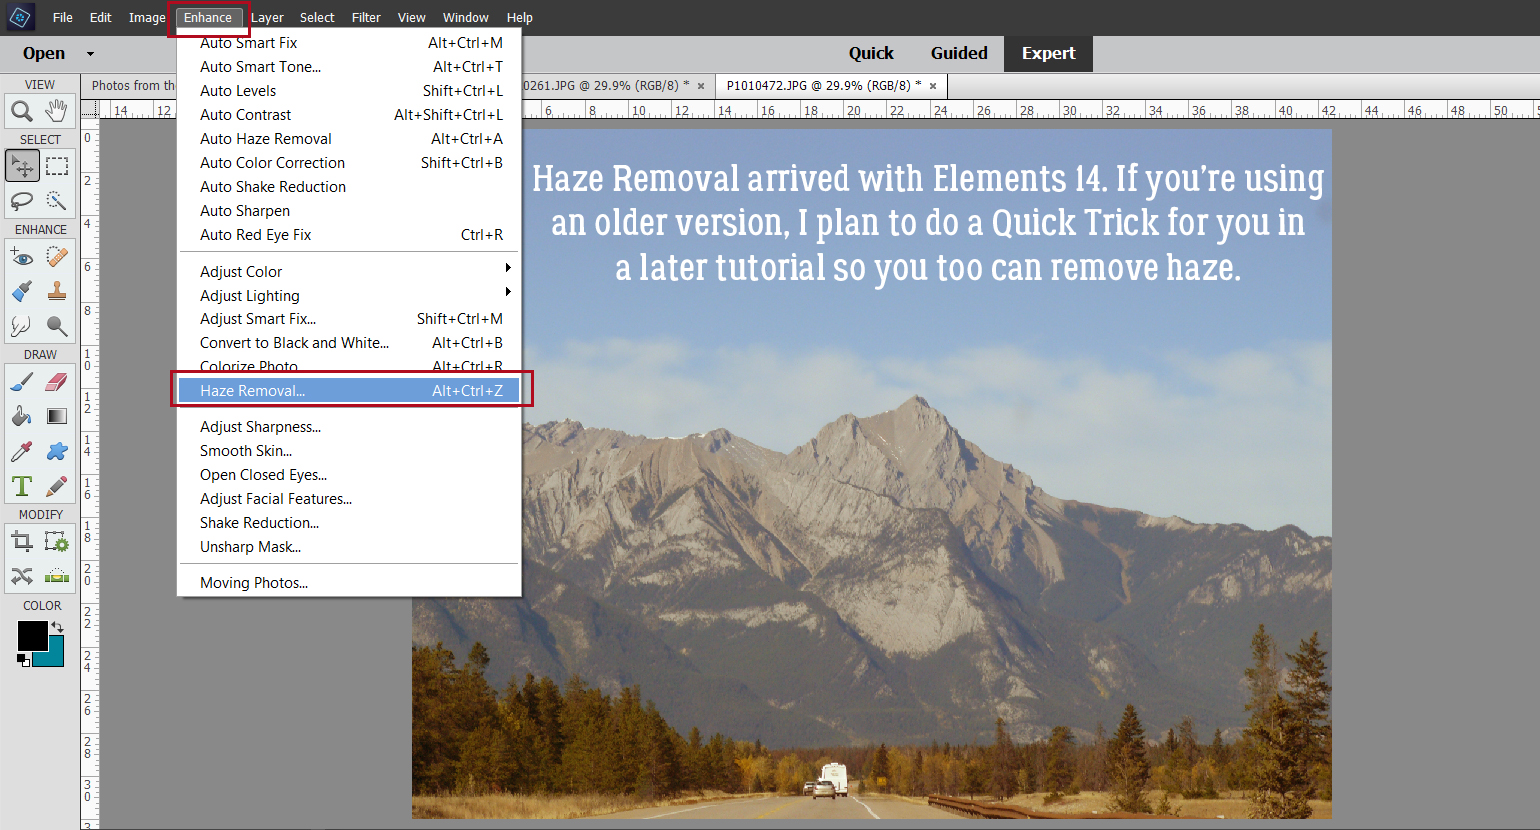
For those of you using Elements 14 or more recent, you’ll have the Enhance>Haze Removal command. If you’re working with an older version, I’m planning a tutorial just for you to give you the capability to duplicate this effect, so stay tuned. The keyboard shortcut for Haze Removal is CTRL/CMD>ALT>Z.
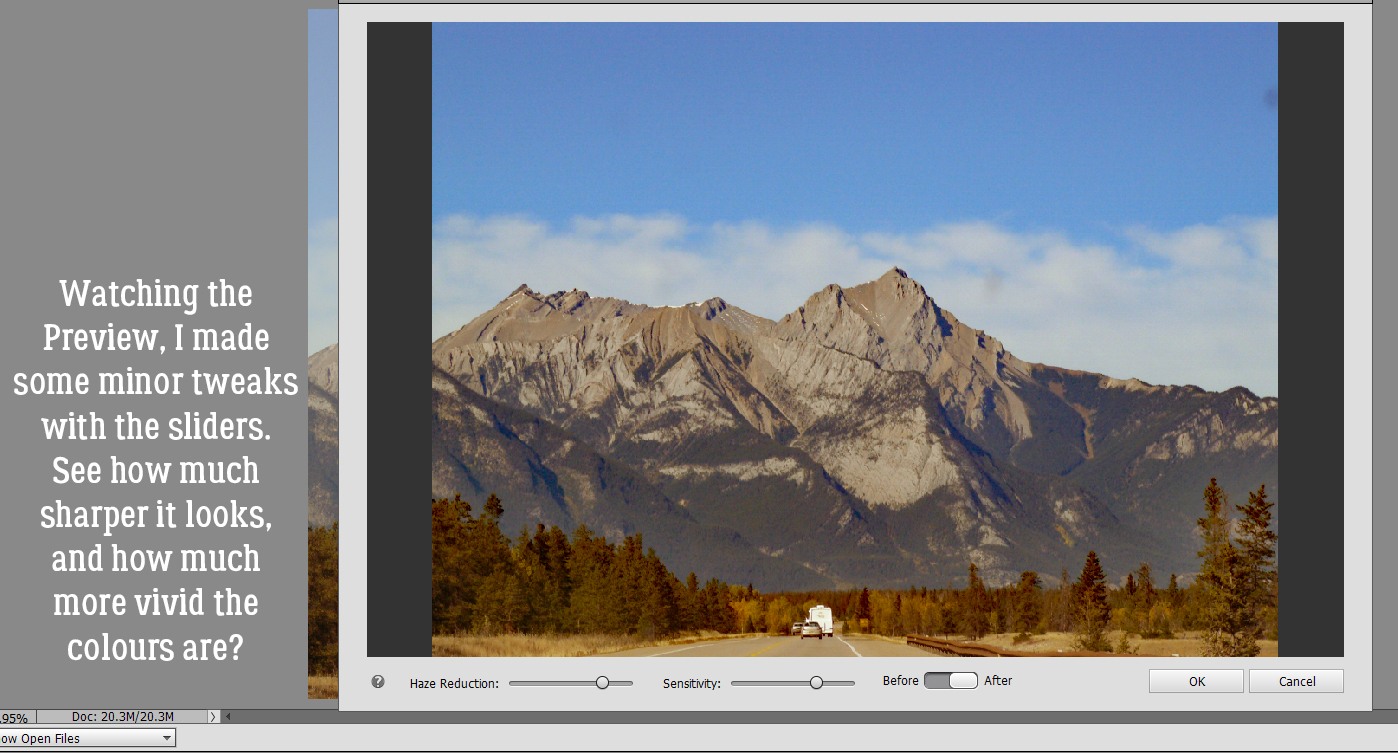
The tool options for this command look like this. There’s a large preview to show what the image will look like once committed, and can be adjusted to obtain the best image. There’s a little bit of the original image peeking out along the left side, so you can see how this command brightens and deepens colours and sharpens the image a bit.
What do you think? Is this a LOT easier than using the Enhance>Remove Color Cast command? Is it much more useful? I think so!
Next Tuesday I’ll have another quick title technique for you. And then it’ll be June…………………………….
PDF Version: https://bit.ly/3lWUZsm
![]()
Jan this is a great tutorial. It works! Thank you.
Thank you. Can’t wait to try this on pictures I took of cedar waxwings in my yard. I had never seen them before, camera’s white balance was off, and every picture has a blue cast. Using the ‘remove color cast’ didn’t help much.
Will try this technique on pictures I took while in an underground cave with yellow cast from spot lights used. Thanks!
It’ll work, I promise! If you find there’s still too much yellow cast, maybe run the process again then adjust the Opacity of the layer mask until you’re happy with the result.
I’ve been really frustrated with the Remove Color Cast command myself. If there isn’t something visible in the photo that is ABSOLUTELY black, white or gray, it doesn’t help at all. That’s why I was so impressed with this trick.
Yep, it works! And it’s easy!!
i use remove colour cast all the time .. these are great tips to go even further with it! thank you! (and yes, that last thing you said about something that’s not an ABSOLUTE value)