Creating and Shadowing Transparent Elements
![]()
PDF Version : https://bit.ly/4cJAs3t
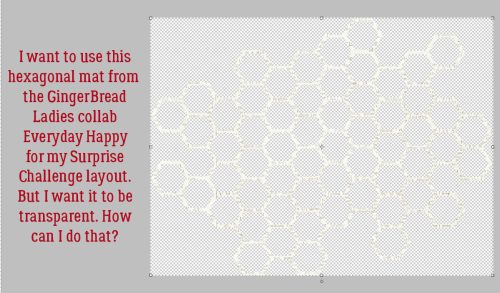
Let me tell you a secret. I really don’t like hexagons. Like REALLY. Possibly because of my husband’s obsession with board wargames, which are played on a hex-grid map, are horrendously expensive, eat up huge chunks of storage space in our house and enormous chunks of his time and attention. Maybe. But all that being said, I decided I would take a run at this month’s Surprise Challenge, hosted by Magical Scraps Galore, which requires the use of hexagons. They had to be there, but they didn’t have to be the focal point, right? So I decided I’d use a glass honeycomb created from a paper mat I found in the GingerBread Ladies‘ collab Everyday Happiness. [Yes, I got the kit’s name wrong on the screenshot. Oy!]
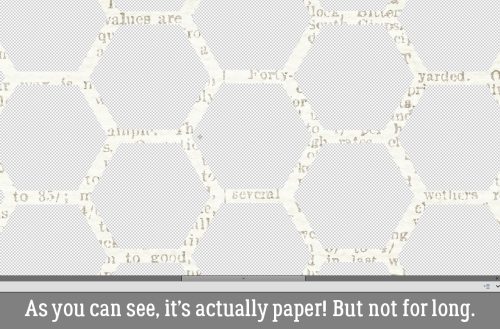
Zoomed in, it’s easy to see it’s actually paper.
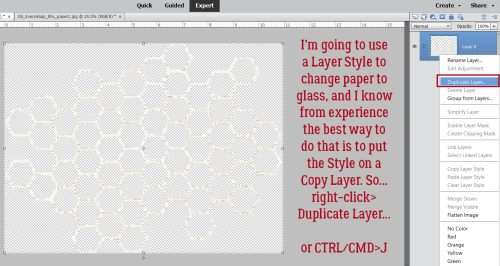
These next few steps turned out to be unnecessary. Feel free to jump 3 steps ahead! There is a purpose for applying Styles in this way, as in when you want to add a Glass, Acrylic or Epoxy Style but preserve the colour or other detail of your original layer. Anyhoo… this is the process I used for this technique, so it stays in. I made a Copy Layer: right-click>Duplicate Layer… OR CTRL/CMD>J.
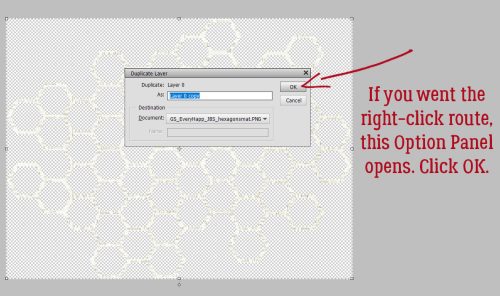
If you opted for the right-click route, this Option Box pops up. Just click Ok.
Then I turned off the Visibility for the original layer.

How many of you out there aren’t aware of how to add and find commercial Styles (and Brushes) to your electronic devices? Do we need a tut on it?
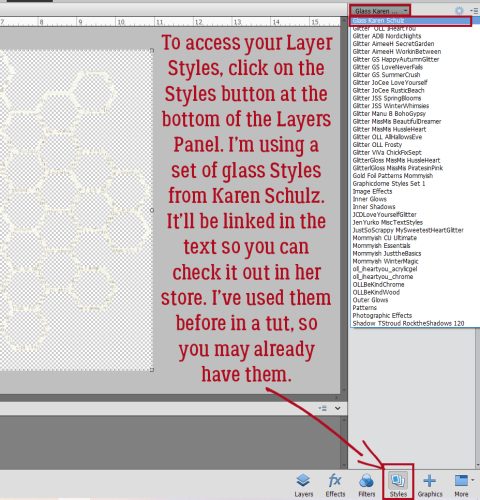
To access the Styles you have installed on your device, click on the Styles button at the bottom of the Layers Panel. It opens the Styles menu. Scroll through until you find the Style set you want to use. I’m using Glass Styles from Karen Schulz. Click HERE to see them in the store.
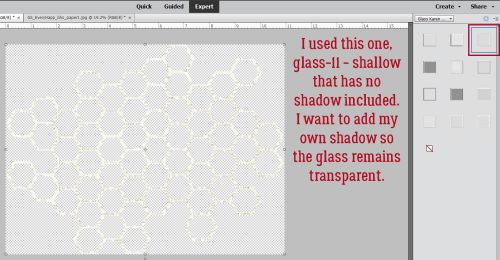
I wish I could still show you the labels that show when you hover the cursor over these. I chose the “glass-11” version, one that has a fairly shallow Bevel and no shadow. This is an important factor. An integrated Drop Shadow will cause the transparent parts to turn gray everywhere – see the thumbnails in the Styles menu in the screenshot – and I don’t want that!
There! The honeycomb is transparent and has a slight weight to it. Against the transparent background, it’s hard to see, but not for long.

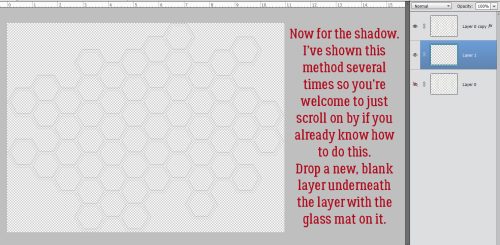
Even transparent objects will cast a shadow, so I’m going to add one to my glass mat using my usual custom shadow technique. Some of you will already have tried it and know how it works, so I won’t be offended if you scroll on by. I start by adding a new blank layer UNDERNEATH the Glass Layer.
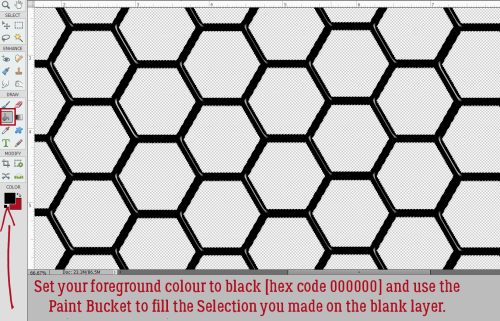
The blank layer is highlighted as being the active layer. That’s what you want. Now, CTRL/CMD>click on the Glass mat’s Layer Thumbnail. That will Select the edges of the mat, but won’t change the active layer. You can see the marching ants in the screenshot, which helps make the glass visible too.

With your Foreground Color set to black (hex code 000000) use the Paint Bucket (keyboard shortcut CTRL/CMD>K) to Fill the Selection. It’s ugly but not permanently so.
To get rid of the marching ants, you can click Select>Deselect or use the keyboard shortcut CTRL/CMD>D.

Now I’ve decided that my light source is in the upper left of the image, so I’ve used the arrow keys to Nudge the Shadow Layer down and to the right a bit. Keep in mind how much your object is raised off the page when determining how much to move your Shadow Layer.

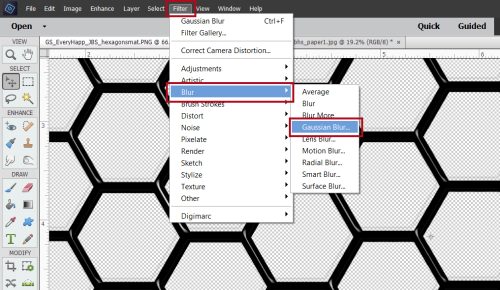
Next, to soften up the edges of the Shadow. Click Filter>Blur>Gaussian Blur…
In this screenshot, you can see the glass much more easily. I moved the slider to the right until I liked the effect – it shows up on the canvas in real time. The Radius is 5.6 Pixels. Of course, it’s much too dark, but the finished product won’t be.

I next changed the Blend Mode to Linear Burn. This is to allow the colour of whatever goes underneath this mat to show through. If I left it set to Normal, it’ would show as black/gray against the paper.
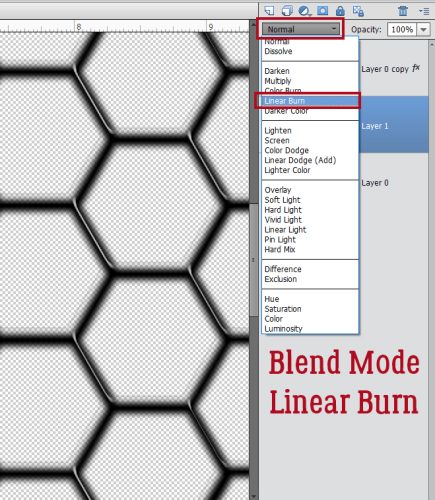
Then I dropped the Opacity to 40%. Make sure to keep these steps in order: change Blend mode first, then the Opacity, otherwise it’ll mess up your hot keys. I think it looks about right. Sort of. If this was a solid object, it would be done.

But it’s GLASS. So I reSelected the edges of the Glass Layer (ignore the active layer in the screenshot because it’s going to change). CTRL/CMD>click on the Glass Layer thumbnail.
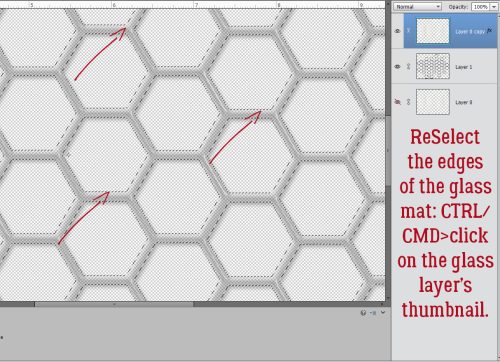
With the SHADOW Layer active, click Edit>Cut OR CTRL/CMD>X. That will remove the Shadow lying underneath the Glass.

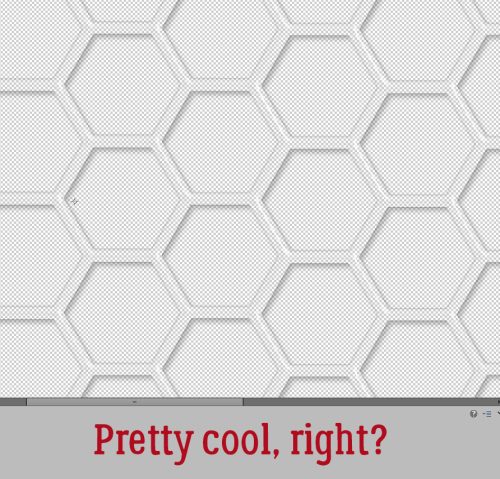
There! You can see the Shadow, the Glass is easily seen and it looks realistic. This Shadow technique will work nicely for acrylic, epoxy and vellum too.
And with paper behind it, it looks spectacular!

![]()
Wonderful tutorial, Jan! I love the idea of using the glass styles … will have to try that sometime. Thanks!!
More than cool! FREAKIN’ AMAZING! Thanks so much!
“add and find commercial Styles (and Brushes) to your electronic devices? Do we need a tut on it?” Yes, I would benefit a lot with that tut!
Thank you for this tut on shadowing a glass object.
Thank you! This is an easy-to-follow tutorial, and I always need a refresher on shadowing transparent or vellum.