Greatest Hits: Paper Tears Updated

You might wonder why I’m doing another rerun here. If you worked through the shadowbox effect tutorial from earlier this month, you might recall that Jill‘s request had two examples of shadowbox techniques. I showed you how I duped the first one, and mentioned that when I showed the second one, I’d be focusing on paper tearing. Since I wrote the original posts I’m going recap today, I’ve learned a few things… and those tears can look even more realistic. Yes, you read that correctly: I’m doing a double-header today! The first technique tut is 9 years old already…
THIS LOOKS REALLY LONG!! DONT PANIC. IT’S NOT THAT BAD!!!
Obviously, the easiest way to add a paper tear to a layout would be to use an already-roughed-up paper from any of the GingerScraps Designers, or to use a Photoshop Elements Action that automates the process. But if you don’t like those options you definitely can create your own tears.
If you were to tear a piece of high-quality cardstock, which generally has colour applied to one or both sides with a white core, you’d get a bit of an irregular edge, with varying amounts of white backing paper showing along it. So to demonstrate this, I’ve used an embossed cardstock from Ooh La La Scraps‘ simply gorgeous bundle You and Me. Fortunately for me, there is also a solid white, textured paper in the kit too, so I’m going to use it for the core. (For the first few steps, I turned the visibility of the white paper layer off.) And to make it easier to see what I was doing, I put a piece of gray patterned paper behind it all.
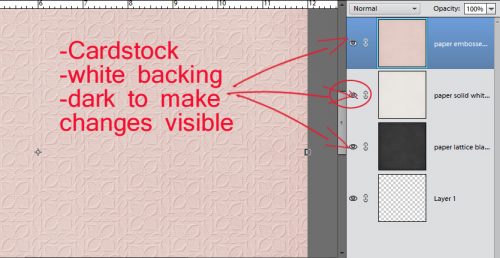
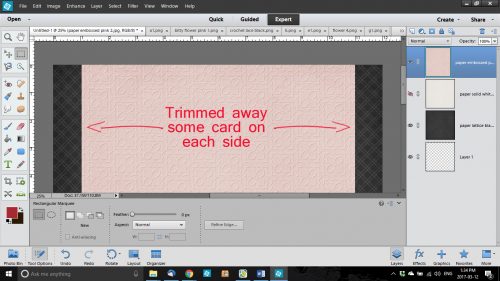
I wanted to have tears along both vertical edges of the paper and I wanted some of the background to be visible. I also wanted to Work Smart Not Hard. So I selected the layer with my pink cardstock on it and using the Rectangular Marquee tool, I selected a portion of paper then Edit>Cut [WSNH: CTRL/CMD>X]I trimmed away some paper from each side. You’ll see why this is a WSNH tip as we go along.
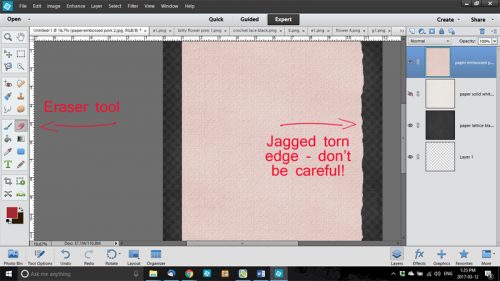
I then selected the Eraser Tool and a relatively small brush size. [Update: Instead of using just a round Basic Brush for this step, check out the Artistic Brush set that’s included in your software. There’s a Rough Bristle option in there and when you set the Size to about 100 pixels, it adds some amazing texture to your tears.] Working along the right side of my canvas, I erased away some of the pink cardstock in an irregular, jagged manner. Don’t try to be too careful because you want it to look… well, TORN. If it might make it easier for you to visualize, take a real piece of paper, any kind, and tear it. For real. Then look at the edge. It’s not gonna be perfect!
Because I wanted both sides to be torn, I repeated the process on the left side of the canvas too. You may have noticed that I broke my own rule of only erasing on a Layer Mask. If you’re wondering why, it’s because it really doesn’t matter if I erase too much of these papers. It doesn’t have to be perfect. It’s better if it ISN’T perfect.
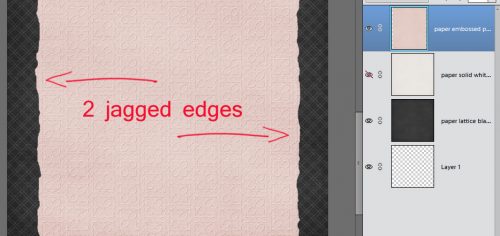
Once I was happy with the edges of my tears, I turned the visibility of my white paper layer back on and trimmed away some of it along both edges in the same way I did with the pink. It made me so happy to see that the texture of the white paper was the same as the pink – that core layer should have some texture to it too. [Update: if you’re using a flat paper or a Fill Layer for your white core, you can get some texture by using a Filter>Noise>Add Noise set to 5%, Gaussian Distribution and the Monochromatic box ticked. If it’s too in-your-face, you can tone it down by adding a Blur>Gaussian Blur>1 pixel.]
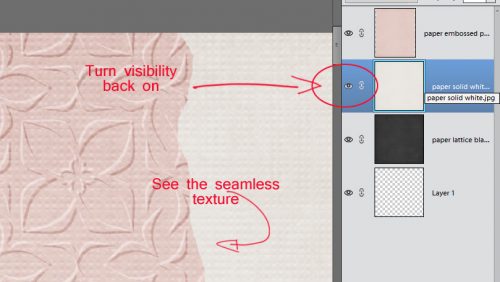
The next step was to erase the edges of the white paper just like I did with the pink cardstock. Zoom in close to your work so you can see exactly what you’re doing.
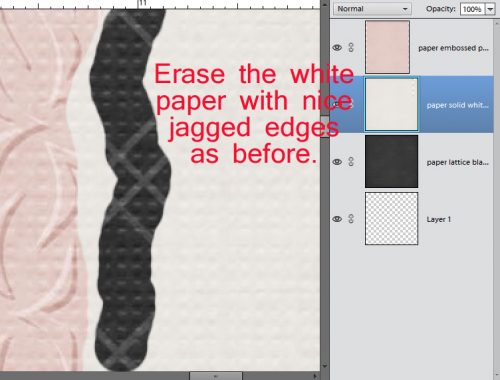
This time I erased close in to the pink paper in some places and veered away a bit in others.
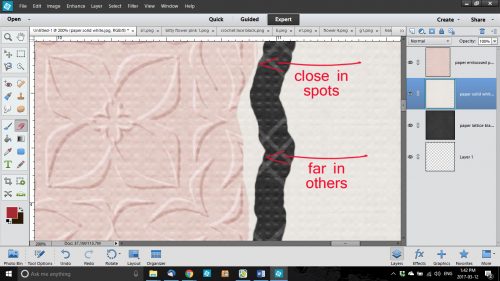
When you zoom back out, there may be some bits of white paper still there. These have to be erased too.
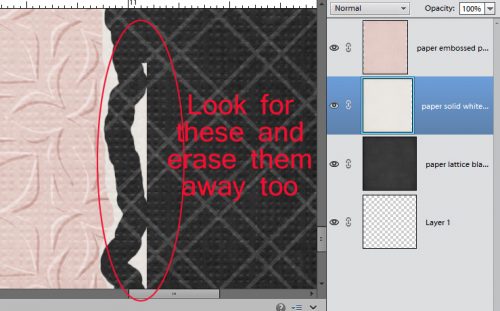
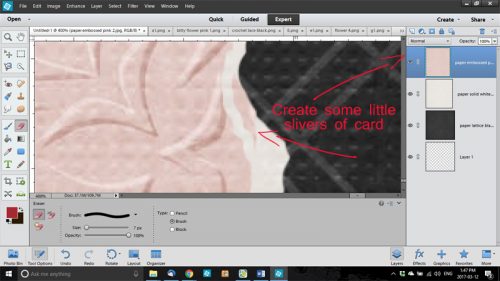
After I had my white edges the way I wanted them, I selected the pink cardstock layer again and went back with the Eraser Tool and created some little slivers of torn paper as shown below. This would happen with real cardstock, so I always include a few little shreds.
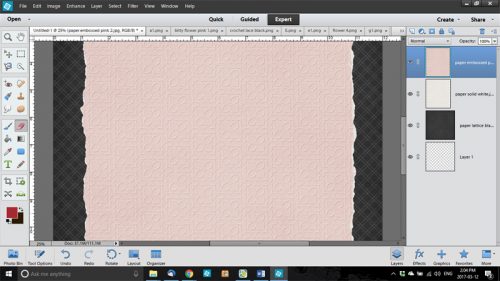
Here’s a full screen view of the two torn edges.
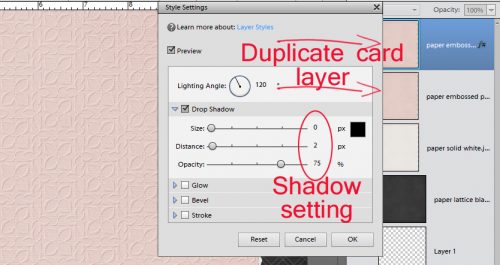
The last step to ensuring realism is to add a very infinitesimal shadow to the cardstock layer. I like to have shadows visible on both edges, so to accomplish that I Duplicated [WSNH: CTRL/CMD>J] the pink cardstock layer before I applied a drop shadow. I used a simple shadow, with the following settings: Size 0, Distance 2 and Opacity 75. (These aren’t hard-and-fast, use whatever settings look the most realistic to you. Just remember them for later.)
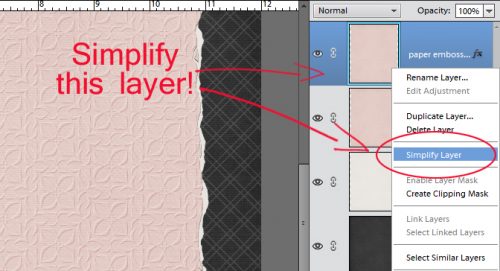
When I had my shadow just so, I Simplified the layer. Doing that locks the shadow to the cardstock so it doesn’t change later.
Then I did the same thing with the second pink cardstock layer, with one difference – the angle of the shadow.
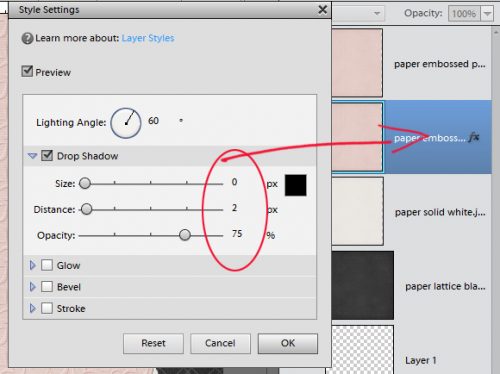
After both layers had that little extra definition provided by the shadows, I merged the two pink cardstock layers with the white paper layer. [WSNH: Select all layers then CTRL/CMD>E]
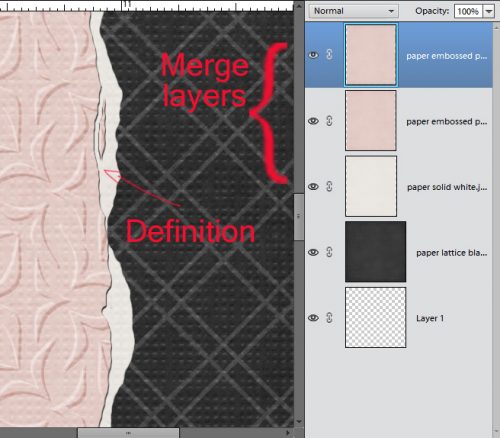
And here’s the finished layout.
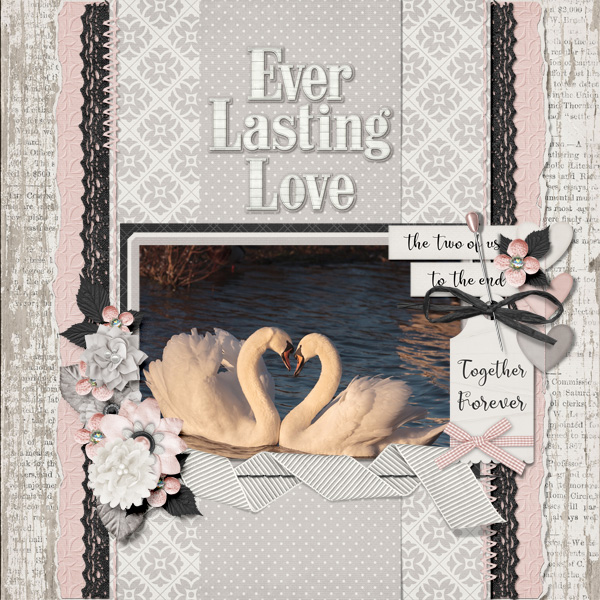
Now, the second trick I’m going to add is to Copy a paper tear from a template! This one is so simple!
There’s a way to import a paper tear from a template into a layout-in-progress that only takes a few easy steps and very little time. However, you must have a template with a paper tear on its own layer, or a commercial-use paper tear template. They have their own limitations, and may not give you the look you’re after. So try this.
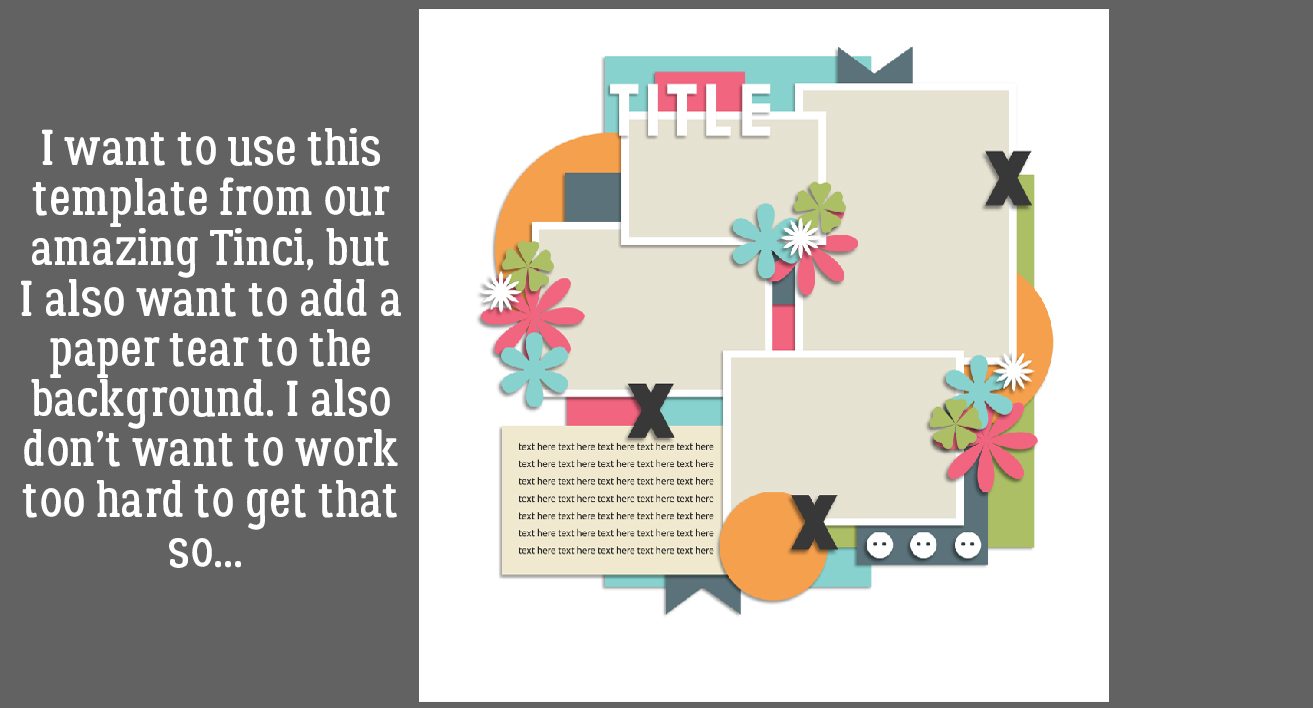
I started out with this template from (former GingerBread Lady) Tinci Designs’ Second Chances V.2 collection. I resized all of the layers (except the background paper) to allow for adding a tear.
I was waiting to find a template like this one from CarolW Designs’ Spring Dawn. That tear is moveable!! But how can I move it onto Krizstina’s template?
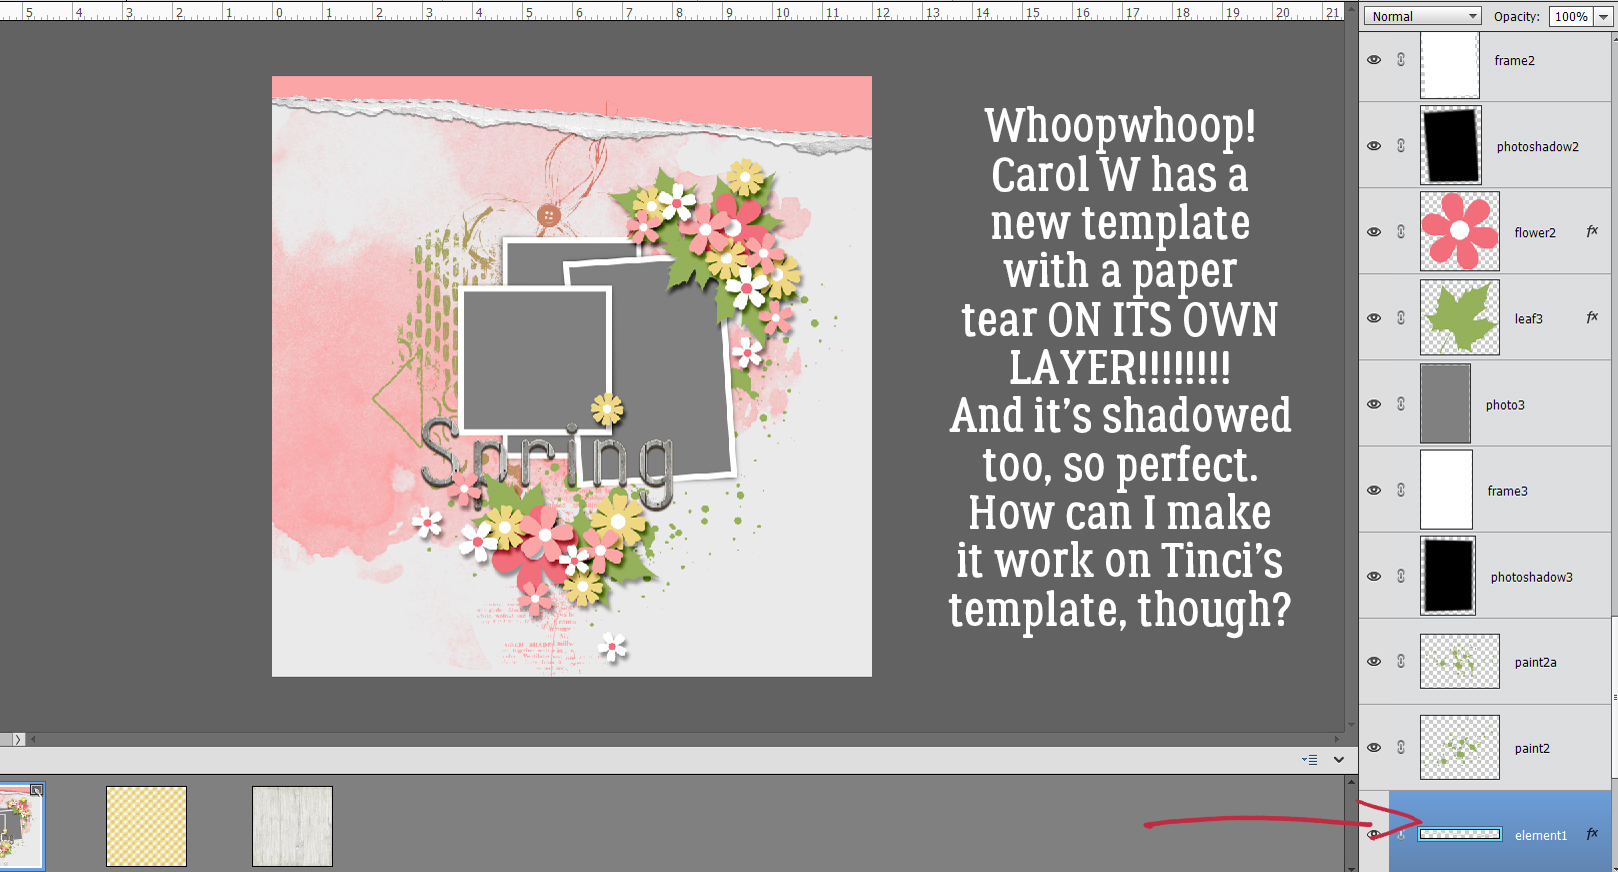
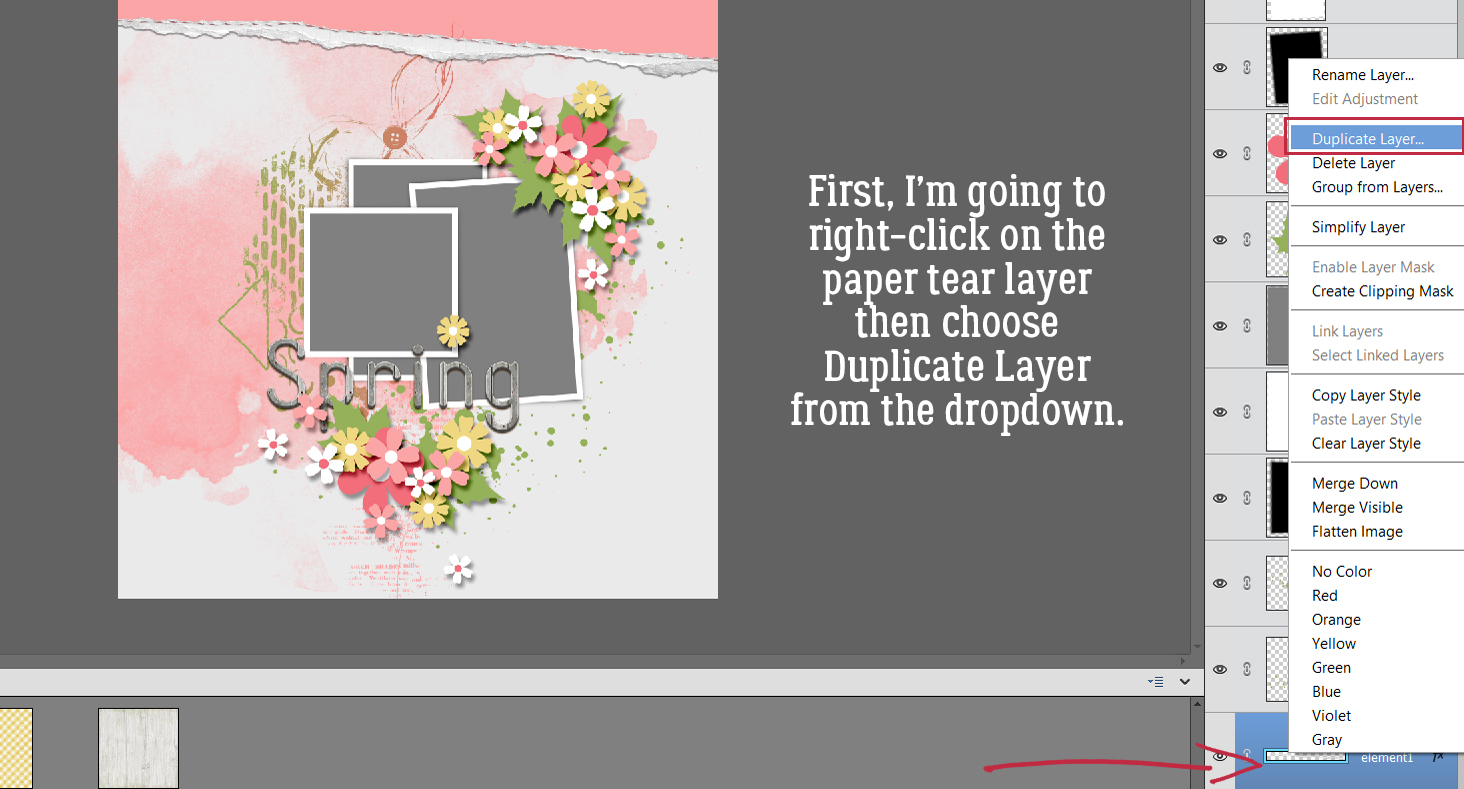
There are a couple of steps that need doing first. But to start, I found the tear layer in Carol’s template, right-clicked on the layer and chose Duplicate Layer from the dropdown menu.
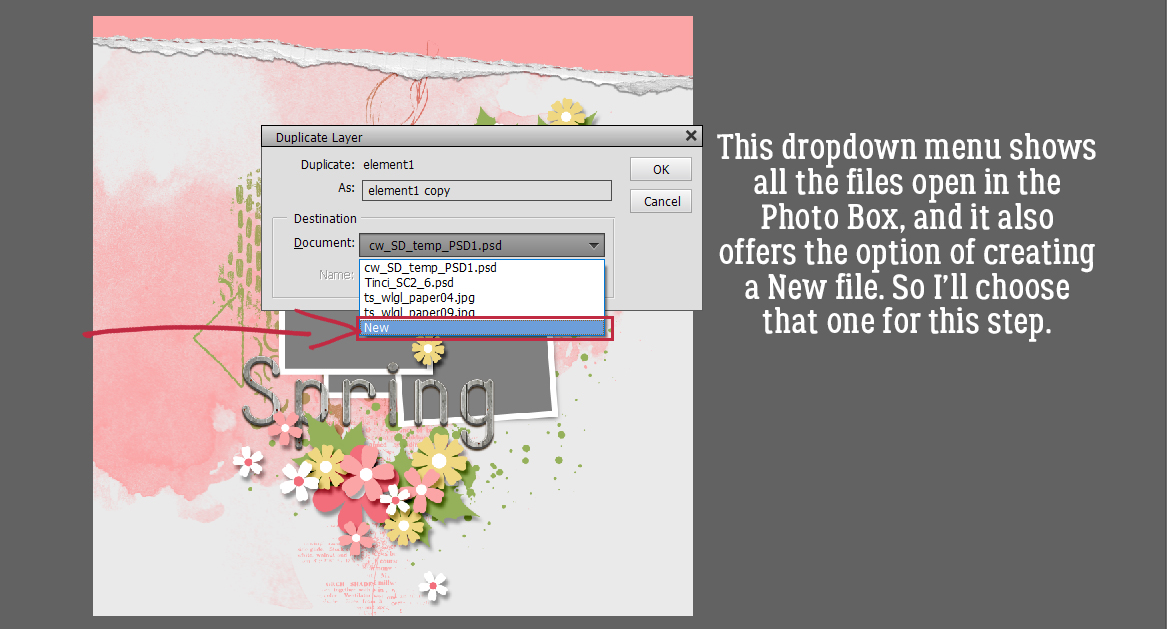
Now Elements needs to know where to put it. The new menu shows all the files currently open in the Photo Box, and offers the option of creating a New Document. That’s what I’m going to do.
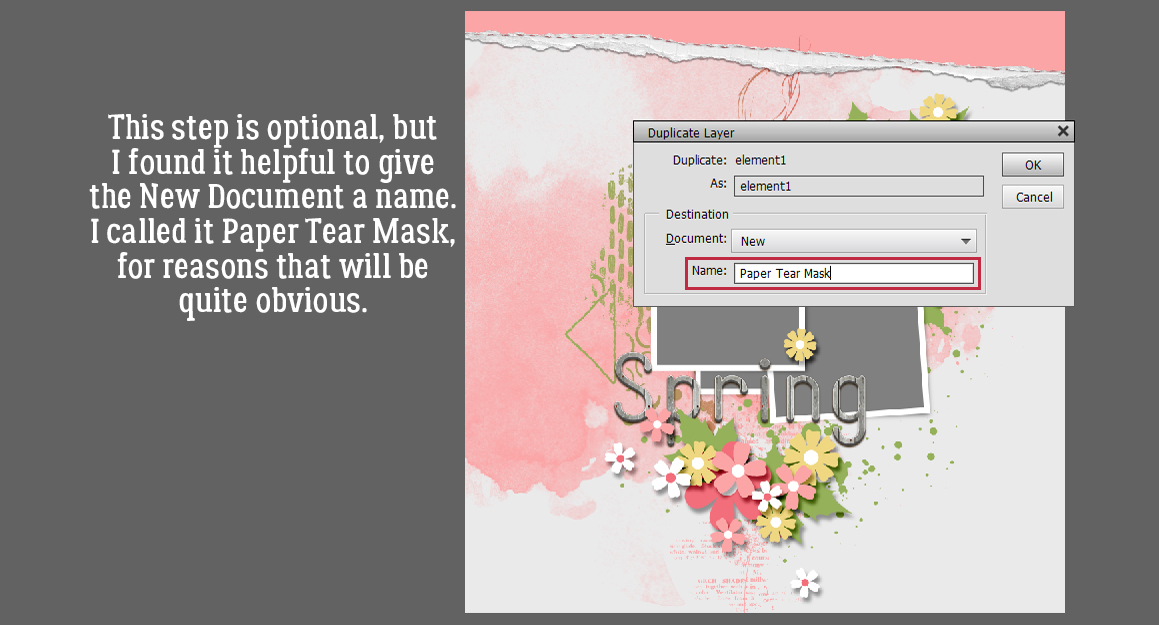
This step is completely optional. I chose to give my new document file a name, Paper Tear Mask, for clarity.
And this is what happens.

But look at that Bounding Box! I was thrilled to see there’s more to the tear that can be used just by Resizing it.
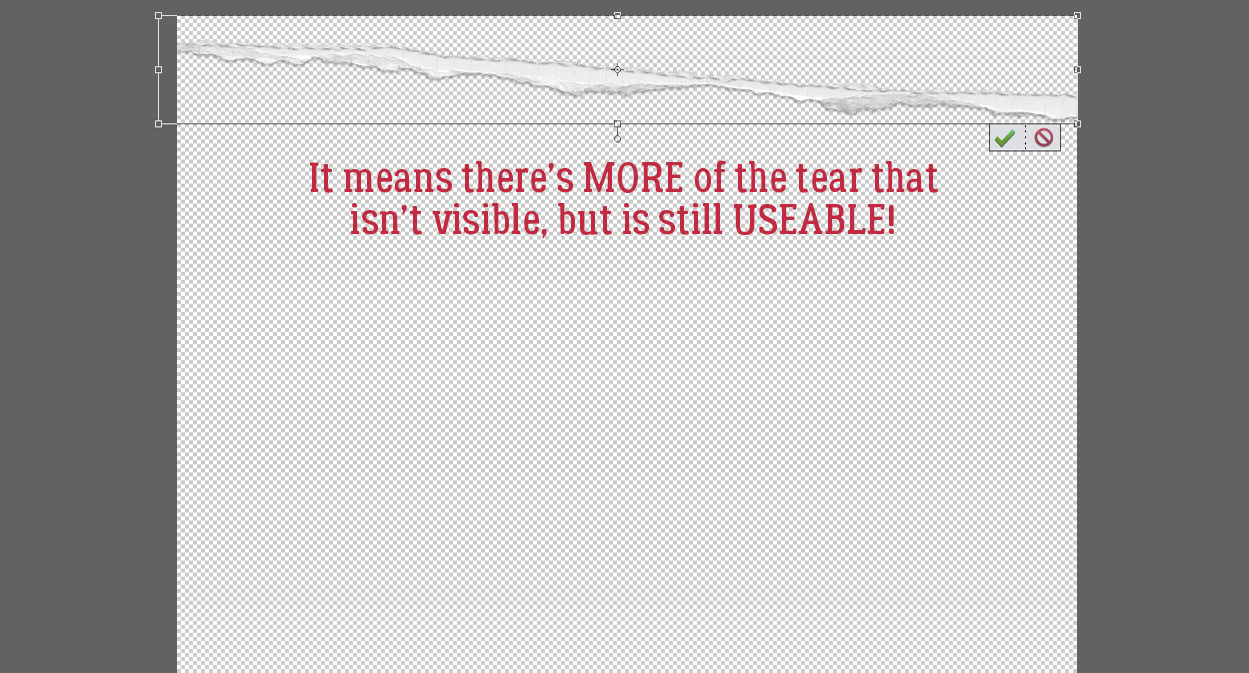
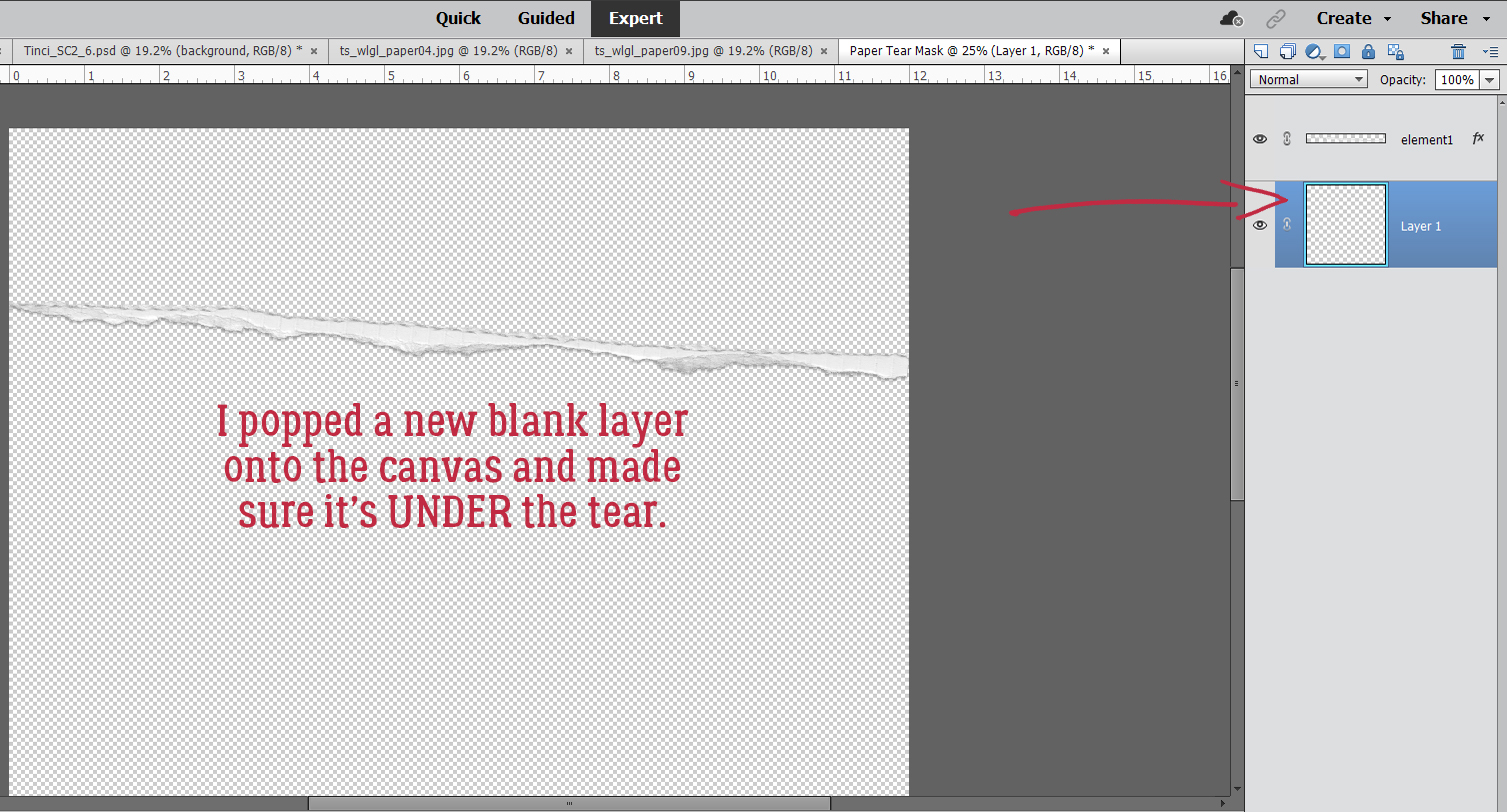
Now to make it useful and not work too hard while I’m at it. I added a new blank layer underneath the tear layer. Just hold down the CTRL/CMD key and click the sheet-of-paper icon at the upper left of the Layers Panel.
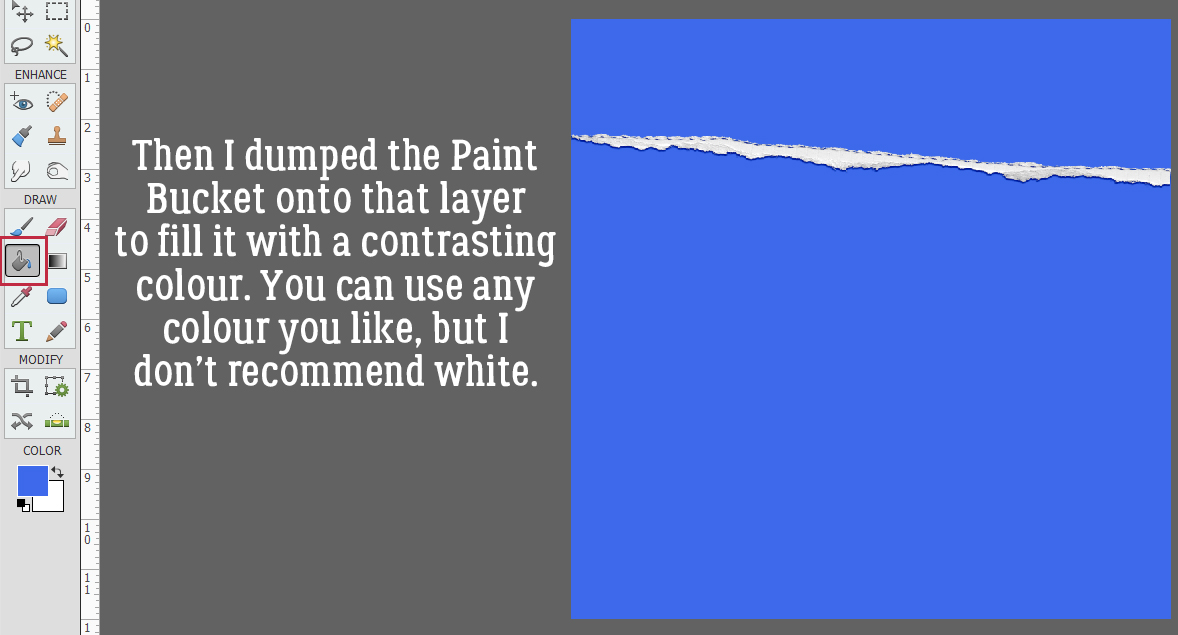
Next, I used the Paint Bucket Tool to fill the whole of the blank layer I just created. Pick any colour you like (but not white) for this step.
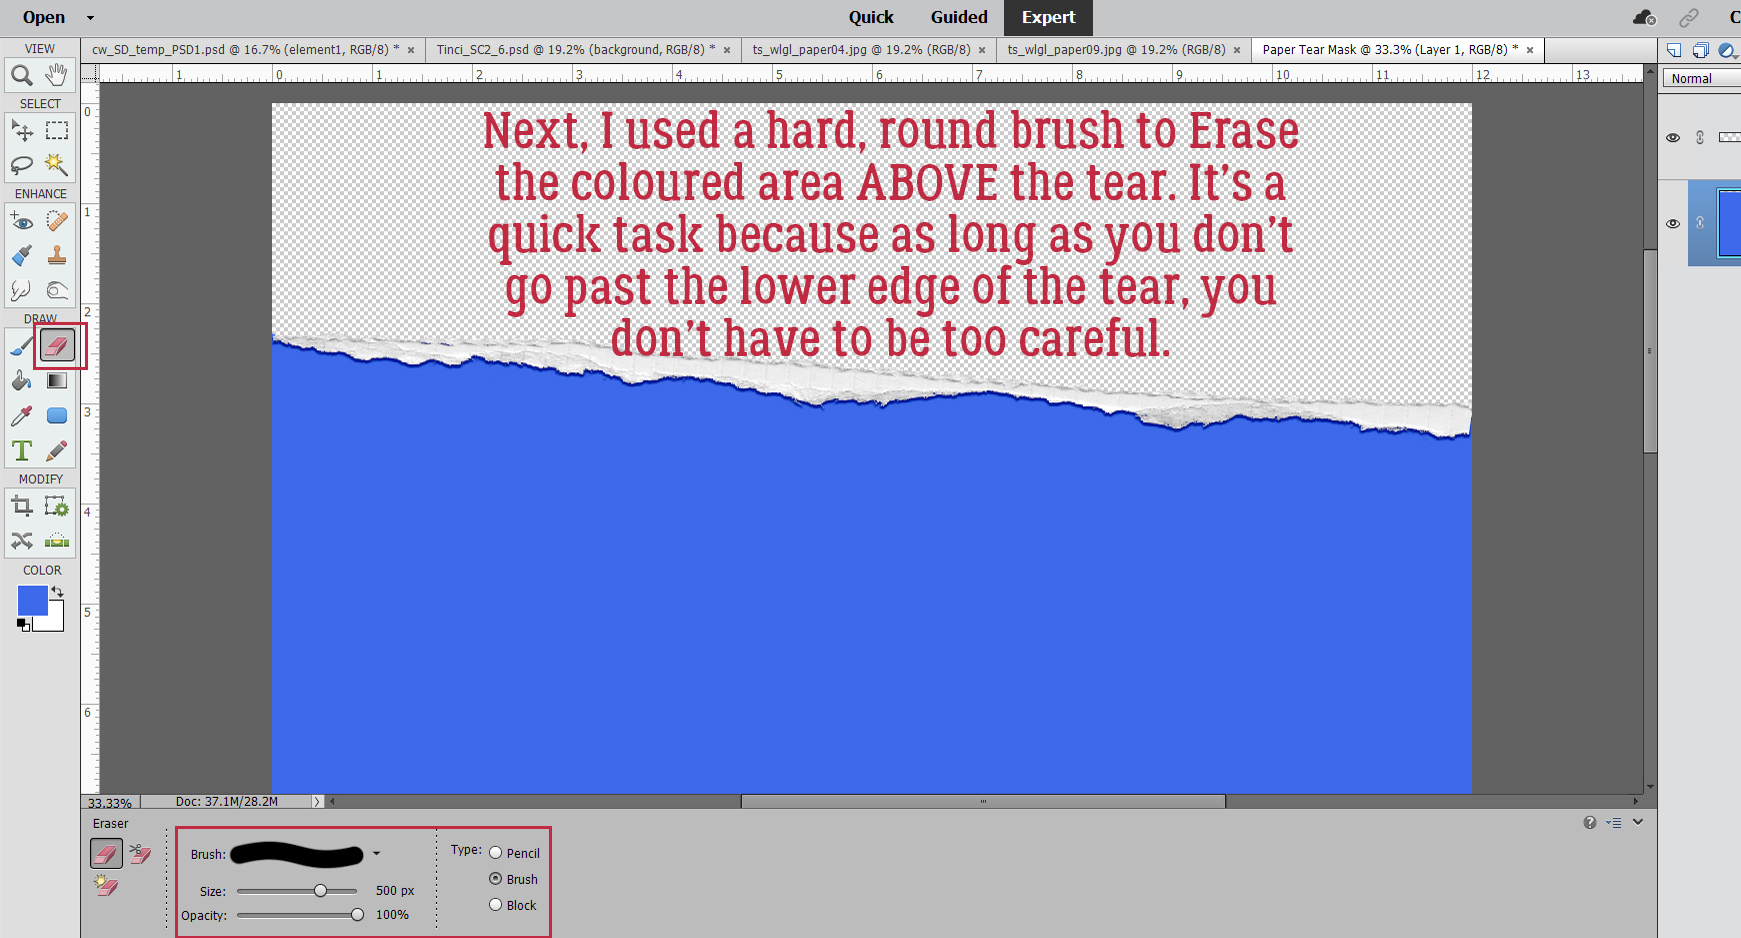
To turn the coloured part into a Layer Mask so papers can be Clipped to it, I used a hard, round brush within the Eraser Tool to remove the coloured part above the tear. This can be done quickly because as long as I don’t cross over the tear into the lower part of the coloured area, I can just scrub it away.
And that’s it for creating the tear mask! To move it over onto Krizstina’s template, I’m going to Activate both layers by click-shift-clicking on each of them, then right-click to open the dropdown menu to Duplicate Layers…
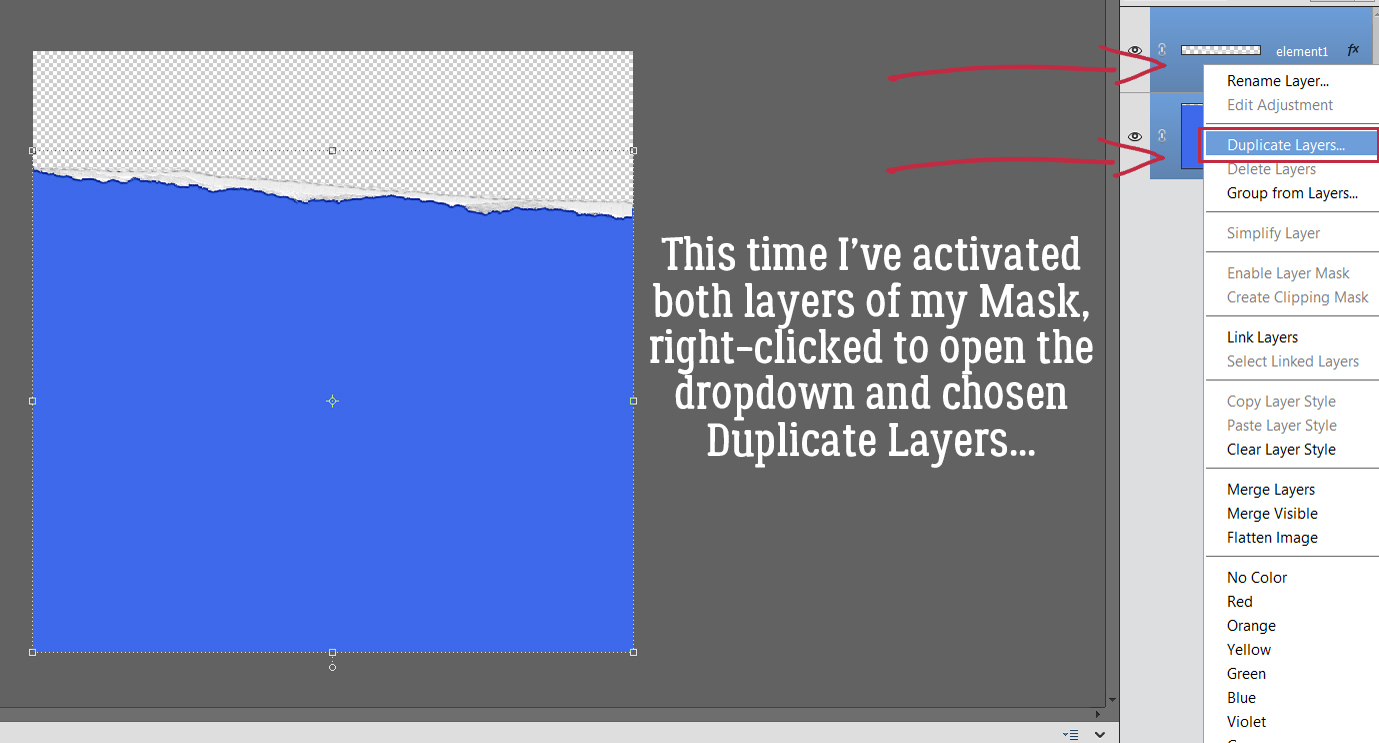
This time, I’m going to send them onto the Tinci template.
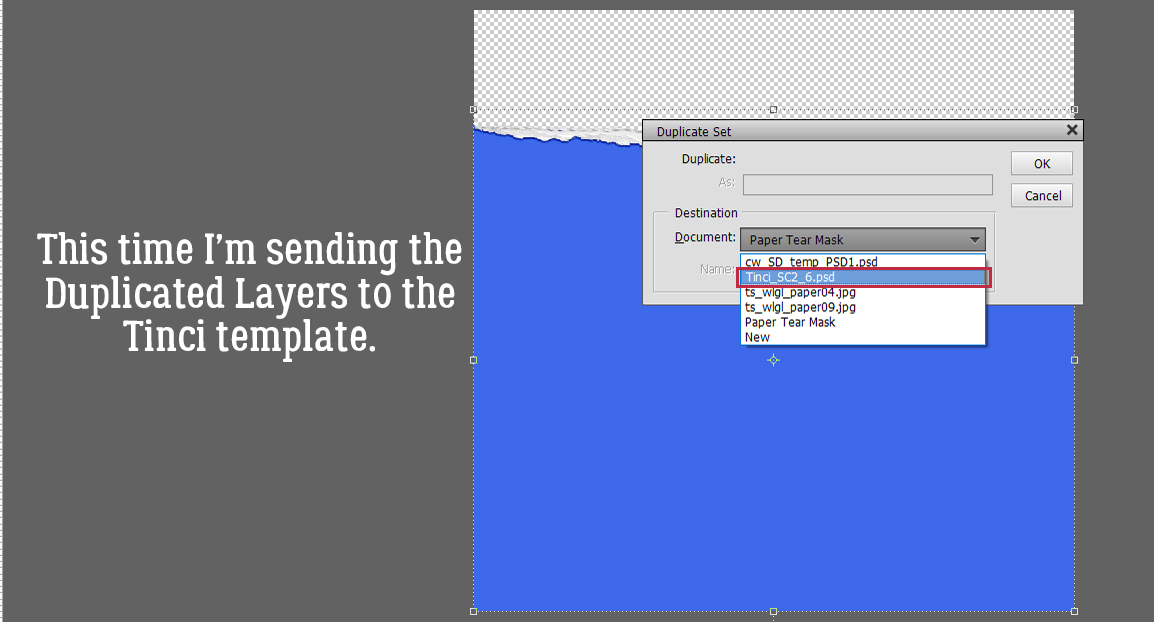
‘MKay. there are the tear and the mask, placed on top of the background paper and underneath the rest of the layers.
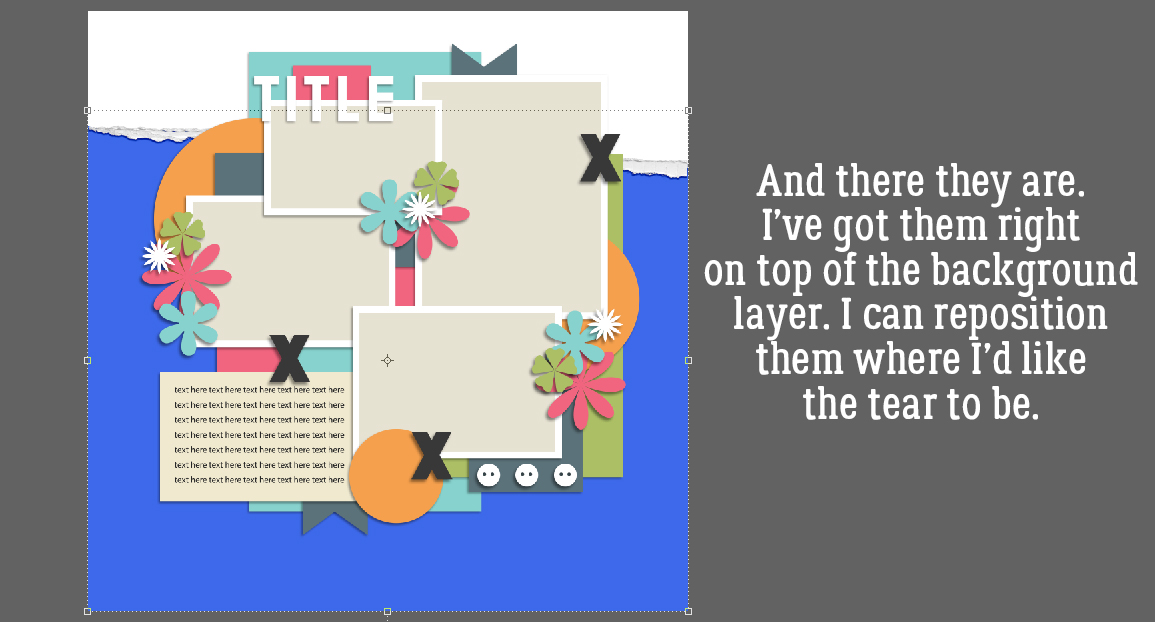
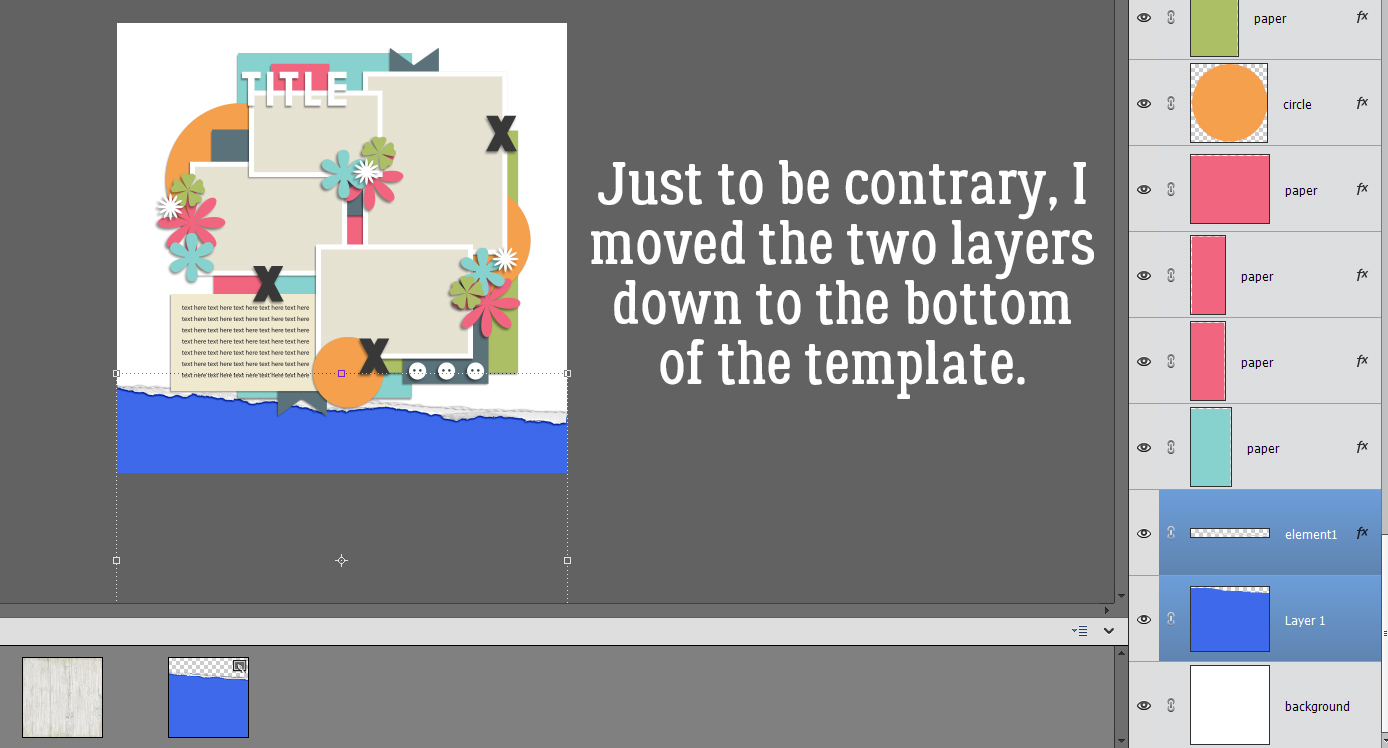
I don’t like the tear up there, just to be a non-conformist. So I’ll move it.
And all that’s left is to add the papers. I’ve used North Meets South Studios’ March 2022 Daily Download kit, When Life Gives Lemons. I want the woodgrain paper to be my background and the yellow gingham to be a tablecloth, sort of – maybe one of those vinyl ones with the fuzzy background and now it’s torn . By Clipping the woodgrain paper to the coloured part I added to the tear, that’s what I get. Cool, right?
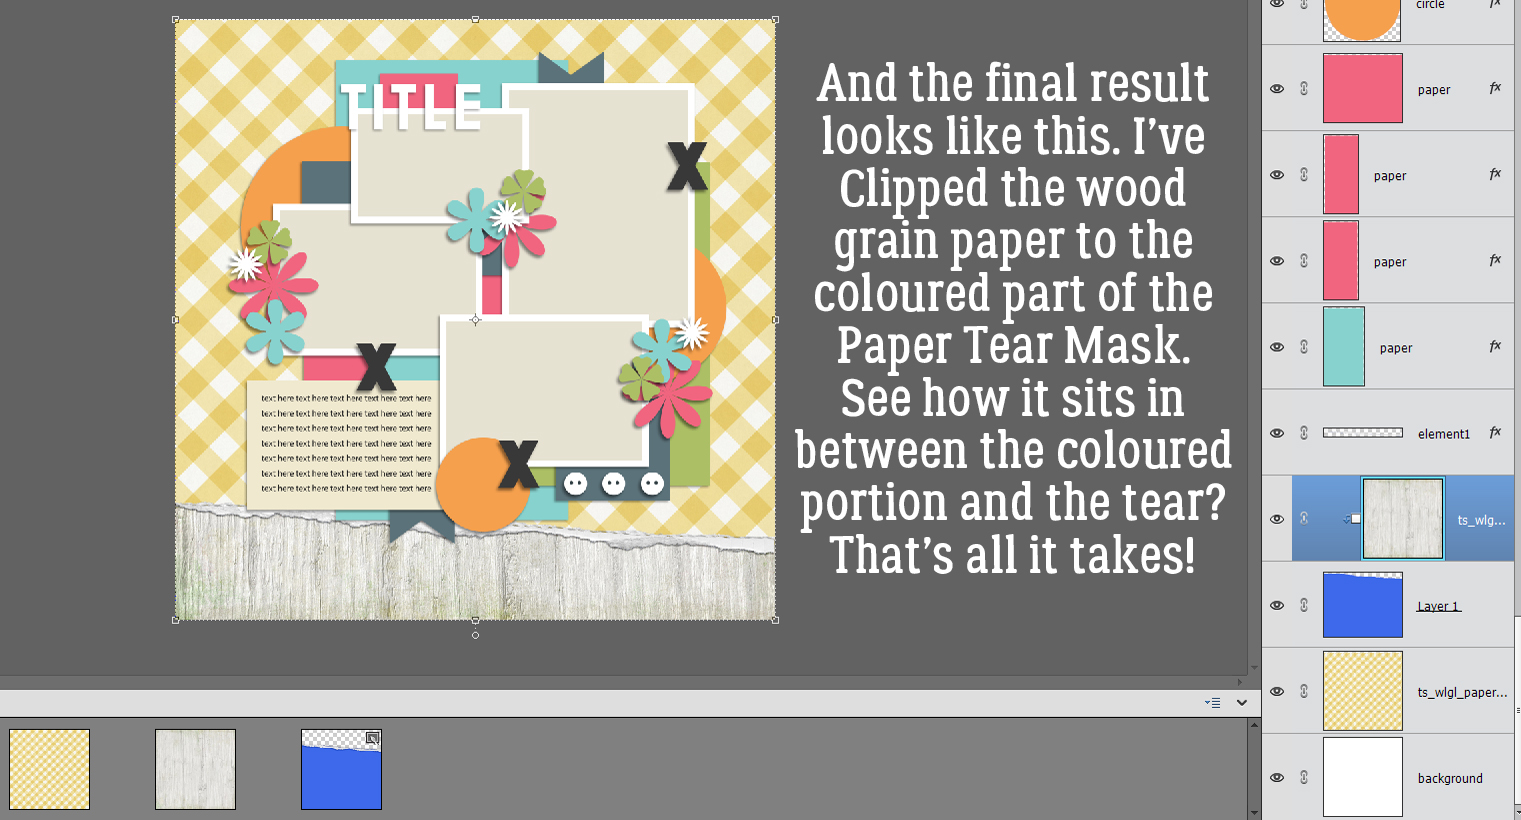
Now, if you’d like to do this technique again sometime, you can Save your work As a .psd or .tiff file and reuse it again and again. By having all that coloured area, you can pretty much put the tear anywhere!
So, how will this novella make next week’s tut easier to follow? The review will ground you in the basics, so when I throw in some curls on those torn edges, you’ll already have great tears to play with! Have I piqued your interest?

Fantastic tutorial Jan – thank you!