Restoring those Vintage Snapshots
![]()
Halfway between my birthday and Mother’s Day, I had the most amazing visit with some relatives I’d never met before. One of the ladies I spend the day with is my Grandmother’s first cousin, who is actually only four years older than my mother. This delightful woman brought along a huge collection of vintage photos, some of them well over 100 years old. Today I’m going to show you one of them and take you through a Guided Edit to restore it. (Spoiler alert: This is NOT a quick edit. It took me about 2 hours to get it to the final version.)
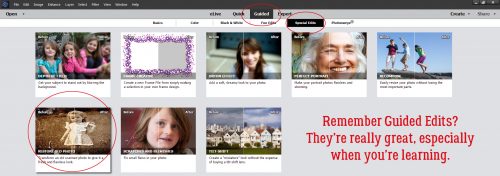
The Guided Edit I’m going to demonstrate today is simply called Restore Old Photo. It’s in the Special Edit toolbox. What I love about these Guided Edits is that everything you’re going to need (pretty much) is all in the Edit toolbox. It’s especially helpful for those who are still learning how to use their software, because each tool in the box has a little explanation of how to use it. Like a mini-tut, if you will.
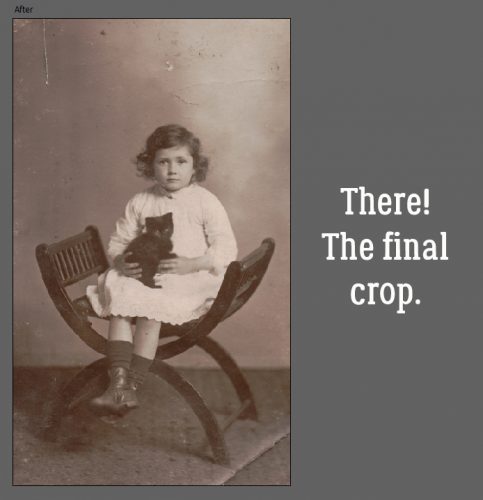
Here’s my photo. The little girl is my first cousin twice removed, Lily Annie Delia. She was nicknamed Laddie (for her initials) and she really didn’t like it! This photo was taken in the fall of 1916 and was sent to her grandmother as a Christmas gift.
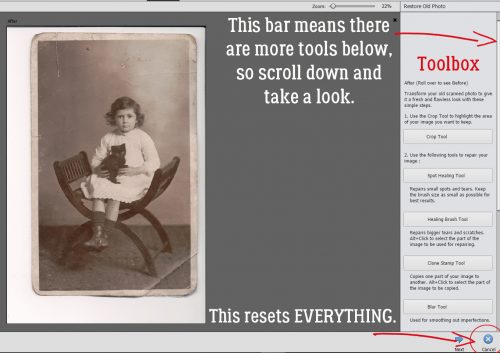
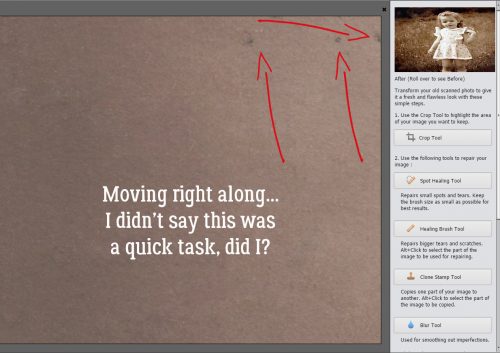
This Guided Edit has more tools within it than can be shown all at once, so don’t forget to scroll down and take a peek. Be cautious of that Cancel button I’ve circled. It resets EVERYTHING back to the original.
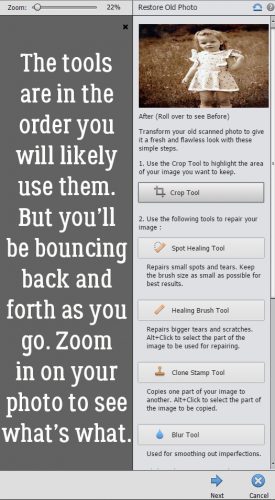
The tools are listed in the order you’re most likely to use them, but I found I was bouncing between them as the condition of the photo demanded. Zoom in really closely so you can see the imperfections better and what changes the tools create when you use them.
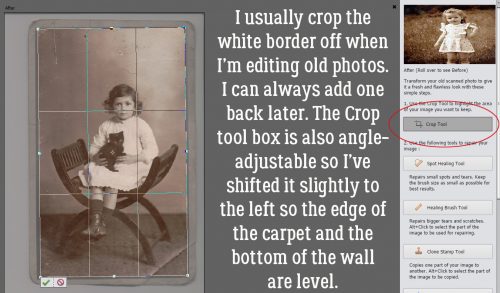
But first… This is a personal preference here. I like to crop off the white paper border before I do anything else. But there may be times when you want to leave it. Here I show you how I cropped this one. The image was printed slightly askew so I straightened the Crop window level to the demarcation between the carpet and the wall.
This is my new starting point.
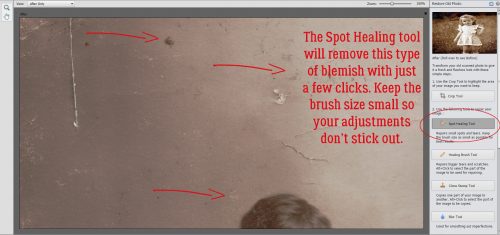
The Spot Healing tool in the Expert edit mode has a number of options for the tool, but within this Guided Edit, it doesn’t. If you’ve never used it before, you’ll be surprised at how one click can make a huge difference. The secret to a great, invisible edit is to take your time and use a SMALL diameter brush.
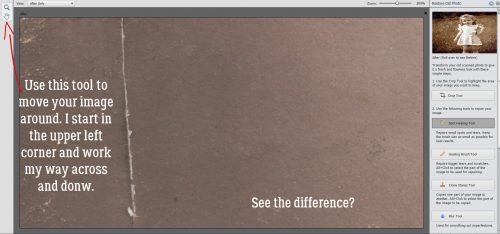
See how all that discoloured scratchy stuff is gone now? Typo spotters… that should read “down”. You can move your photo around on your workspace by using the Hand tool.
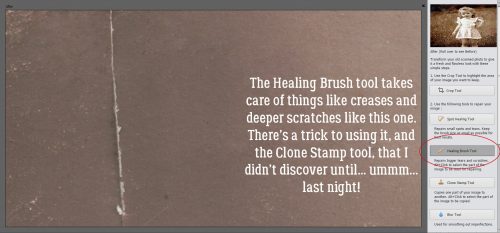
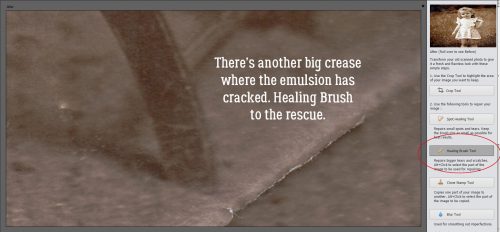
That scratch and the messy corner will need more help than the Spot Healing tool can provide, so I’ll use the Healing Brush. It’s similar to the Clone Stamp but can be stroked across a blemish like a brush. More details on how this tool works best are to follow.
Now you see it, now you don’t!
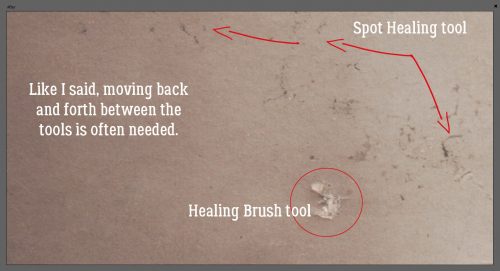
This is where I started moving back and forth between the Spot Healing tool and the Healing Brush.
This shows how sometimes there are several types of blemishes in a small area.
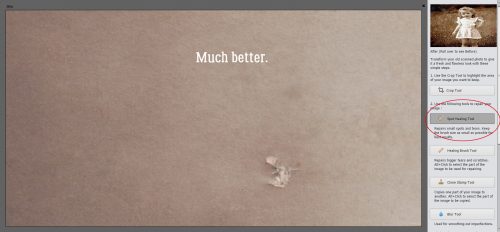
The Spot Healing tool is active in this screenshot. I’ve removed most of the discoloured stuff.
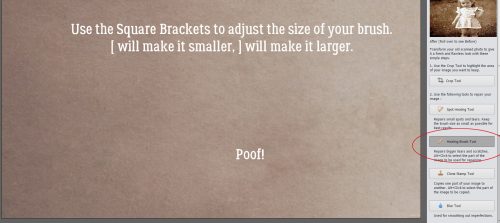
It’s very easy to change the size of the brush you’re using in either the Spot Healing tool or the Healing Brush. Those square brackets that don’t have much use outside of algebra are the volume up and volume down buttons for brushes. The [ one makes your brush smaller, while the ] one makes it bigger. I just made my Healing Brush slightly bigger than the scraped area, selected an unblemished area of my photo and painted over it.
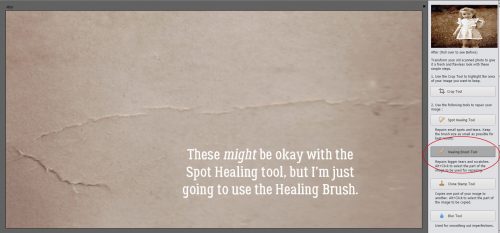
These scratches and creases might be erased with the Spot Healing tool, but I didn’t take any chances. I used the Healing Brush.
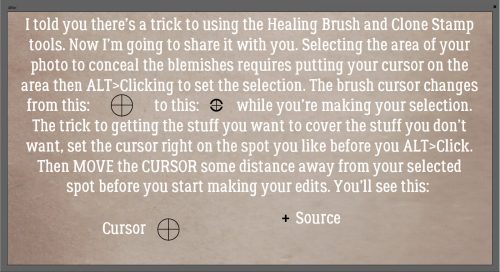
Here’s the secret to making the Healing Brush and Clone Stamp tools work to their best advantage. (And I literally discovered the trick LAST NIGHT!) If you don’t move the cursor away from your ALT>Click selection before you start using the tool, your “source” point will be… what you’re trying to cover. So always move it, even just a little bit, before you start trying to fix an area. You’ll be able to see where your source is because there will be a little white “plus” sign at the spot where the colour or texture is being sampled. Below I’ve mocked up what you’ll see, but in black to make it more easily seen.
When using either the Healing Brush or the Clone Stamp, work AWAY from your source so you’re moving from clear to unclear. You’re trying to blend away the blotches, not replicate them.
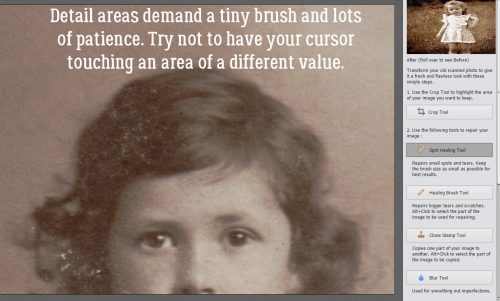
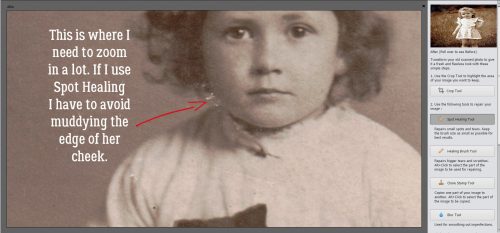
No matter what tool you’re using, when you’re in a spot where there’s lots of detail, you need to slow down and use the smallest brush possible. If you’re too close to an area where the colour or tone is different, your correction will actually only create another flaw.
Hair. It’s one of those love-it-or-hate-it things!
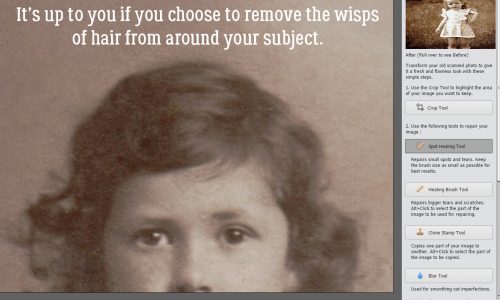
Use the zoom! The keyboard shortcuts – and + make it easy to do. Get in tight where you need to, pull back to make sure it looks right when you need to.
I used the Spot Healing tool, the Healing Brush and the Clone Stamp freely in this area. The Clone Stamp tool is terrific for repeating shapes and sharp edges. By selecting a spot along the edge, for example, I can replicate that perfect spot all the way down the rung.

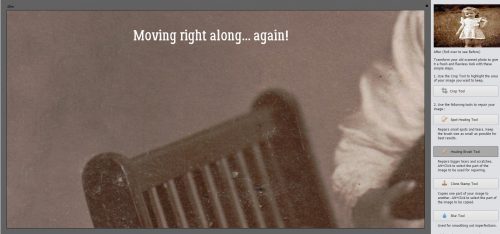
And on it goes.
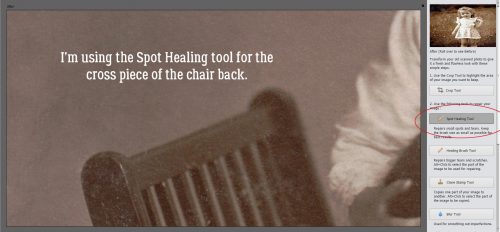
Spot Healing worked well for the cross piece here.
I made my way across the photo from the upper left corner over to the right, dropped my working area down then worked back from right to left, repeating until I’d covered the whole photo.
I could stop here, but I want to show you some more options, so let’s press on.
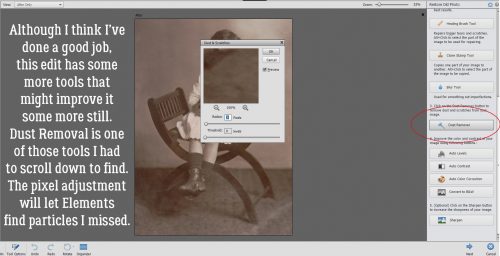
Even though I think I’ve done a great job, I think I want to use the Dust Removal tool to refine the image even more. It’s one of the hidden ones I had to scroll down to find. Adjusting the pixel size, I can tell Elements to find all the remaining flaws that size or smaller and Elements will fix them.
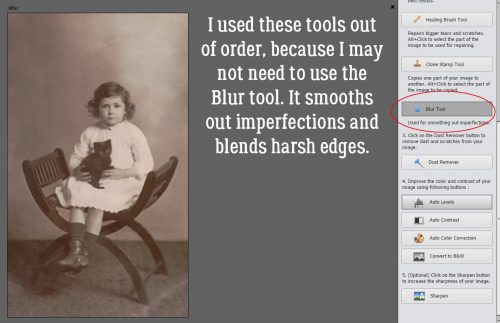
I wanted the Dust Removed first before I went on to the Blur tool. It does exactly what it says it does. It softens the hard edges of an edited area so it doesn’t stand out. I just brushed it over some of the background.
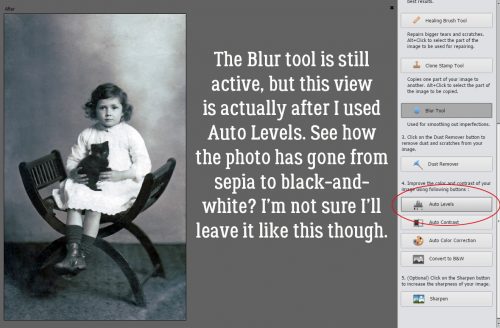
The next several adjustments aren’t using any of the tools, just adjustment modes, so the Blur tool looks like it’s still active. But this screenshot shows my photo after I used the Auto Levels mode.
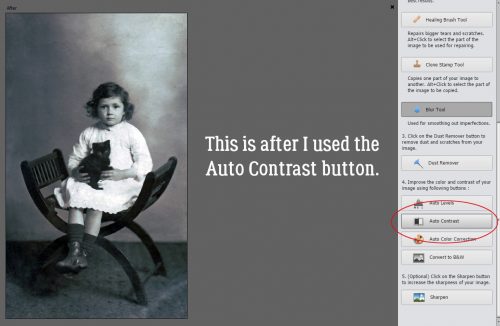
Then I let Elements adjust it with Auto Contrast.
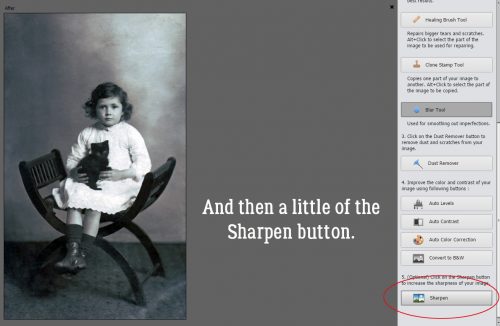
And a touch of Sharpening.
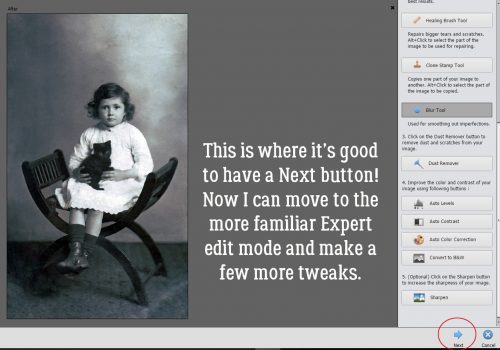
When I’ve gone as far as I want to with the Guided Edit, I can click on that Next button and go into the Expert edit mode.
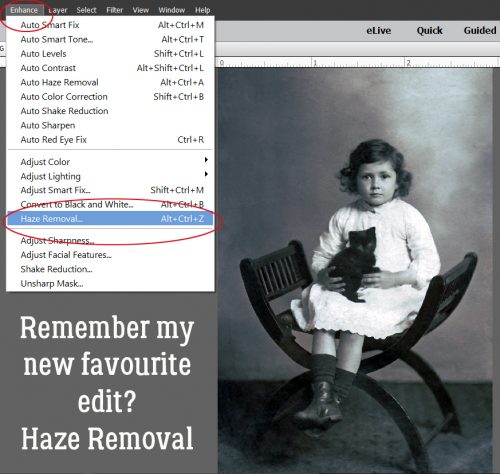
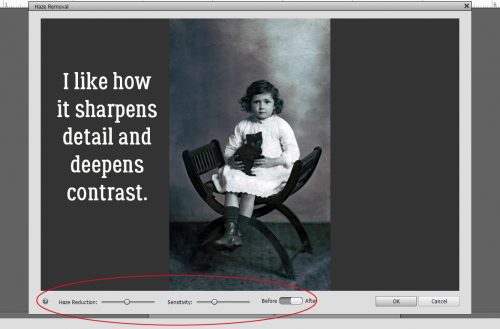
Since I discovered Enhance>Haze Removal, I’ve used it SO OFTEN! It does several things all at once – sharpening details and deepening contrast.
And the effect is fully adjustable. I’ve moved both sliders to the left from the default settings.
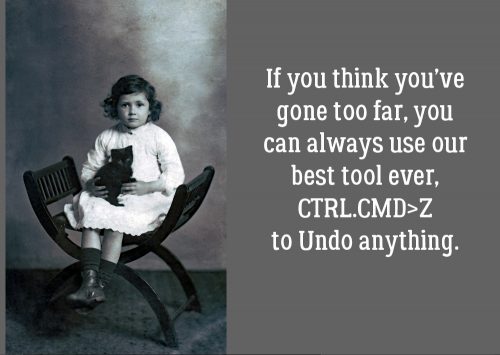
Don’t worry that you’ve gone too far… you can ALWAYS Undo it all! CTRL/CMD>Z is a scrapper’s best friend! (CTRL/CMD>Y will Redo, so you’ve got options!)
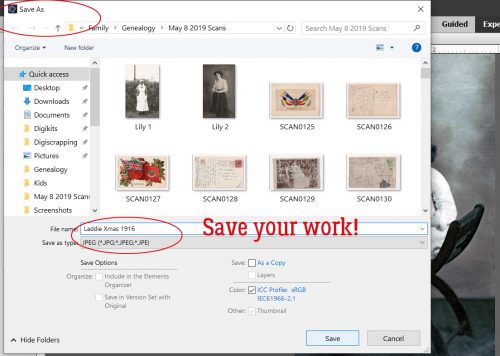
Don’t foget to save your hard work! I named my new photo Laddie Xmas 16 for ease of finding it later.
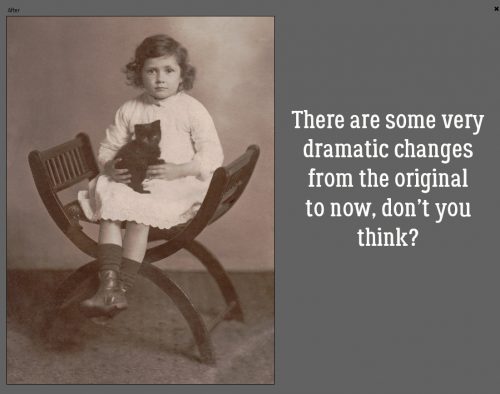
What do you think?

![]()