Taking the Shine Off
![]()
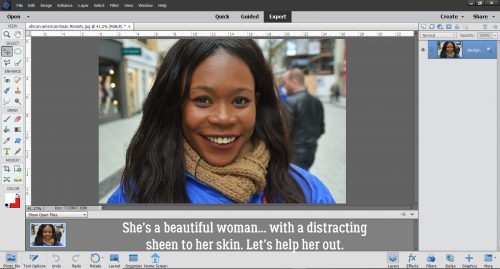
Glee came to me last Tuesday with a question. “Would you by any chance know any tricks/tips for taking the shine off a person’s face? Like how to digitally apply some powder? I just took some pix, and my subject has very dinner cheeks and forehead. Thanks!” I know I have quite a few photos that needed some powder, and you probably have some too. This is actually one of the simplest edits there is. I’m using a photo from Pixabay taken by Dean Moriarty as my sample photo. Isn’t she gorgeous?
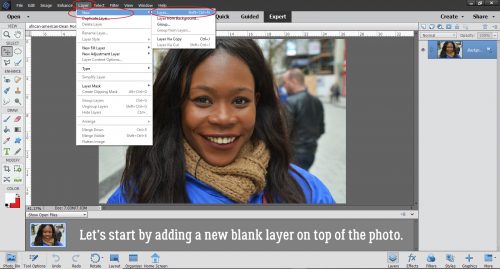
Everything I’m going to do to apply some mattifying to her shiny spots will take place on a new layer. You can click Layer>New>Layer or use a keyboard shortcut (CTRL/CMD>Shift>N) to add a layer above your photo.
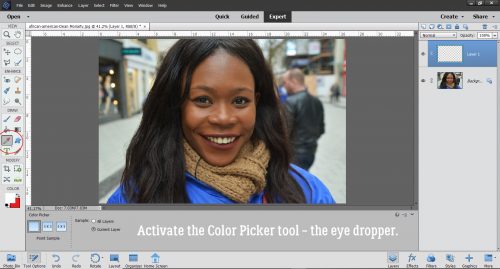
Next, select the Color Picker (eye dropper) tool to pick up the skin tone from an area near the first area you plan to powder. Look for a spot where the skin tone is fairly uniform.
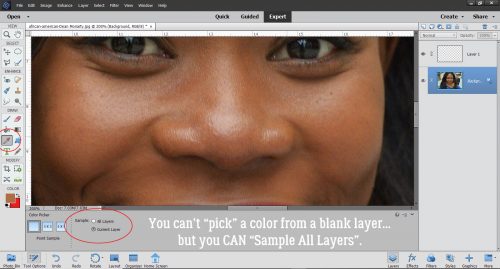
You actually can’t pick a color from a blank layer (DUH! But I tried!) But I definitely want to make my adjustments on that blank layer. So what can I do? I can “Sample All Layers”!
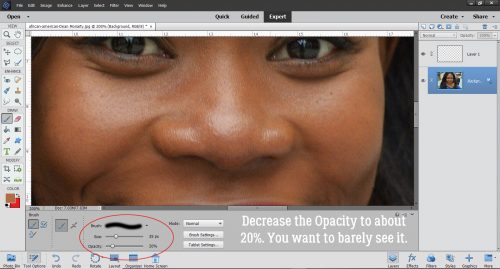
Now you’ve selected the skin color you want to powder with, and it’s time to choose a nice brush to apply the powder with. I used a soft, round brush from the Basic Brushes included in the software, with a diameter of 35 pixels.

Before you start dabbing on the powder, set the brush’s Opacity to about 20%. It can always be adjusted later.
Then just start powdering! You can brush it on like you’re dusting her with powder, or you can dab it on. Whatever looks best to your eye.

Go back and forth between the Color Picker and the Brush, adjusting the color of your powder to the area of skin closest to the part you’re powdering.

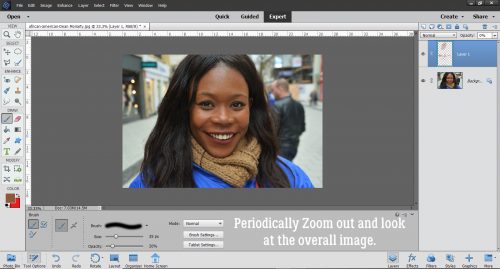
Every so often, Zoom out and have a look at the effect. Make sure it looks natural.
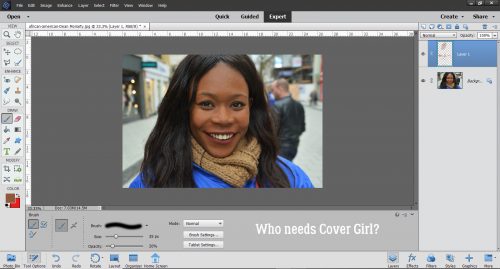
In a matter of minutes, the shine is gone, but the highlights are still there. Who needs Cover Girl? If you think the effect looks too artificial, you can adjust the Opacity of the powder layer to make it a little more sheer. That’s the benefit of doing the adjustment on its own layer. If you powdered right on the background layer, you’d have no way to lighten it up.
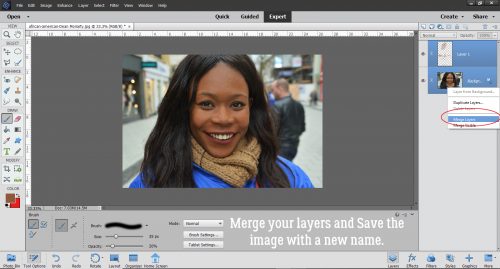
When the image looks natural and beautiful, you can Merge the two layers and Save your edited image with a new name.
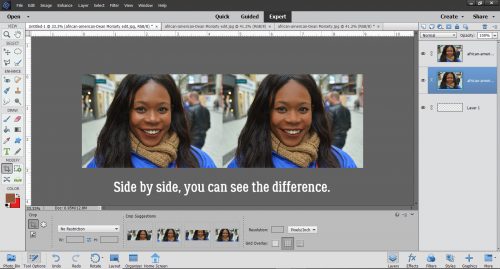
Here are my two images side by side. Now the eye isn’t being pulled to her forehead any more!
This method is much easier than using the Healing Brush or Spot Healing Brush, which would do a good job of reducing glare from a person’s spectacles. That’s a more complex edit, and not something we’re going to talk about today.
Just an aside… this tutorial marks the beginning of my fourth year as your ObiJan. Time sure flies! I’m keeping all of you and your families in my thoughts as you navigate the stormy seas of preparing for the new school year with so many uncertainties. I don’t have any school-aged kids to worry about but I DO have 3 grandkids, the oldest of whom is entering first grade this year. They’ve gotten quite comfortable masking whenever they’re around other people, something we never dreamed would be necessary. Every one of us has our own priorities and I hope no one makes you question the decisions you make based on yours. Unless they’ve lived in your skin, they have no right to judge. We’re all in this together.
![]()